Tag: mom life

I’m making the case for jarred garlic – really!

I’ve been giving this a lot of thought lately. It’s funny because, I can vividly remember chatting with a girlfriend – pre marriage, and babies – when I explicitly said “if you have any respect for yourself and cooking – you should never use jarred garlic.” She called me fancy pants and that was the end of that! Anthony Bourdain has been quoted as saying something similar too.

Jarred pre-minced garlic will never replace fresh cloves (that is where you get the best flavor). But if peeling and slicing garlic is a step of cooking that is getting in the way of YOU cooking meals at home, I say use the jarred garlic. And don’t feel guilty about it! As you start to cook more, or circumstances change, you may have more time to give to the cooking process, and your choice of garlic may change too!

But now that I’m in another phase of life, I see (both garlic and cooking) differently. I just don’t have the same time to enjoy the art and process of cooking at every meal. Instead, home cooked family meals are a way to be sure my husband and I and the children are eating health(ier) food instead of fast food or takeout alternatives. They’re a way to be sure we’re eating enough fruits and vegetables, and a way to save money on expensive takeout.

Since culinary school I’ve practiced the technique of mise en place. I would choose an elaborate recipe based purely on flavor or presentation, purchase ingredients in the most fresh and unprocessed form and then prepare everything according to the ingredients list. So if a recipe called for sliced garlic. I would buy garlic bulbs at the local grocery store, break off the fresh garlic cloves, peel and slice until I had enough for the recipe. Then I’d move onto the next ingredient.

Today, it’s a different story. I am open to any and all grocery store shortcuts or new products, anything that will save me time and money and help get a home cooked meal on the table – VERY QUICKLY.

Types of garlic and garlic products

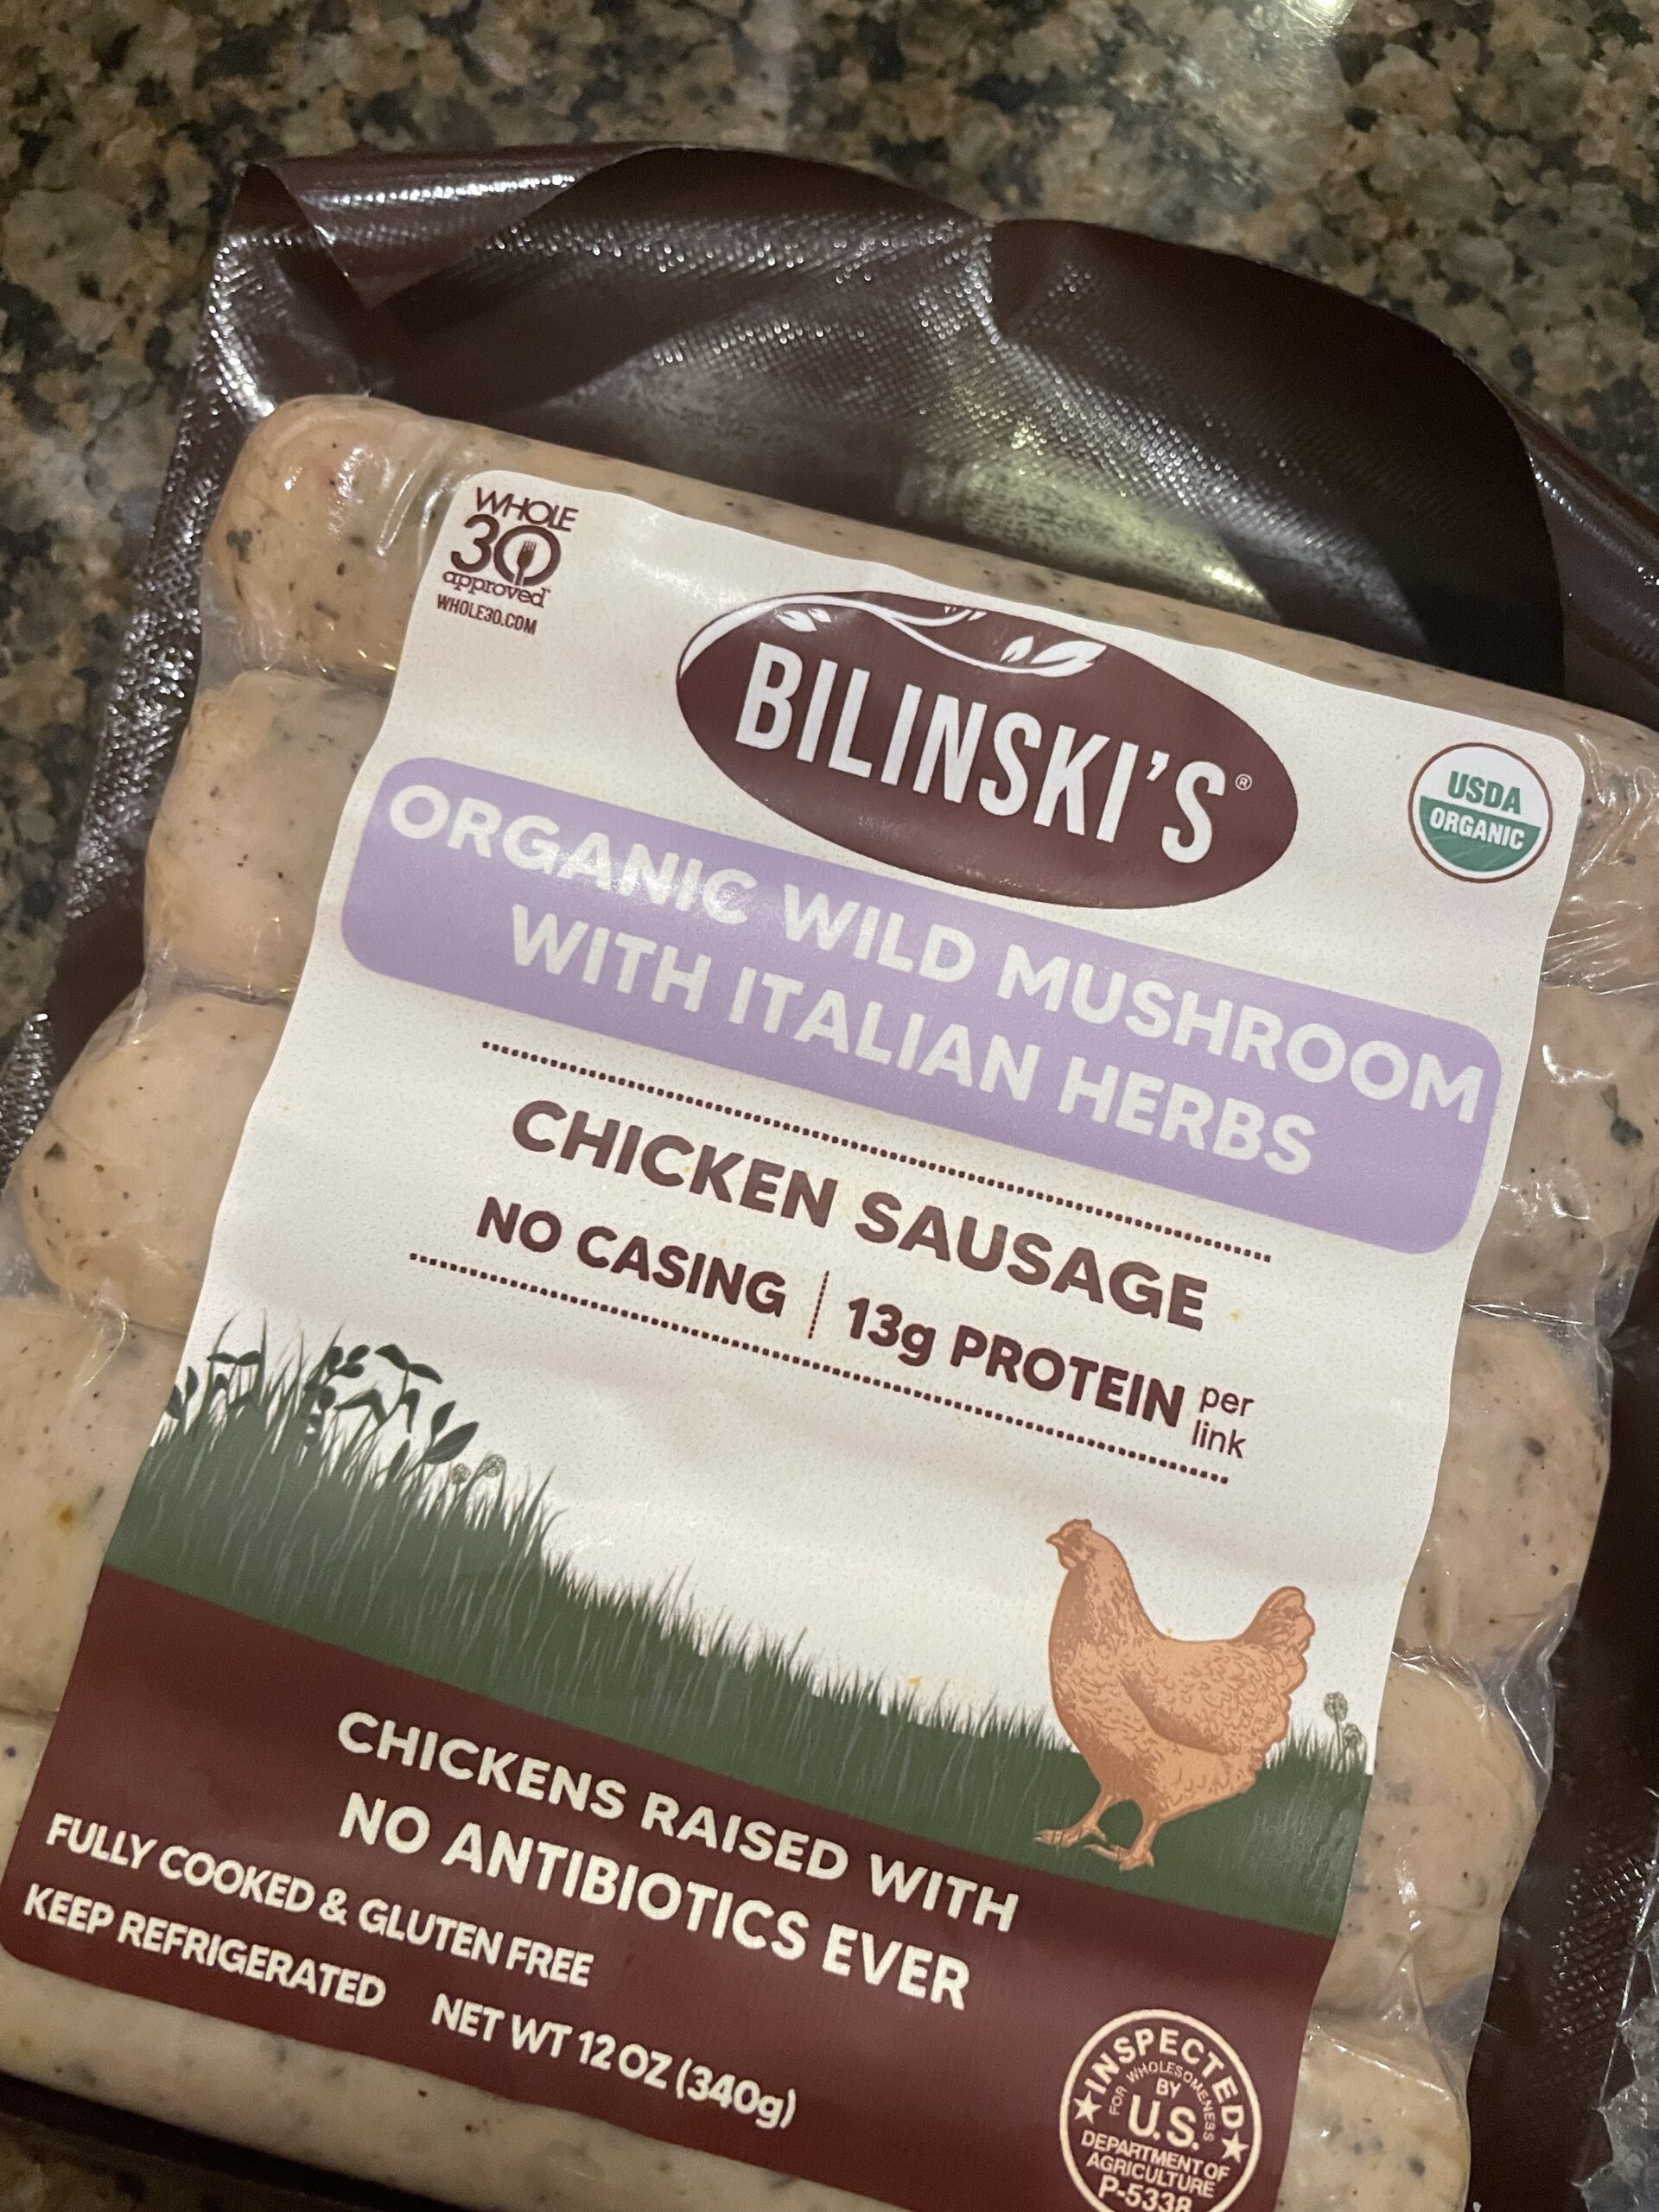
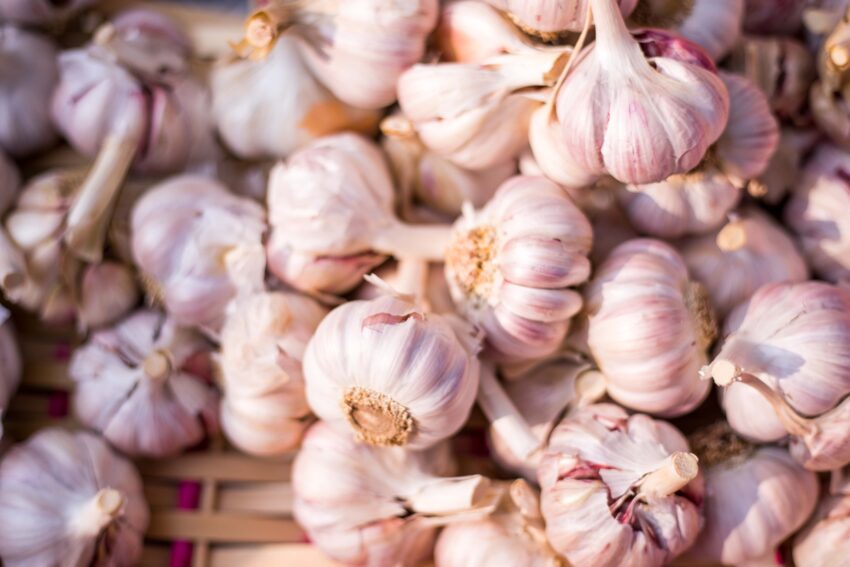
  • Raw whole bulb garlic can be found in the produce aisle. They’re covered in a white papery skin and last for quite some time at home when stored in a cool dry place. Not the refrigerator. These will have a stronger flavor than other “processed” garlic options.
  • Elephant garlic is a favorite of mine because 1 clove is equal to at least 2-3 normal cloves so it’s less labor to peel and easier to slice.
  • Black garlic is more earthy and not the same as traditional white garlic.

Aside from the traditional raw forms of garlic, you can also find other garlic products. Experiment with using different sources of garlic next time you make a pasta sauce or salad dressing. Then use wha you prefer.

  • Pre-peeled whole cloves of garlic can be found in produce sections. Caution with these because once you open the package, they will need to be used within a week or so. So unless you need a lot of garlic, buying these large bags may not be the money and time saving solution for you.
  • Garlic paste is usually in the refrigerated section of the grocery store, but has more additives.
  • Chopped garlic in small jars in the produce section of your grocery store, usually they’re sold in water or olive oil.
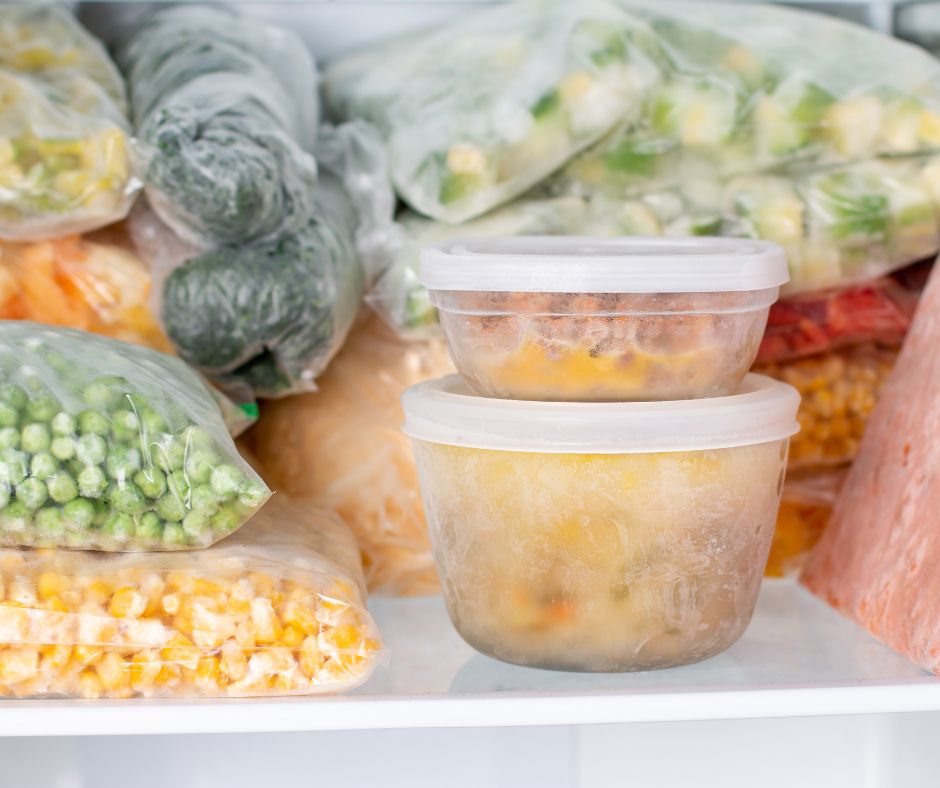
  • Frozen garlic cubes are great because one cube is equal to one clove of garlic which makes easy measuring.
  • Dried garlic in the spice aisle in the form of dehydrated garlic cloves or garlic powder. These are best for dry rubs.
  • Garlic salt is a mixture of garlic powder and salt.
harvesting garlic

What is in jarred garlic?

The main ingredients are garlic, water and citric acid which is used as a preservative to prevent oxidation and browning.

Converting teaspoons to cloves

Half a teaspoon of jarred garlic is equal to one clove of fresh garlic. Jarred is not as strong as the fresh stuff, so you can get away with using a little bit more.

If you ask me, there’s no such thing as too much garlic.

Benefits of jarred garlic

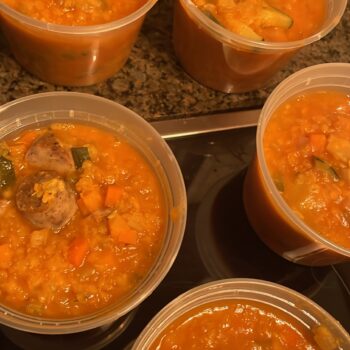
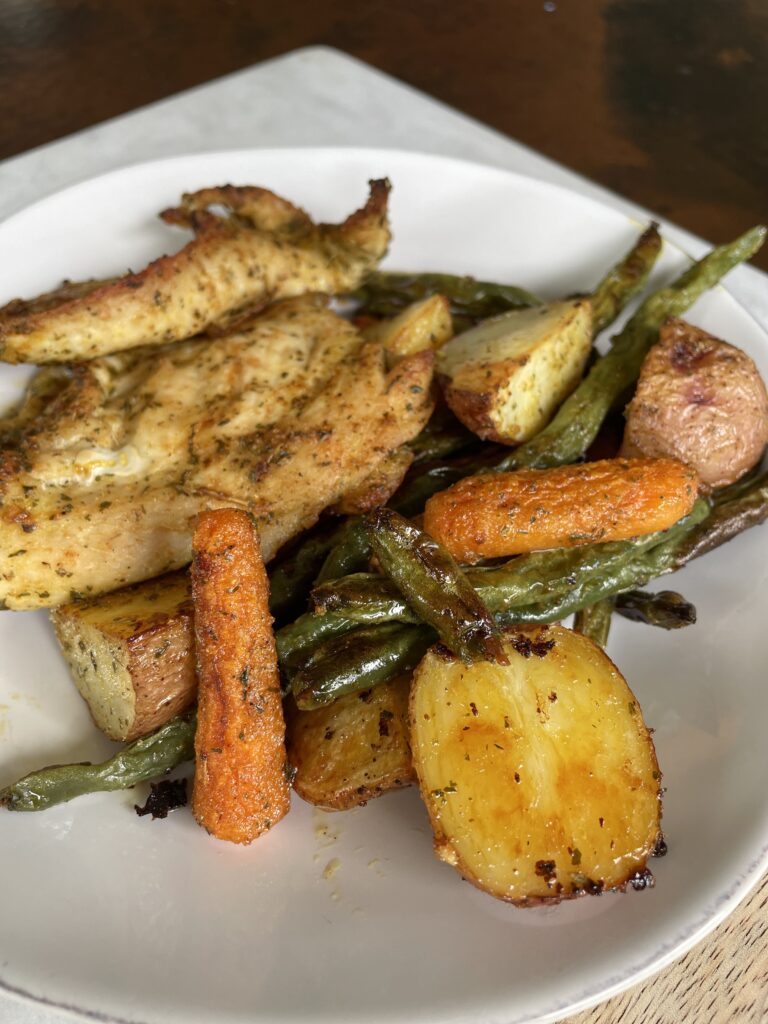
  • Convenient option for last minute meals – think stir fry, garlic bread, soup, salad dressing or marinade starter.
  • It has a longer shelf life than other garlic products such as garlic paste or pre-peeled cloves
  • No need for a garlic press
  • Time saver when you don’t have time to mince garlic
  • It can remove the mental hurdle of needing to peel and slice garlic which can be tedious
  • No smelly hands

Negatives of jarred garlic

  • You won’t get the same quality aroma filling your home – you need fresh for that!
  • Nutritionally, jarred garlic doesn’t have the same health benefits because it has been pasteurized or heated during the packaging process.
  • It loses it loses it’s antibacterial properties and has lower levels of allicin, a compound which may prevent certain types of cancers.1
  • The garlicky flavor is not as strong as fresh raw garlic.
  • It has a stigma, and your foodie friends will always hold against you.
  • It can develop an off putting odor and flavor after it’s been open for too long – so be sure to keep an eye on the expiration date.

What are signs of spoilage?

If your jarred garlic started to have an off odor or becomes discolored it’s time to toss it. It can last several weeks in the refrigerator, especially when it’s sealed and stored properly. When using garlic, be sure the spoon being used is clean to avoid cross contamination from other foods.

The bottom line

Jarred pre-minced garlic will never replace fresh cloves (that is where you get the best flavor). And some dishes are not a good fit for jarred garlic – like anything you’d eat raw. But if peeling and slicing garlic is a step of cooking that is getting in the way of YOU cooking meals at home, I say use the jarred garlic. And don’t feel guilty about it! As you start to cook more, or circumstances change, you may have more time to give to the cooking process, and your choice of garlic may change too!

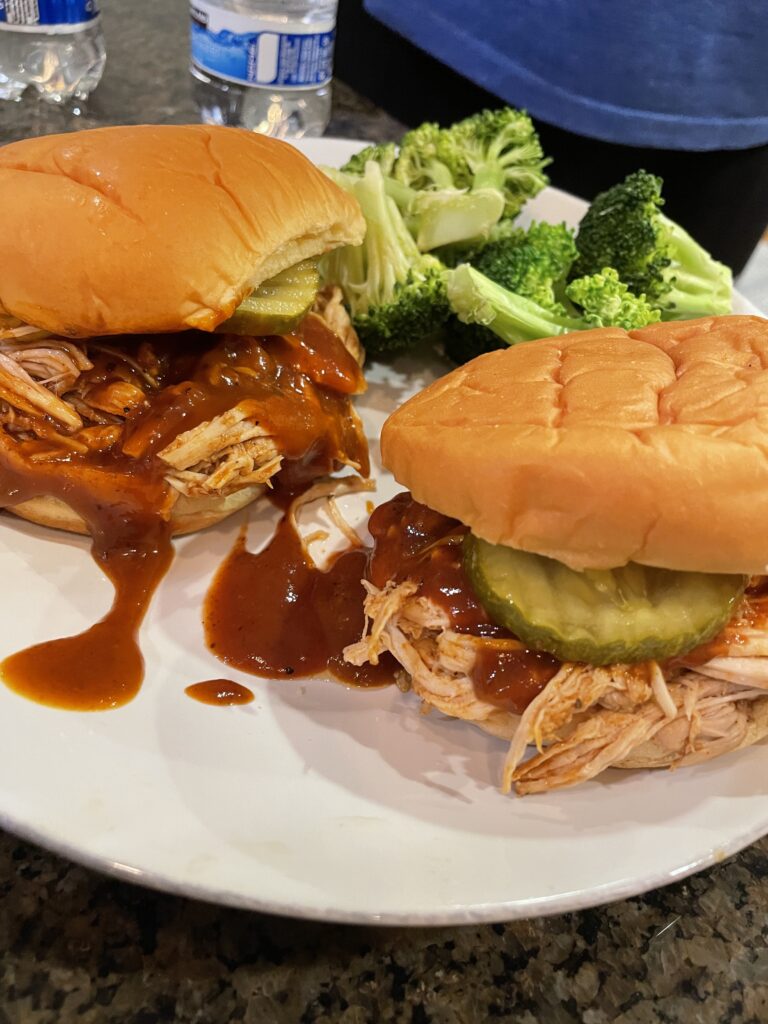
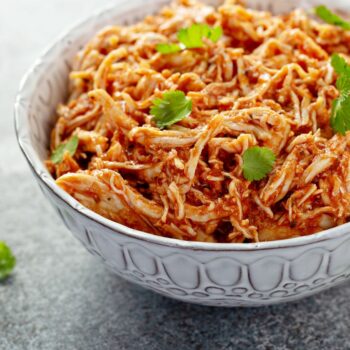
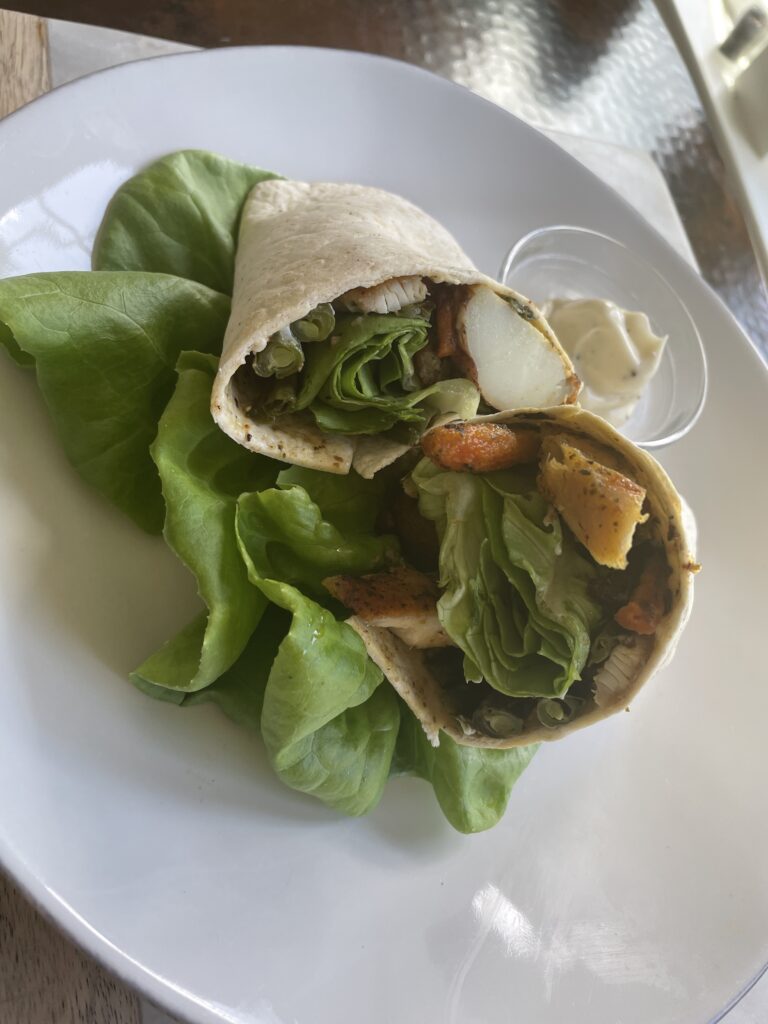
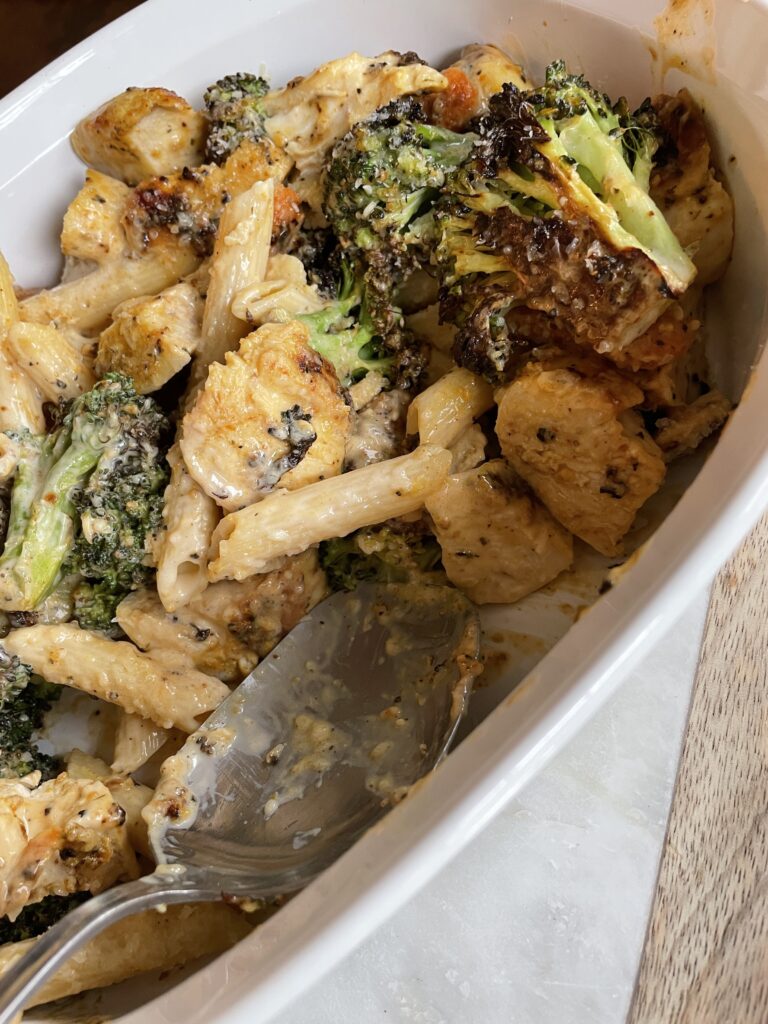
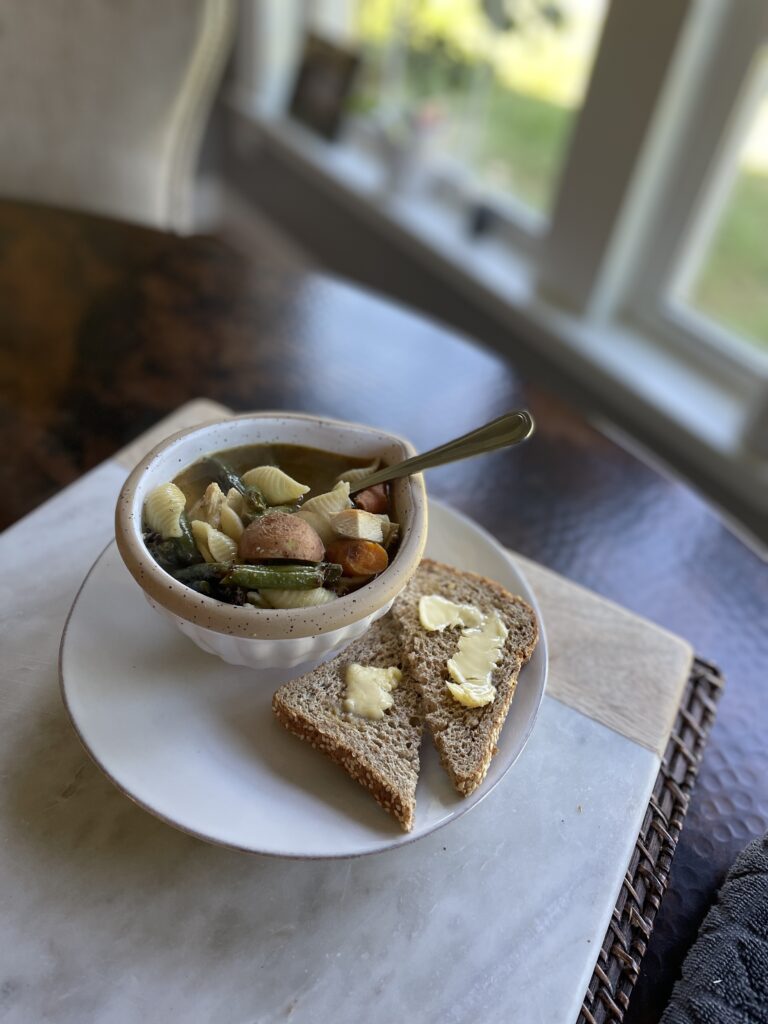
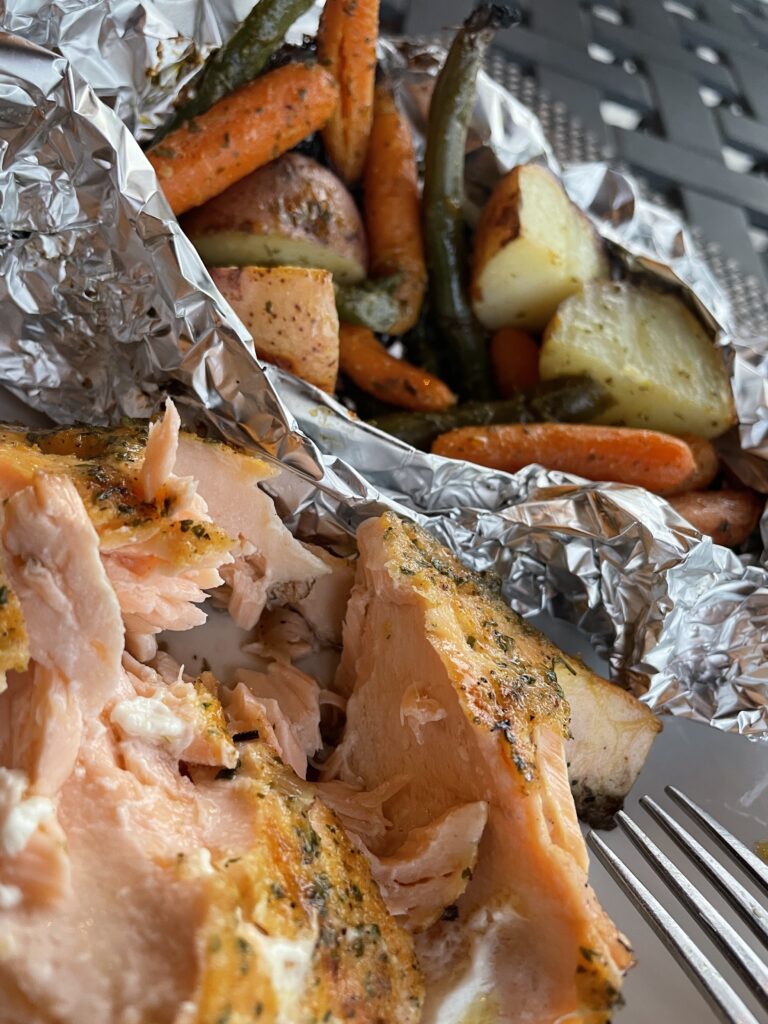
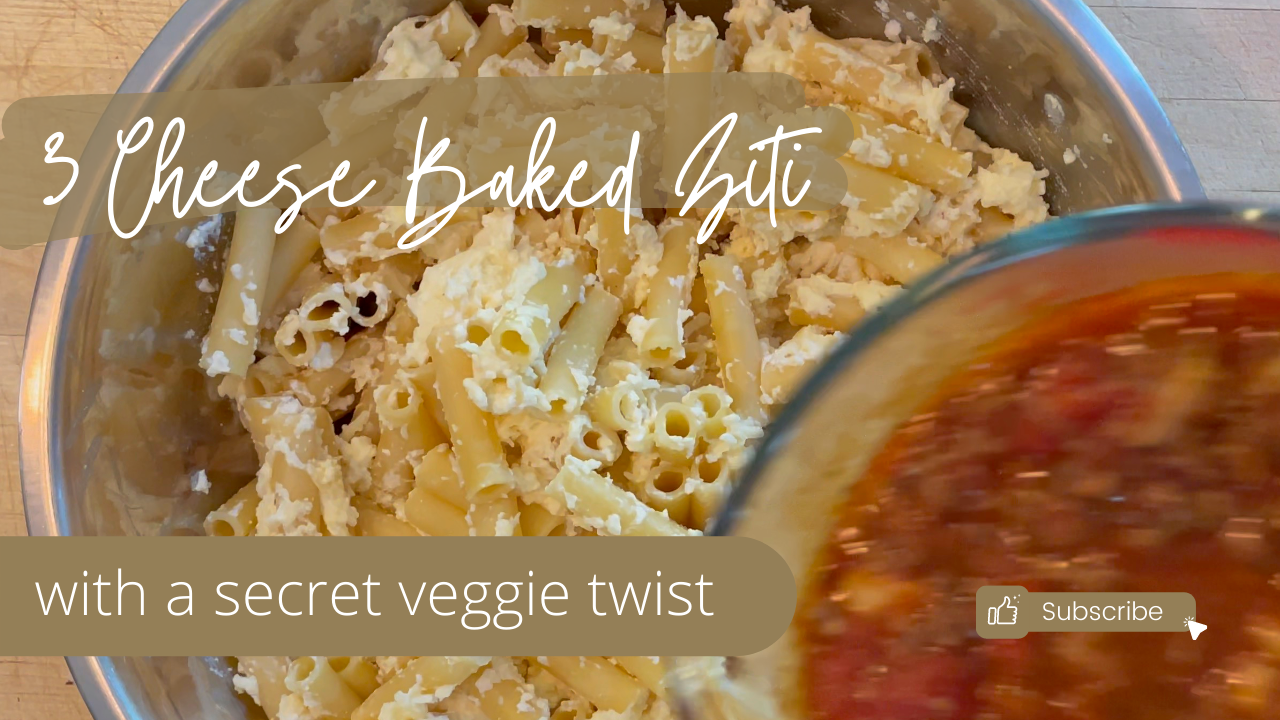
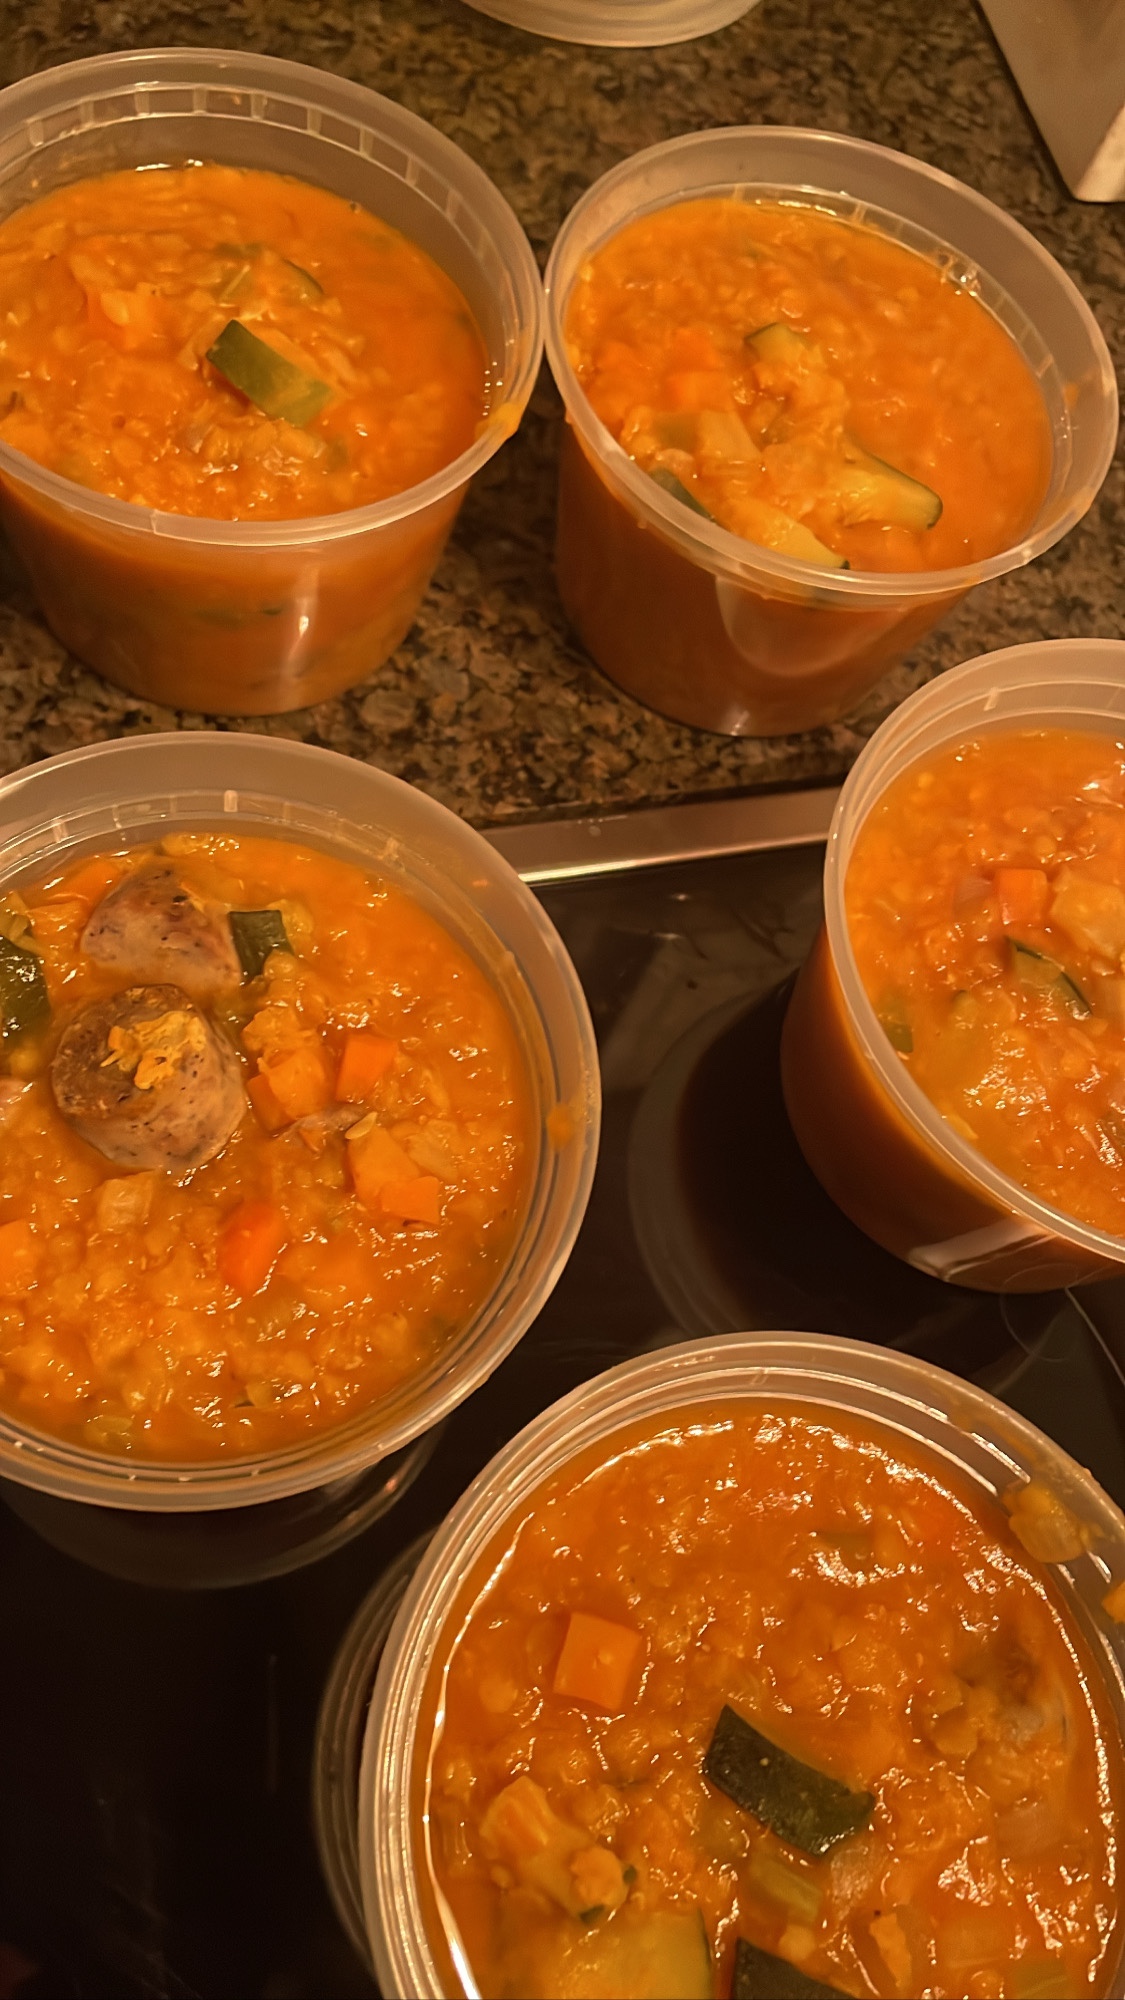
Recipes you can use jarred garlic in

1
Egg Roll meal prep
Egg Roll In A Bowl
Easy weeknight recipe that comes together with basic pantry staples and 2-3 fresh ingredients from the store!
Check out this recipe
2
Three Cheese Baked Ziti
Crowd pleasing pasta that's full of flavor and less fat than your standard version!
Check out this recipe
3
Easy red lentil soup
Easy Split Red Lentil Soup
This super fast, protein packed recipe can be made any night of the week in under an hour!!
Check out this recipe

Resources

  1. https://pubs.acs.org/doi/10.1021/jf8000907

About Me

I’m Melanie.

I’m a chef, registered dietitian, foodie, wife and mom.
If you’re looking for quick and healthy meal inspiration that supports your health goals while feeding the rest of your family (including the kiddoes) well, then you’ve come to the right place!

Melanie Marcus Selfie

Baked Salad should be a staple winter recipe for you – a dietitian explains

When I heard baked salads were trending on TikTok, I was intrigued and as a dietitian, pleasantly surprised. Baked salad is simply a variety of roasted vegetables that are eaten as a warm salad – which is perfect for winter eating! To me, baked salad recipes are the 2.0 of sheet pan meals. They’re an ideal way to increase your servings of vegetables and they’re very easy to make. I tested

This recipe is inspired by the version made by Justine Doiron, it’s the perfect balance of sweet and bitter, soft and crunchy. Her’s used chili oil, which I didn’t have on hand, so simplified a bit, either way, I really enjoyed it when I made it for the first time. It even reheated will as leftovers too! Just think of it as a roasted vegetable salad with fun crunchy bits on top. Let me know if you try this cozy dish and happy baked salad season!

I tested this concept as part of my work for Dole Food Company, but all opinions are my own!

Ingredients and substitutions

baked salad with salmon
  • cabbage – Not only is cabbage inexpensive, they’re a cruciferous vegetable, loaded with nutrients. Brussels sprouts or pre cut slaw mix would work well here too, if you don’t have cabbage.
  • kale– Kale is a hearty green that stands up to the heat of roasting. Collard greens are a good substitute if necessary.
  • red onion – This recipe called for red onion within the dressing, a yellow or white onion could also be used here. If you want to skip the warm dressing agrodolce all together, just use your favorite oil based salad dressing instead.
  • quinoa – I used a red quinoa, but white quinoa could also be used. If you don’t have quinoa, you can create breadcrumb mixtures that will provide the same texture as crispy quinoa. Sourdough croutons, crispy chickpeas or pumpkin seeds would also work well!
  • honey – maple syrup or agave could be used instead.
  • herbs such as sage and rosemary sprig.
  • red wine vinegar – A rose vinegar or a white vinegar would also work well here. I caution using apple cider or balsamic vinegar as their flavors are much stronger.
  • olive oil – since this oil is heated, don’t use extra virgin. Regular olive oil or other neutral oil such as vegetable or avocado oil would be fine.
  • kosher salt and black pepper

Variations and serving suggestions

Experiment making your own version of baked salad with these ideas.

  • Roast sweet potatoes, butternut squash cubes or other winter vegetables for a splash of color and vitamin A.
  • Top with roasted chicken breasts or poached salmon to create a meal that even meat eaters will love.
  • Pan sear goat cheese rounds to create a baked goat cheese salad as a fancy DIY first course at home.
  • Enjoy as a light lunch topped with chickpeas or roasted tofu.
  • Try roasting grapes, tomatoes or peaches for a sweet twist!
  • Which ever combination you choose, you won’t go wrong by adding a squeeze of fresh lemon juice before serving.

How to make baked salad

  • Start by thinly slicing the cabbage and kale. I used a mandolin to slice the cabbage into uniform strips and I took a shortcut with pre cut and pre washed kale.
  • Coat the cabbage and kale with olive oil, and place into a 400 F oven. Bake the kale for 8 minutes or until fork tender, leaving the cabbage in for a total of 20 minutes, until golden brown.
  • Cook quinoa according to package instructions and then spread onto large baking sheet, spray with olive oil spray and sprinkle with pinch of salt and pepper or Seasonello. Bake at 375 until crisp, about 20 minutes.
  • In a medium saucepan heat 1teaspoon olive oil with rosemary and then add honey mixture. Let simmer for 2 minutes add vinegar and then pour over sliced red onion in small bowl. Set aside.
  • When quinoa is toasty, layer the salad in one large bowl or divide into 3 or 4 smaller ones for meal preps!

Ingredients not to use

Roasting vegetables is one of my favorite things to do to increase flavor without a lot of work. In my opinion, nearly any vegetable can be roasted, but you may just want to watch out for the few below.

  • Delicate leafy greens such as spinach or spring mix. They will not stand up to the heat from the oven!
  • Avocado – While I’ve had success grilling avocado, I don’t suggest roasting it, in this way.
  • Cucumber – They will take longer to roast and will likely need seasoning to enhance the flavor.

If you want to use these items, I would suggest adding them raw just before serving.

Why you should try baked salads

  • They’re delicious.
  • They’re a hands off way to meal prep healthy lunches for the week.
  • This recipe is a good base that plays nicely with other ingredients to create variety.
  • Nine out of 10 Americans don’t eat enough fruits and vegetables – add more to your diet without sacrificing flavor.
  • This is an easy way to enjoy a warm cozy dish outside of salad season.
  • It makes amazing leftovers!
  • It’s a perfect fit if you’re following a low carb or Mediterranean style diet.

About Me

I’m Melanie.

I’m a chef, registered dietitian, foodie, wife and mom.
If you’re looking for quick and healthy meal inspiration that supports your health goals while feeding the rest of your family (including the kiddoes) well, then you’ve come to the right place!

Melanie Marcus Selfie

Slow Cooker Three ingredient BBQ Pulled Chicken Hack

Every mom needs an easy slow cooker recipe that the whole family will love. Bonus points if it can transform from one meal to another without comment from the peanut gallery – this hack will do just that! This cooking method is a great way to result in tender chicken that can be used in a multitude of ways. Think of this as your protein meal prep for the week. In fact, you can cool and freeze half of what you make for a future easy dinner too! It’s easily a week’s worth of chicken for 2-3 people.

Ingredients you need for BBQ Pulled Chicken

chicken, bbq sauce, salt and water
  1. Boneless skinless chicken breasts and/or boneless skinless chicken thighs, plus kosher salt
  2. BBQ sauce – use your favorite barbecue sauce, we like to use Stubb’s.
  3. Water – you can also use a low sodium chicken broth for added flavor here!

Optional ingredients

If you have spices on hand you can enhance the sauce ingredients by adding a tsp of smoked paprika and a tsp of garlic powder or onion powder. If you like heat, you can add a few tablespoons of hot sauce during the cooking process. Another version of this recipe is slow cooker Mexican chicken which is made by swapping bbq sauce for mild or medium salsa.

Step by Step instructions

  • First line your slow cooker for easy clean up. Slow cooker liners are a must for me, they make the entire process including cleanup very hands off.
  • Next add your raw chicken breast and thighs to the bottom of the slow cooker. Sprinkle with salt.
  • Top with water and bbq sauce
  • Cover and cook on high for 3-4 hours or low for 6-8 hours
  • When chicken reaches an internal temperature of 165F, remove pieces from slow cooker and place in large bowl.
  • I like to shred using two forks, but you can also use a hand mixer to quickly pull apart the cooked chicken. Just be sure to use a low speed!
  • Then ladle 1-2 cups of the liquid from the slow cooker bbq chicken over the pulled chicken, allowing it to reabsorb.
  • The rest of the liquid can be discarded, but if you’re going to re-heat leftover pulled chicken later in the week, you may want to hold onto the extra sauce.
  • Lastly, if you’re feeding a crowd, return the pulled chicken to the slow cooker to keep warm for serving.

Store leftover pulled chicken in an airtight container in the refrigerator for 3-4 days or freeze for up to 3 months.

Step by step images

Ways to eat your pulled chicken

  1. On whole wheat hamburger buns with pickles and red onion
  2. With potato salad and string beans
  3. Make BBQ chicken sandwiches on a hearty bread
  4. With roasted sweet potato and a side salad
  5. With corn tortillas, sour cream and coleslaw
  6. Stuffed inside a baked potato with black beans and salsa

Macros Breakdown

240 calories

10g fat

5g carbohydrate

29g protein

0 fiber

This is truly the easiest bbq chicken recipe out there. There’s a little prep in just making sure you have chicken pieces and your favorite bbq sauce on hand, but other then that, it’s ideal for busy days!

Check out my review of Dole Sheet Pan Starter Kits for other easy dinner ideas. If you like this recipe, you should also check out my Fast Fajitas.

easy pulled chicken

BBQ Pulled Chicken

Easy protein meal prep that the whole family will love.
Prep Time 5 minutes
Cook Time 6 hours
Total Time 6 hours 5 minutes
Course Main Course

Ingredients
  

  • 2 pounds chicken breast boneless and skinless
  • 1 pound chicken thighs boneless and skinless
  • 1 cup bbq sauce
  • 1 tsp kosher salt
  • 1/3 cup water

Instructions
 

  • Place chicken pieces in the bottom of slow cooker.
  • Season with salt and cover with bbq sauce and water.
  • Cook on low for 8 hours.
  • Remove chicken from slow cooker and pull apart with two forks until fully shredded.
  • Pour 1-2 cups of sauce over shredded chicken and allow to absorb.
  • Return chicken to slow cooker to keep warm until serving.
Tried this recipe?Let us know how it was!

About Me

I’m Melanie.

I’m a chef, registered dietitian, foodie, wife and mom.
If you’re looking for quick and healthy meal inspiration that supports your health goals while feeding the rest of your family (including the kiddoes) well, then you’ve come to the right place!

Melanie Marcus Selfie

Big batch cooking for beginners – save time and money

Let’s go a step beyond crockpot and freezer meals and talk about batch cooking as a time-saving strategy. With this approach to food, you dedicate 1-2 days a month (a couple of hours each day) to cook large quantities of your favorite recipes. I’m not talking about doubling – I’m talking about cooking big batch meals, like 3-4 times each recipe. It’s a great way to meal prep because you cook, freeze and store food for future weeknight meals while simplifying the cooking process. What can be easier than that? You cook once, have a variety of healthy meals available then you spend less time cleaning, meal planning and food shopping!

This article was inspired by a piece written for Dole Food Company!

Meal prep food in containers

And let’s face it, when life is busy and time is short, there’s nothing better than gaining precious time to spend with loved ones or just doing more of what you want to do! 

I love this concept for my family because it saves you time, money, cleanup, plus you’ll have a bunch of healthy recipes at your fingertips to get you through weeks ahead! If you’re only cooking for 1 or 2 you can divide into separate containers if you want to meal prep individual meals.

This method truly makes putting a good meal on the table a breeze.

Special equipment for easy batch meals

  • Slow Cooker
  • Instant pot
  • Sheet pans
  • Plastic bags
  • Individual food containers
  • Airtight containers
  • Extra freezer
  • Labels and sharpie

When it comes to special equipment, you can almost always modify a cooking technique for another piece of equipment if necessary. So don’t worry if you don’t have a slow cooker or instant pot! Just don’t forget the labels, you need to know what you have in stock and the date it was made!

Tips for grocery shopping large meals

Whether you’re cooking nutritious meals or good ol comfort food favorites, shopping online will help you save so much time, especially when you need to pick up a bunch of ingredients! It’ll also help prevent food waste because you’ll be preparing purchased product right away, so it won’t go bad in the produce drawer!

  • First, identify your recipes by choosing 1-4 recipes that you enjoy eating. If you’re a beginner at this, start with one recipe and build up week after week. For example, you can start with a basic baked ziti and simply double the recipe.
  • Next make your grocery list. I recommend doing this online and double check sizes of product needed. For example, if a recipe calls for a 28oz can of diced tomatoes, be sure not to choose a 14oz can instead! Just use the search bar and add items to your list one by one! Couldn’t be easier. I’m always surprised at how much I save when I do this!
  • Consider making a Costco run to save on buying products in bulk. My main concern with Costco on a normal week, is that we won’t use a package of broccoli, pesto or even fresh fish up before it goes bad, but large-batch cooking calls for a lot of food!
  • If it’s summertime, check out your local farmers market to see what’s in season.

Pantry staples for batch cooking meals

  • Variety of spices – I like to buy these as needed and in small batches because they do expire and lose potency. They are also expensive and a little goes a long way.
  • Sweet potatoes and regular potatoes – nutrient dense, gluten free and taste great. THey’re a kitchen workhorse.
  • Onions and garlic – these are so healthy for you and they’re also major flavor enhancers!
  • Broth – I suggest always getting low or no sodium broth. This way you can control the amount of salt and the overall flavor.
  • Breadcrumbs – Gluten free or plain breadcrumbs are a pantry staple. Season as needed.
  • Olive oil – Save the extra virgin for your salad dressings.
  • Canned beans, lentils – Go with low sodium or dried.
  • Canned diced tomatoes, tomato sauce – common ingredients in soups, chili and pasta dishes.

Items like brown rice, white rice, wild rice and pasta can usually be made quickly to go along with your batch meal at the last minute. You don’t need to prep and freeze these.

Cooked food in freezer

What types of recipes are best for batch cooking?

Make your batch cooking a success by coming up with a menu plan that lends itself to reheating. With a little planning, you’ll have your own list of go-to recipes and enjoy the beauty of batch cooking for yourself – week after week!

  • Pasta dishes such as lasagna or baked ziti are – AMAZING!
  • Soups such as lentil or minestrone
  • Muffins
  • Enchiladas
  • Burritos
  • Casseroles
  • Sauces, such as tomato sauce or curry, or salad dressing
kitchen counter with dirty dishes in sink
With batch cooking you worry about cleaning up less often!

How to avoid freezer burn

The easiest way is to allow cooked food to reach room temperature on the counter and then chill before freezing.  First cool food from 135 to 70 degrees within two hours, and then from 70 to below 41 within the next four hours. Seal in ziplock bag, wrap tightly with plastic wrap or enclose in freezer safe container, then label with the name of the recipe.

Five Tips for batch cooking success: 

  1. Select Winning Recipes. Choose recipes you know your family will love. My family loves Three Cheese Baked Ziti, Turkey Meatloaf and Red Lentil Soup.
  2. Shop in Bulk. Once you select recipes, take inventory of what spices, pasta and canned goods you have on hand and buy the rest. You may even find that you spend less money on groceries because you are laser-focused on specific dishes. 
  3. Have the right container! If you’re making lasagna or casseroles, choose freezer-safe glass ware, or save time on cleanup with recyclable aluminum trays. Keeping pans the same size helps maximize space in the freezer too! 
  4. Cool foods fully before labeling and freezing. First cool food from 135 to 70 degrees within two hours, and then from 70 to below 41 within the next four hours. Label each container with the name of the recipe and date it was made for easy recall!
  5. Make a schedule –  Keep your family traditions intact by writing in your Taco Tuesday’s or Pizza Friday’s and adjust your schedule accordingly! Just take 5 minutes to write out your monthly menu to help reduce decision stress and fatigue! And if it seems repetitive, try to remember what you ate yesterday for lunch – I bet no one will realize they’re on a rotation.

Here’s a sample schedule:

MondayTuesdayWednesdayThursdayFridaySaturdaySunday
Turkey Burgers with Sweet Potato friesTaco TuesdayLentil Soup with Garlic BreadLeftoversPizza FridayEat OutGrilled Chicken and Vegetables
Three Cheese Baked ZitiTaco TuesdayLeftoversLentil Soup with Garlic BreadPizza FridayTurkey Burgers with Sweet Potato friesEatout
Grilled Chicken and VegetablesTaco TuesdayLentil Soup with Garlic BreadLeftoversPizza FridayEat OutSheet Pan Salmon
Three Cheese Baked ZitiTaco TuesdayTurkey Burgers with Sweet Potato friesLentil Soup with Garlic BreadPizza FridayLeftoversGrilled Chicken and Vegetables
Make a schedule of your own, pop in your favorite recipes, and change it up as needed. Once you have a starting point your weekly dinner meals will go much smoother!

There’s nothing better than coming home after a long day to find a freezer full of fresh meals that just need to be heated! And the best part is that you know exactly what is in them because you made them yourself!

About Me

I’m Melanie.

I’m a chef, registered dietitian, foodie, wife and mom.
If you’re looking for quick and healthy meal inspiration that supports your health goals while feeding the rest of your family (including the kiddoes) well, then you’ve come to the right place!

Melanie Marcus Selfie

The perfect texture rich, cozy fall harvest farro salad

When the calendar turns to November, my usual salad just won’t do. I usually turn to warm and comforting foods, but I find that roasted vegetables on top of arugula are just one of those hearty salads that you just want seconds of! I love this as a meal prep lunch for the work week, but it would also be a beautiful and unexpected addition to any Thanksgiving table.

I am the Registered Dietitian for Dole Food Company and they generously covered the cost of ingredients for this recipe.

What is farro?

farro

Farro is an ancient grain that has a nutty flavor and a pleasantly chewy texture when cooked. It looks a lot like barley. The great thing about it is that it doesn’t get mushy, even if you overcook it!

Ingredients you need for Harvest Farro Salad

  • farro
  • red onion
  • sweet potatoes
  • olive oil
  • salt and cinnamon
  • lemon juice
  • chopped fresh parsley
  • honey
  • baby Arugula
  • pomegranate arils
  • pepitas or pumpkin seeds

Tips for putting it all together!

  • Prepare your farro in advance, according to package directions, remove excess liquid once done cooking.
  • Use a rimmed baking sheet, lined with nonstick foil when roasting vegetables.
  • Let the farro and veggies come to room temperature before laying salad.

Substitutions & Additions

  • Instead of sweet potato you could use butternut squash
  • If you don’t have canned mandarins, use fresh!
  • If you don’t have farro you could use barley, wheat berries, quinoa or whole grain brown rice.
  • Carmelized brussels sprouts would be an amazing addition
  • A beautiful garnish would be goat cheese or feta cheese crumbles.
  • If you don’t have pomegranate arils you could always use chopped apple.
  • If you don’t have lemon juice you can use tangy apple cider vinaigrette or vinegar instead!

Nutrition Rundown

While this salad isn’t gluten free because of the farro, it could easily be made without gluten by substituting another whole and hearty grain. Try quinoa!

This recipe is naturally vegan and vegetarian and chock full of antioxidants from ingredients like arugula, pomegranate, sweet potato and pepitas!

Farro is an excellent source of fiber which helps keep us full, but it also helps keep our digestive system regular and happy! It’s also a wonderful source of complex carbohydrates which provides that immediate satisfaction for the brain, but has the added fiber to be a longer burning fuel for the body. Farro also contributes iron and magnesium to the diet.

How to cook farro

I just followed the package instructions which was to use 1 cup dry farro and 2 cups of water. Bring them to a boil and then reduce down to a simmer and cook for about 40 minutes until all the water was absorbed.

PRO TIP: rinse your farro after it’s done cooking to prevent further cooking!

What to do with leftover farro

I has leftover farro when preparing this recipe, so if that’s the case with you, here are a few ideas to help you.

  • Serve it like oatmeal with milk and honey
  • Fry it up like fried rice with veggies and an egg or shrimp
  • Add it to salads
  • Use it as a base for a grain bowl
  • Mix into sautéed spinach and garlic

If you like this recipe, be sure to check out my family’s special recipe for creamy balsamic salad dressing. It’s amazing for salads but as a marinade too!

Delicious Autumn Salad

Autumn Harvest Salad

Prep Time 15 minutes
Cook Time 25 minutes
Total Time 40 minutes
Course Salad
Servings 8
Calories 251 kcal

Ingredients
  

  • 1 cup dry farro rinsed and drained
  • 1 red onion cut into wedes
  • 1 sweet potato cut into pieces
  • 1/4 cup olive oil
  • 1.5 tsp kosher salt
  • 1/4 tsp cinnamon
  • 1 lemon juiced
  • 1 tbsp chopped parsley
  • 1 tbsp honey
  • 2 cups arugula
  • 1 cup mandarins in juice
  • 1/2 cup pomegranate arils
  • 1/2 cup roasted salted pepitas

Instructions
 

  • Preheat oven to 425°F; line a rimmed baking pan with nonstick foil. Prepare farro as label directs; cool.
  • Toss onion, potato, 1 tablespoon oil, ½ teaspoon salt and cinnamon in a large bowl; spread on prepared pan. Roast onion mixture 25 minutes or until golden brown and tender, stirring once.
  • Whisk lemon juice, parsley, honey and remaining 1 teaspoon salt in a separate large bowl; whisking constantly, slowly drizzle in remaining 3 tablespoons oil to emulsify. Fold in arugula, Mandarins, farro and onion mixture. Makes about 7 cups.
  • Serve salad sprinkled with pomegranate arils and pepitas.

Nutrition

Calories: 251kcal
Keyword autumn
Tried this recipe?Let us know how it was!

23 Healthy Halloween Recipes Plus Activities that Kids will LOVE!

Move over huge bags of sugary candy, festive fun is more important than ever!!

Can the words healthy and Halloween really belong in the same sentence? According to research published in the Journal of the American Medical Association, they should! Healthy options are now more than ever! This research found that childhood obesity rose significantly during the pandemic, especially in children 5-11 years old. Whether the weight gain was a result of food choices or children being more sedentary, the gain was about 5 pounds which equals the weight increase from the past 20 years! This perfect storm of ready to eat and junk foods, meal fatigue and lack of activity during quarantine makes the focus on healthy holiday celebrations much more important this year. 

This article has been adapted from an article originally written for Dole Food Company.

While candy is a focal point for most kids, Halloween truly has a lot more to offer children — spooky costumes, magical activities and the opportunity to incorporate festive meals throughout the day. 

Celebrating the holiday season is not about taking any of that away, it’s about enhancing the Halloween experience while pumping up the nutrition in a fun way.

Melanie Marcus MA RD

And truthfully, with a little creativity, healthy Halloween snacks are sooo simple to make and they deliver a huge payoff because you kids won’t have sugar overload, or the inevitable crash afterwards!

Read on for healthy Halloween recipes and activities to enjoy the holiday in a healthy way.

Here are 23 recipes for the whole family to enjoy – without the added sugar! 

  1. Start your day with a breakfast that any monster would enjoy! These Mike Wazowski Fruit Stack served with yogurt are balanced and super fun!! My kids LOVED them!!
  2. Lunch time can be fun too!! Turn any sandwich into a spider sandwich with this trick – Cut your favorite sandwich into a circle using a large cookie cutter. Lay pretzel sticks between layers (4 on each side) to resemble spider legs! Use olives to create spider eyes on top! 
  1. Another lunch alternative are these super cute Chicken Stuffed Roz Heads from Monsters Inc!
  2. Jazz up dinner with Pumpkin Stuffed Peppers. Turn your favorite stuffed pepper recipe into a jack o lantern of a meal by cutting out eyes and a mouth in your bell peppers before stuffing and baking! 
  3. Try this Witchy Dip for a fun halloween snack! Turn Dole avocadoes into a spooky delight by serving homemade guacamole in a shallow oval bowl. Top half the dish with blue corn chips to form a witch’s hat. Then add shredded carrots for witch’s hair, a mini pickle for a nose, olives for eyes and red pepper for a mouth! 
  4. A creative way to serve energy bites is to turn them into Bat Energy Bites! Take your go-to energy bite recipe and add two candy eyes, plus broken blue corn tortillas for wings for a festive treat!
  5. A go-to healthy snack are banana ghosts. Simply cut your peeled banana in half. Roll in yogurt and unsweetened coconut flakes then use mini chocolate chips for eyes and enjoy!
  6. Another banana based favorite are banana mummies! Wrap your banana in fruit leather and add candy eyes for a mummerific snack!
  7. If you’re little one loves PB&J, try making Dole Crazy Eyes. Start by thinly slice a baguette into ovals and spread with peanut butter. Top with a single banana slice and blueberry and use raspberry jam to create squiggly red lines coming out of the banana.
  8. A great way to get kids to eat their greens is by making Franken-smoothies! Take any green smoothie recipe and pour into a clear plastic glass that has been decorated to look like Frankenstien. So simple and so easy!!
  1. Another simple and fun snack are strawberry ghosts! Just take white chocolate and microwave at 10 second intervals (stirring in between) until soft. Then drizzle horizontally across your strawberries, finishing off with candy eyes! You can also use any other melted chocolate or dark chocolate that you like!
  2. Party guests will love candy corn parfaits. Just take small drink cups or clear cocktail cups and layer diced papaya followed with diced fresh pineapple and topped with your favorite cool whip, whipped cream or even vanilla greek yogurt for a protein packed version! Totally festive and easy! Try them at your next school party!
  3. Make Monster Mouthes with apple slices for lips, slivered almonds and marshmallows for teeth and strawberries for tongues! Super fun!!
  4. Another easy school snack are clementine pumpkins! You can leave them whole and use a black food marker to draw pumpkin faces. Go all the way by slicing small celery sticks to insert in the top for a stem!
  5. If you love cozy pumpkin spice flavor, you have to try Pumpkin Spice Sweet Potato Dole Whip! It’s autumn in a bowl 🙂
  6. Or check out this Witching Hour Fro Whip inspired by everyone’s favorite Sanderson sisters!
  7. I recently saw a dietitian create witches fingers out of Moondrop grapes which I thought was so cool. The grapes are naturally the shape of fingers and when you add an almond sliver for a nail, it couldn’t be more realistic!!
  8. Little witches brooms are simple to make with mozzarella string cheese! Cut the string cheese into 3 equal sized pieces and cut slices length wise about 2/3 of the way across each piece to make the bristles of the broom. Then insert a thin pretzel rod into the cheese!
  9. How about serving hummus in the shape of a pumpkin! To make “pumpkin” hummus, just take your knife or spoon to create a pumpkin shape and then top with a celery stick or cucumber log for a stem!
  10.  Another perfect way to get kids to way their veggies are with Green Slimesicles. Popsicles made with fruit and veg to give green slime a whole new meaning.
  11. Create a Halloween veggie skeleton! This one is easy- just use your imagination to create a skeleton with fresh cut vegetables! The sky is the limit! Use
  12. Serve up your greens with these intimidating Meanies! The concept will feature your favorite salad in classic Halloween style, and they’ll add flair to your table scape too!
  13. Wash everything down with a deliciously scary mocktail! These Sparkling Ghouls are complete with cranberry blood!!! eek

What to stock up on to make Halloween snacks a breeze

  • Toothpicks
  • Candy Eyes
  • Chocolate in various colors
  • Parchment Paper
  • Mini chocolate Chips
  • Mini marshmallows
  • Slivered Almonds
  • Black food marker
  • Clear plastic cups
  • Straws

Make a Halloween Pineapple Jack-o-lantern!

Nothing says Halloween fun like jack o’ lanterns!! But instead of using a pumpkin, why not use a pineapple! You can eat the inside and then create a fresh fruit centerpiece that everyone will be talking about!

Pineapple Jack O Lantern

Carve a festive centerpiece for your Halloween season!

Equipment

  • 1 Pineapple 5" wide and 7" tall
  • 1 serrated knife
  • 1 spoon
  • 1 cutting board
  • 1 pineapple corer optional

Instructions

  • Cut the bottom of the pineapple off using the serrated knife, then cut around the inside edge of the pineapple, keeping the walls of the pineapple about 1" thick for support.
  • Use the knife and spoon to remove the pineapple flesh, including the core, until nice and clean. Place the pineapple flesh in a bowl to eat.
  • Using the serrrated knife, carefully cut out your face!
  • Place the finished pineapple on a plate and enjoy the look and taste of your creation!
  • when it gets dark, place a lit LED candle on the plate under the pineapple Jack-O-Lantern

October is truly an exciting time of year, and if you think about it’s more like a full blown Halloween season, it’s not just one meal or afternoon of sweet treats anymore. There are neighborhood Halloween parties, festive school lunches to make, halloween class parties, annual parades, and costume contests that make for the perfect opportunity to enjoy healthy treats. There will be plenty of sweets to enjoy, but be sure to offer healthier options too!

How to Cut Papaya – Step by Step

While there are all different types of papaya or “pawpaw”, all of them are native to tropical regions such as Central and South America, Mexico, Hawaii. Local grocery stores near me carry Mexican papayas and the brand they had today was Chula Vista. They are large football shaped fruit, weighing about four pounds and are green when unripe. The inside can range from yellow to deep peach or bright orange flesh that has the texture of mango, with the sweet flavor of melon. They also have hundreds of black seeds inside which are normally removed, but don’t worry, they’re edible! Read on for how to cut papaya in different ways and why you want to do it!!

How to choose a papaya at the store

In addition to Mexican papaya, you may also see Hawaiian papaya in the U.S. Either way, they will most likely be green, so just pick one that is heavy for it’s size with clean, unblemished skin. Ripe papaya should have a sweet aroma and papaya skin should hold an impression when squeezed gently. Handle gently to prevent bruising. And beware, fresh papaya will continue to ripen at home. Peak season is late Fall through early Spring. Though, like pineapple, in the US papaya are available and ready to eat year round.

How do you know when it’s ripe?

When you get it home, it will likely need a few days to ripen to a nice yellow color. Unripe papaya is green and should be stored in a cool dry place. I remember my grandfather wrapping it in newspaper and leaving it on the counter in the cool laundry room to become ripe at room temperature.

Papayas are kind of like bananas, where they’re not so sweet when they’re green, but they’re really enjoyable to eat when they’re deep yellow, even slightly spotted.

Papayas are best enjoyed when they are 3/4 yellow. Overripe papaya may blemish and develop soft spots. If this happens, cut it right away.

How to ripen papaya at home

Store green papaya wrapped in newspaper or in a paper bag in a cool dry place for 2-3 days until it is no longer green, and is turning yellow. The more yellow and spotted the papaya, the riper it is. Once it is ripe, or turning yellow, it should be cut. It can be stored in the fridge to stall ripening, if you’re not quite ready to cut it yet.

What you need to start cutting

  • cutting board
  • chef’s knife
  • paring knife
  • spoon
  • optional: vegetable peeler

How to cut your papaya

  1. Remove the paper from your papaya
  2. Rinse under cool running water.
  3. Using a sharp knife, cut the papaya in half, longways.
  4. Then cut off the ends of the papaya.
  5. Using a large spoon, remove the black seeds and discard, or set aside to add to salad dressings for a peppery bite!
  6. At this point you can use a melon baller to scoop out kid friendly rounds!
  7. OR I like to use a chef’s knife to cut into long strips, about 3/4 inch thick. For me, this is the simplest method.
  8. Then use a paring knife to remove the papaya skin along with any black spots
  9. Then I either serve in strips or cut into smaller pieces.

I’ve seen people remove the skin of the fruit with a vegetable peeler, but it can be a little cumbersome. If you want to remove the skin before cutting the fruit halves, I recommend turning the “papaya boat” or half, upside down so the flat side is on the flat surface of the counter top so the slippery fruit is more stable.

What does papaya taste like?

Mexican papaya is firm and juicy, but not quite as intense as Hawaiian papaya, which are much smaller in size.

Papaya has a sweet taste similar to other melons and can have a musky flavor when overripe. If you don’t like the flavor of papaya at room temperature, you may like it chilled.

What do you do with papaya seeds?

The small round black seeds inside the papaya are actually edible! They have a peppery flavor and can easily be incorporated into salad dressings or marinades.

If that doesn’t sound good to you, compost them or discard.

How to serve papaya?

  • Chilled with a little lime juice
  • Chop it into a fruit salad with other tropical fruits such as mango and banana
  • Papaya salsa made with red onion
  • Use papaya halves as their own bowl! Fill them with tuna salad, fruit, yogurt or cottage cheese.
  • Add papaya to salad
  • Consider adding papaya to lunchboxes as an interesting and tasty addition
  • Add to holiday fruit baskets.
  • Add a papaya salad to your brunch spread
  • Pair with grilled meat and seafood for a pop of color and balance.
  • Add papaya to marinades to take advantage of their natural tenderizing properties
  • Cut a papaya to pair with food from Indian cuisines
  • Juice it or add to smoothies!

What flavors go well with papaya?

  • meat
  • poultry
  • smoked meats
  • avocado
  • chilies
  • lime
  • lemon
  • tropical fruits
  • coconut
  • ginger

How to store papaya?

  • Store in an airtight container for several days in the refrigerator.
  • Chunks can also be frozen. I recommend freezing them on a large sheet pan first. Then place frozen chunks in a zip lock bag, remove as much air as possible and then place back in the freezer for up to three months!

How does papaya fit into my macros?

  • Just like most fruit!
  • Make a mental note to fit it into your next regular or low macro days!
  • Portion it out into 1 or 2 cup servings for an easy grab and go lunch!
  • 1 cup : 16g Carb, 2g Fiber, 1g Protein, 1g Fat

Papaya Nutrition

Papaya is low in calories and rich in nutrients and has a lot of health benefits. List most fruit, they’re low in calories and a good source of fiber and other important nutrients.

Just one cup of pieces has…

  • 62 calories
  • 1g protein
  • .5g fat
  • 16g carb
  • 2g fiber
  • 29mg calcium
  • 264mg potassium
  • 53mcg folate
  • 68mcg vit A
  • 88mg vit C
  • 3.77mcg vit K
  • 2650mcg lycopene

And so much more!! 2

They’re high in vitamins A, C, K and folate, fiber and potassium!

They’re also rich in antioxidants carotenoids and phenols.

It also contains an enzyme called papain, which aids digestion.

Papaya was ranked first in a study that compared 40 different fruits for their Dietary Recommended Intake of nine vitamins, potassium and fiber.3

It’s combination of vitamins A and C, fiber and potassium make it a super heart healthy fruit.

Red flesh papaya fruit are a good source of lycopene which is an inactive source of Vitamin A that has been linked with reduced risk for lung, prostate and stomach cancers.1

References

  1. https://www.sciencedirect.com/topics/agricultural-and-biological-sciences/papaya
  2. https://fdc.nal.usda.gov/fdc-app.html#/food-details/169926/nutrients
  3. https://www.amazon.com/Dole-Nutrition-Handbook-Longer-Healthier/dp/1605292958

Quick, Simple & Satisfying Weeknight Split Red Lentil Soup Recipe

I got home from Costa Rica last week the seasons had turned. It was chilly and windy and seemed as though sweater weather had set in. As I went through my pantry to get a few ideas for weekly meals – the bright split red lentils stood out at me. I got them at a European market on the other side of Charlotte over the summer, but now is their time! I saw a red lentil soup recipe from Trader Joe’s that is simple and easy… but I used it as inspiration to make this one, which is even easier and can be made on busy weeknights without much effort. If you’re in the mood for a hearty soup – READ ON!

Jump to Recipe

What do red lentils taste like?

They have a very mild flavor, even slightly sweet which makes them a good introduction to the lentil family for you or little ones!

Ingredients and substitutions

Split red lentils – aka red split lentils, these little guys cook up quickly so I don’t recommend substituting with other types of lentils such as brown lentils, yellow lentils or green lentils. You could, but the cook time will be longer, and the beauty is that it’s an easy lentil soup recipe for any weeknight. It has simple ingredients and doesn’t require a long cooking time to ensure everything is cooked properly.

I do suggest however, to rinse lentils in a fine mesh sieve under cold water. Run your fingers through the lentils to be sure small stones or other debris are not included.

If you can’t find split red lentils, plain red lentils cook quickly and will work just fine in this recipe!

Chicken broth – You can substitute with 32 ounces of vegetable stock or water and bouillon cubes if all else fails!

Mirepoix – This is my major shortcut. The original recipe calls for just onions, but can you ever go wrong with carrots and celery too? If I go to Trader Joes, during the winter, I always pick up pre-cut mirepoix. This way I can literally throw together a healthy meal that can be eaten right away or stored in the freezer for a quick meal. Alternatively, I could cut my veg the old fashioned way or blitz them in the food processor (but that’s less appealing because it’s more to clean).

Yellow or green squash – For me, these say “summer”, but they do add a nice texture to this soup, and obviously a lot of nutrition. You could leave them out or substitute with a few handfulls of baby spinach.

Can of tomato sauce – This helps contribute to that beautiful orange color, but if you don’t have them a can of diced tomatoes or even a few Tbsp of tomato paste will do. Tomatoes add umami to any dish, so don’t skip them!

Chicken sausage – This ingredient could be left out, but I think it adds great flavor plus lean protein! I opt for a variety with mushrooms, but any flavor you like will work well. Alternatively, you can add any of your favorite plant-based protein options just before serving.

Olive oil – You can use any neutral oil like avocado or canola, but olive adds great flavor. Use it if you have it. Butter will work too!

Salt and black pepper – This is obvious, but my secret ingredient is Seasonello. I love this stuff and I’ll have to dedicate an entire post to it. It’s an Italian seasoning salt that makes every dish feel homey to me. I highly recommend buying it as a seasoning pantry staple.

How to make hearty red lentil soup?

Jump to Recipe

Using a large pot or Dutch oven, heat olive oil over medium-high heat, add mirepoix and zucchini. Let it cook until translucent.

Next add the sausage. Let it cook until browned. Then add remaining ingredients including lentils, stock, tomato sauce, salt and pepper and cook over medium heat until lentils are fully cooked through.

Variations

You can easily improvise with this recipe and add anything from sweet potatoes to coconut milk to deepen the flavor. Indian spices, curry and fresh ginger are great additions to this soup!

You can also make a smooth version by reserving your sausage after cooking. Then simply use an immersion blender to blend the soup until it yields a smooth creamy consistency. Sometimes it is worth the extra step, but other times, I want something that has a little more texture.

You’re probably wondering if you can make this in an instant pot. And you probably could. Just be sure to cook your vegetables well and brown your sausage before adding the rest of the ingredients. But it won’t save you that much time, this recipe can be done in under an hour.

Can I make this dish vegetarian?

You sure can! Leave out the sausage- don’t worry you’ll get plenty of protein from the lentils! And of course, swap in your favorite vegetable broth instead of the chicken broth.

What to serve with red lentil soup?

  • Crusty bread or pita
  • Side salad
  • Greek yogurt or sour cream
  • Squeeze of fresh lemon juice or lime juice

How to store leftovers

After you let the soup cool, I recommend dividing into 4 equal portions in 1/2 quart containers. I love to re-use to-go containers here! Once they’re in the fridge you can store in an airtight container for 4-5 days or label and freeze for another day. The portion sizes are hearty and it tastes even better the next day!

What else can I make with red lentils?

While I haven’t tried all of these… I think they’re worth experimenting with to use up your bag of lentils!!

Nutrition benefits

Just 1/2 cup serving of these red lentils have 358cal, and 24g protein. That’s equal to the protein you’d find in any poultry, meat or seafood serving! It also delivers an important source of 11g fiber 7g iron, 650mg potassium, 48mg calcium, 59mg magnesium, 3.6mg zinc.1

Fiber is a superstar in this dish. Each serving provides 12 of the 25-35 recommended grams of fiber you need in a day. Fiber helps keep us regular and helps support blood sugar control and cholesterol levels! We should all be aiming to reach recommended fiber intake daily.

Protein is the last nutrient I’ll call out for this recipe. With 41g per serving, you can be sure you’ll feel satisfied after eating this soup! The lean protein and fiber combo won’t leave room for any cravings in-between or after meals. Let me know if you try it!

How does this recipe fit into my macros?

NFP for red lentil soup

I like to divide this recipe into 4 portions. If you like smaller portions, I’d recommend dividing into 6 equal portions.

With 4 portions you have 470 calories (which fits well into my macros as a hearty meal). It has 13g fat, 48g carbs, 12g fiber and 41g protein! It’s ideal for a regular macro day!

Easy red lentil soup
Portioning out my red lentil soup!

References

1 https://fdc.nal.usda.gov/fdc-app.html#/food-details/174284/nutrients

Thanks for reading along with me! Check out these other articles that may interest you!

Easy red lentil soup

Easy Split Red Lentil Soup

This super fast, protein packed recipe can be made any night of the week in under an hour!!
Prep Time 5 minutes
Cook Time 45 minutes
Total Time 50 minutes
Course Main Course, Soup
Servings 4
Calories 470 kcal

Ingredients
  

  • 2 tsp olive oil
  • 1 quart mirepoix
  • 1 each zucchini, chopped about 1 cup
  • 1 package chicken sausage I like TJ's mushroom
  • 1 cup split red lentils
  • 1 can tomato sauce 14oz
  • 32 oz chicken broth
  • 1/2 tsp salt

Instructions
 

  • Add 2 tsp olive oil to large Dutch oven. Add mirepoix and zucchini and sauté until translucent. Season with salt and pepper.
  • Add chicken sausage and let brown slightly.
  • Then add lentils, tomato sauce and chicken broth.
  • Bring everything up to a boil and then down to a simmer for about 40 minutes.
  • Once everything is cooled, divide into 4 equal portions. I like to use pint containers for easy meal prep lunches!

Nutrition

Calories: 470kcal
Keyword plant forward, protein
Tried this recipe?Let us know how it was!

Easy weeknight meals with Dole Sheet Pan Starter Kits!!

To say life with kids is hectic, is a complete understatement. Between school, work, sports, birthday parties and family visits there is always something going on – and I think moms everywhere will agree with me, time for meal planning is precious. So in the spirit of sharing things that are too good to be true…read on for my experience with these Dole Sheet Pan Starter Kits.

So in the spirit sharing things that are too good to be true… read on for my experience with these Dole Sheet Pan Starter Kits.

Ever since culinary school, I loved roasting. My culinary school partner in crime, Tracy, observed early on, that there’s nothing I loved more than a good roast – or anything that can be made in the oven. And what’s not to love? It’s an easy, hands off, clean way to get dinner on the table using a conventional sheet pan. So when Dole came out with a new line of sheet pan starter kits I was ecstatic. There are three popular flavors, including French Onion, Homestyle Roasted Herb and Lemon Parmesan flavor varieties. They include a combination of ready-to-roast vegetables including red potatoes, whole baby carrots and broccoli florets or green beans, plus a delicious seasoning packet. All you need to do is add your favorite choice of protein to the fresh vegetables and roast for 30-35 minutes.

Dole Sheet Pan Dinner

And if you’ve been getting recipe inspiration online (AKA Pinterest trend data), you know about the growing sheet pan meal trend. It’s everywhere.

Sheet pan dinners make for easy cooking and even easier cleanup!

So on their own, these unique products fill a consumer need and offer a flavorful meal experience, but it actually gets better! Each of the distinct flavor varieties can be transformed into a completely different meal. Let me explain.

When you make your new sheet pan meal starter kits at home, you’ll get a perfectly seasoned and balanced plate that includes protein, carbohydrate and fat (we recommend olive oil). But, we experimented further with the kits to see how we could transform them into soups and wraps, meals that could be made on the grill, even breakfast sheet pans, perfect for brunch! I’ve personally tried them all and couldn’t believe that one truly got better than the next.

Just in case you’re new around here, I am a registered dietitian and nutrition and health communications manager for Dole Food Company. Dole generously covered the cost of ingredients for these recipes, but all of the opinions are my own!

Use Dole Sheet Pan Starter Kits to make healthy meal solutions!

The combination of lean proteins with fresh Dole vegetables is more versatile than you would think and the perfectly paired seasoning packet provides more than enough to create these dishes below. Each of these recipes can be found at Dole’s website.

French Onion Turkey Burgers with Veggies

Dole Sheet Pan Turkey Burger

This was a no brainer! Combining the seasoning packet with extra lean ground turkey was easy to do and it all roasted together in the pan. The simple addition of truffle aioli (I used a vegan version from Trader Joe’s) was so good!! It’s seriously crave-able.

Sheet Pan French Onion Sandwich Wraps

Dole Sheet Pan Wrap

I loved this for leftovers. (If you have any!). Just reheat them and drop into your favorite wrap with mayo.

Lemon Parmesan Sheet Pan Pasta

Who doesn’t love a pasta night? This is the perfect meal for aspiring athletes. It’s a great way to carb load with whole foods that taste delicious. It’s also a good solution for leftovers. All you need to do is add pasta, parmesan cheese seasoning and a jar of your favorite sauce – I used Rao’s Alfredo – and bake until cooked through. It was a major crowd pleaser.

Breakfast Sheet Pan Meal

Talk about a way to impress your guests! Just replace the cooked chicken or add eggs to your protein of choice for a hearty breakfast for a crowd.

Roasted Chicken & Vegetable Soup

Quick Chicken Soup

The fresh-cut vegetables make soup a natural choice to transform this kit. After roasting as directed, add ingredients to a stock pot with chicken broth. It’s that easy.

Herb Salmon & Foil Pack Grillers

Dole Grilled Sheet Pan Dinner

We love cooking on the grill to keep the heat out of the kitchen, and these foil packets were so easy to throw on the grill. They didn’t need to be babysat or anything. My children loved the salmon and got a kick out of seeing their veggie foil packets!

So grab your favorite protein – chicken, salmon, pork, ground beef, different varieties of seafood – whatever and you can literally have one of these fresh vegetable meals on your table in 30 minutes.

One of the best things you can do for your health is to eat more servings of fruits and vegetables each day. And these Dole sheet pan meal starter kits help overcome a major hurdle for busy consumers which is time! It eliminates the need for a lot of specific ingredients, and limits that daily decision fatigue of – what’s for dinner!

Melanie Marcus MA RD

Are Dole Sheet Pan Meal Starter Kits Macro Balanced?

They are!! These kits are perfect for a regular macro day if you’re following the FASTer Way to Fat Loss and if you’re tracking macros, it’s easy to see where your carbohydrate, fat and protein are coming from. The potatoes help ensure you get a source of whole food carbohydrate to fuel your workouts, and you can use any protein you like! If I’m meal prepping for myself, I like to use a little less seasoning and then break out into 2 hearty portions.

When prepared as suggested, the Lemon Parmesan has 340 calories, 17g Fat, 18g Carbohydrate, 3g Fiber and 29g Protein.

But like I said, you can easily modify oil and protein choices for your needs!

So where do you find them?

Distribution started in select markets in the United States, but recently I have been able to find them near Charlotte and friends of mine in New Jersey have also tried them! I hope to see additional future flavors and new products come out soon… after-all there’s nothing better than single-pan meal options to get restaurant-quality meal on the table!

For more recipes and meal inspiration check out these links

Cooking as a way to instill good habits in kids

Little ones love to stay busy and if you’re a parent, then you know that children love to get involved with whatever YOU are doing. From dusting to washing dishes or even sharing your meal, if you’re doing it, then your toddler wants in on the action. Why not take advantage of their enthusiasm to teach a new skill and build better cooking habits for the whole family?

This article was adapted from a piece written for Dole Food Company.

Cooking with children is a great way to help them build confidence and lay the foundation for healthy eating as they grow. Research also shows that cookin meals at home resultsin eating fewer calories, and negative nutrieints like saturated fat and sugar- even when you’re not trying to lose weight! So why not try new foods together while teaching children this essential life skill?

Melanie Marcus MA RD

Here are five tips for cooking-up healthy habits in the kitchen:

  1. Dress for the part! Pull out the aprons and get everyone in costume. If you really want to be official, check out this Dole printable chef’s hat. Children will love to personalize their own before getting busy in the kitchen! 
  2. Give them a seat at the table (literally)!  Instead of sitting little helpers on the counter, get them a step stool so they can see the counter – most importantly, what’s in that big bowl – or sit them in a booster seat at the table so they can help measure, mix and complete other age-appropriate tasks. This keeps them interested and safe. And remember to always wash hands before getting started! That is food safety 101! 
  3. Mise en place!  This is French for “everything in its place.” Set out your ingredients on the counter in pre-measured amounts that match the recipe. Maybe your child can help measure dry beans or flour? Or pull items out of the pantry? To hold little ones’ attention, start following the recipe directions only after everything is prepped. Start with simple recipes to minimize tantrums.
  4. Prepare for spills! Have your kitchen towel handy and put a garbage bowl on the counter is the best way to help clean along the way. It’s always easier to stay on track with recipes when you have a clean workspace.
  5. Set a fun table! The best part of cooking is eating! While dishes simmer or bake away, have children set the table. If they’re too little to handle carrying your fine dishware, use paper! And don’t forget the placemats. This Dole placemat will keep the kiddo’s coloring until their dinner is ready to eat. And older kids might enjoy personalizing a downloadable menus and recipe cards to turn your kitchen into a French bistro!

How to choose healthy recipes to make with your little chef

  • Start with simple snack foods. It could be as basic as having younger children use small cookie cutters to make shapes out of melon.
  • Other healthy snacks to try could be apple slices with hummus dip. Have children slice the apple with a safety knife and scoop dip into a bowl.
  • Look to your family traditions. What foods have meaning to your family. Is there special sweet treat or holiday food you can tell a story about?
  • Take a trip to the farmers market or grocery store and let your little chef choose an ingredient to work with.
  • Have your little kids scan through cookbooks or magazines to choose kid-approved recipes by looking at pictures.
  • What about something simple and easy that even picky eaters will love? Check out these simple banana oatmeal cookies.
  • If all else fails get a ball of whole grain pizza dough from the grocery store. Shape into a round and top with your favorite sauce, cheese and olive oil. You can top with veggies of choice and a green salad for a delicious dinner.
Small sized and safe tools empower children to take snack time into their own hands the healthy way!!

Benefits of cooking with kids

  • What’s better than sneaking a little extra reading time. Have them read the list of ingredients or point out letters of the alphabet.
  • They learn important math skills from measuring out ingredients!
  • They become familiar with kitchen tools
  • They can hone fine motor skills when the write out the shopping list.
  • It’s the perfect time to talk nutrition and the benefits of eating lots of colorful vegetables!
  • It’s an excellent way to spend one on one quality time.
  • It’s a great time to forget the stress and focus on the task at hand – for parents and kids!
  • Picky eaters are more likely to try new things if they’ve made them!

Things to consider buying to make cooking with kids easier!

Plastic chef knives give small hands the freedom to do the same thing you do! It makes them feel special and can motivate them to do prepare foods on their own!

A kid safe kitchen stool. These are built with safety in mind, to get kids up at counter level while ensuring they don’t fall.

Cookie cutters of all shapes and sizes. These again, are a fun way to add creativity to meals and snacks – especially fruits! My daughter loves to makes shapes out of melon and then skewer them onto toothpicks.

Bonus: Kids are more likely to try foods that they help prepare in the kitchen! Take advantage of that opportunity to make family meals that include fruits and vegetables and other healthy ingredients that improve diet quality.