Month: February 2024

Two ingredient soup hack (creamy + nourishing)

As a mom and dietitian, I’m always on the hunt to make something wholesome and easy to feed myself and my kids – and this one hits the mark for both. You can warm up your soul with this quick and easy two-ingredient soup hack that is perfect for those busy weekdays or whenever you need a quick dinner fix. It also happens to be an excellent way to get your kids to eat vegetables! Plus you can add to it to create a macro balanced meal or snack.  It is literally the easiest soup recipes I have ever tested.

This recipe is built on the convenience of frozen mirepoix and chicken broth from the grocery store, making it a great go-to meal when you’re short on time.

Jump to Recipe

Ingredients and Alternatives:

For this basic recipe, you will only need two main ingredients, frozen mirepoix and broth, but you can add additional ingredients to customize the soup to your own preference. 
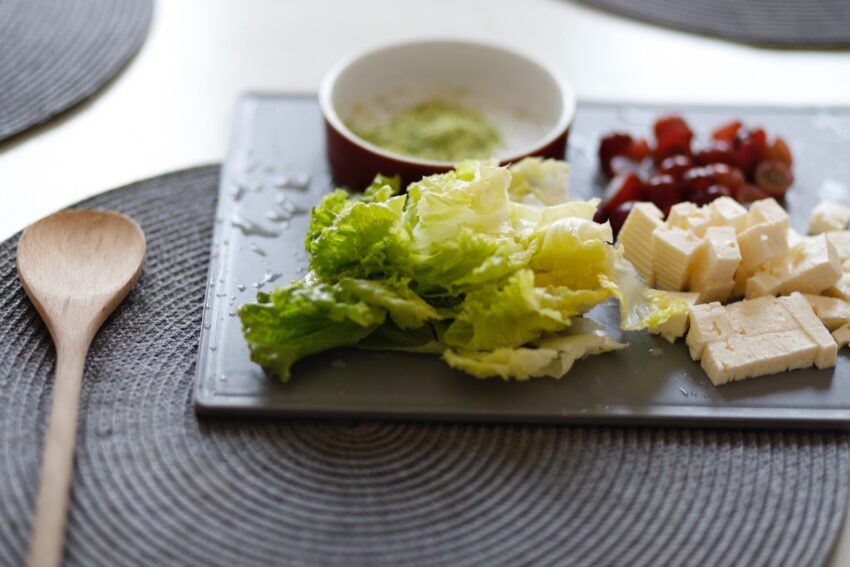
Frozen mirepoix

  • This is a combination of pre-diced celery, onion and carrot.  I usually have a bag in the freezer.  
  • This soup is equally as good with fresh mirepoix, my local Trader Joe’s and Harris Teeter always have it available in the produce aisle.  When I buy fresh, I generally try to cook it the same day.  
  • You could always use 3/4 cup each of diced carrots and celery with 1 cup of diced onion.  
Chopped onions, carrots, leeks and turnips for soup.

Chicken stock

Bowl of broth herbs and spices to make chicken soup
  • Vegetable stock is a perfect alternative if you’re vegan, vegetarian or trying to follow a more plant based lifestyle.
  • Beef stock will add a deeper umami flavor to this soup.
  • Turkey stock is a great alternative to chicken stock.
  • Bone broth may also be used.  This option will offer a more protein rich soup.  

​Make it your own

  • Feel free to add fresh herbs, such as thyme or rosemary, to elevate the soup’s flavor, or hot sauce to add an extra kick.
  • Try adding a can of tomatoes to make a tomato-based soup.
  • Grate or add a cube of fresh ginger to the mirepoix for a nutrient and flavor boost.
  • Serve with poached shrimp for an elegant starter or light lunch.
Jump to Recipe

Steps to Make It:

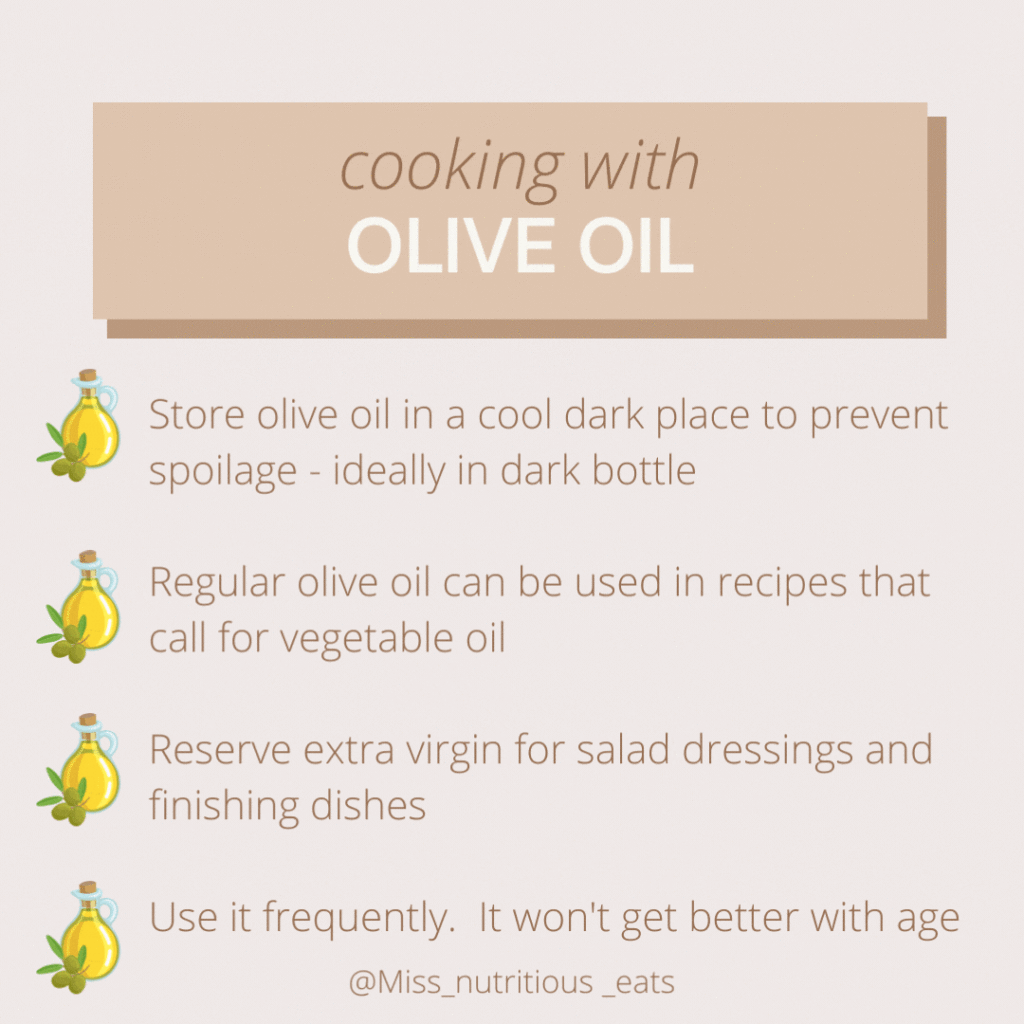
  1. Start by heating up a large pot on medium heat and adding a tablespoon of olive oil.
  2. Add the frozen mirepoix mixture and cook for 5-7 minutes until it’s soft and fragrant.
  3. Pour in the chicken or vegetable broth, enough to cover the mirepoix, and let it come to a boil.
  4. Turn down the heat and let the soup simmer for at least 15 minutes.
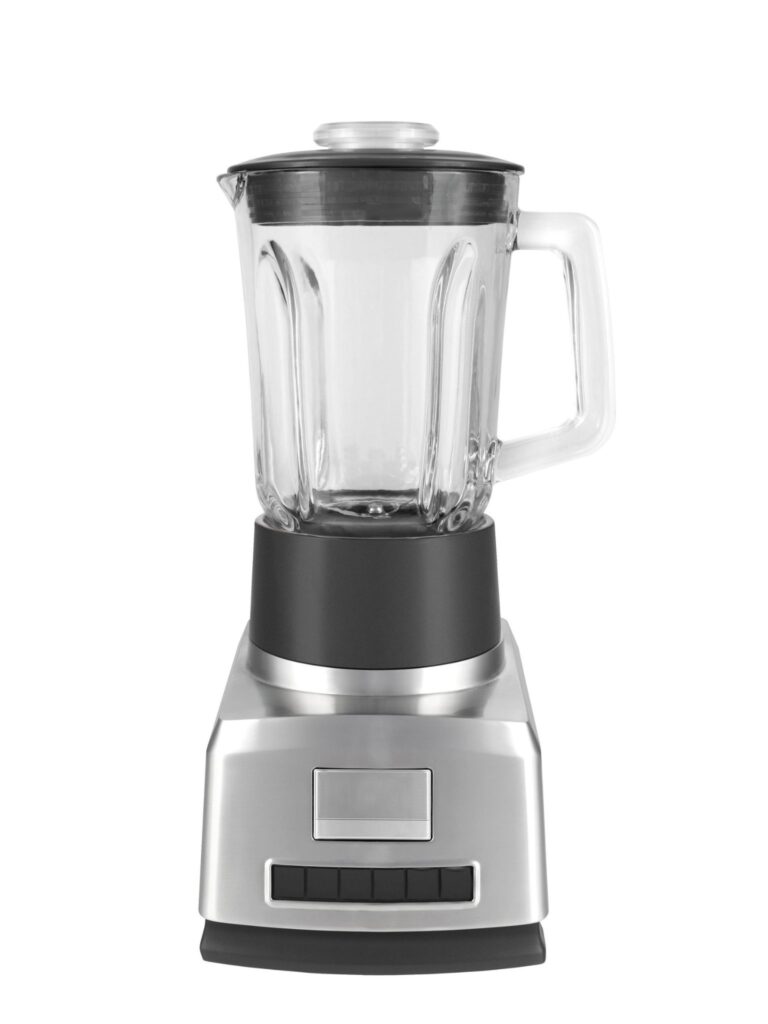
  5. Use an immersion blender to puree the soup until you reach the desired consistency.
  6. If you want a thinner soup, add more warm chicken or veggie stock and blend.  
  7. Serve hot with toppings of your choice.
Home blender

The beauty of this recipe is that it is perfect for anyone looking for a warm and hearty soup without having to spend hours in the kitchen. This is perfect for those who are seeking a healthy option but don’t want to sacrifice flavor.

Interesting Ways to Serve It:

Bowl of creamy soup decoreated with crema and herbs

If you’re looking to mix things up, try serving this soup as a base for a poached egg. 

You can also roast sweet potato cubes and add them to the soup for a seasonal twist. 

For extra creaminess, add a dollop of Greek yogurt, (heavy cream or sour cream work too!) 

 Serve with crusty bread, green onions, and black pepper.

Top with croutons or toasted pumpkin seeds for an extra crunch.

This two-ingredient soup is an easy favorite during any time of year and is perfect for children and adults alike.

How to store It:

You can pop any leftover soup in the freezer in an airtight container for a quick and easy lunch. I recommend pouring into pint containers for easy meal prepping and portioning.

Nutrition & Macros:

This soup is packed with nutrients from the vegetables and broth. Mirepoix, made from a mix of carrots, celery, and onions, is an excellent source of vitamins and fiber. It is also great for hydration.

It has about 100 calories per serving and is made with real whole food ingredients.

  • Carbohydrates 5g
  • Protein 6g
  • Fat 3g

These values may change if you use a different broth such as bone broth or vegetable broth.

If you’re following the FASTer Way, save this recipe for low macro day. It’s will definitely help you feel full and hit your macro targets.

If you’re in a soup mood, you should try this split lentil soup recipe. It’s high protein and fiber gets better with time.

Don’t hesitate to make it your own by adding your own twist to the recipe. Happy cooking!

delicious pumpkin soup in ceramic bowl

2 Ingredient Soup

This recipes is so easy and comes together quickly for a cozy soup.
Cook Time 45 minutes
Total Time 45 minutes
Course Soup
Cuisine American
Servings 4
Calories 109 kcal

Equipment

  • 1 blender

Ingredients
  

  • Frozen Mirepoix
  • 32 ounces chicken stock

Instructions
 

  • Heat 1 tbsp olive oil in stock pot.
  • Add frozen bag of mirepoix and cook over medium heat until translucent and soft. About 10 minutes.
  • Add broth or stock to vegetables and let simmer for 20 minutes.
  • Transfer hot soup to blender and blend until smooth.
  • Serve and enjoy

Nutrition

Serving: 4gCalories: 109kcalCarbohydrates: 15gProtein: 6gFat: 3gSaturated Fat: 1gPolyunsaturated Fat: 0.5gMonounsaturated Fat: 1gCholesterol: 7mgSodium: 374mgPotassium: 238mgFiber: 2gSugar: 7gVitamin A: 35IUVitamin C: 4mgCalcium: 9mgIron: 0.5mg
Keyword easy, kid friendly
Tried this recipe?Let us know how it was!

About Me

I’m Melanie.

I’m a chef, registered dietitian, foodie, wife and mom.
If you’re looking for quick and healthy meal inspiration that supports your health goals while feeding the rest of your family (including the kiddoes) well, then you’ve come to the right place!

Melanie Marcus Selfie

Mom’s Best Ever Whole-Wheat zucchini bread recipe

I enjoyed this delicious zucchini bread recipe frequently during my childhood. It was a go-to option for quick breakfast, an after-school snack, and as an adult, a sweet(ish) after dinner treat. One of our family favorites was the blueberry zucchini bread, baked to perfection in a bundt pan. During prime zucchini season, the irresistible aroma of freshly baked loaves would fill the air, waiting to be packaged and frozen for later indulgence.  What a great memory – and now I share it with my children.

Jump to Recipe

Now that I have my own garden, growing zucchini plants successfully has been quite the challenge.  I’ve learned first hand that squash bugs can take out your crop within a week if you’re not prepared – and to grow them in North Carolina is a labor of love.  After three years of watching my plants die, this year I was ready and have been able to grow amazing zucchini through August! If you are a successful gardener, bookmark this page so you can make this wholesome zucchini bread recipe anytime.  You won’t regret it!

Ingredients and Substitutions for Walnut Zucchini Bread

  • Walnuts – preferably toasted!  Always store walnuts in the fridge to maintain freshness.  
  • Eggs – It’s best to use room temperature eggs.  Also, you can use up to two flax eggs in this recipe if you want.  
  • Sugar – the original recipe called for 2 cups of sugar. If you want to limit sugar, you can go down to 3/4 cup instead – which is what I do! Coconut sugar can be used instead of white sugar if you like.  I don’t recommend using honey or maple syrup because they’ll add extra moisture.  
  • Vegetable Oil – any oil will work.  I’ve used canola oil, olive oil, coconut oil and rapeseed oil and they all turned out well.  Keep in mind that certain oils will impart flavor and potentially more saturated fat than others.  
  • Apple Sauce – I use unsweetened apple sauce to help keep the bread moist.  You can also use plain greek yogurt or mashed banana. 
  • Unsifted White Whole Wheat Flour – You can use half whole wheat (whole grain flour) and half white flour to  bump up nutrients from whole grains.  All purpose flour or AP flour will also work well.
  • Baking Soda
  • Salt
  • Cinnamon
  • Baking Powder 
  • Zucchini shred using food processor or box grater.  This recipe calls for two cups of grated zucchini, I tend to use about 2 1/2 cups or one large zucchini. But remember to remove the seeds!!  Smaller zucchini are more desirable for their smaller, more digestable seeds.  If your zucchini is large, you will need to scoop them out.  
  • Vanilla extract
  • Optional mix ins :  blueberries, raisins, chocolate chips, lemon zest
Jump to Recipe

It’s so good that I’ll even make it in winter!

About white whole-wheat flour

White whole wheat flour is a healthier alternative to traditional all-purpose flour because it is made from whole grains rather than refined grains. Unlike other types of whole wheat flour, white whole wheat flour is made from a variety of wheat that has a lighter color and milder flavor, making it more appealing to those who are used to the taste of white flour. White whole wheat flour retains the bran and germ of the wheat, which are packed with fiber, vitamins, and minerals that are beneficial for our health. 

How to make the best zucchini bread

I love a short and simple quick bread recipes, and this one is my favorite.  

  • First things first, preheat oven to 350F and line two bread pans (aka loaf pan) with parchment paper and spray with nonstick spray.  You can also use one bunt pan.
  • In a large bowl, beat eggs (plus flax eggs) if you’re using, sugar, applesauce and oil. I like to do this by hand, but you can use your stand mixer with paddle attachment.  
  • Next, in a medium bowl combine all of the dry ingredients.  Whisk flour mixture well before gradually adding to wet ingredients.  
  • Now mix in zucchini.  
  • Last stir in walnuts and vanilla.
  • Pour batter into prepared pan or divide batter into two loaf pans and bake at 350F for about 1 hour or until toothpick comes out clean.  Cooking time may vary slightly depending on the moisture content of the zucchini.    
  • When it comes out of the oven, set the pans on a cooling rack and cover with a clean kitchen towel.

How to freeze this classic zucchini bread

  • For best results, let your breads rest on a wire rack until cool to touch. This helps ensure that excess moisture has evaporated and doesn’t get trapped inside.  
  • Wrap tightly with aluminum foil.
  • Then label freezer-safe bag with date they were made.  
  • One loaf will fit into one gallon size plastic bag.  
  • Freeze completely in the coldest part of the freezer.  
  • When you’re ready to enjoy your zucchini walnut bread simply take out of the freezer the night before so you can have it the next day.

When to eat zucchini bread

1.  Serve for breakfast instead of store bought muffins.  

2.  Bring a loaf of zucchini bread to the office to share with co-workers

3.  Enjoy a warm slice with a little butter. There’s nothing like it.  

4.  Cut into individual slices and wrap with plastic wrap.  Store in a freezer safe bag in the freezer for a healthy snack anytime.  

The best part about this whole wheat zucchini bread recipe is that it makes two loaves!  It’s a quick bread batter that is sure to rival your favorite banana bread or pumpkin bread. For me, there is just something incredibly satisfying about this homemade treat – perhaps it was the inclusion of toasted walnuts, adding a perfect crunch to every bite.

Let me know if you try it for yourself!!  

Mom’s Walnut Zucchini Bread

Prep Time 15 minutes
Cook Time 50 minutes
Total Time 1 hour 5 minutes
Course Breakfast
Cuisine American
Servings 16
Calories 288 kcal

Ingredients
  

  • 4 each eggs
  • 1 cup sugar
  • 1 cup vegetable oil
  • 1 tsp vanilla
  • 2/3 cup unsweetened applesauce
  • 3.5 cups white whole wheat flour unsifted
  • 1.5 tsp baking soda
  • 1.5 tsp salt
  • 1 tsp cinnamon
  • 3/4 tsp baking powder
  • 2 cups shredded zucchini
  • 1/2 cup walnuts toasted and chopped

Instructions
 

  • Mix eggs, sugar, oil, applesauce and vanilla in a large bowl.
  • In another bowl, combine all dry ingredients.
  • Gradually add dry ingredients to wet ingredients.
  • Fold in zucchini and walnuts
  • Pour into 2 prepared loaf pans, or 1 bundt pan.

Nutrition

Serving: 16gCalories: 288kcalCarbohydrates: 33gProtein: 4gFat: 17gSaturated Fat: 2gPolyunsaturated Fat: 10gMonounsaturated Fat: 3gTrans Fat: 0.1gCholesterol: 1mgSodium: 343mgPotassium: 95mgFiber: 3gSugar: 14gVitamin A: 36IUVitamin C: 3mgCalcium: 37mgIron: 1mg
Tried this recipe?Let us know how it was!

About Me

I’m Melanie.

I’m a chef, registered dietitian, foodie, wife and mom.
If you’re looking for quick and healthy meal inspiration that supports your health goals while feeding the rest of your family (including the kiddoes) well, then you’ve come to the right place!

Melanie Marcus Selfie

9 ways to start cooking healthier at home today

Cooking at home is an incredible way to ensure that you are eating healthy meals that are both tasty and nutritious. It always amazes me to think about that what you eat has the power to prevent or reduce your risk of chronic disease such as diabetes, heart disease and obesity. Not only that, it is also an enjoyable way to spend time with family and friends, enhance your culinary skills, and save money! However, sometimes it can be challenging to whip up a meal that is both healthy and delicious, especially if you are new to cooking. But don’t worry! I have got you covered.

It always amazes me to think about that what you eat has the power to prevent or reduce your risk of chronic disease such as diabetes, heart disease and obesity.

Tip #1: Prioritize whole foods

When I say whole foods, I mean foods that are in their mostly natural form.  Think fresh fruit and vegetables, lean meat, healthy fats like avocado and walnuts as well as whole grains.  In the Faster Way, we say anything that comes from the ground or has a mother is fair game.  These foods provide more nutritional value than convenience foods and processed foods because they have micronutrients and fiber that keeps you feeling full and content. For example, incorporating whole grains like brown rice and quinoa into your meals is a great way to add fiber to your diet while fresh fruits and vegetables are chock full of mood enhancing and gut healthy nutrients that bring color and flavor to meals.  Whole food nutrition is also an important element of weight management.  

Tip #2: Plan ahead

Planning ahead is a crucial step in healthy cooking. It saves time, money, and reduces food waste. Develop a weekly menu, taking into consideration the nutrients you need, and shop accordingly. Meal prepping is also a great way to ensure that you have healthy meals ready to go when you are tight on time. Having a handy kitchen notebook or weekly meal planner is a simple way to organize your dinners for the week. It’s your one stop for your favorite new recipes, recipe notes and ingredients that should make up your pantry staples!  

Tip #3: Use the right cooking methods

The cooking methods you choose can significantly impact the health of your meals. Instead of frying, try baking, grilling, or steaming. These methods tend to require less oil and maintain the flavor of your ingredients. Another tip is to use non-stick pans or parchment paper to eliminate the need for excessive oils. Keep in mind that fats have twice the calories as carbohydrate and protein. 

Roasted potatoes

Tip #4: Play with spices and herbs

Parsley on counter

Who says healthy food has to be boring? Playing with spices and herbs is an excellent way to liven up your meals, especially when you’re reducing the amount of fat in food.  Adding spices also provides health benefits. Spices like turmeric, ginger, and cumin are known for their anti-inflammatory properties, and herbs such as parsley and basil have high antioxidant levels.  Once you master a cooking technique, such as roasting for example, you can play with the combination of fresh herbs to create variety in flavor.


Tip #5: Experiment with healthy substitutes

There’s no shortage of healthy substitutes for common ingredients. 

  • For instance, instead of using white flour, try almond or coconut flour, which both contain high vitamins and minerals. 
  • Rather than using sugar, opt for natural sweeteners like honey, maple syrup, or dates.  
  • You can also use unsweetened applesauce or mashed banana in place of butter to keep baked goods healthier too. 
  • Another option is to swap out solid fat such as butter or lard for avocado oil or olive oil because these oils support healthy cholesterol and overall heart health.  
  • Instead of sour cream use a Greek yogurt for that creamy consistency with the added benefit of protein.
  • If you choose to consume dairy, opting for low-fat options is a great way to add calcium and water-soluble vitamins to your diet. So instead of choosing whole milk, try a 2% milk and gradually go to a 1% option as everyone gets used to the change.  (They may not even notice the difference!)
  • Instead of going for the salt shaker or soy sauce which should be avoided if you have high blood pressure, try a squeeze of lemon juice.  Acidity from lemon has a way of brightening up a meal, beyond what salt can add.  Try it!
  • If you are cooking with ground beef, try chopping mushrooms to replace part or all of the beef.  This will decrease total calories and saturated fat, but also add fiber, flavor and important micronutrients.  

Tip #6: Pay attention to portions

healthy travel snacks

This is a big one because portion size and balance of macronutrients can make or break our health goals. Portion sizes can make a big difference in a meal.  White rice for example has 170 calories per 1 cup, cooked.  If you accidentally double that by taking a second helping, the calories will add up quickly.  Plate fruits and vegetables first and incorporate lean proteins like fish and chicken to ensure a balanced meal. Plate your carbohydrates last.  

Tip #7:  Change up your appliances

One of my favorite appliances is my air fryer.  When it comes to cooking fish, chicken cutlets or fries, it’s one of my favorite ways to get a home-cooked meal on the table quickly. Using a slow cooker is a great way to cook lean meats like chicken and pork while retaining their flavor and nutritional value too.  

Vegetable Hack: Cook frozen veggies in your air frier for a quick side that comes together in about 10 minutes!

Tip#8: Nutrition by addition

Often times, an average meal or snack is just one or two ingredients away from being well balanced and satisfying. 

  • Chia seeds can be sprinkled on top of meals for healthy fats and fiber.  
  • Slice bananas or mash berries on top of toast with peanut butter for micronutrients and a pop of flavor.
  • Leftover restaurant meals, like risotto or pasta can be reheated and combined with a bag of frozen vegetables to increase the volume and add nutrition.
  • You can add a scoop of protein powder to rolled oats to provide satiating protein.  
  • Instead of snacking on a piece of fruit, add a scoop of cottage cheese for protein and fat.  
  • When you’re having a slice of pizza, one of the best ways to bump up the nutrition is to have a small side salad or raw vegetables along with it.  
  • If you have to stop for fast food, you can opt for a salad but be sure to add a protein.  At Chick-Fil-A you can ask for double grilled chicken or nuggets to add for filling protein.  

Tip #9 :  Measure your oil

One tablespoon of olive oil or vegetable oil has 120 calories. So when you do the Rachel Ray swirl in the pan (straight from the bottle) it’s easy to add more than intended.  One simple way to avoid eating too much fat is to measure your oil.  Fat is an important part of a healthy diet, so I’m not saying to avoid it all together, it’s just a food group to be aware of, especially if you have heart disease.  

Check out this home made salad dressing – it’s so creamy and tangy. Seriously the best!

My favorite recipes on repeat

1
Quick Fried Rice for One
Check out this recipe
2
Yogurt Curry Chicken Skewers
This recipe couldn't be faster to throw together, and it's a complete crowd pleaser.
Check out this recipe
3
Egg Roll meal prep
Egg Roll In A Bowl
Easy weeknight recipe that comes together with basic pantry staples and 2-3 fresh ingredients from the store!
Check out this recipe

Remember that even small changes in your eating habits can lead to big health benefits. There are even great options for healthier meals at the grocery store (just check out the prepared foods and frozen sections!) and simple swaps you can make to your favorite dishes to make them healthier. 

Follow me on instagram to cook along with me!

About Me

I’m Melanie.

I’m a chef, registered dietitian, foodie, wife and mom.
If you’re looking for quick and healthy meal inspiration that supports your health goals while feeding the rest of your family (including the kiddoes) well, then you’ve come to the right place!

Melanie Marcus Selfie

How to prep kale for any recipe – step by step

Kale is a delicious, leafy green that’s rich in vitamin C and essential nutrients. It’s no surprise that many people consider it one of their favorite ingredients! However, if you’ve ever cooked with curly kale, tuscan kale, dinosaur kale, or lacinato kale, you might have noticed that these greens have tough stems running down the center of the leaves. These stems can be bitter and chewy, detracting from the best flavor of the kale leaf. That’s where deveining kale comes in. In this step-by-step guide, you’ll learn the best way to devein kale for any recipe.

curly kale on white background

Step-by-Step Guide: How to Devein Kale for Any Recipe

Step 1: Gather Your Tools and Ingredients

To prepare your kale, you’ll need a few simple tools and ingredients:

  • A bunch of kale (curly kale, tuscan kale, dinosaur kale, or lacinato kale all work well)
  • A cutting board
  • A sharp knife
  • A large bowl
  • Cold water
  • Ice
  • Paper towels or a salad spinner

Optional:

  • Plastic bags
  • Sheet pans

Step 2: Remove the Kale Leaves from the Stem

close up shot of chopped kale on a white surface

To begin, hold the kale leaf by the stem, with the tip of the leave pointing down. With a paring knife, slide the blade of the knife down both sides of the stem. The tough stems should come out in one piece, leaving you with kale leaves ready to be washed and cooked.

Step 3: Wash the Kale Leaves

Once you’ve separated the kale leaf from the stem, put the leaves in a large bowl of cold water. Move the leaves around in the water to help remove any dirt or debris. Then, lift the kale leaves out of the water and discard the water. It’s important to remember not to soak the leaves for too long, as kale can absorb too much water and become soggy, diminishing its best flavor.

Step 4: Blanch the Kale (optional)

If you’d like to soften your kale leaves, you can quickly blanch them in boiling water for about 30 seconds. Then, immediately transfer the blanched kale to a bowl of ice water to stop the cooking process. After a minute or two, drain the kale and gently squeeze any excess water out of the leaves.

Step 5: Dry the Kale Leaves

Whether you blanch the kale or not, it’s important to dry the leaves well before cooking. You can do this by using paper towels to blot the kale dry or by using a salad spinner to remove excess water. If you choose to use a salad spinner, be sure to spin the leaves in smaller pieces to ensure that they dry thoroughly.

Step 6: Chopping the Kale Leaves

Now that you’ve deveined and cleaned your kale, it’s time to chop it into smaller pieces. Using a sharp knife, cut the leaves into thin strips or smaller pieces, depending on the recipe. Skip this step if you need the leaves to remain whole.

Step 7: Store Your Deveined Kale

To keep your kale fresh and crisp, wrap it in paper towels, place it in a plastic bag, and store it in the refrigerator. This will help absorb any excess moisture and keep your kale fresh for up to a week. In a pinch, you can purchase kale at your local farmer’s market or grocery store that has already been washed chopped and deveined.

Easy recipes to make with Kale

Kale Chips:  Toss the chopped kale leaves with a bit of olive oil or sesame oil and add a pinch of salt. Spread them in a single layer on a sheet pan and bake in the oven at 350°F for about 10-15 minutes, or until they’re crispy.

Optional: For an added kick, you can add a squeeze of lemon juice or sprinkle of red pepper flakes to your kale leaves.

Kale Salad:  Drizzle your fresh kale(small pieces) with red wine vinegar and a bit of salt.  Massage the kale with your hands until kale is slightly wilted.  Then drizzle with olive oil and fresh ground pepper to taste.  You can top this with goat cheese, white beans and pepitas for a refreshing side.  It’s my favorite way to eat kale!

One of the best things about kale is its versatility in the kitchen. It can be eaten raw, blended into smoothies, roasted, sautéed, or even made into chips.

This baked salad recipe with kale is a must try!

photo of salad ingredients

“As a mom and registered dietitian, I am always on the lookout for nutrient-dense and delicious food options that my family will actually enjoy. That’s why I love sautéing kale with just a few simple ingredients – olive oil, garlic, and Seasonello seasoning. Not only does it taste incredibly flavorful, but it’s also full of essential vitamins and minerals. Plus, the healthy fats from the olive oil help your body absorb those nutrients even better. When you cook up a big batch of this tasty kale dish, it’ll be hard to keep it on the table for very long. Give it a try and see for yourself!”

Melanie Marcus MA RD

Kale Nutrition

Kale is a superstar among greens, packed with vitamins and minerals such as vitamin C, vitamin K, vitamin A, calcium, magnesium and folate. It is also rich in antioxidants and fiber, making it an excellent addition to almost any diet.1

In addition to its impressive nutrient profile, kale has been linked to a range of potential health benefits. Studies have shown that consuming kale may help improve heart health, reduce inflammation, and even lower the risk of some cancers. It is also a low-calorie food with about 40 calories per 100g, which can be helpful for weight management.

The nice thing about kale, as with most green leafy vegetables, it fits well with may eating patterns including the mediterranean diet, the keto diet, low carb , vegetarian, vegan and gluten free.

If you’re following the Faster Way to Fat Loss, kale is a vegetable that can fit on your regular macro, low macro, and low carb day plans.

Sources

  1. Alfawaz, H. A., Wani, K., Alrakayan, H., Alnaami, A. M., & Al-Daghri, N. M. (2022). Awareness, Knowledge and Attitude towards ‘Superfood’ Kale and Its Health Benefits among Arab Adults. Nutrients14(2), 245. https://doi.org/10.3390/nu14020245

About Me

I’m Melanie.

I’m a chef, registered dietitian, foodie, wife and mom.
If you’re looking for quick and healthy meal inspiration that supports your health goals while feeding the rest of your family (including the kiddoes) well, then you’ve come to the right place!

Melanie Marcus Selfie

How to cook rolled oats in the microwave (easy + mess free)

I know overnight oats are having a moment, but for me, a warm cut of oatmeal is a staple food for me – especially in the winter. Whether it’s as a break fast food or snack, at home or at the office, it’s the perfect vehicle for fruit, healthy fats, even protein. The truth is oatmeal is a nutritious food enjoyed by many, but cooking oatmeal on the stove can be time-consuming and messy. That’s why learning how to make oatmeal in the microwave is a great way to save time and hassle, especially on busy mornings. In this blog, I’m sharing an easy microwave oatmeal recipe that results in a delicious bowl of oatmeal with no mess involved.

What type of oats should you use? 

Before we dive into the cooking process, let’s talk about the type of oats you should use. There are a few different kinds of oats, including quick oats, old-fashioned oats, and steel-cut oats. What’s the difference?  

Quick Oats – AKA quick-cooking oats were made for perfect microwave oatmeal. Quick oats are essentially rolled or old fashioned oats that have been chopped up to have a higher surface area.  They offer the same fiber and nutrients as other oats, your body simply doesn’t have to work as hard to break down.  Generally this type of oats is usually found in those little packets.  

Old-Fashioned Oats – For me, these make the perfect oatmeal.  Not too mushy, and still cook quickly in the microwave. Old-fashioned or rolled oats are steel cut oats that have been flattened by large drums to increase the surface area. The cooking time is much faster than steel-cut oats. 

Steel-cut Oats – are nubs of oats or oat groats that have been toasted and cut to the size of a pinhead.  They have a hard exterior that takes some time to soften when cooked.  

I recommend sticking to quick oats or old-fashioned oats for the best results when cooking oatmeal in the microwave.  

​How to cook oatmeal in the microwave

Step 1 – combine oatmeal and liquid

To start, you’ll need a microwave-safe bowl and a cup of oats. For a single serving of oatmeal, use 1/2 cup of oats and 1 cup of liquid. The liquid can be water, milk (dairy or non-dairy), oat milk or even a combination of these, depending on your personal preference. You can go up to 2 cups of liquid if you prefer a larger volume of oatmeal.  

Step 2 – season and microwave

Add a pinch of salt and microwave on high power for 6 minutes, stirring every minute to ensure even cooking. The actual cooking time will vary depending on the type of oats you’re using and your microwave’s power, so it may take some trial and error to find your perfect cooking time.

I find that cooking for 2 minutes and then stirring works best. Stopping every minute during the last 2 minutes of cooking.

Step 3 – add protein if desired

To make your oatmeal extra creamy, try adding a scoop of protein powder or a tablespoon of peanut butter to your cooking liquid before microwaving. This will give your oatmeal a protein boost and a delicious flavor.

Step 4 – add flavor

Once your oatmeal is cooked, it’s time to add your favorite toppings. Consider adding some fresh fruit, peanut butter powder, dash of vanilla extract, even some extra milk to your bowl of oats. The best part of oatmeal is that it can be customized to your personal taste preferences, so get creative with your toppings.

​How to prevent oatmeal from spilling over in the microwave

Ensure your oatmeal doesn’t spill over the bowl while cooking by using a large bowl.  Much larger than you think you need.  

Next, it’s critical to stop and stir your old fashioned oats frequently while they are cooking.  This means you should stop the microwave every one to two minutes of cook time, especially during the last minute when it is the hottest!  

​My favorite way to eat oatmeal

I’ve said it before, oatmeal is such a great vehicle to balance macros. (All this means is that you are eating a combination of protein, carbohydrate and fat at each meal). 

Oatmeal + collagen + almond milk + frozen blueberries

Oatmeal + banana + peanut butter 

Oatmeal + 2 egg whites 

Oatmeal + sautéed spinach + fried egg

Oatmeal + diced apple + cinnamon + milk of choice

​Oatmeal tips if your trying to lose weight

Common toppings like chocolate chips, maple syrup, brown sugar even peanut butter should be added to oatmeal in a limited capacity. Honey, maple syrup, agave and brown sugar are all simple sugars and a simple form of energy.  Instead add flavor to your oats with spices like vanilla or cinnamon, fresh berries or protein powder.  

I’m not saying you shouldn’t sweeten your oats at all.  I just want to caution you that these ingredients should be used with caution.  

Full disclosure, microwaving oatmeal may not be the traditional way of cooking oatmeal, but it’s a good idea for people who want to save time and hassle. Plus, by using a microwave you can enjoy a delicious bowl of oatmeal in just a few minutes, without the mess – ANYTIME!

​I’d love to know if you try to make oatmeal in the microwave!  Let me know!

About Me

I’m Melanie.

I’m a chef, registered dietitian, foodie, wife and mom.
If you’re looking for quick and healthy meal inspiration that supports your health goals while feeding the rest of your family (including the kiddoes) well, then you’ve come to the right place!

Melanie Marcus Selfie