Month: March 2024

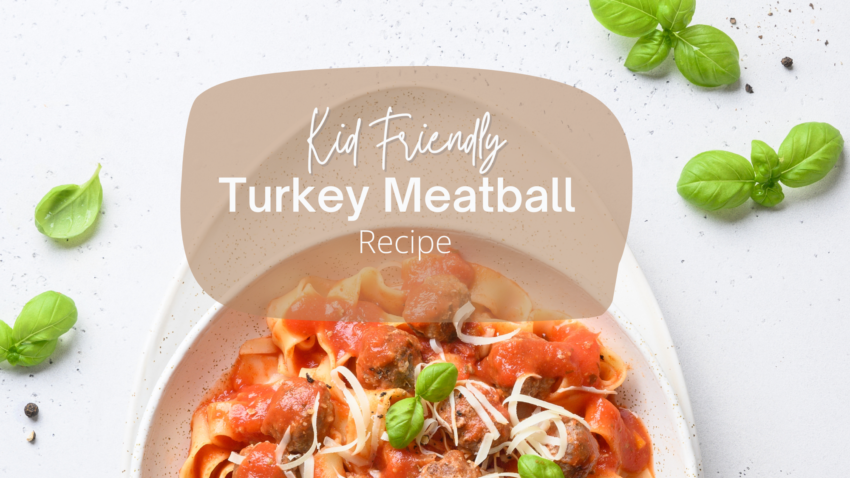
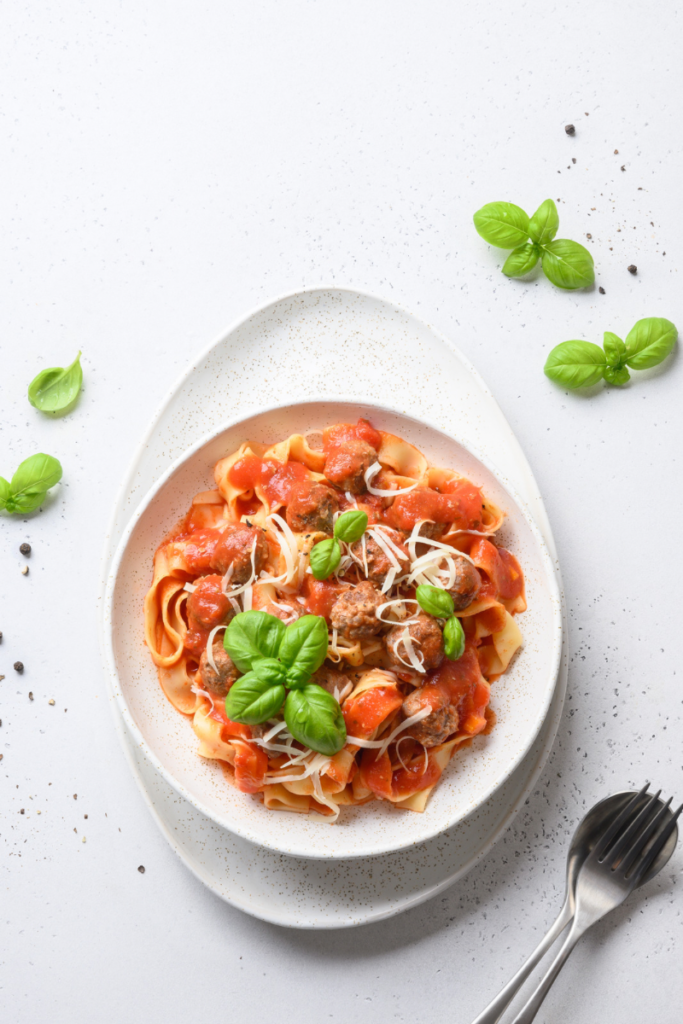
Kid-friendly + Easy baked Turkey Meatball recipe

If you know me, you know I love my mom’s turkey meatballs.  They’re actually called kotlety, which is Polish for “meatball”.  They’re just downright comforting and very simple to make.  I love them with sauce, sliced cold onto a sandwich or just straight out of the fridge for a quick snack.  IYKYK.  So, honestly, I’m sharing this recipe more for myself, my brother and my sister so all of my nieces and nephew can enjoy and remember these as fondly as I do.  Thanks Mom!

Jump to Recipe

Kid appeal

The best part? This turkey meatball recipe is baked and can be a delicious dinner staple for every age—from younger children with little fingers to picky eaters who only eat one food – this is a strong contender. The flavorful meatballs are a mixture of ground turkey, breadcrumbs, and the secret ingredient, Locatelli Romano, making them perfect for a childhood food and well into adulthood. 

Ingredients You’ll Need:

  • 3 pounds lean ground turkey
  • 1/3 cup breadcrumbs
  • 1/4 cup grated Locatelli Romano cheese
  • 3/4 cup finely chopped parsley
  • 1/4 cup milk
  • 1 clove garlic
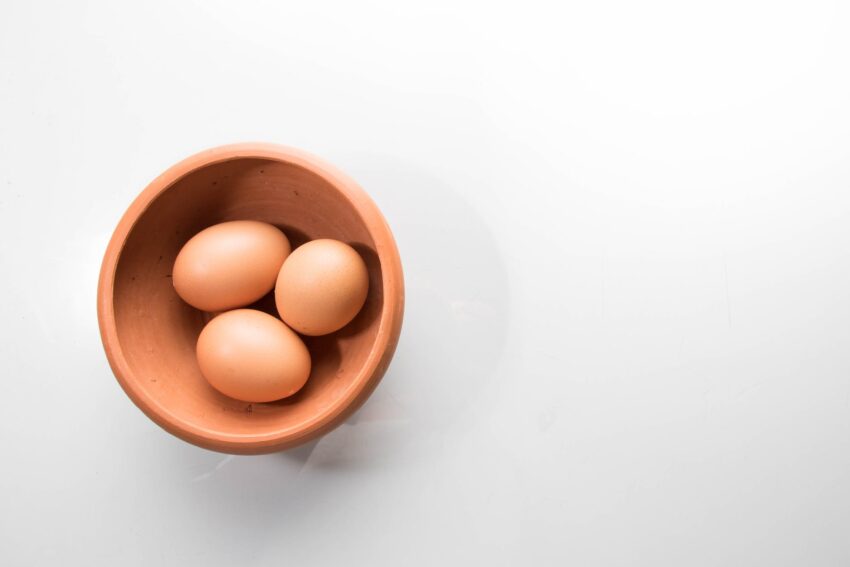
  • 1 large egg
  • Salt and pepper to taste

About the turkey

I’ve tried this recipe with 85%, 92% and 99% lean ground turkey.  I am always happier with the texture and flavor when I use 85 or 92% lean ground turkey.  Not to mention when I use 99% only, they need much less bake time, and could be done in about 30 minutes.  So while I love a good lean protein option, this one should be saved for low carb day.  I recommend going with 85% lean ground turkey.  

The secret ingredient – Locatelli Romano

We’ve tried making this dish with parmesan cheese in a pinch, and it is simply not the same.  Locatelli Romano cheese has a deep, sharp and salty flavor that literally makes this recipe.  Don’t try to substitute it!  Buy a large chunk and grate with a box grater or microplane when you need it for this recipe.  

​Don’t skimp on the parsley

Let me tell you why.  This recipe has a lot of umami rich ingredients.  With turkey and egg and cheese, it needs the brightness from the parsley and while 3/4 cup chopped seems like a lot (I sometimes add more) and it’s really what makes it such a great recipe.  

A Few ‘Great Ways’ To Serve These Meatballs:

  • Over your favorite pasta with marinara sauce for a quick meal.
  • Paired with sweet potato fries or brown rice and broccoli for a well-balanced plate.
  • Smothered in Rao’s marinara or any tomato sauce you love served on a whole grain roll.
  • Stored in an airtight container, they make for fantastic meal prep options for a quick meal the next day.
Instructions for Making Mom’s Turkey Meatballs:

Jump to Recipe
  1. Preheat your oven to 375 degrees F and line a baking sheet with non-stick parchment sheets or parchment paper for fast cleanup.
  2. In a large mixing bowl, combine all ingredients.  Integrating a food processor might seem like an easy way, but some things are best done the traditional way, ensuring the turkey mixture retains its texture.
  3. Into the turkey mixture go the grated Locatelli Romano, breadcrumbs, fresh parsley, and milk. Using a wooden spoon, mix until you’ve got a consistent meatball mixture.
  4. Crack in the egg, and crushed garlic followed by a sprinkle of salt and pepper. Mix until combined.
  5. Time to shape these simple turkey meatballs! With clean hands or a set of scoopers, form the turkey mixture into perfect balls. For consistent sizes, use a small cookie scoop—it also makes the prep time fly by while keeping my hands clean!
  6. Place the meatballs on the prepared baking sheet ensuring they’re spread out evenly. 
  7. Bake the meatballs in the preheated oven until golden and cooked through, with an internal temperature of 165 degrees F—this usually takes 50 minutes.

Protein Options

For those who like to tinker in the kitchen, here are different ways to modify this new recipe:

  • Swap ground turkey for ground chicken or lean ground beef.
  • Turn them into paleo turkey meatballs by using almond flour instead of breadcrumbs.
  • Hide additional nutrients like finely diced red onion or grated sweet potatoes into the mix for hidden vegetables.
  • Make a double batch of these baked meatballs and store extras in the freezer for an even quicker family meal next time. For other batch cooking ideas, check out this article.
Macros and Nutrition

I broke out the serving for these to one meatball so you can create a serving of 2, 3, 4 or more meatballs to meet your individual macro needs.

When made with 85% lean turkey, one meatball has:

Carb: 1g

Protein: 14g

Fat: 2g

Other Family Favorite recipes to try
1
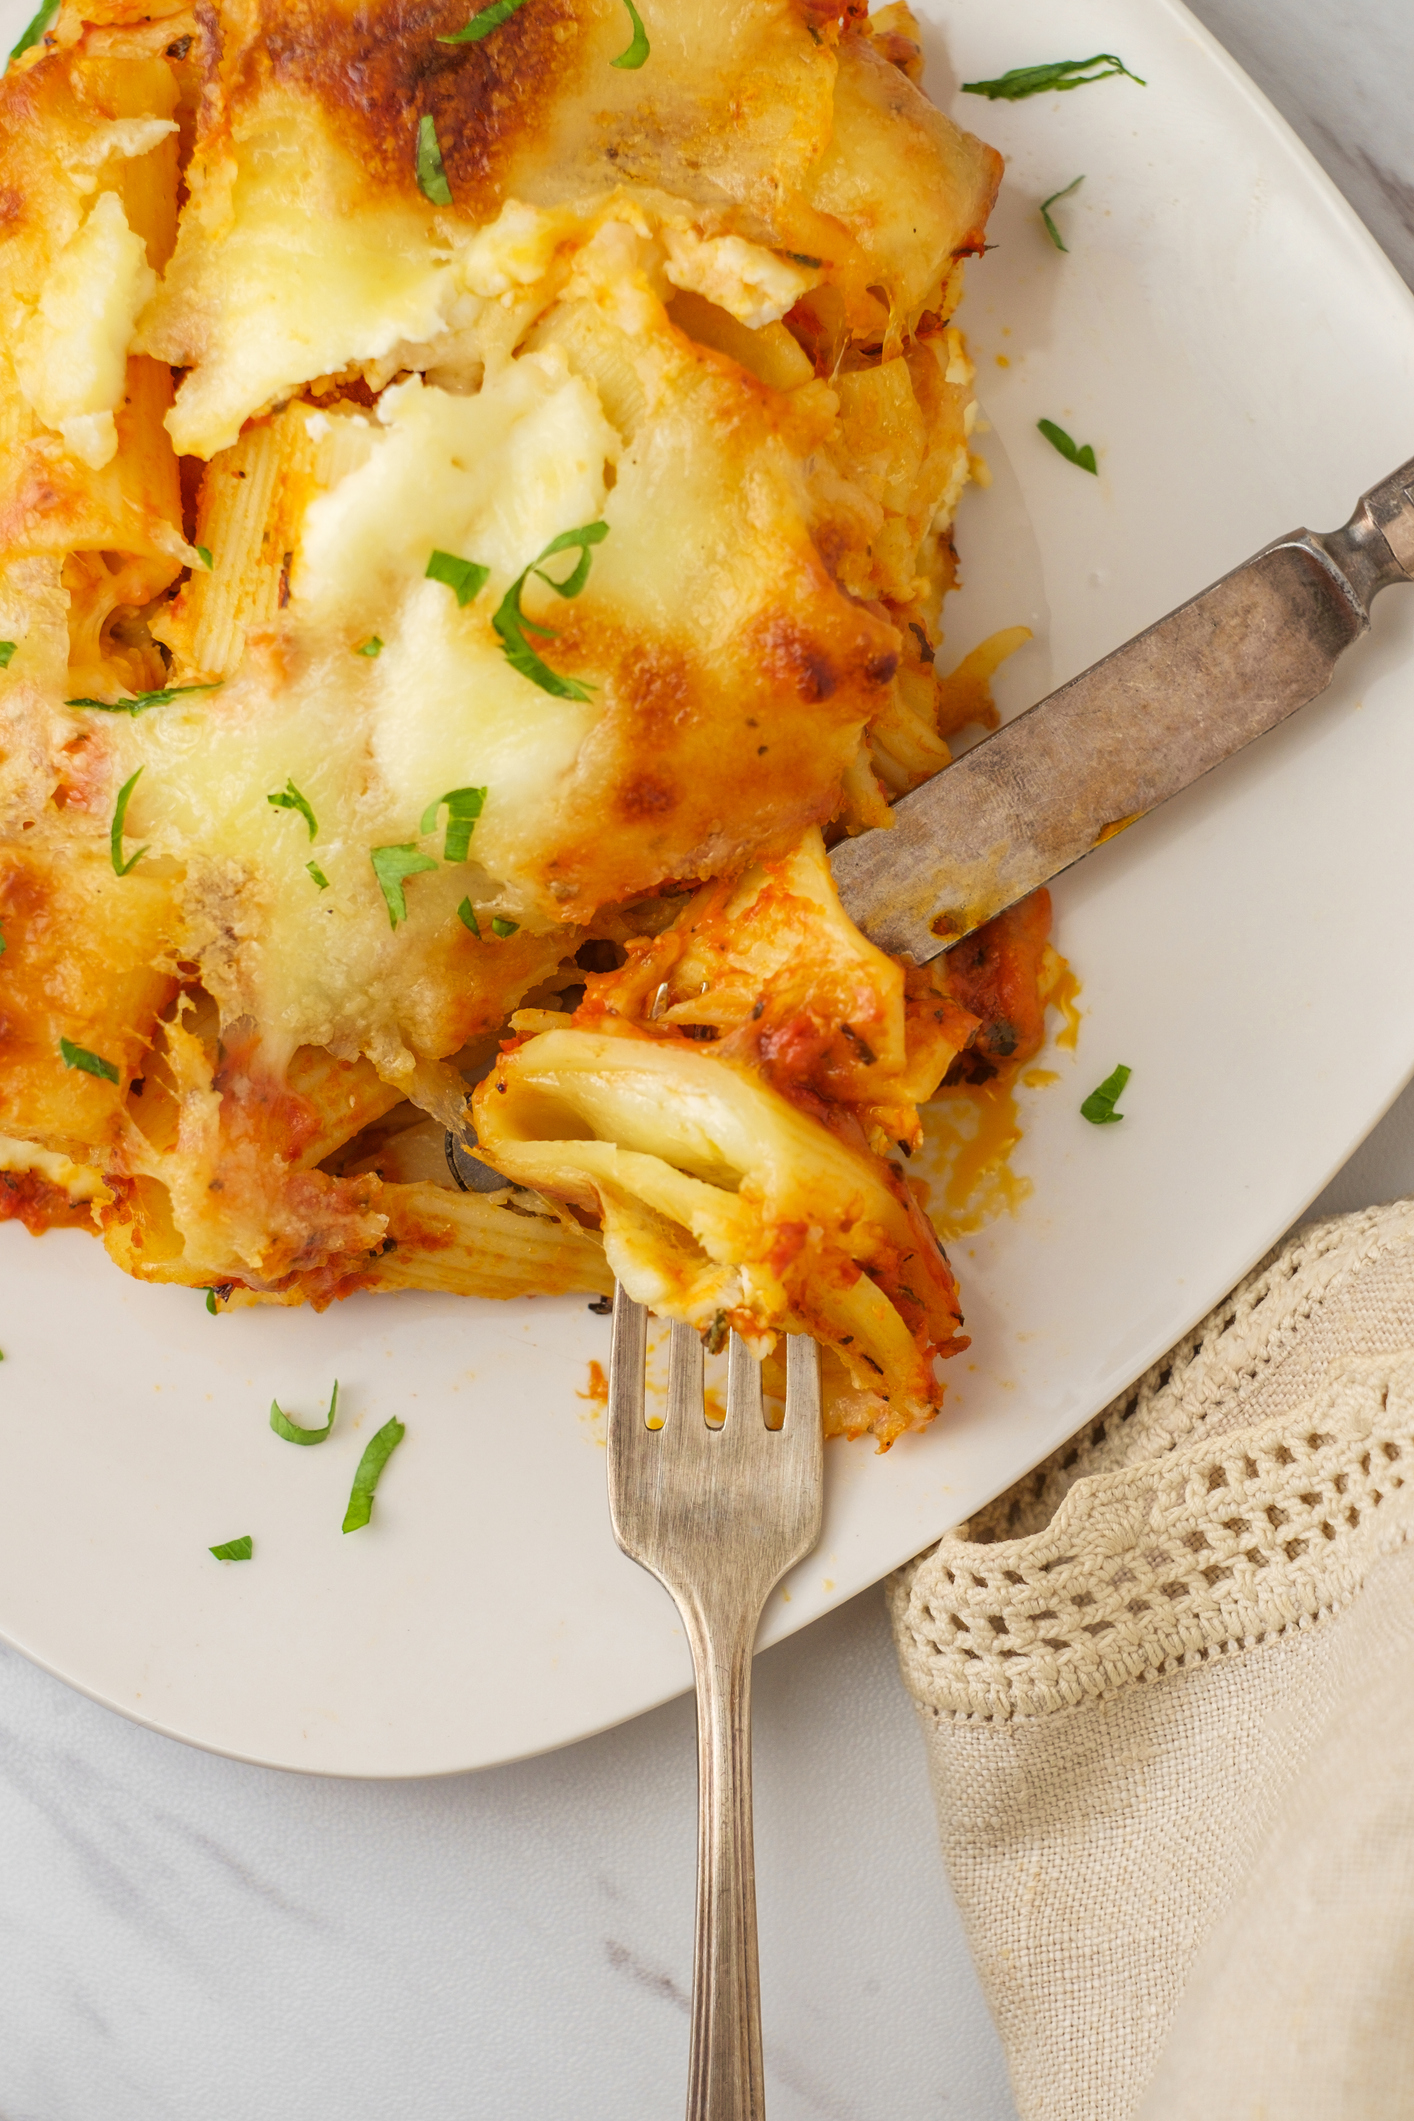
Three Cheese Baked Ziti with Meat and Hidden Mushrooms
Check out this recipe
2
close up photo of farfalle
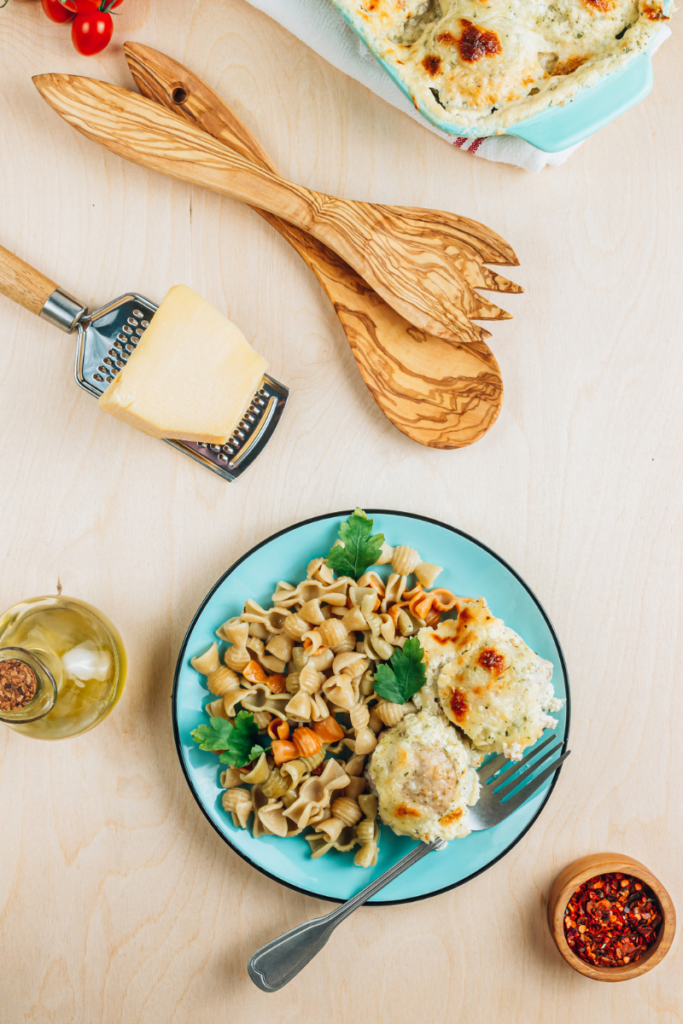
Creamy Ricotta Pasta with Veggies and Pine nuts
Check out this recipe
3
salmon on top on lemon slices.
Why I eat leftover salmon straight from the fridge
Check out this recipe

Follow me on IG for more daily inspo in my stories: @miss_nutritious_eats
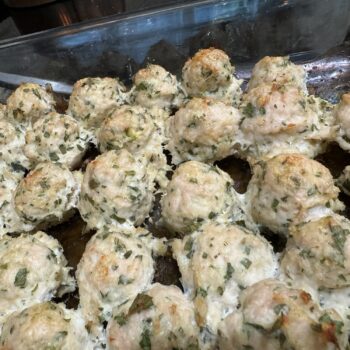
Mom’s Turkey Meatballs

Prep Time 5 minutes
Cook Time 50 minutes
Course Main Course
Servings 24
Calories 78 kcal

Equipment

  • 1 Sheetpan
  • 1 baking dish 9×13

Ingredients
  

  • 3 pounds ground turkey 85% lean
  • 1/3 cup bread crumbs
  • 1/4 cup Locatelli Romano cheese grated
  • 3/4 cup parsley chopped
  • 1/4 cup milk
  • 1 clove garlic I use Dorot
  • 1 egg
  • salt and pepper to taste

Instructions
 

  • Gently combine all ingredient in a large bowl.
  • Use a small ice cream scoop to form into even balls. (about 24)
  • Bake at 375 F for 1 hour.

Nutrition
Calories: 78kcalCarbohydrates: 1gProtein: 14gFat: 2gSaturated Fat: 1gPolyunsaturated Fat: 0.4gMonounsaturated Fat: 0.5gTrans Fat: 0.01gCholesterol: 39mgSodium: 57mgPotassium: 188mgFiber: 0.1gSugar: 0.2gVitamin A: 190IUVitamin C: 3mgCalcium: 22mgIron: 1mg
Tried this recipe?Let us know how it was!

About Me

I’m Melanie.

I’m a chef, registered dietitian, foodie, wife and mom.
If you’re looking for quick and healthy meal inspiration that supports your health goals while feeding the rest of your family (including the kiddoes) well, then you’ve come to the right place!

Melanie Marcus Selfie

The Best Super Yummy Chicken Dinner Recipe ideas

What is better than a go-to chicken recipe that’s a crowd pleaser and macro friendly? I went ahead and pulled together an array of super yummy recipes catered to women looking to feed their families healthy, macro-friendly chicken dinners. These are recipes that I make on re-peat at home. Whether you’re a busy bee seeking quick meals or a picky eater aiming to indulge without the guilt, these chicken breast-centered dishes are delicious and nourishing.

Why Choose Chicken Breasts?

Chicken breasts are a wonderful source of lean protein and are incredibly versatile. If you’re tracking macros, you know lean chicken breast is a great way to hit your protein macro goals without added fat. They can be baked, grilled, pan-seared, or slow-cooked into a variety of dishes that won’t derail your health goals. Plus, using simple ingredients, you can transform this humble poultry cut into a culinary delight that everyone at the table will love.

If you want to know more about how tracking macros can help you reach your health goal, check out this article.

The Only Thing Better Than Quick Chicken Recipes? Healthy Ones!

​Here’s a roundup of a few of my go-to’s

4
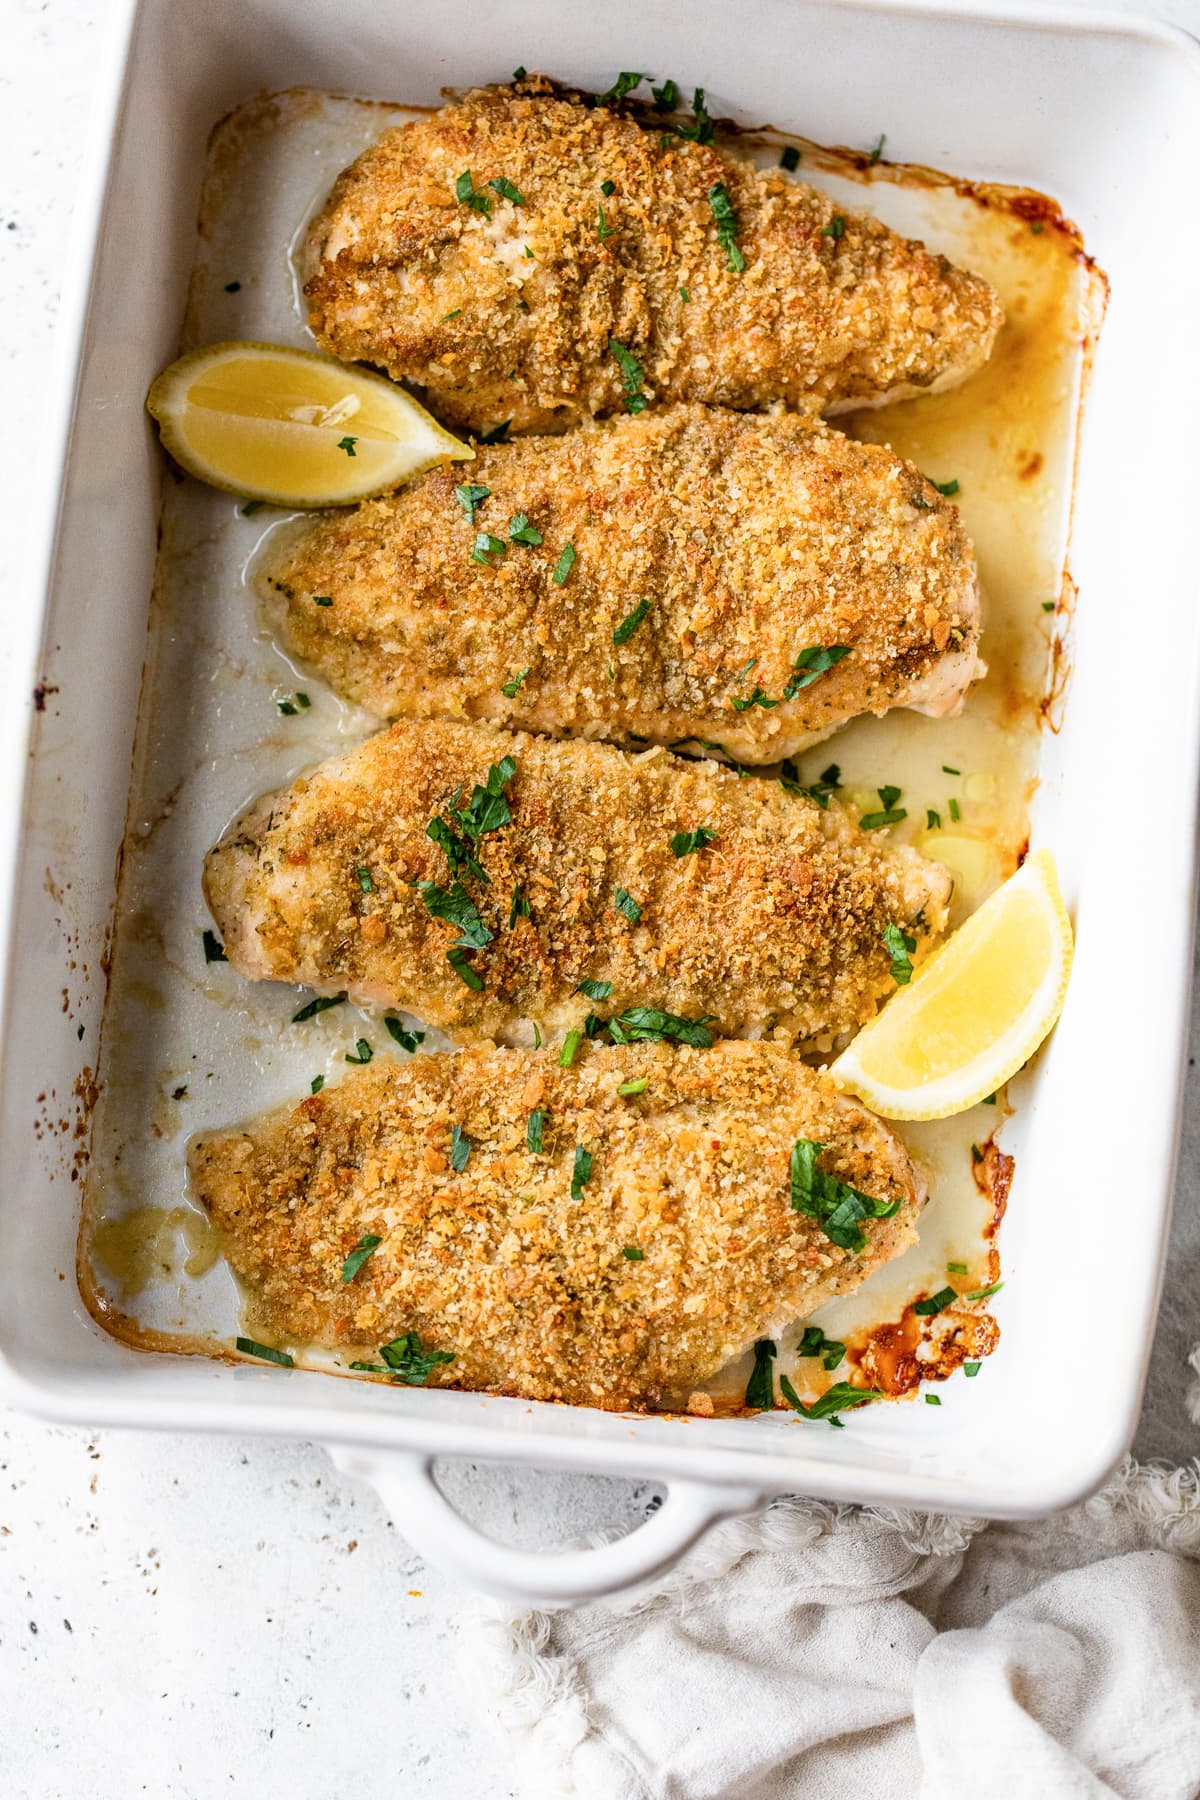
Baked Chicken Breasts
skinnytaste.com
Baked Chicken Breasts
Perfect, juicy Baked Chicken Breasts topped with crispy panko-parmesan crumbs are flavorful and delicious!
Check out this recipe
5
Yogurt Curry Chicken Skewers
This recipes reminds me of the chicken, salad and rice plates that I would get in New York. Even easier to make!
Check out this recipe
6
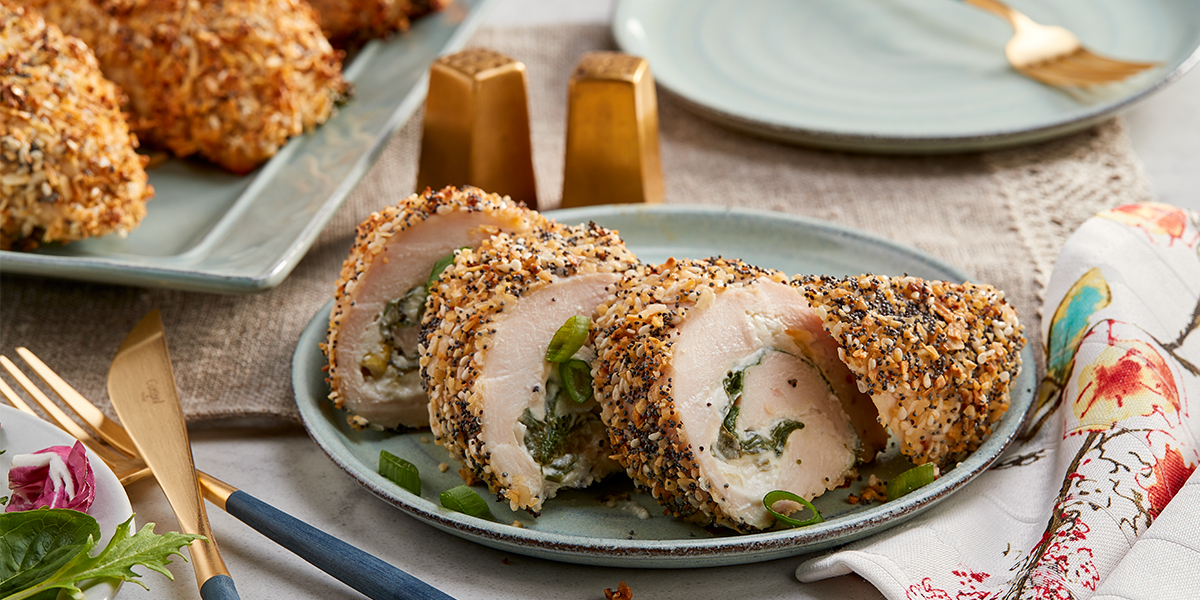
Everything Bagel Chicken Roll-Ups
dole.com
Everything Bagel Chicken Roll-Ups
4 Servings per container
Check out this recipe
7
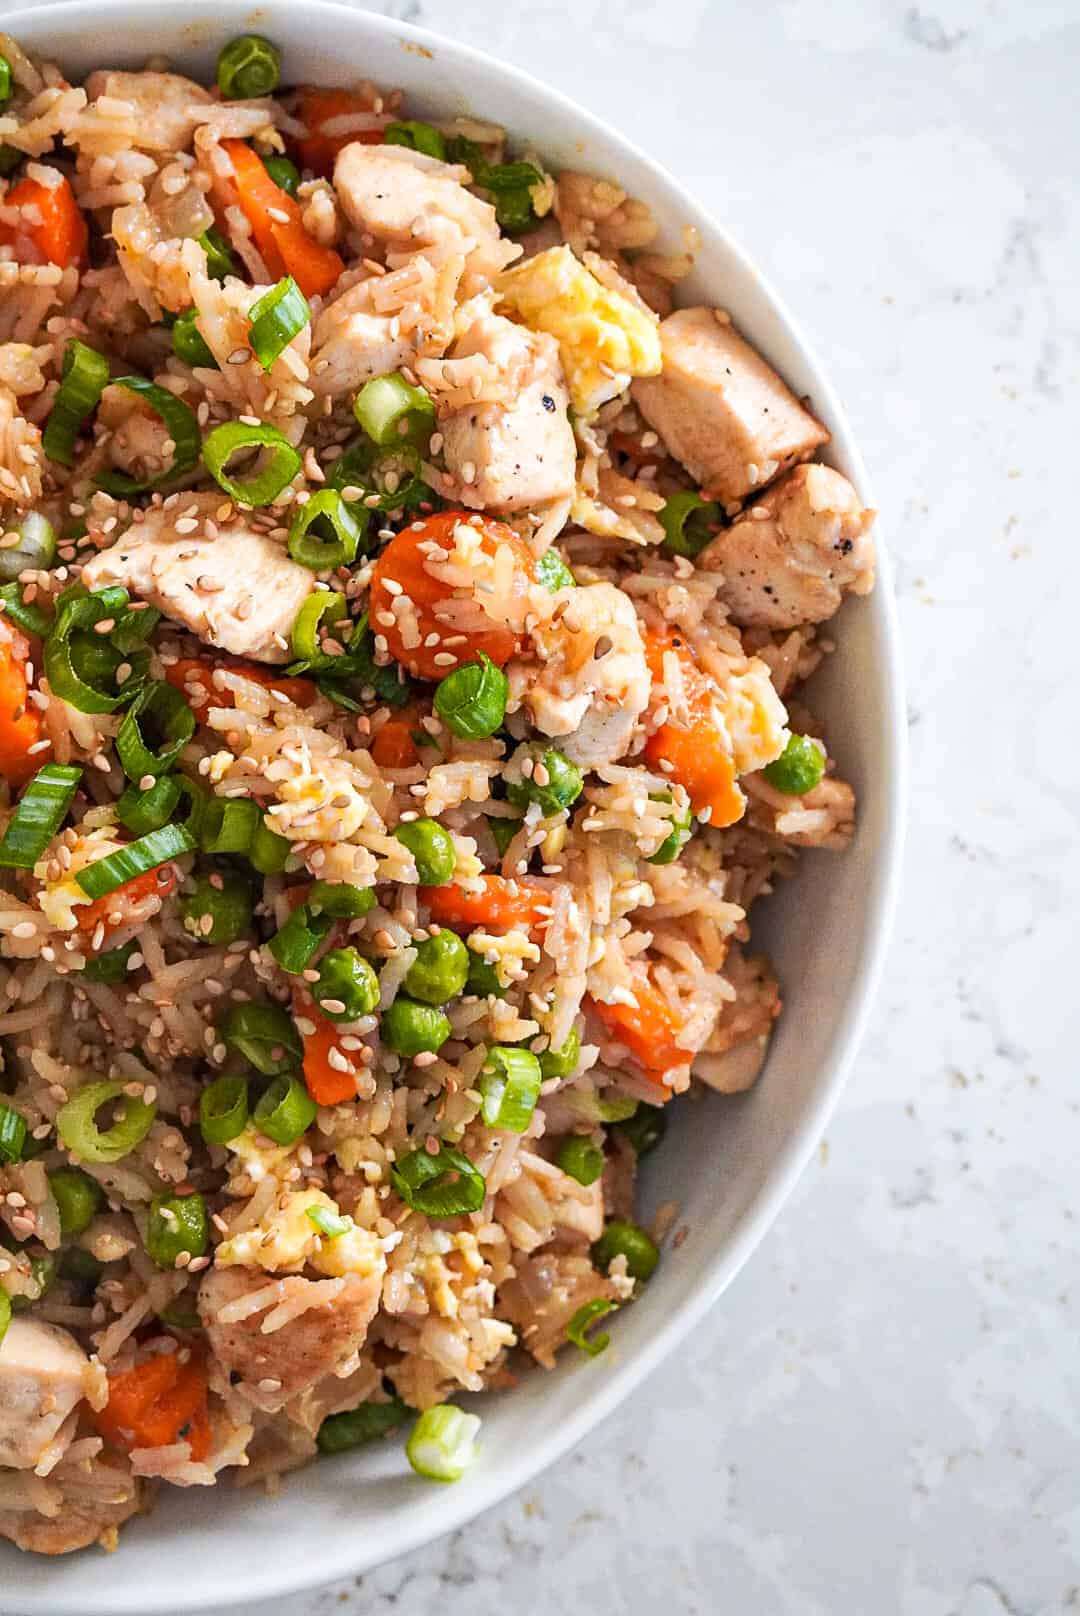
Chicken Fried Rice
ohsnapmacros.com
Chicken Fried Rice
This Chicken fried rice Recipe is packed with chicken, veggies and basmati rice. This Macro Friendly dish is full of flavors and great for meal prep.
Check out this recipe
8
easy pulled chicken
BBQ Pulled Chicken
This one couldn't be easier. Set it and forget it.
Check out this recipe
9
Macro Friendly Caprese Chicken
julieledbetter.com
Macro Friendly Caprese Chicken
Cook this delicious and macro-friendly caprese chicken! Believe it or not, with just four main ingredients and 30 minutes, you can make this super delicious, and incredibly healthy caprese chicken. With mozzarella, tomato, and fresh basil, it tastes just like an authentic, Italian pizza but you won’
Check out this recipe
10
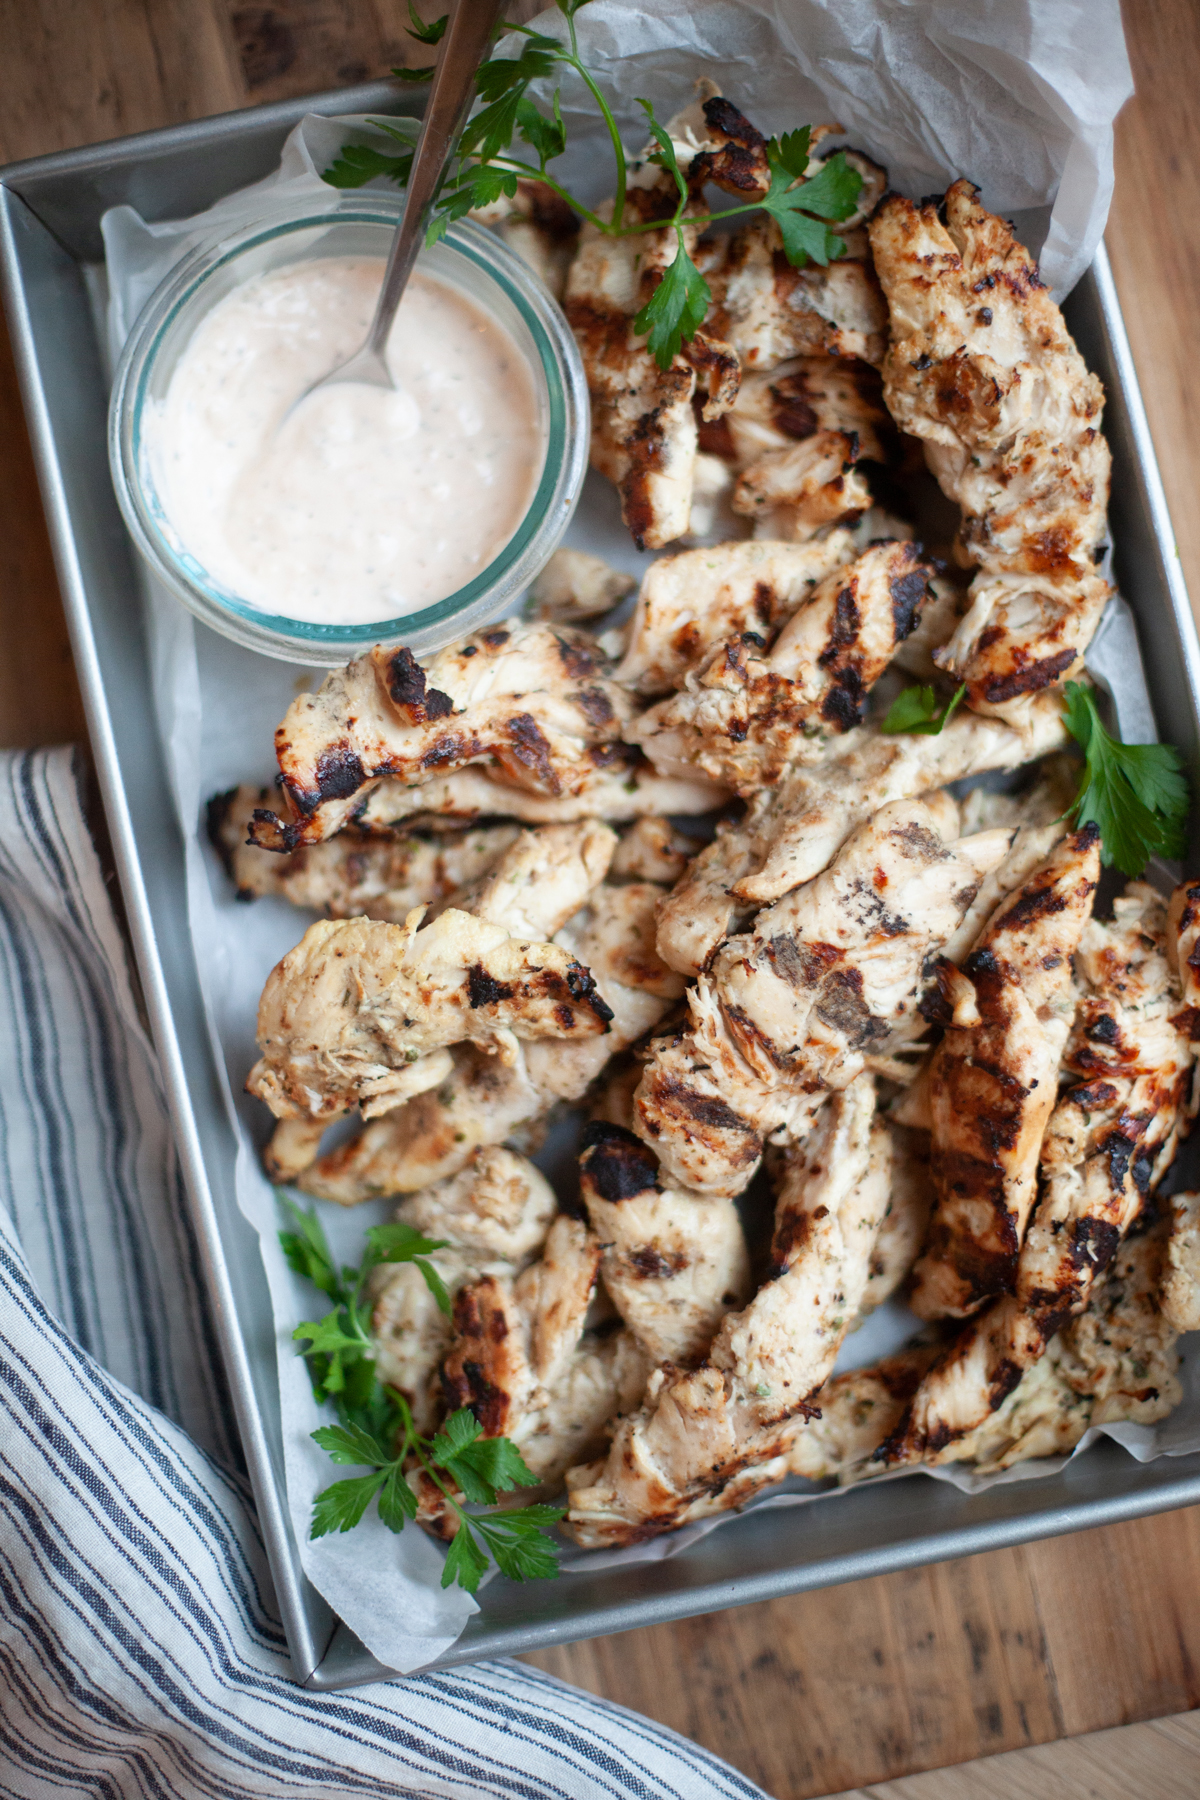
Herby Mediterranean Grilled Chicken Tenderloins
lillieeatsandtells.com
Herby Mediterranean Grilled Chicken Tenderloins
This Herby Mediterranean Grilled Chicken Tenderloin recipe is a great go-to for your favorite recipes that call for grilled chicken!
Check out this recipe
11
Sweet Potato Chipotle Rotisserie Chicken Skillet
lillieeatsandtells.com
Sweet Potato Chipotle Rotisserie Chicken Skillet
With this sweet potato chipotle rotisserie chicken skillet recipe, your macros will be covered and you’ll still get all the comfort you need.
Check out this recipe
12
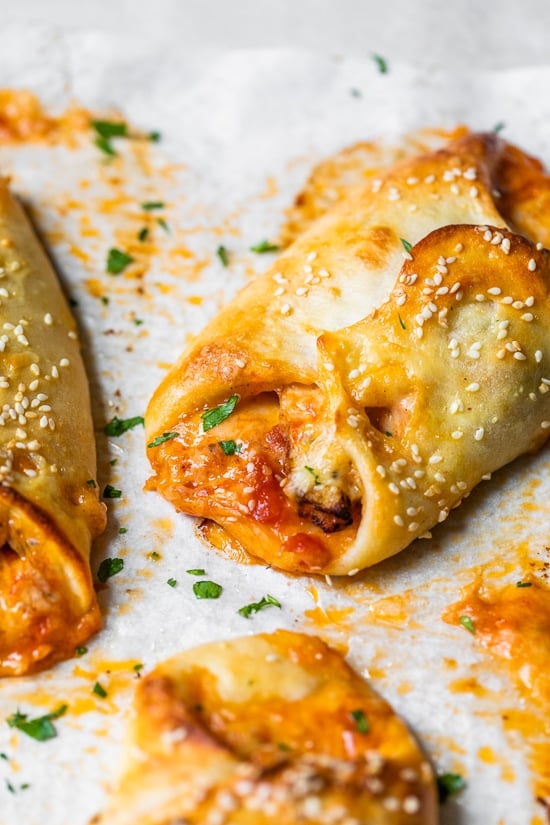
Chicken Parmesan Rolls (Pizzeria Style Chicken Rolls)
skinnytaste.com
Chicken Parmesan Rolls (Pizzeria Style Chicken Rolls)
These protein packed Chicken Parmesan Rolls (also know as chicken rolls) are wrapped in my homemade pizza dough with marinara and mozzarella.
Check out this recipe
13
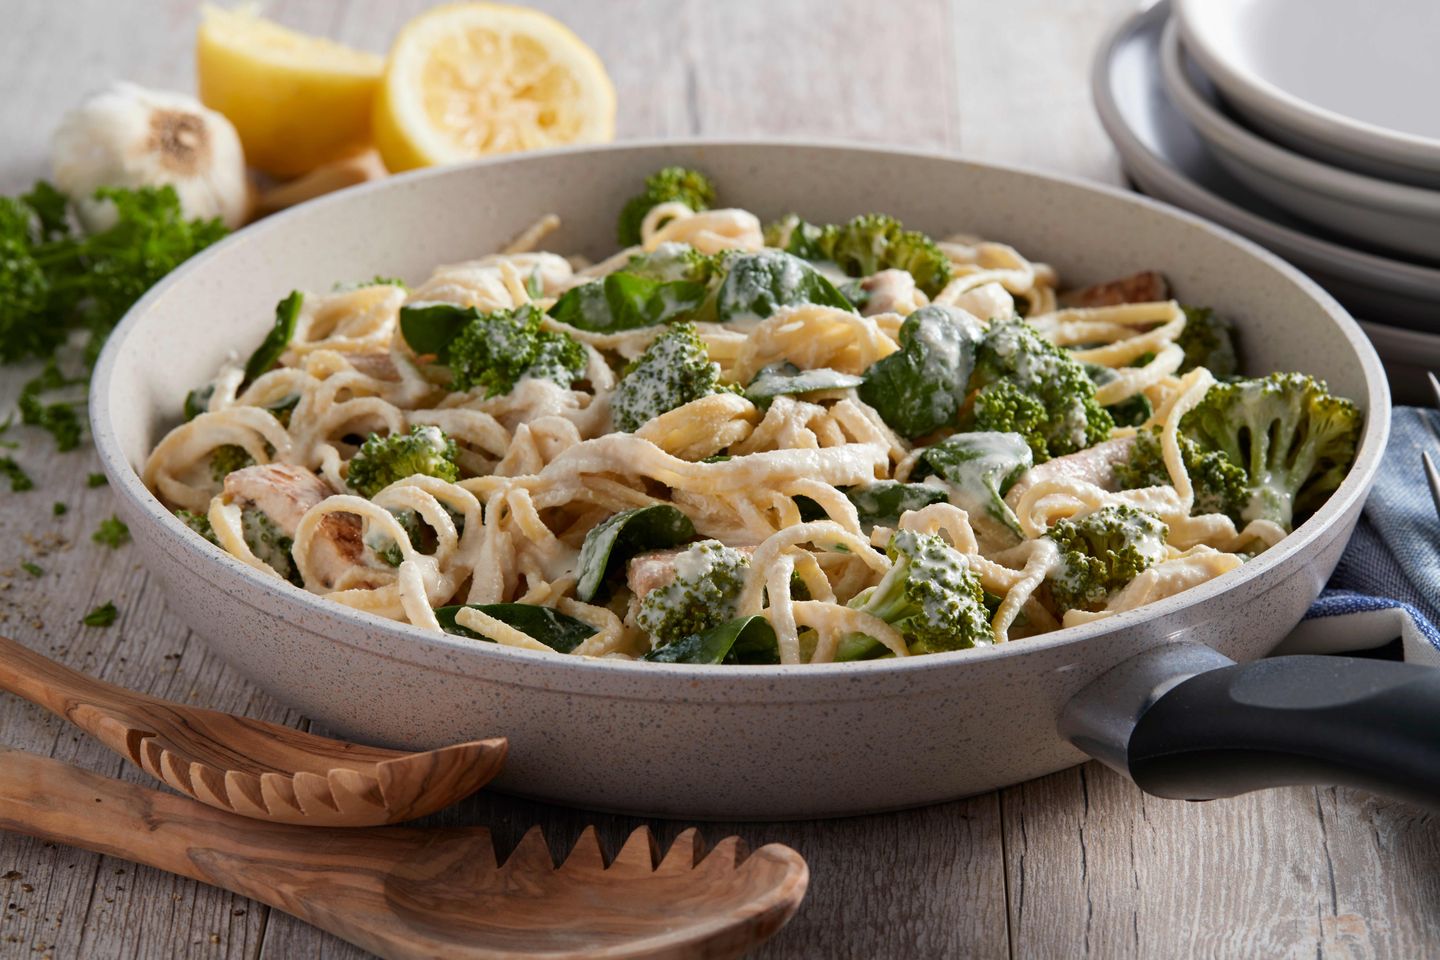
No-Dairy Chicken Alfredo
dole.com
No-Dairy Chicken Alfredo
6 Servings per container
Check out this recipe

Which will you choose?

Healthy dinners don’t have to be synonymous with bland or boring. With these super yummy recipes featuring chicken breasts, you can satisfy every member of the family, including the picky eater at your table. They offer a quick recipe solution when you’re short on time but still want to ensure a nutritious meal.

And remember, while chicken dinners are fabulous, the only thing that might top off your meal perfectly is a scoop of ice cream for dessert (we all need a little treat now and then, after all)!

About Me

I’m Melanie.

I’m a chef, registered dietitian, foodie, wife and mom.
If you’re looking for quick and healthy meal inspiration that supports your health goals while feeding the rest of your family (including the kiddoes) well, then you’ve come to the right place!

Melanie Marcus Selfie

A Dietitian’s Harris Teeter Grocery Haul (2024)

Adjusting to grocery shopping in North Carolina has taken some time.  If you’ve been following me for a while, you know that when I lived in New Jersey, I was a ShopRite girl, and could get essentially everything I needed there at a great price.  Now that I’m in North Carolina, not only are the stores different, and pricier, but I’m feeding an entire family (four of us), so I find that I make the rounds from Harris Teeter (HT), Costco, Walmart Marketplace event Trader Joe’s and Aldi depending on where my errands take me.  

But we do shop Harris Teeter most frequently, especially for those last minute dinner pick ups!

When it comes to shopping for healthy food, having a reliable grocery store that stocks a wide variety of nutritious options is such a relief (plus is seems like there is one located every 3 miles!). They have a ton of whole, minimally processed foods and I find they have most of the trending/healthy items that align with contemporary dietary trends, from maintaining blood sugar levels and following a gluten free lifestyle to supporting an anti-inflammatory diet and tracking macros of course! 

In this post I will share my go-to items for each category.  Remember, I don’t do large “stock up” shops at HT.  Generally it’s last minute pick ups, items for a special meal, or I get smaller sizes of new products that I want to try- before I buy in bulk.  

Harris Teeter Produce Department

Produce Selection

The produce section at HT is always in good shape. I shop their produce most frequently because we eat a lot of fruits and vegetables, and I like to get them fresh- or as we need them.  Like most grocery stores, the seasonal and sale items are always in front and they also offer organic produce as well as club size options of the most popular items.  

  • Berries
  • Bananas
  • Mango
  • Pears
  • Pineapple
  • Baby Carrots
  • Cherry tomatoes
  • Spinach or Spring Mix
  • Mushrooms
  • Red onion
  • Iceberg lettuce – to replace wraps or for burgers
  • Premade cauliflower rice – especially if on sale
  • Steamable green beans
  • Precut zoodles instead of pasta for low carb days
  • Pre-cut apple slices
  • Pre-cut butternut, or sweet potato
  • Pre-cut mirepoix
  • Locally grown squash, string beans, greens and more during the summer season
  • Seasonal items like sumo citrus or peaches

I also find that when I shop on Tuesday mornings, a ton of the convenience produce items are on sale. So if I need something for dinner, I’ll usually grab something precut or washed as long as I’m going to use it that day.  

Bread, Grains and Substitutions

HT’s offers a variety of whole-grain products are a staple if you’re trying to incorporate high-fiber options. From ancient grains like quinoa to hearty brown rice, to microwaveable rice options and whole grain pasta, they have it all. They also have pasta substitutes that you’ll find right in the pasta aisle.  For example, they have Palmini “pasta” which is a low carb “pasta” made from hearts of palm.  It’s an option to consider if you are following a low carb diet or want to incorporate more plant based meals into your diet.  

  • Quinoa
  • Raos or Barilla Pasta
  • The Harvest Loaf from the bakery is my favorite.  It’s loaded with seeds and toasts up well. 
  • Mission Low Carb Wraps, they’re 40 calories and loaded with fiber.

Lean Proteins 

I find that we  At HT, the meat counter is stocked with choices like skinless chicken breasts, turkey, and lean cuts of beef. If you prefer seafood, HT’s offerings won’t disappoint—including everything from salmon to shrimp offered on a daily basis.

  • Thin sliced chicken breast – for cutlets
  • Thick cut pork chops 
  • 90% lean ground beef
  • 99% lean ground turkey

Gluten-Free & Allergy Friendly products

Living with gluten sensitivity or celiac disease can be a challenge, but HT makes it easier by carrying a bunch of gluten-free.  Most stores have a dedicated aisle too! From pasta to bread, you can find gluten-free alternatives that allow you to enjoy your favorite dishes, worry-free.

For example, these two Catalina Crunch products I first saw at HT and had to try them.  I also tried the chocolate squares breakfast version and didn’t care for it.  But now that I know I like them I usually get the French Toast variety at Costco.  It’s my version of try before you buy.  

  • Catalina Crunch savory snack mix
  • Catalina Crunch French toast squares

Convenient Frozen Foods

Harris Teeter’s frozen foods section is a gold mine of wholesome choices. Here are a few of my favorites.  

  • Steamable edamame
  • Pre-chopped onion
  • Broccoli
  • Spinach or collards
  • Green peas

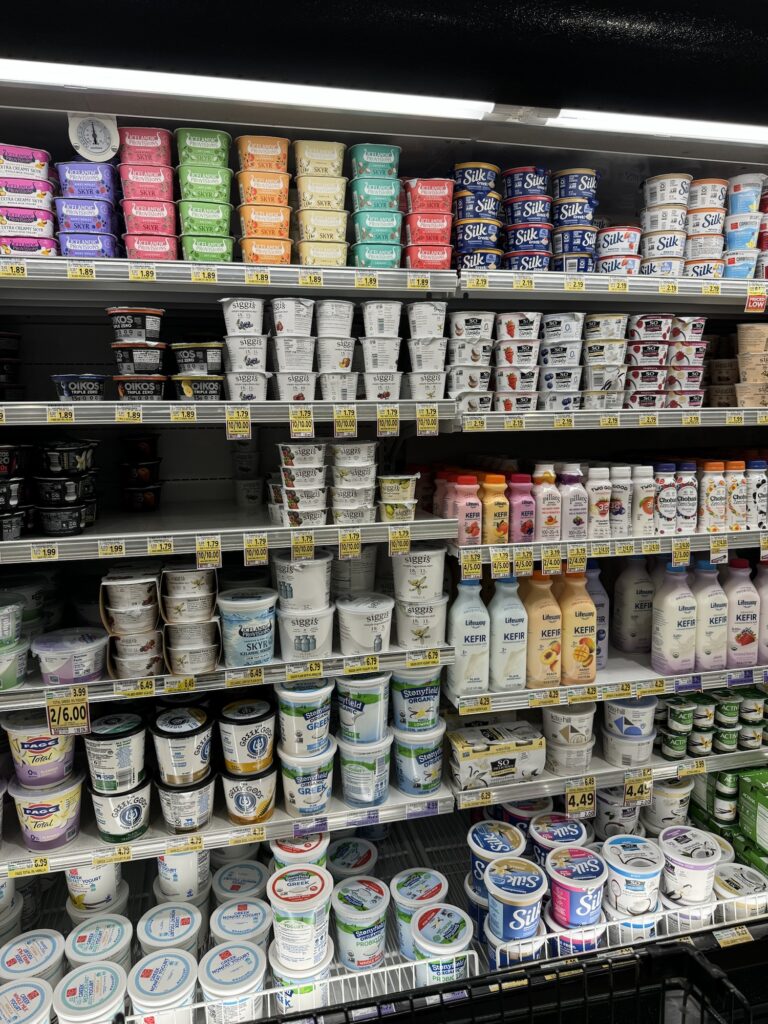
Dairy Selection

Whether you’re a milk lover, Greek yogurt, or need dairy free alternatives, HT has options. They also have a variety of gourmet and shredded cheeses for that last minute baked ziti or lasagna.  

  • Chobani zero sugar yogurt – is a high protein alternative that is usually on my list.  
  • Fage Total fat free greek yogurt
  • Shredded mozzarella
  • Organic 1% milk – if I’m out from my Costco haul
  • Barista blend Oat Milk creamer

Pantry Staples and Canned Items

Unless there’s a sale, I usually save stocking up on pantry items like beans, legumes, and tomatoes at Costco.

That said, I am usually picking up ingredients like beans for chili, canned corn for cowboy caviar, or canned tomatoes for sauce.  Basically anything that comes up in a recipe that I need in a small amount.

  • Goya chickpeas
  • Simple Mills crackers
  • 100 calories chocolate almond packs
  • canned tomatoes
  • canned corn
  • tomato paste

Kids Lunch Items

  • Boars Head (BH) Lower sodium ham
  • BH yellow American cheese
  • Kings Hawaiian Buns
  • Sun Butter
  • Chocolate covered raisins
  • Fruit snacks
  • Pre-sliced apples
  • Grapes
  • Unsweetened applesauce cups

The HT App

Personally, I like to use the grocery list function in the HT App.  It’s easy to review the weekly ad to create a shopping list or to go back to previous orders to add items you have on repeat to your current list.  Most of the time, timeslots for pick up are available the next day making it very convenient to get what you need in as little time as possible.  

As you can see, I shop for generally whole foods and to grab last minute ingredients for weekly menus.  While it’s a little bit more expensive than Walmart Market, TJ’s or Costco, it’s very convenient and always has what we need.  Which is why we shop there several times a week!  

What am I forgetting, let me know in the comments!

About Me

I’m Melanie.

I’m a chef, registered dietitian, foodie, wife and mom.
If you’re looking for quick and healthy meal inspiration that supports your health goals while feeding the rest of your family (including the kiddoes) well, then you’ve come to the right place!

Melanie Marcus Selfie

Date night review: Fox & Falcon Southpark Charlotte

If you know me, you know I have a passion for food.  And my husband and I both really enjoy a good meal. Having lived and worked around Manhattan, we always had a lot of fun trying new places (before kids, and before we moved to Charlotte).  While less often, we still try to get out and try new places in the Charlotte culinary scene.  So… I thought I’d start sharing about some of the places we’ve tried lately.

Last weekend we snuck down to trendy South Park area of Charlotte, North Carolina, to check out the Fox & Falcon by David Burke. It’s over at 4905 Ashley Park Lane near the South Park Mall and it’s website describes it as modern steakhouse fare. I’m familiar with Burke’s restaurants from living in New Jersey, and was excited because he has a reputation for offering a culinary experience.

So, I met Andy over in the Southpark area of Charlotte around 8:30 after a girls happy hour.  If you’ve never been there before, it’s in a bit of a residential area with apartment buildings around it.  The garage nearby says it’s only for residents and there is on street parking.  I did not see valet available, so maybe just plan for that if it’s a busy night!  

The Ambiance

Walking in, the restaurant’s ambiance spoke volumes—with bold wallcoverings, neutral colors complimenting woody trusses and brick columns, and soft illumination from salt rocks, created a really cool sophisticated vibe. There was lots to look at from both the bar and table including a somewhat open kitchen so you could see the line area. When you walk in, it really looks like a fun place for a birthday dinner or romantic date night.  

The Drinks

I had a super cold vodka martini with blue cheese olives.  It was cold (it didn’t have ice pieces in it) but cold enough and the olives were on point!  

Andy usually has a regular vodka martini or a negroni, before enjoying wine with dinner.  That said – it was really interesting to see a NO ABV and LOW ABV section of the drinks menu. They were intriguing with their use of herbs, 0 proof alcohol and wine syrup.  

The Menu

At first glance, there was a lot to choose from on the menu.  Appetizers included signature Clothesline Bacon, Lobster Dumplings, Tuna & Salmon Tartare, Gruyere Popovers and Pretzel Crab Cake to name a few.  There were also a variety of mains offered covering everything from pasta to fish and obviously steak. 

What we ordered

Starter

  • (6) oysters

Salad

  • Classic Caesar Salad, split

Appetizer

  • Tuna & Salmon Tartare
  • Pretzel Crab Cake

Mains

  • 16 oz Prime Rib **
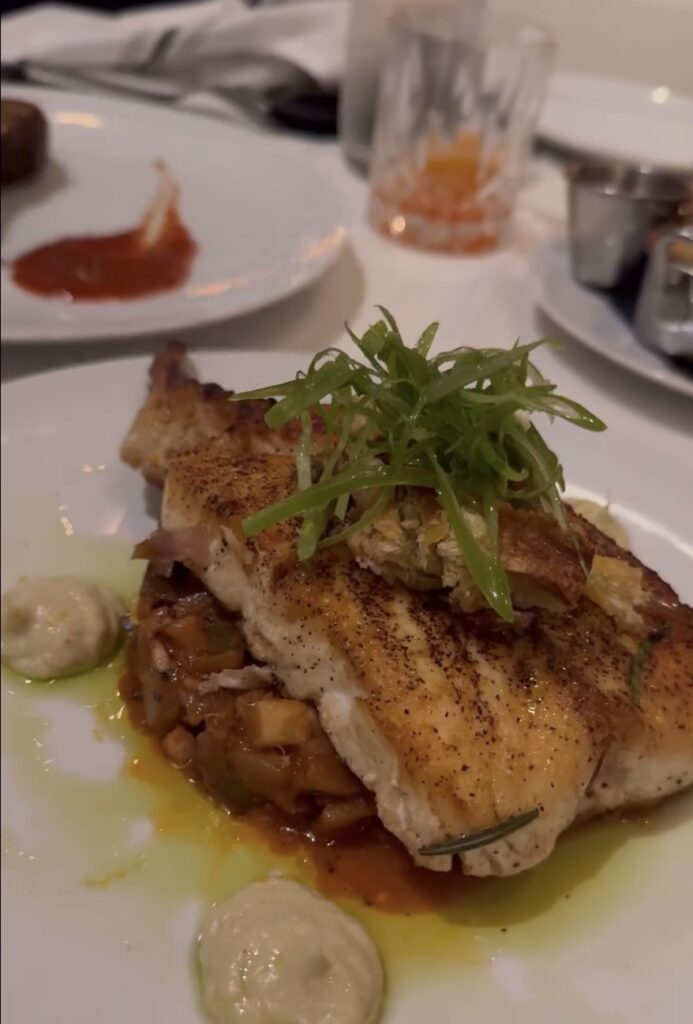
  • Halibut T-Bone

Sides

  • Truffle Fries

Dessert

  • Apple Pie**
  • Walnut Parfait

**What they ran out of

This was a recurring and unfortunate theme.  Upon sitting at 8:30 on a Saturday night, the server went over the prime cuts of beef and let us know that the lamb** from the menu was no longer available.  When the waiter came back he sold on the 16oz ribeye** and learned that they were out of that too (as well as the lobster mac and cheese). So my husband upgraded to the 20oz ribeye**.  After all of the appetizers were brought over, we were informed that the 20oz rib eye** was no longer available.  Which was odd because the dining room wasn’t packed.  It was busy, there was a good vibe, but I’d say at least 1/3 of the restaurant was empty.  

So there were no specials, and the upscale modern steakhouse ran out of it’s signature rib eye.  Instead Andy went with the NY Strip. 

The manager apologized and offered the steak and desserts to us to make up for it.  

We also learned that while they have a full bar, they don’t serve Frangelico which is Andy’s go-to after dinner drink.

The Service

The service was efficient but felt slightly rushed, more like a relay race than a romantic leisurely dinner for two.  At one point, I thought I was at an all you could eat buffet, because the oysters, salad and appetizers were all served at the same time! It was slightly comical (as a dietitian) because I don’t think there was any room on the table when all 5 plates were put down at the same time. We were there to relax and have a couple of drinks with dinner.  But if we wanted to, we could have probably been in and out in an hour.  

I would have preferred to have the meal paced out so we could eat food at the proper temperature and not feel like we were gorging!  It also made me wonder, would this have happened at the eight-seat chef’s table that is available for reservation?

Food Quality

In true steakhouse fashion, the menu selections teetered on decadent. Yet, as already mentioned item after item—the lamb, the 16oz rib eye, even the celebrated apple pie for dessert—were unavailable.

One thing stood out to us.  Nearly all of the appetizers came out warm – not hot or cold.  The oysters were not cold, cool at best while the tartare felt like it actually was set under a heat lamp before coming to the table.  The flavors were good, but the temperature felt off.  

The pretzel-crust crab cake was super tasty, but didn’t feel hot. 

My halibut on the bone was really different.  I’ve never seen fish presented that way.  It was served over ratatouille and had a good mix of vegetables and protein.  It was Mediterranean inspired and the portion was significant.  I took half home and it reheated well :).  

Truffle fries tasted more like parmesan and were super salty.  

While Andy’s strip steak wasn’t great.  It had a noticeable ring of fat, but it was cooked medium as he requested.  

The Walnut Trifle for dessert was right up my alley.  It was served in a coup glass, super rich and creamy.  I really enjoyed it, but I know Andy would have loved apple pie!  It’s his favorite.  

Walnut Trifle

And sometimes, I hate that I’m so detail oriented, but I overheard the server go take a dessert order for an 8 top next to us and they ordered two apple pie desserts.  After he put that order in, he let us know they were out of the apple pie. Maybe it’s just me, but when I waited tables, if I had a party that had to speak to the manager, I’d just make sure I did what I could to make the rest of the evening seamless.  I probably would have taken our dessert order before the 8 top!  

Beverage Offerings

The bar has a carefully crafted cocktail menu, as well as a full NO ABV (mocktail list!) which includes drinks like the Faux & Falcon which is a combination of ginger beer and NA red wine syrup.  They also boast a thoughtfully curated wine list plus sake and draught beers. That said, they don’t have Frangelico as part of their full bar offering.  

Meal Timing

Overall needs improvement.  My husband sold wine for some time in New York and myself having worked in several restaurants, we both know how the pace of the meal improves the guest experience, but also helps improve sales!  We easily would have had another round of drinks if we weren’t rushed through our first course.  

How I handle macros

 In the FASTer Way we have a saying, “memories over macros”.  And I apply this to holidays or eating occasions where I want to be present and not track every element of the meal.  Instead I look at my day in the morning and strategically choose foods that are lower in fats and higher in proteins so that I can enjoy the richer foods while dining out.

Before a big date night, I’l usually have a protein shake, egg white and veggie omelette or maybe this two ingredient soup with a scoop of collagen to get my protein up!

Check out this page if you want to know more.

Overall Impression

As a culinary trained dietitian and foodie, the menu was interesting and had great variety.  We wish everything was available so we could have tried the items we initially ordered. Before arriving, the online menu drove me in with the Branzino which wasn’t offered when we were there, but I loved the balance of my halibut dish, it was light and flavorful and fit perfectly with my macro protein goal!  

Overall it was a bit disappointing – especially for the price.  We had tried Red Salt by celebrity chef David Burke and while Southern cuisine isn’t my favorite, I thought both the food and the service were excellent there.  I’ve also had a level of enthusiasm for Burke’s Port City Club takeover since it’s nearby, but now I’m on the fence!

We kind of agreed that it seemed as though an intentional decision was made to buy and prep food in order to run out and not have food waste.  Which would be a fine strategy if it weren’t an elevated modern steakhouse menu.

Would we go back?

Probably not for date night. It certainly has potential, but when you weigh the cost, travel time to get there and ability to deliver on offerings from the menu, we felt it was a little unpredictable given our first experience.  If I was in the Southpark area, and were to meet a friend for a drink, I could see myself meeting there to check out the bar bites menu with a glass of wine or their NO ABV section of the cocktail menu but I wouldn’t reserve a table again.  

​Where are you eating in and around Charlotte?  We want to go check it out too!

About Me

I’m Melanie.

I’m a chef, registered dietitian, foodie, wife and mom.
If you’re looking for quick and healthy meal inspiration that supports your health goals while feeding the rest of your family (including the kiddoes) well, then you’ve come to the right place!

Melanie Marcus Selfie

How to Naturally Dye Easter Eggs with up-cycled ingredients

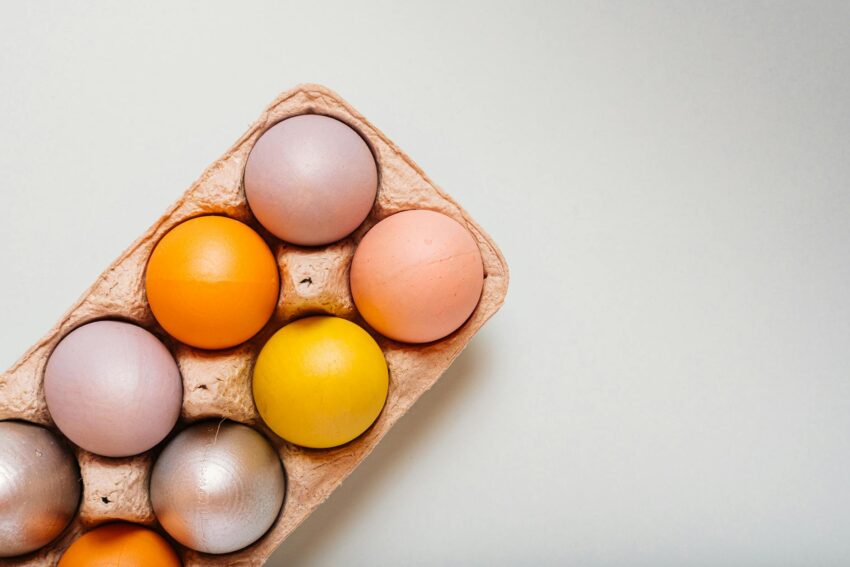
Easter is a special time of year known for family gatherings, egg hunts, the excitement of Easter baskets filled with goodies and of course renewed faith. But have you considered ditching the artificial colors this year for natural Easter egg dyes? It’s an excellent way to get gorgeous, sometimes subdued, sometimes vibrant colors without the chemical dyes. It’s a fantastic opportunity to involve children in a seasonal tradition of creating beautiful Easter egg colors using natural ingredients that would have otherwise been trash. Here’s my easy guide on how to do it.

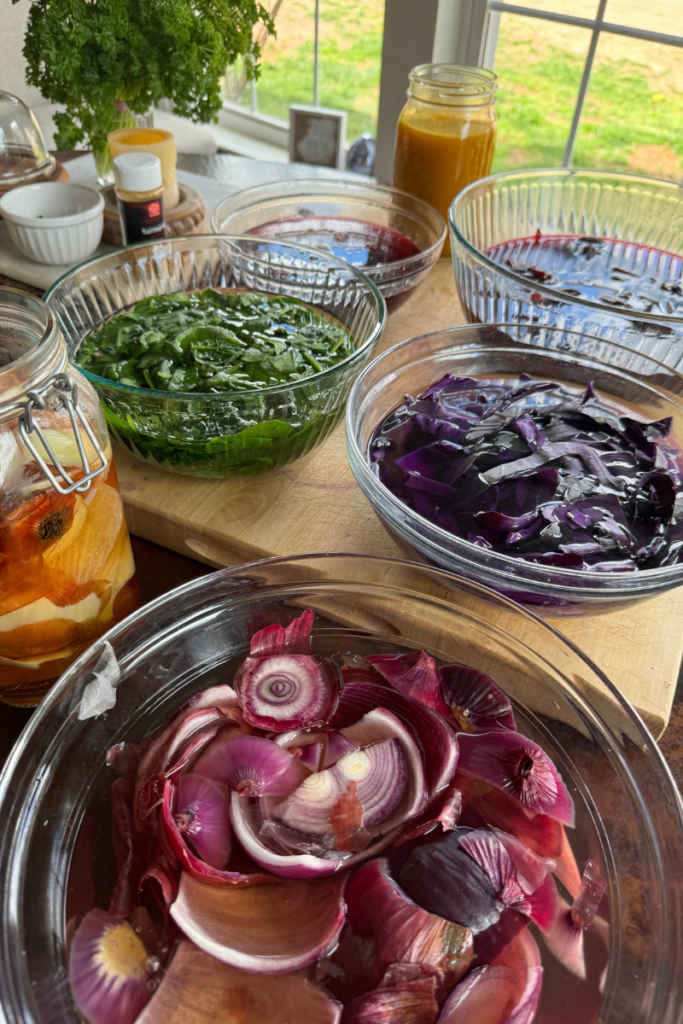
a variety of colorful foods in boiling water to create dye

Growing up my aunt always colored Easter eggs using different things, but I will always remember a large stock pot filled with onion skins on her kitchen stovetop.   She even used panty hose to experiment with placing herbs or flowers to make unique designs on the eggs.  I always thought it was resourceful and beautiful.  

Materials Needed:

  • A selection of cooked white eggs and brown eggs
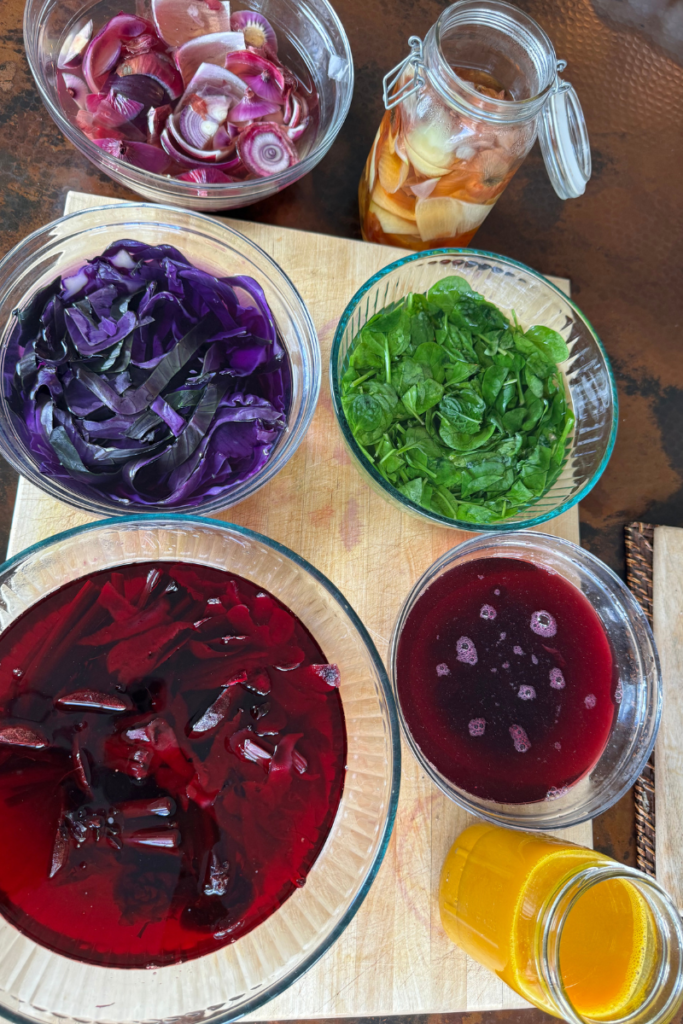
  • Natural dye materials: yellow onion skins, red onion skins, purple cabbage, beets, turmeric, paprkia, red zinger tea, raspberries, blueberries, spinach, black coffee
  • White vinegar or lemon juice
  • Water
  • Pots and sauce pan
  • Fine mesh strainer
  • Disposable cups or mason jars
  • Slotted spoon

Natural Dyeing Mediums to Consider

You will be amazed with how many different foods can produce a variety of colors.

Produce items

  • Red onion skin – light pink color
  • Yellow onion skin – orange color
  • Spinach – light green color
  • Raspberries – pink color
  • Purple Cabbage – blue/purple color 
  • Red Cabbage – purple color
  • Blueberries – blue color

Spices

  • Paprika – red color
  • Turmeric – yellow color

Beverages

  • Red Zinger Tea – red color
  • Coffee – blackish brown color
  • Tart Cherry Juice – red color

Remember the Ratio

One cup of medium per one cup water.  I usually do 4 cups of water so I have plenty to color several eggs at one time.  

Step 1: Prepare Your Hard-Boiled Eggs

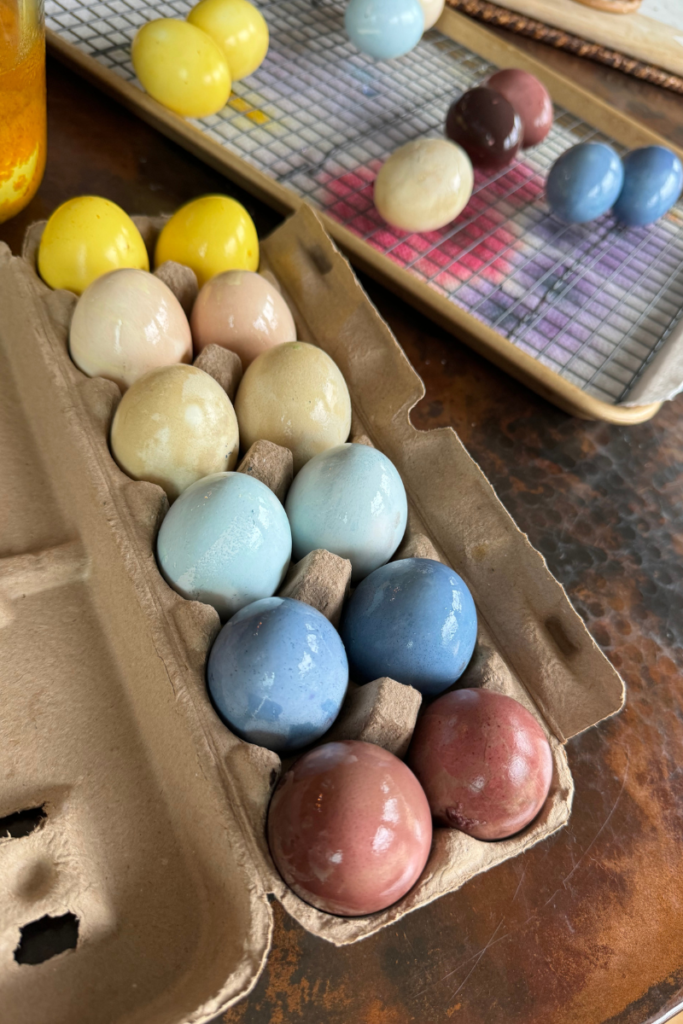
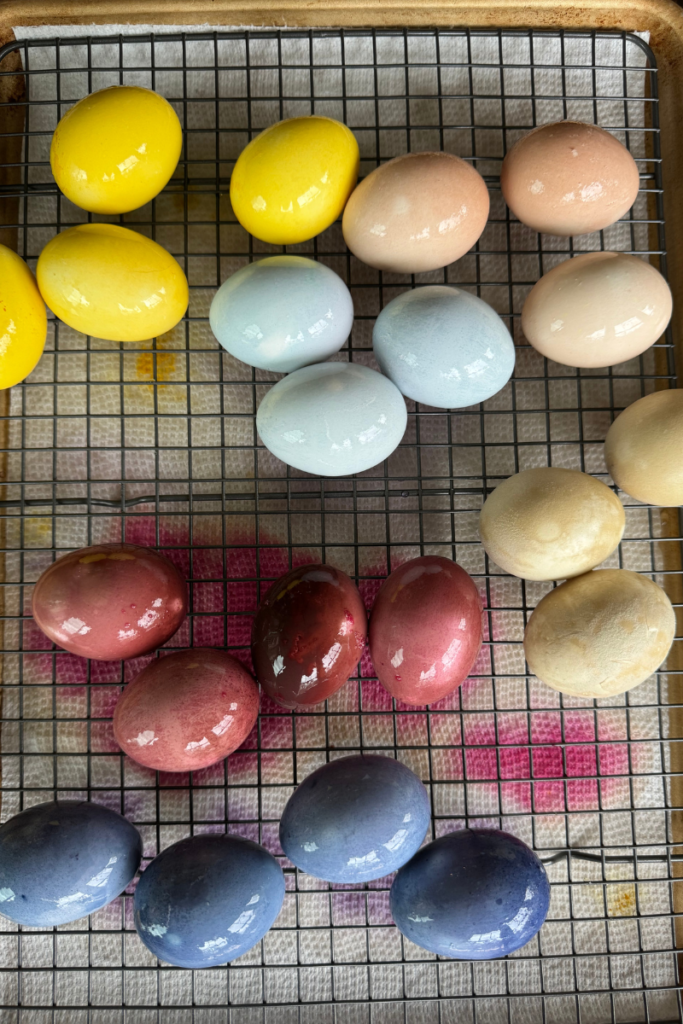
Before you start, make sure you have plenty of hardboiled eggs in either white or brown. If you need more info on that, check out my article on the perfect hard boiled egg. Keep in mind that brown eggs will give you more muted tones when dyed while white eggs can render bright yellow, green eggs, or even blue eggs based on the natural colors you choose. 

Step 2: Create the Natural Dyes 

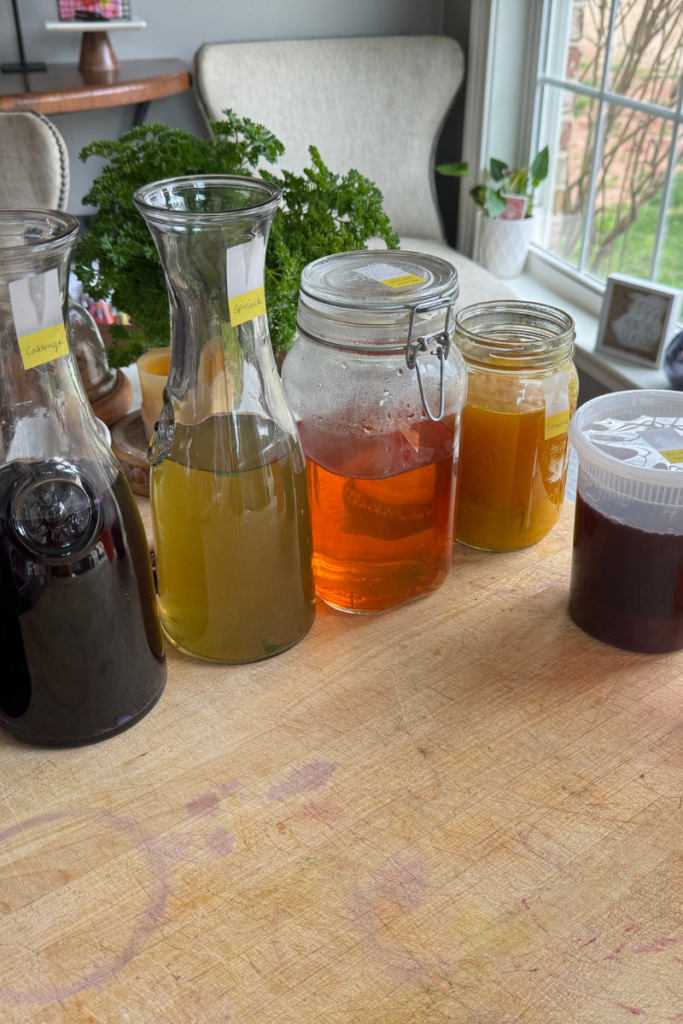
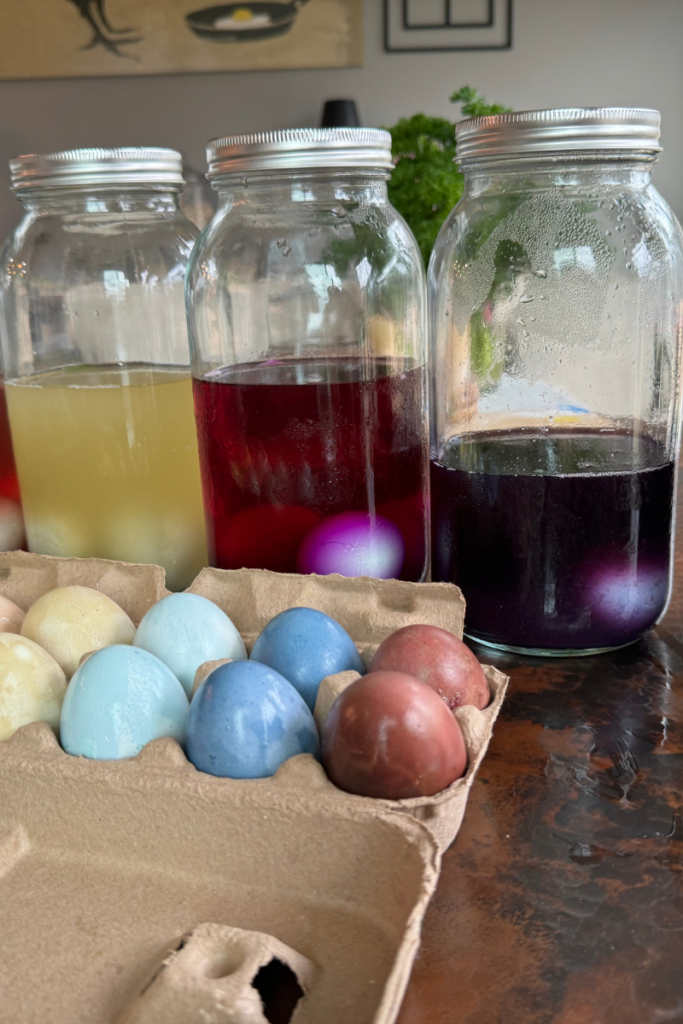
Natural food dyes in jars

For a true homemade dye, select the natural ingredients you want to use. Last year I experimented with a variety of produce to get different colors including  a orange dye from yellow onion skins, purple from red cabbage dye, and green dye from spinach.  

To start, place your items in large mason jars and add enough boiling hot water to cover them. For every cup of water, add the same amount of your chosen plant material and let cool completely.  This will ensure a high concentration of natural colors in the dye pot.

For spices like turmeric, mix one tablespoon of spice with a cup of water. If you’re using coffee or tea bags, brew them as you would if you were going to drink them, but in a high concentration AKA extra strong.

Step 3: Strain and Add Vinegar

Once your dye bath reaches room temperature, use a fine mesh strainer to eliminate any large pieces and pour the fluid back into mason jar. For each cup of natural dye, mix in one tablespoons of vinegar. This step is crucial as the acidity from vinegar helps the egg shells to absorb the natural colors from your homemade dye, ensuring beautiful colors.

Step 4: Dye Your Eggs

Before immersing the eggs, wrap them in various things like silk ties, old pantyhose, or rubber bands for interesting patterns. Or use  a white wax crayon to create unique designs.  Then gently lay your hard-boiled eggs into the natural egg dyes using a slotted spoon.

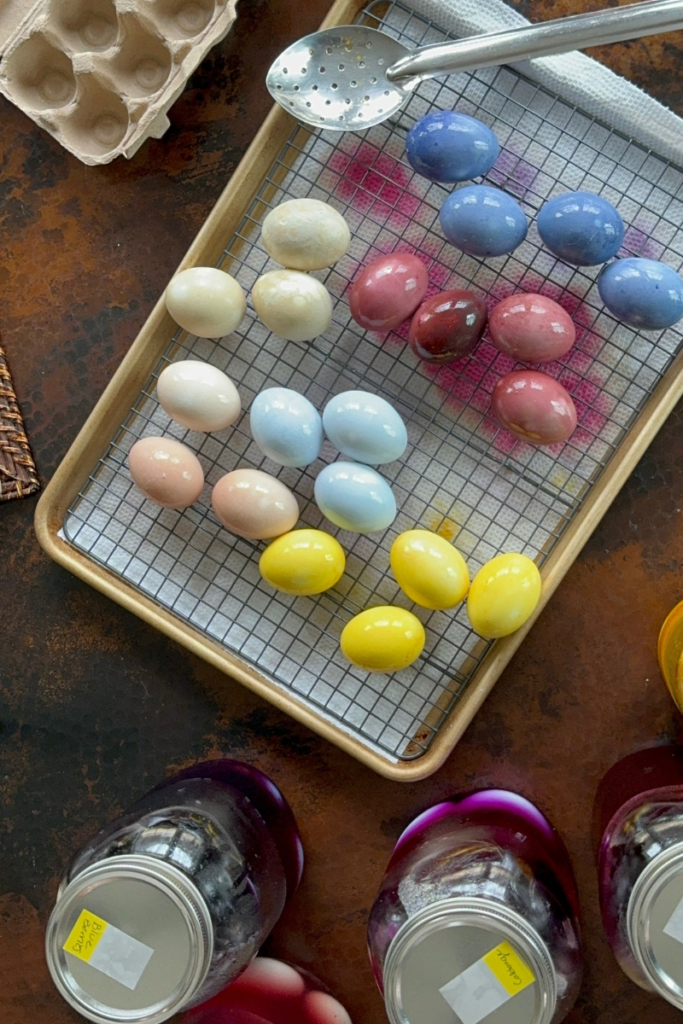
If you’re using hollow eggs, the process is much the same, but you may need to fill them with a little bit of water to ensure they sink. Leave the eggs in the dye bath in the fridge for a few hours or overnight for more profound depth of color. (I prefer overnight).  The good news is you can check on them occasionally to see if they’ve reached your desired color. These natural options provide various colors, from  bright yellow to blueberry’s deep blue dye.

Step 5: Drying the Eggs

Remove the eggs from the dye and set them on paper towels or a rack to dry. Resist the temptation to wipe them down, as you could rub off the natural colors. Instead, let the natural easter egg dye work its magic as the eggs dry to a wonderful sheen.

I’d love to know how your eggs turned out! Tag me on social media to share your creations!

IG: Miss_nutritious_eats

About Me

I’m Melanie.

I’m a chef, registered dietitian, foodie, wife and mom.
If you’re looking for quick and healthy meal inspiration that supports your health goals while feeding the rest of your family (including the kiddoes) well, then you’ve come to the right place!

Melanie Marcus Selfie

Foolproof method to make perfect hard boiled eggs 

We make a batch of hard boiled eggs on a weekly basis in our house.  It’s just one of those things that I thought everyone knew how to do!  Making the perfect hard-boiled egg isn’t as simple as tossing eggs into hot water.  (So many blogs suggest leaving eggs in hot water hard boil eggs.  However, that method has a lot of room for error.)  

My method places eggs in a pot of water and boils them for a specific amount of time until desired doneness.  This is hands down the best way to do it. Though my mom does love making them in an instant pot… I just can’t commit to another appliance right now!  

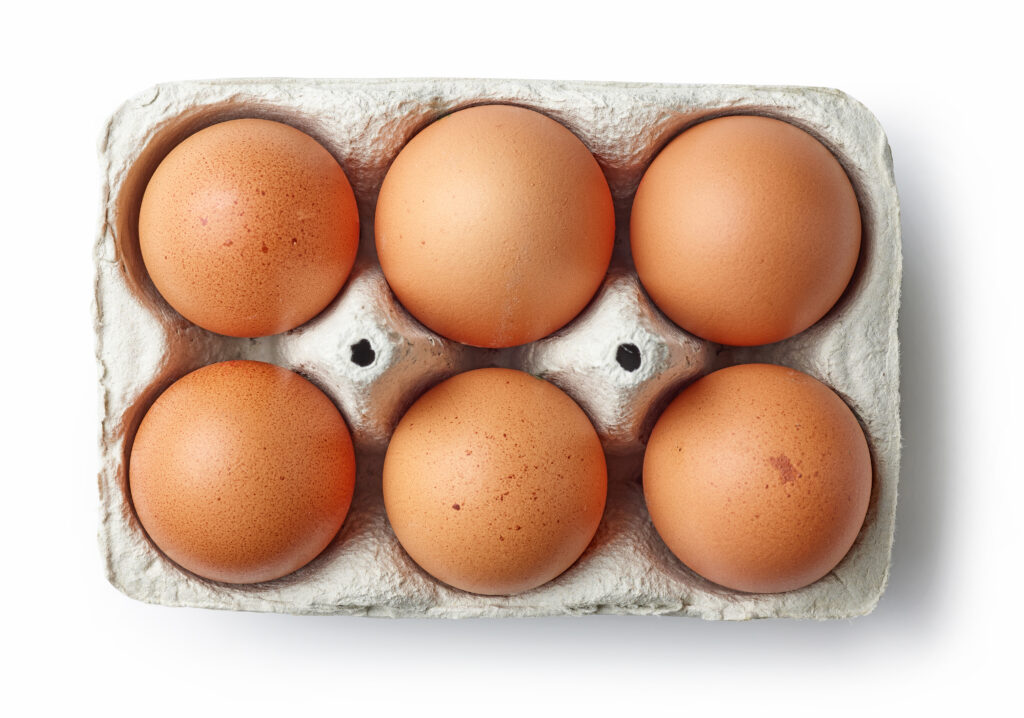
Brown Chicken Eggs

Whether you prefer your yolks gooey and soft or fully set, following a few important tips ensures your eggs turn out exactly the way you like them, every single time.  The biggest problem is that timing will vary depending on the size of egg.  But one of the best things is, if you always buy large eggs, you will get perfect hard-boiled eggs every time.  

Ingredients

  • Large eggs (as many as you need)

Note that these directions are intended for large eggs. You may need to adjust boiling times accordingly if using smaller or larger eggs.

Equipment

  • Saucepan or pot
  • Bowl for ice-water bath
  • Slotted spoon or skimmer
  • Timer

Instructions

Step 1: Preparing the Eggs for Boiling

Before boiling, ensure your eggs are at least 10 days old for easier peeling.  I found that older eggs work best.  And don’t worry, this usually isn’t a problem unless you are getting fresh eggs from chickens each week!  Add cold eggs to pot in a single layer (you don’t want eggs sitting on top of eggs because they may break).  Any cracked egg (raw) should be discarded and not cooked or consumed.  

Step 2: Boil the Water

Fill a pot with enough water to cover the eggs by about an inch. Bring the water to a full rolling boil over high heat.

Step 3: Lower the Heat 

Once boiling, reduce the heat to medium.  This should look just above a simmer. This prevents the eggs from moving too much and cracking.

Step 4: Adjust Heat and Start Timer

Immediately set your timer for your desired level of doneness.  

Check out this list for cook time:  

  • 6 minutes: Soft-boiled eggs. Runny yolk, soft white.
  • 6 1/2 minutes: Soft, jammy yolk.
  • 8 minutes: Perfect eggs in my opinion!  Medium yolk, slightly soft. 
  • 10 minutes: Mostly hard with a hint of softness.
  • 12 minutes: Fully hard-boil eggs with a lighter yolk.
  • 14 minutes: Hard-cooked eggs.  Very firm hard-boiled egg.

It’s not advised for anyone to eat raw eggs.  Some whole shell eggs may contain bacteria that can lead to food born illness.1 

Step 6: Ice Water Bath for rapid cooling

While the eggs are boiling, prepare an ice-water bath. This is basically a large bowl filled with ice and cool water from the tap.  Exactly when your timer goes off, remove the eggs with your slotted spoon and transfer them into the ice bath. This will halt the cooking process and make your eggs easier to peel.

Step 7: Peeling

Once the eggs are cooled (about 5 minutes in the ice bath), gently crack them all over and peel under running water for most manageable peeling.

Tips

  • Do not overcrowd the pot; boil in batches if necessary.
  • Fresh eggs are more difficult to peel. Use eggs that have been in the refrigerator for at least a week. As an egg ages, moisture escapes from the shell leaving an air pocket inside.  The more air there is, the easier it will be to peel them.  
  • For extra help with peeling, after cooling the eggs in an ice-water bath, peel the eggs under cold running water or in the water bath itself.

Nutrition & Macros
One large egg contains about 6 grams of protein which is important for building and repairing tissues in the body. It also provides 5 grams of healthy fats that are necessary for brain health and can help with weight management by keeping you fuller longer.

Macros: 6gP, 5gF, 1gC, 0g Fiber

Join my next round of the FASTer Way

Tired of endless diets and no results? Join the FASTer Way to Fat Loss and see real, sustainable changes in just 6 weeks!

Melanie Marcus FASTer Way to Fat Loss Coach

Eggs are also rich in choline, a nutrient that plays a vital role in brain development and function. Furthermore, they contain antioxidants lutein and zeaxanthin which promote eye health.

What to do with hard boiled eggs

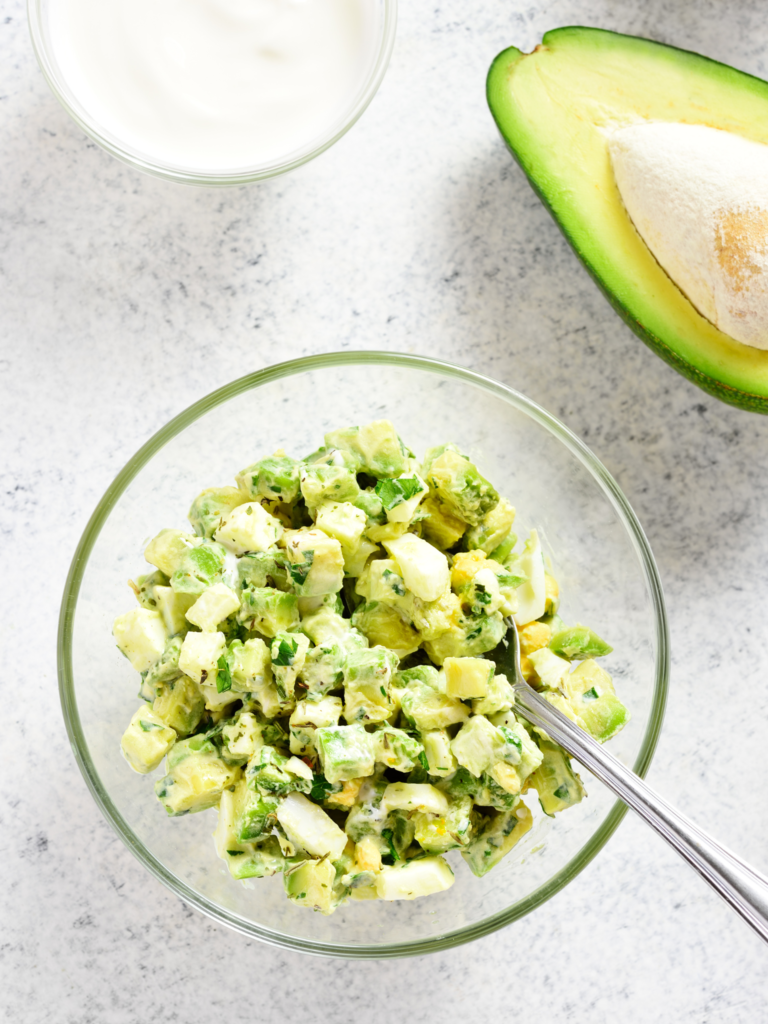
  • Turn into egg salad.  On busy days I like to mix 2 hard boiled eggs with 1 individual serving of avocado mash for a quick low carb option.  
  • On toast!  Slice your hard boiled eggs and place on buttered toast with a bit of Seasonello!
  • Eat them plain as a protein-packed snack.  Pair with berries and whole grain crackers to make it more substantial.  
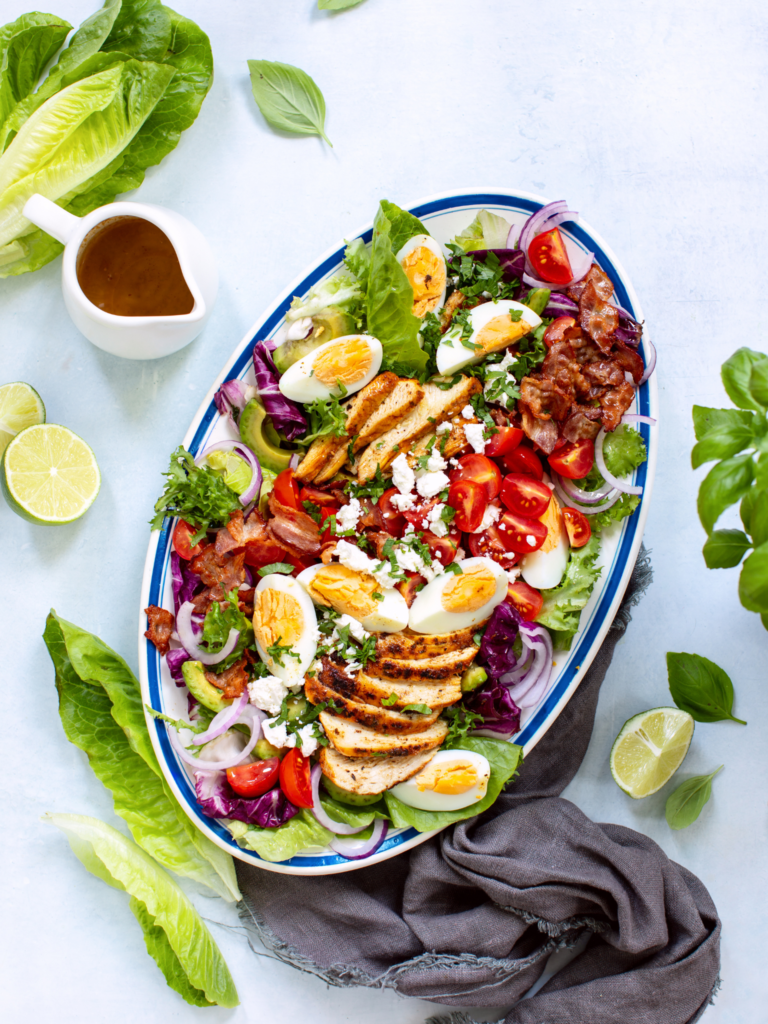
  • Use them to make a Cobb salad for a low carb day meal.  
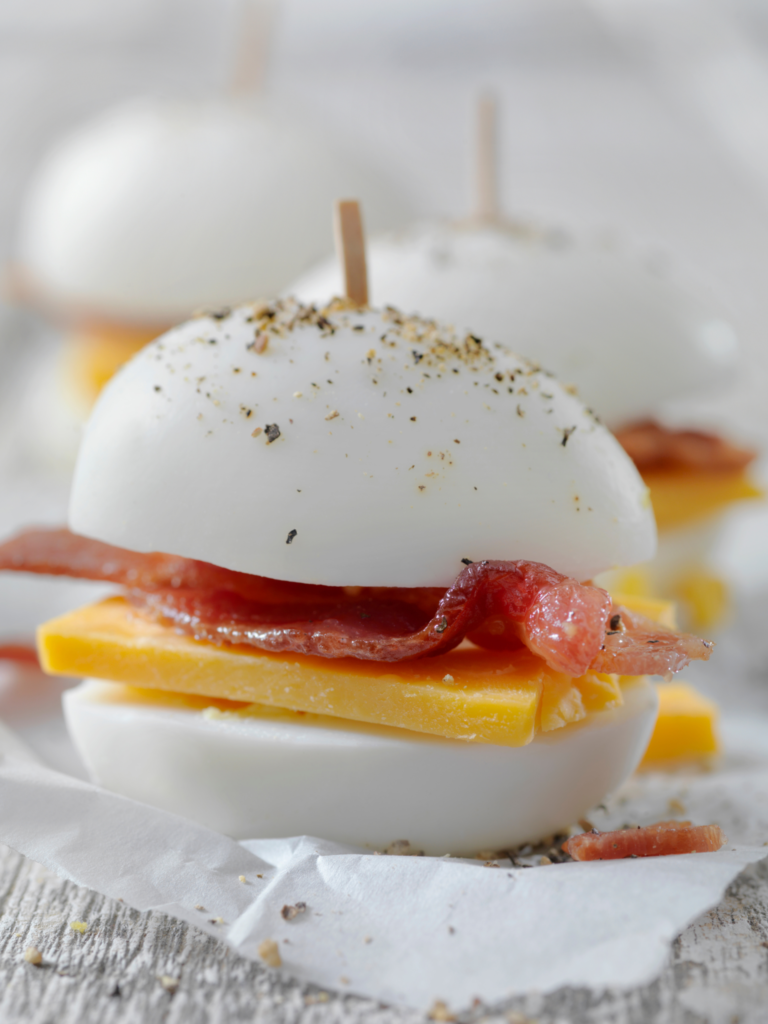
  • My kids usually grab their own hard boiled eggs in the morning as part of a quick hands off breakfast for me!
  • Decorate them for Easter 🙂

How long will hard boiled eggs last

Hard boiled eggs can last up to one week if stored properly. The key is to keep them in the fridge and not leave them out at room temperature for too long. 

I usually place eggs in a bowl once cooled and store them on the center shelf in my fridge.  This way anytime we open the fridge we can see them, and eat them before the week is over.  

Sources

  1. https://ask.usda.gov/s/article/Is-it-safe-to-eat-lightly-cooked-egg-dishes-or-use-recipes-that-call-for-raw-eggs

About Me

I’m Melanie.

I’m a chef, registered dietitian, foodie, wife and mom.
If you’re looking for quick and healthy meal inspiration that supports your health goals while feeding the rest of your family (including the kiddoes) well, then you’ve come to the right place!

Melanie Marcus Selfie

Helpful essentials when starting the FASTer Way to Fat Loss

Welcome to what could be the start of a life-changing experience for you—the FASTer Way to Fat Loss program. Embarking on this path is not just about shedding pounds; it’s about gaining a whole new understanding of health and wellness. However, to maximize your chances for success and truly thrive on this program, having the right tools can make all the difference. In this post, I’m sharing the essentials that my clients find the most value in having as they start their new healthy lifestyle!

The Essentials for a Smooth Journey

Before you launch into the world of intermittent fasting, carb cycling, and effective workouts, it’s important to gather a few key items. And before you commit to a specific coach – be sure you like their style of teaching. I think this is an important one that easily gets overlooked!

Join my next round of the FASTer Way

Tired of endless diets and no results? Join the FASTer Way to Fat Loss and see real, sustainable changes in just 6 weeks!

Melanie Marcus FASTer Way to Fat Loss Coach

Fitness Must-Haves

  • Sports Bra: Starting any workout regimen without good support is like trying to run a race with your shoes untied—it just doesn’t make sense! A quality sports bra will keep you comfortable and focused on the task at hand.
  • Sneakers: The backbone of any physical activity, a sturdy pair of sneakers is vital. They’re not just for show; they protect and support your feet through every squat, lunge, jump, or step.
  • Strength Bands/Weights: While body weight is an excellent resistance tool, incorporating some basic weights or strength bands can add variety and challenge your muscles in new ways.
  • Water Bottle: Hydration is key, especially when you’re pushing your body to new depths. Keep a water bottle on hand to ensure your water intake is up to par with your hard work.

Kitchen Allies

  • Dry Measuring Cups & Spoons, Kitchen Scale: These tools are pivotal in mastering portion control, which is an integral part of the program’s nutrition approach.
  • Sheet Pans & Food Storage Containers: Meal prep is a game-changer when it comes to sticking to the weekly meal plans. Having the right containers will keep your nutritious meals fresh and ready to go.
  • Protein Powder: I find that most clients at some point start using a protein supplement to help build lean muscle. The trick with a protein powder is to find one that delivers protein and not carbohydrate and fat. This makes meeting macro goals much easier!

Tech Support

  • iPhone/Smartphone: Immediate access to the FASTer Way app keeps you tapped into daily workouts, meal plans, and the supportive community for that daily accountability boost.
  • TV that will mirror your phone: Totally not required, but I find that I like to cast my screen to make workouts more enjoyable.

If I had to pick just one thing

I would highly, suggest that you invest in a kitchen scale.  It will be a game changer when it comes to dialing in on your macros. 

Beyond the Physical Items

Having physical items on hand is wonderful, but the most important part of your success is cultivating an open mind. The strategies you will implement—like low macro days and regular macro days—are designed to elevate your metabolic rate and improve overall health, not just for immediate results but as part of a holistic approach to wellness.

Adopting the FASTer Way lifestyle means recognizing that this isn’t just a weight loss program—it’s a complete recalibration of how you view and consume food, how you move your body, and how you prioritize your overall health.

Success Stories to Inspire You

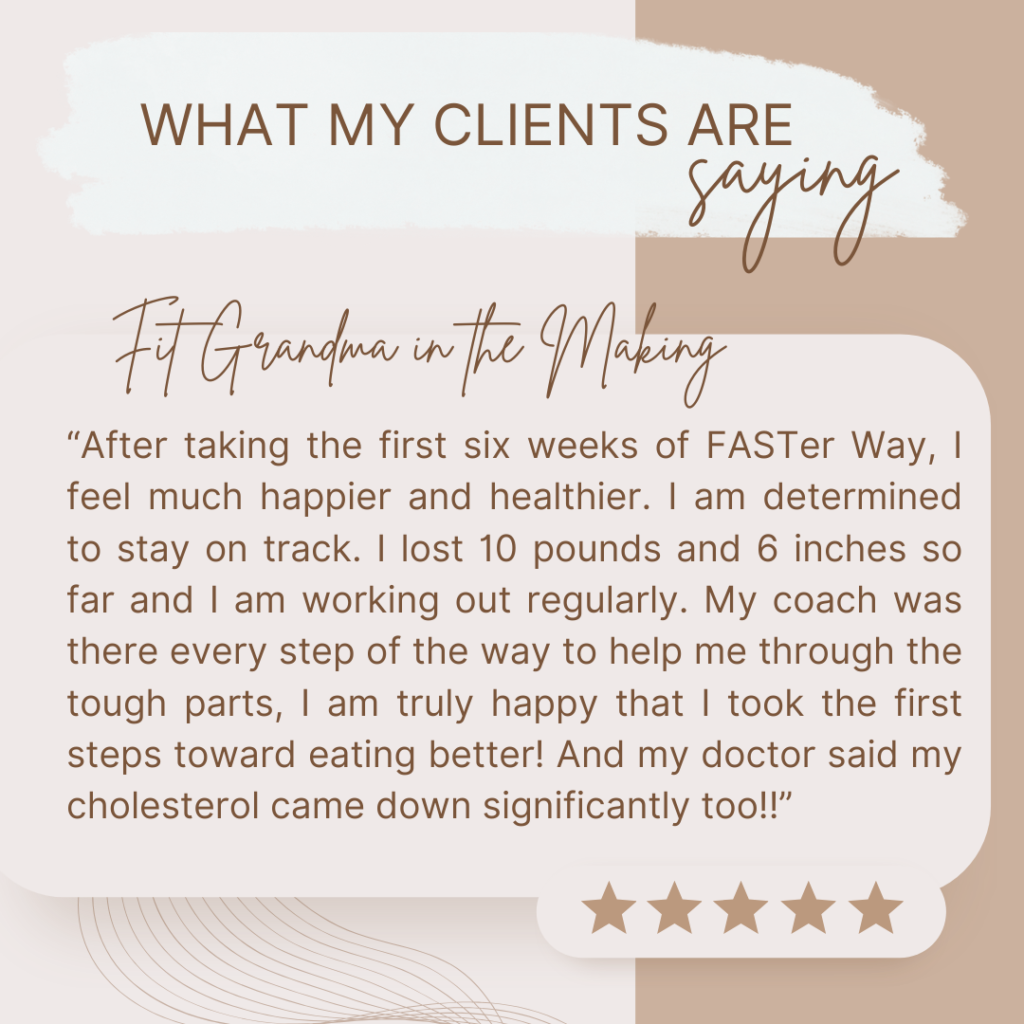
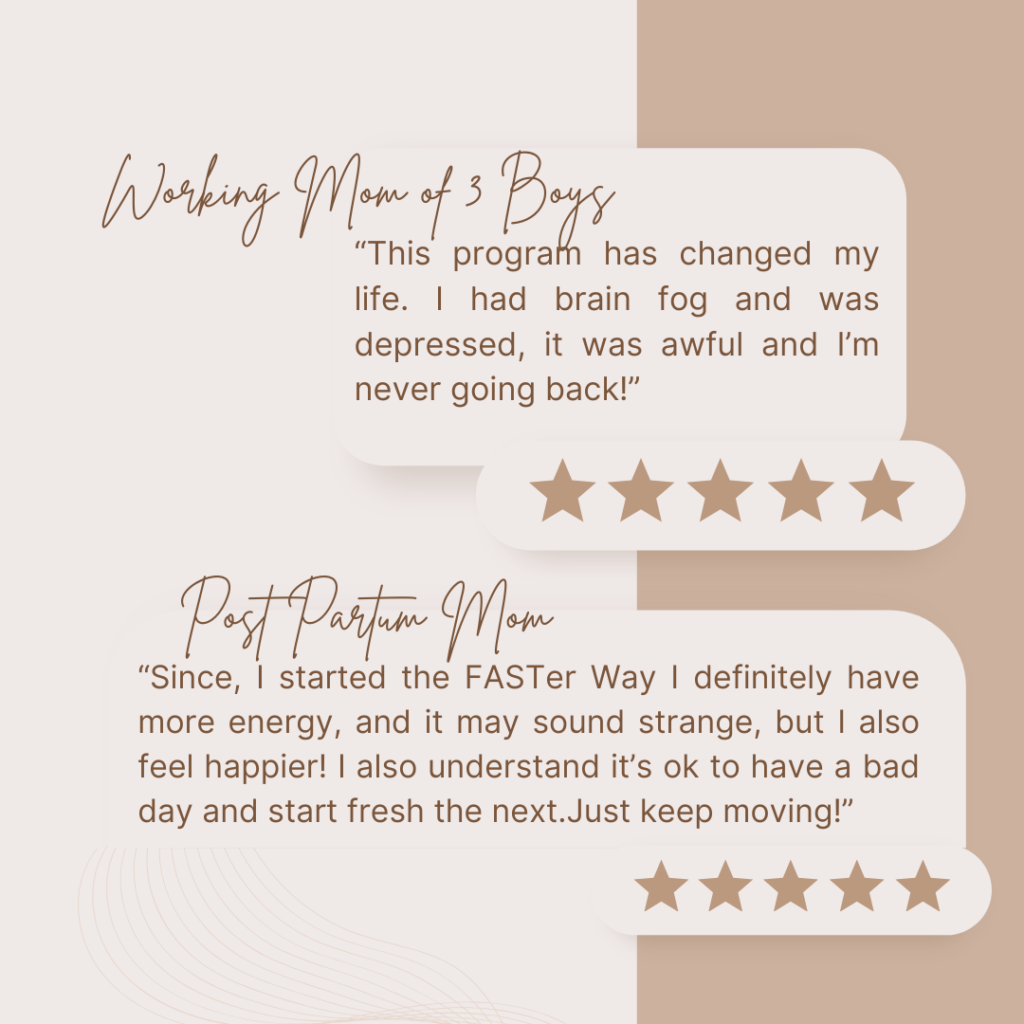
The FASTer Way has been a game-changer for many who’ve walked this path before you. Take it from our community members who’ve found success:

A Final Word of Encouragement

Remember, your commitment to this 6-week program and ultimately joining the VIP membership is about integrating these new practices into your life one day at a time. From the start prep week with your certified coach, you’re setting yourself up for long-term success.

One of the best things about this online fitness program is that it truly provides a consistent community, always ready to provide comprehensive support through social media platforms, VIP programs, and of course, the irreplaceable Facebook group banter. 

You will have a wealth of resources at your fingertips—from meal plan information to ongoing access to sample meal plans and daily meal plan recipes.

Join thousands of FASTer Way veterans who’ve seen great results, and remember, becoming a more confident, healthy, and energized you is worth every step, every rep, and every healthy meal. 

Are you ready to start your weight loss journey with the right tools and best support? Join me and become a faster way member today! 🌟

About Me

I’m Melanie.

I’m a chef, registered dietitian, foodie, wife and mom.
If you’re looking for quick and healthy meal inspiration that supports your health goals while feeding the rest of your family (including the kiddoes) well, then you’ve come to the right place!

Melanie Marcus Selfie

Best macro friendly Waldorf chicken salad recipe

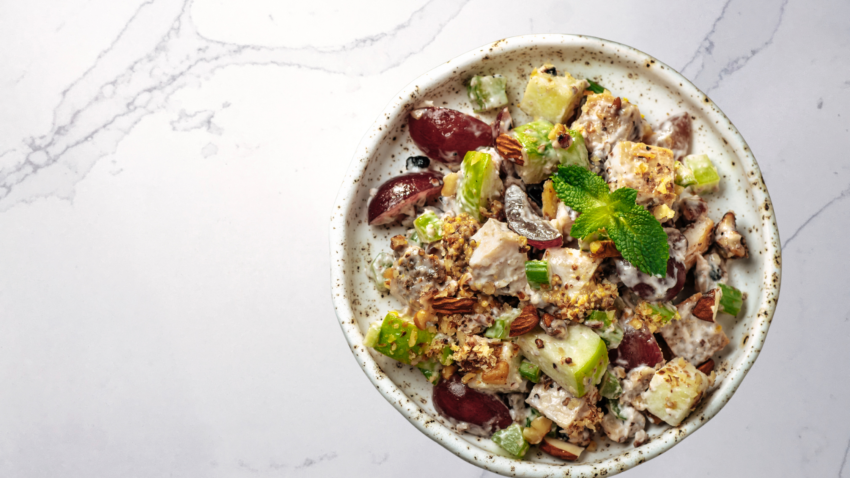
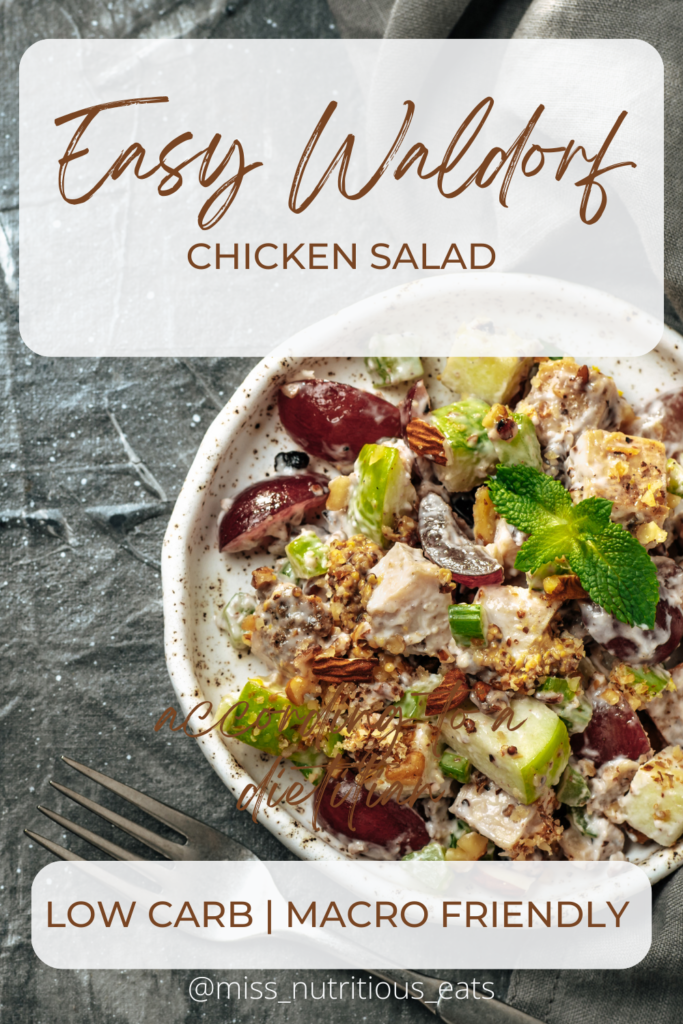
Whether you’re looking for easy lunches, a quick low carb meal, or you’re into meal prep, this Macro Friendly Waldorf Chicken Salad will quickly become your favorite way to satisfy hunger.

This delicious chicken salad harnesses the efficiency of canned chicken, without sacrificing the creamy texture we all love in traditional chicken salad recipes. The great recipe I’m sharing with you today is lean and offers that perfect balance of sweet and crunchy too.  

Jump to Recipe

But what makes it macro friendly?

When a food item is considered macro-friendly, it generally means it is composed in a way that helps you meet your macronutrient needs in a balanced and healthful manner. Macronutrients, commonly referred to as macros, are the nutrients required by the body in large amounts, which include carbohydrates, proteins, and fats.

Being “macro-friendly” could indicate that the food:

  • Has a balanced amount of carbs, proteins, and fats.
  • Is versatile and can be easily incorporated into different dietary regimens without overly skewing the balance of macronutrients.
  • Is calorie-dense and provides nutritional benefit without excessive sugars or unhealthy fats.
  • Can be portioned effectively to meet individual macro tracking goals, often relevant for those tracking their intake for body composition goals, such as fitness enthusiasts and athletes.

This recipe in particular is macro friendly because it is easy to modify the recipe ingredients to meet your macro goals whether you are following a low carb or regular macro day.

A macro-friendly food helps you nail your specific dietary targets based on your personal goals, whether that be weight loss, muscle gain, or maintenance of general health.

Macros

This recipe makes one large serving. It’s a lot of food. I like to have most for lunch and finish the rest as an afternoon snack. I serve with seed crackers, romaine leaves, celery, carrots or on Ezekiel bread!

Calories: 474 kcal

Carbohydrates: 22g

Protein: 36g

Fat: 29g

Fiber: 3g

Jump to Recipe

Join my next round of the FASTer Way

Tired of endless diets and no results? Join the FASTer Way to Fat Loss and see real, sustainable changes in just 6 weeks!

Melanie Marcus FASTer Way to Fat Loss Coach

Ingredients:

  • Canned chicken breast
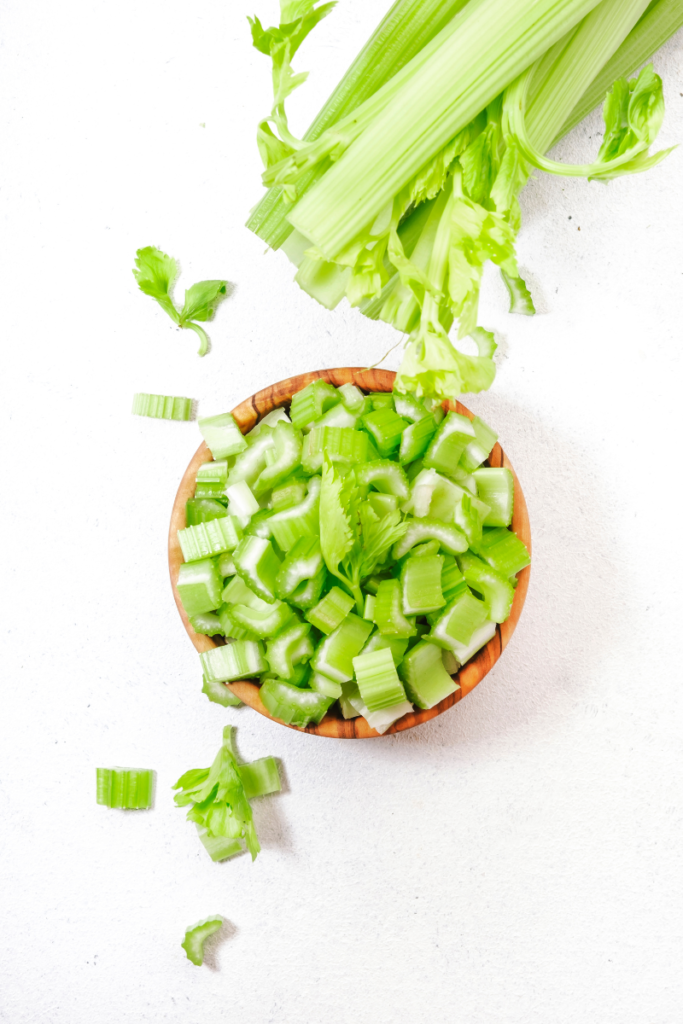
  • Crunchy celery
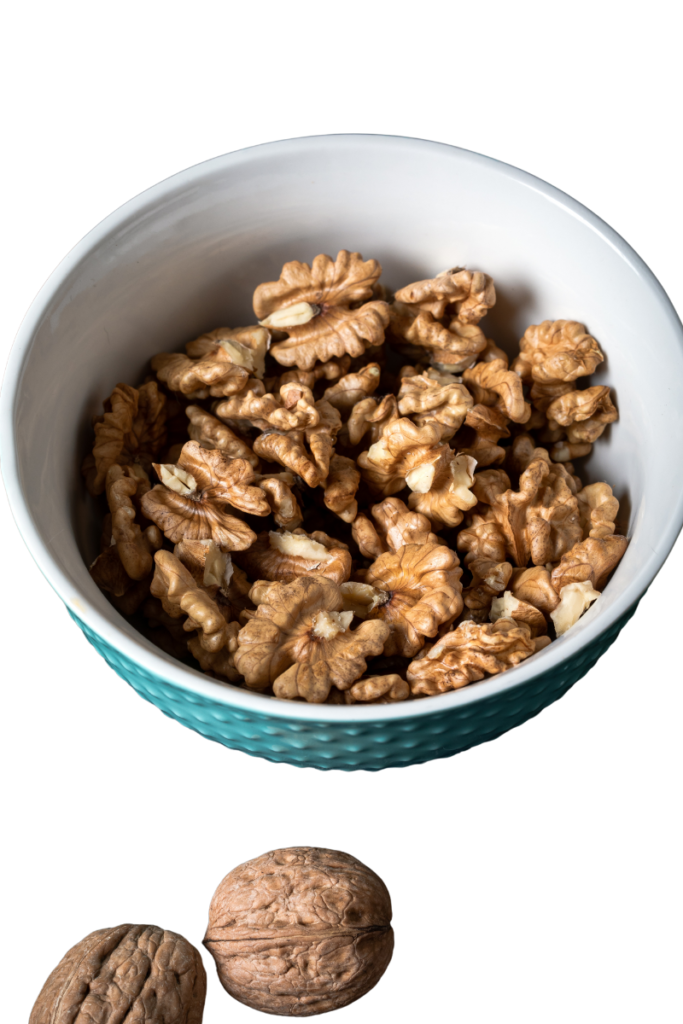
  • Walnuts (toasted for the best flavor)
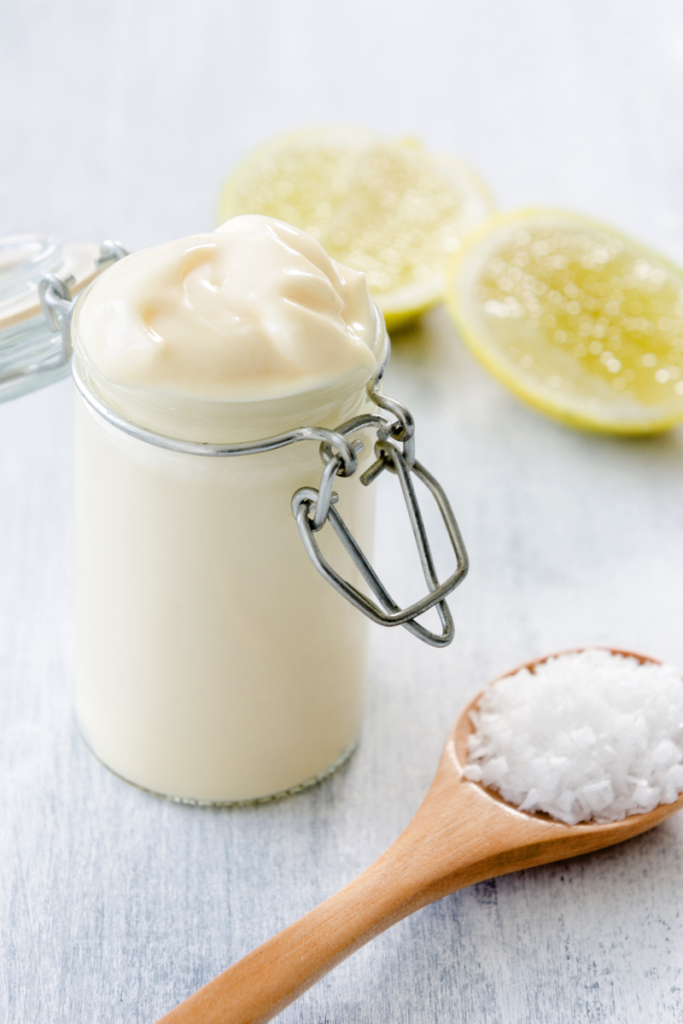
  • Mayonnaise (light mayonnaise for a low-calorie option)
  • Dijon mustard
  • Fresh dill (or other fresh herbs for an aromatic twist)
  • Green or red grapes
  • Green apple
  • Lemon juice, optional (for some zesty flair)
  • Onion powder and garlic powder, optional (to spice things up)

Step-by-Step Instructions:

  1. Quickly drain the canned chicken breast. I find the Costco brand offers great quality, perfect as the main ingredient for this recipe.
  2. In a large mixing bowl, combine the chicken with 1.5 Tbsp of light mayonnaise, 1 tsp dijon mustard, 1/2 ounce of crushed toasted walnuts, 1/2 cup halved red grapes, and 1/2 cup of chopped crunchy celery, 1/4 cup chopped apple for that classic flavor profile.

Preparing Your Salad

When you’re finished mixing up this easy chicken salad recipe, store it in an airtight container in your fridge. It’s a super easy way to dig into a macro friendly meal throughout the week, especially if you’re looking to reach your macro goals on a low carb day. Serve this salad as lettuce wraps, which is not only a great option for a gluten-free dish but also keeps it low carb and fresh. 

And if you’re counting macros, here’s a healthy salad recipe tip for you: before digging in, measure the total gram weight of your serving to stay on track. If you’ve served yourself a 100g portion, simply enter 100 as the serving size when logging your meal.

Jump to Recipe

The Best Things About This Chicken Salad

  • Versatility: You can enjoy it on a bed of lettuce, stuffed in avocado halves, or as a filling for bell peppers.
  • Convenience: It’s the perfect make-ahead lunch to enjoy throughout the week.
  • Customization: Feel free to add hard-boiled eggs, cherry tomatoes, bell peppers, green onions, and fresh parsley to add more flavors and textures.
  • Ease: If you want to use freshly poached chicken breast:  With the paddle attachment on your stand mixer, shredding chicken becomes effortless, giving you the creamy texture without much fuss.
  • Nail Fat Macros:  If you follow the FASTer Way to Fat Loss you may notice, there are some days that fat macros may be difficult to reach.  This recipe will help you get there!
  • Family Friendly: While it will help you reach your goals- your family will probably like it too! Check out this post for how to prepare macro friendly foods they all will love.

Above all, the best way to discover this great recipe is to try it yourself! Enjoy the process of mixing and matching, maybe even adding a bit of tangy buffalo sauce if you’re looking for that kick. 

Bonus: Looking for an easy chicken salad recipe that feels gourmet? Add a hint of poppy seeds and apple cider vinegar to the mix and experience a new take on a beloved classic!

Nutrition, flavor, and satisfaction – it’s all here in this Macro Friendly Waldorf Chicken Salad. Enjoy and happy healthy eating!

Waldorf Chicken Salad

Macro friendly and perfect for a low carb day.
Course Main Course, Salad
Servings 1 person
Calories 474 kcal

Ingredients
  

  • 8 ounces Kirkland Chicken Breast
  • 1.5 tbsp mayonaise
  • 1 tsp dijon mustard
  • 1/2 cup grapes halved
  • 1/2 cup celery chopped
  • 1/2 ounce walnuts toasted
  • 1/4 cup green apple

Instructions
 

  • In a large bowl combine all ingredients and mix.

Nutrition
Serving: 1gCalories: 474kcalCarbohydrates: 22gProtein: 36gFat: 29gSaturated Fat: 3gPolyunsaturated Fat: 16gMonounsaturated Fat: 5gTrans Fat: 0.04gCholesterol: 109mgSodium: 1071mgPotassium: 383mgFiber: 3gSugar: 16gVitamin A: 313IUVitamin C: 6mgCalcium: 48mgIron: 1mg
Keyword chicken, macro friendly, protein
Tried this recipe?Let us know how it was!

About Me

I’m Melanie.

I’m a chef, registered dietitian, foodie, wife and mom.
If you’re looking for quick and healthy meal inspiration that supports your health goals while feeding the rest of your family (including the kiddoes) well, then you’ve come to the right place!

Melanie Marcus Selfie

Why I eat leftover salmon straight from the fridge

Atlantic salmon is a weekly staple for us when it comes to healthy eating.  (I’ll save why this is my preference for another post!) It’s a delicious fish that can be prepared in a variety of ways whether you’re buying fresh or frozen salmon from the grocery store.  

Leftover salmon from the day before is delicious protein source. Have you ever tried eating cold salmon? Personally, I think it’s the best way to eat it for convenience, taste and avoiding that fishy smell! Read on, and I’ll explain 🙂

The fastest way to prepare salmon

Jump to Recipe

Before Kids

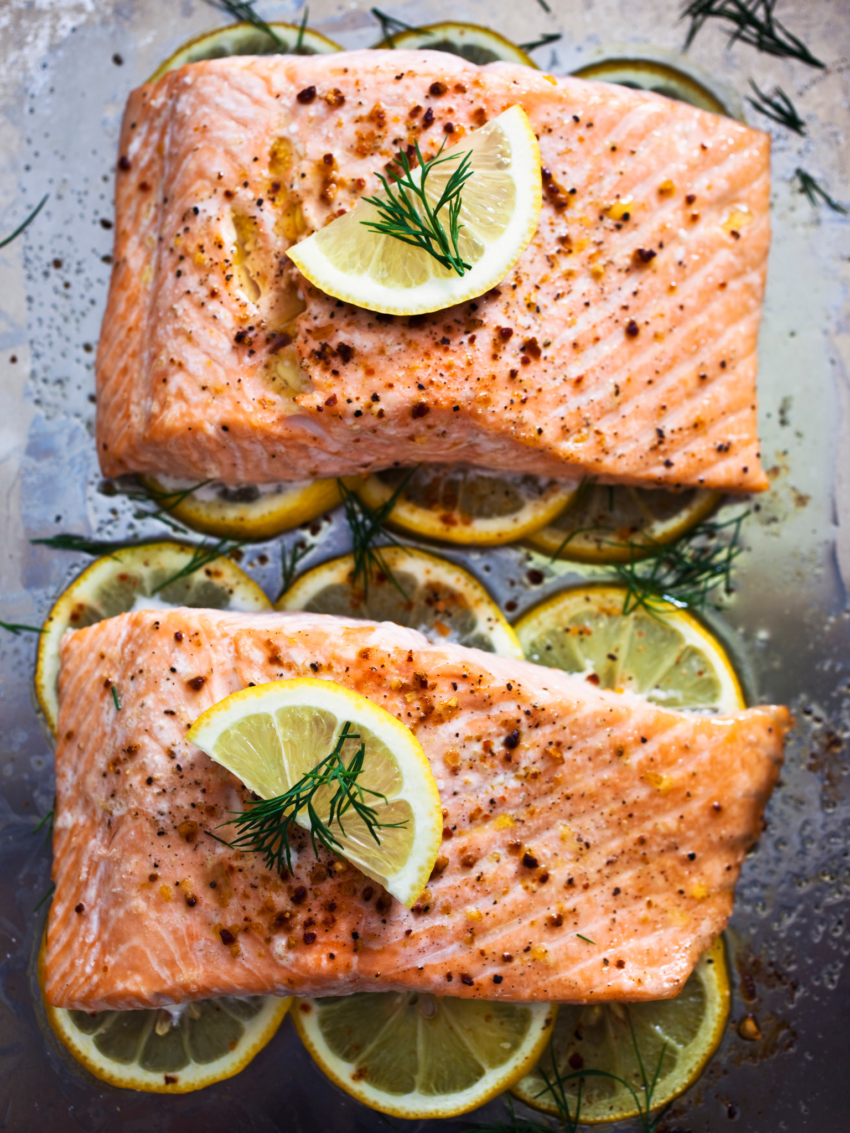
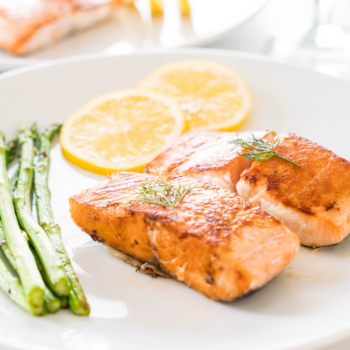
I used to roast fresh salmon or defrosted salmon in my toaster oven or in a 400 F oven.  I would remove any excess moisture with a paper towel, coat with a bit of olive oil spray, season with Seasonello and top with lemon slices and roast for 15-20 minutes depending on the thickness of the fish.  Still a great way to prepare salmon, (and I still do when cooking for a large crowd), but on a normal weeknight, every minute counts.

After Kids

While the above method seems pretty quick and painless, I now have even less time and this is BY FAR, my favorite way to prepare salmon – bonus my husband even likes it too!  

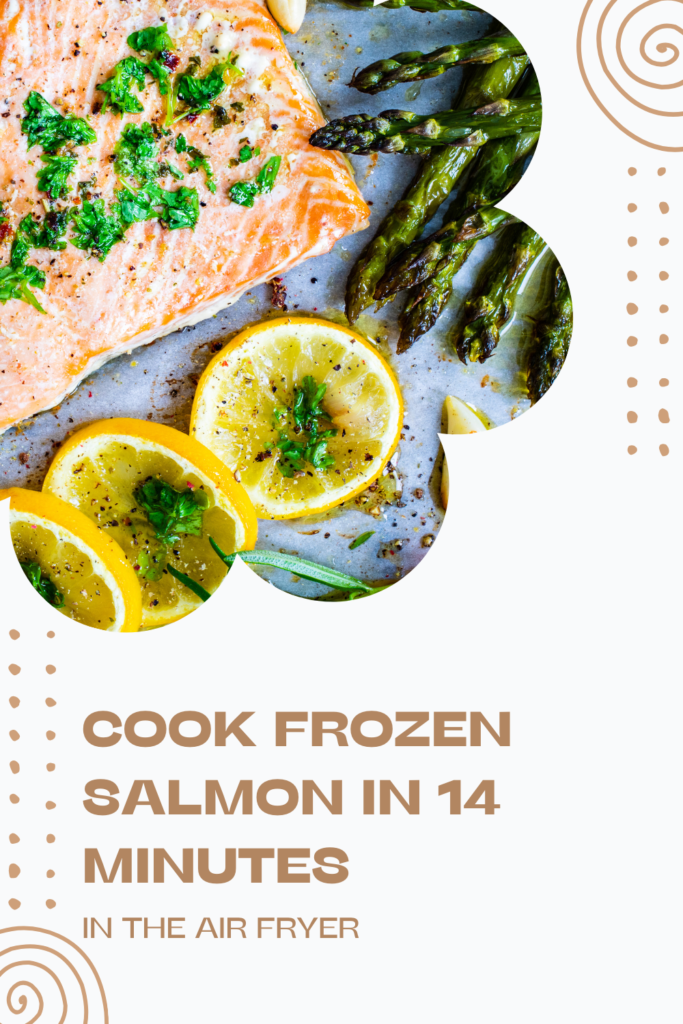
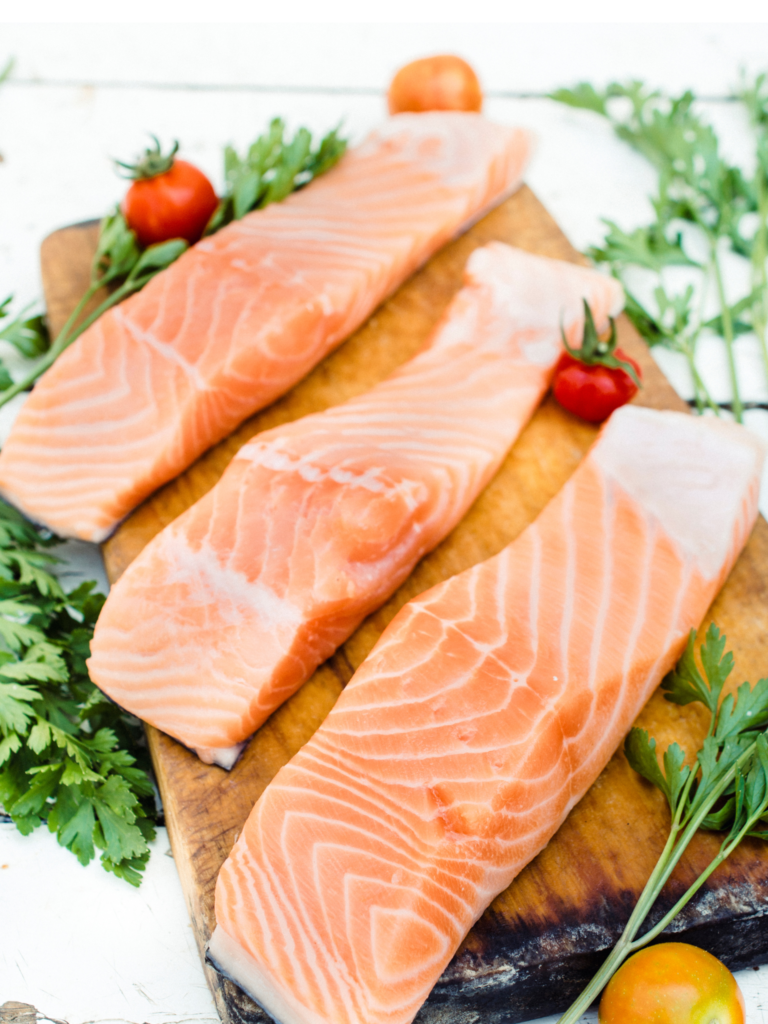
  1. Take a 6-8oz frozen salmon fillet out of packaging and place directly in 400F bucket air fryer.  
  2. Spray with olive oil spray, season with salt and pepper or Seasonello and top with lemon slices.  
  3. Cook for 14 minutes (from frozen) and serve!!  
  4. Salmon should look opaque and golden and reach an internal temperature of 145 F with a food thermometer when done.

When it’s cooked at a high temperature like this, the outside gets a little color to make it appealing and the inside is flakey and moist.  

I can usually fit 3 salmon fillets in my air fryer and I usually try to make at least one extra piece of salmon for lunch the next day.  

How to store cooked salmon properly

Storing leftover salmon properly is crucial to ensure food safety and to maximize its shelf life. After cooking salmon, let it cool to room temperature before storing it in an airtight container or wrapping it tightly in plastic wrap or aluminum foil. This will keep it fresh for up to 3-4 days.

Why I eat cold leftover salmon straight from fridge

Now, back to the topic of why I eat cold leftover salmon straight from the fridge. There are a few reasons why this is a great choice.

Convenience: 

Eating cold leftover salmon is a great way to save time and effort. You don’t have to worry about reheating it or going through the whole cooking process again. I like to eat it as is, make salmon salad out of it, add it to a salad or even make a sandwich. 

Taste: 

As strange as it may sound, leftover cold-cooked salmon can taste even better than the first time you had it. The flavors have had time to meld together, and your taste buds may pick up on different nuances that you didn’t notice before. Because salmon is a fattier fish, it maintains a moist flaky texture too which makes it very satisfying to eat.  My kids prefer salmon cold too.  

No Fishy Smell:

There’s something to be said about office kitchen etiquette about salmon.  When you’re eating it, everyone knows it because of they fishy odors!  When you have it cold with your meal, it still tastes great, and won’t smell up the whole kitchen the way reheated fish does.  

Roasted salmon pinterest pin

Nutritional benefits: 

Salmon is rich in omega-3 fatty acids, which are important for brain function and overall health. Eating cold leftover salmon is an easy hands off way to get more of these beneficial nutrients in your diet.

Rich in Omega-3 fatty acids: Seafood, especially oily fish like salmon, tuna, and sardines, are excellent sources of Omega-3 fatty acids that are essential for heart and brain health.

High in protein: Seafood is a great source of lean protein, making it an ideal option for those looking to increase their protein intake without consuming excess calories or unhealthy fats.

Low in saturated fat: Compared to other animal proteins, seafood contains lower amounts of saturated fat. This makes it a healthier option for those looking to maintain cardiovascular health.

Contains essential vitamins and minerals: Seafood is rich in vital nutrients like vitamin D, selenium, iodine, and zinc, which play crucial roles in maintaining overall health.

Helps prevent chronic diseases: Regularly consuming seafood has been linked to a reduced risk of chronic diseases like heart disease, Alzheimer’s disease, and depression due to its high nutrient content.

Supports healthy growth and development: Seafood is especially important for children and pregnant women as it provides essential nutrients for proper growth and development.

Lowers inflammation: The anti-inflammatory properties of Omega-3 fatty acids found in seafood can help reduce inflammation in the body, which is linked to many chronic diseases.

Aids in weight management: Due to its high protein content and low calorie density, seafood can be beneficial for weight management by promoting satiety and reducing overall calorie intake.

To enjoy cold leftover salmon straight from the fridge, simply take it out of the container and enjoy, or let it sit at room temperature for a few minutes and top with lemon juice. 

Other salmon recipes

I know my roasting method is basic, but it works and it’s delicious.  I’m not a fan of coating with cream cheese or feta cheese because it is already a good source of healthy fats.  And for basic weeknight meals, balance is important.  We talk a lot about that if you enroll in the FASTer Way and are focused on health too!  

14
Quick High Protein Salmon Salad
Use canned or leftover salmon to make this recipe.
Check out this recipe
15
Tuna poke in a blue bowl
Tuna Poke Salad
If you're loving salmon, use sushi grade salmon in this recipe instead of tuna!
Check out this recipe
16
salmon on top on lemon slices.
Baked Salad
Top this with salmon – it's soooo good!
Check out this recipe

You can easily turn leftover salmon into salmon cakes by combining with a bit of bread crumbs, chopped bell peppers, red onions and mayo or egg.  Form into salmon patties and cook over medium heat with a little olive oil on stovetop until brown and cooked through.  

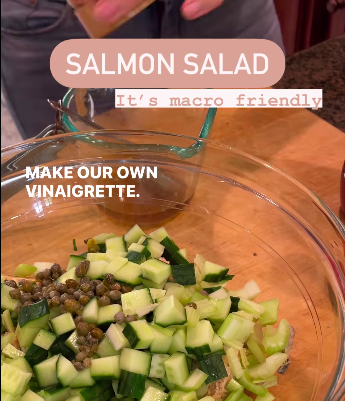
One recipe I do really love is this simple salmon salad, which you can make with canned or cold cooked salmon.  It would also be phenomenal over baked salad too!

Roasted salmon on plate.

Air-fryer Roasted Salmon

Use salmon straight from the freezer.
Prep Time 1 minute
Cook Time 14 minutes
Total Time 15 minutes
Course Main Course
Cuisine American
Servings 1
Calories 242 kcal

Equipment

  • 1 basket style air fryer I have found if I use my other toaster oven style air fryer, I need to add a few minutes to cook time. And it tends to make a mess.

Ingredients
  

  • 6 oz Atlantic Salmon fillet, frozen I like Costco fillets
  • Seasonello or salt and pepper

Instructions
 

  • Preheat air-fryer to 400F.
  • Place frozen salmon on parchment liner in air fryer basket and let cook for 14 minutes.
  • Should reach an internal temperature of 145F with a meat thermometer when done.

Nutrition
Calories: 242kcalProtein: 34gFat: 11gSaturated Fat: 2gPolyunsaturated Fat: 4gMonounsaturated Fat: 4gCholesterol: 94mgSodium: 75mgPotassium: 833mgVitamin A: 68IUCalcium: 20mgIron: 1mg
Keyword air fryer, easy, fast, protein, simple
Tried this recipe?Let us know how it was!

About Me

I’m Melanie.

I’m a chef, registered dietitian, foodie, wife and mom.
If you’re looking for quick and healthy meal inspiration that supports your health goals while feeding the rest of your family (including the kiddoes) well, then you’ve come to the right place!

Melanie Marcus Selfie

The Ultimate Yellowfin Tuna Poke Salad Recipe

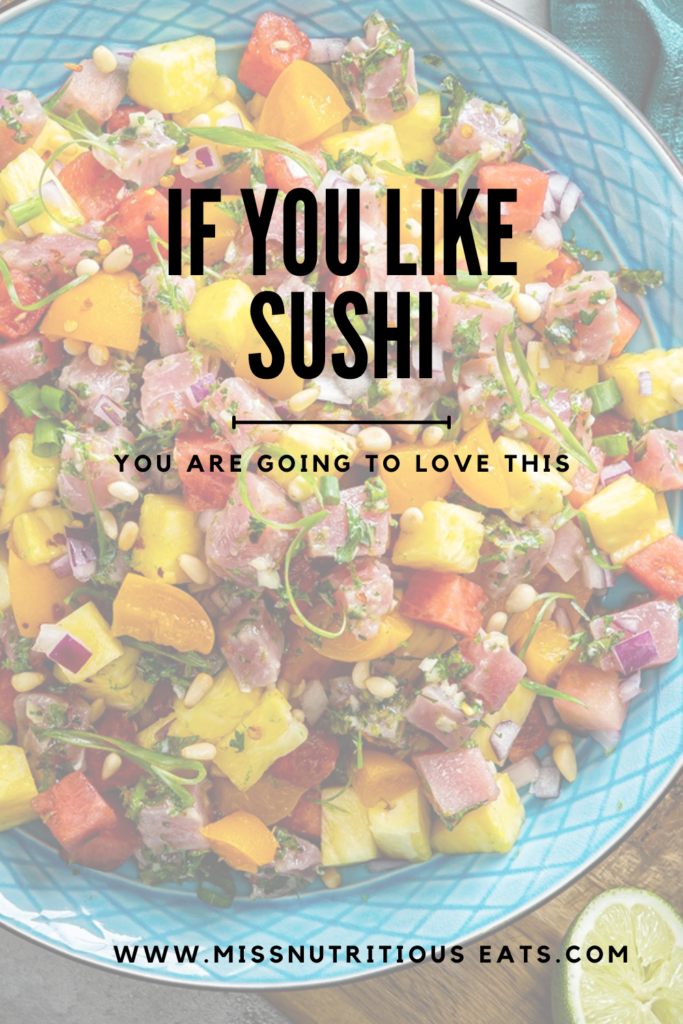
If you like sushi – then this recipe is for you. I recently tested this recipe originally from dole.com and made a few tweaks and it is my new obsession.

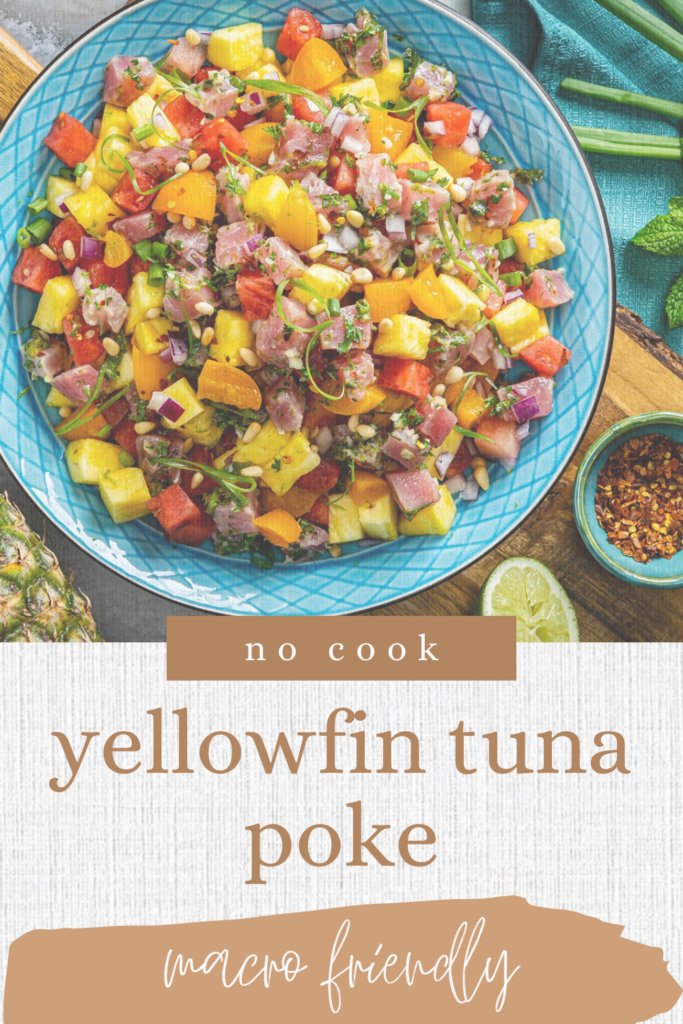
Poke (pronounced “POH-kay”) has surged in popularity, becoming a staple of healthful eating for many. A traditional Hawaiian dish that has leaped from the islands to the mainland, poke bowls are known for their fresh fish, vibrant sauces, and the sheer satisfaction of customizable, bowl-based feasting. Today, I’m sharing a Yellowfin Tuna Poke recipe. 

Jump to Recipe

Once you make you’re own fresh poke, I think it’s safe to say – you’ll be hooked!

Ingredients & Substitutions for yellowfin tuna poke

  • Red wine vinegar: substitute with a splash of another acidic component like apple cider vinegar for a similar tangy kick.
  • Honey: for a different type of sweetness or if honey is not on hand, try using agave syrup or a dash of sugar.
  • Lime juice and zest: lemon in combination with orange juice would be nice.
  • Garlic: I would consider using frozen pureed garlic for this if fresh wasn’t available.
  • Fresh parsley and mint: cilantro would offer a similar freshess.
  • Crushed red pepper : optional
  • Sushi-grade Yellowfin tuna:consider using other types of sushi-grade fish such as Ahi tuna, salmon or cooked shrimp
  • Pineapple and watermelon 
  • Red Onion: sweet yellow onion 
  • Green Onions
  • Pine nuts: macadamia nuts would be a great alternative.
tropical poke in blue bowl pin

How to make yellowfin tuna poke

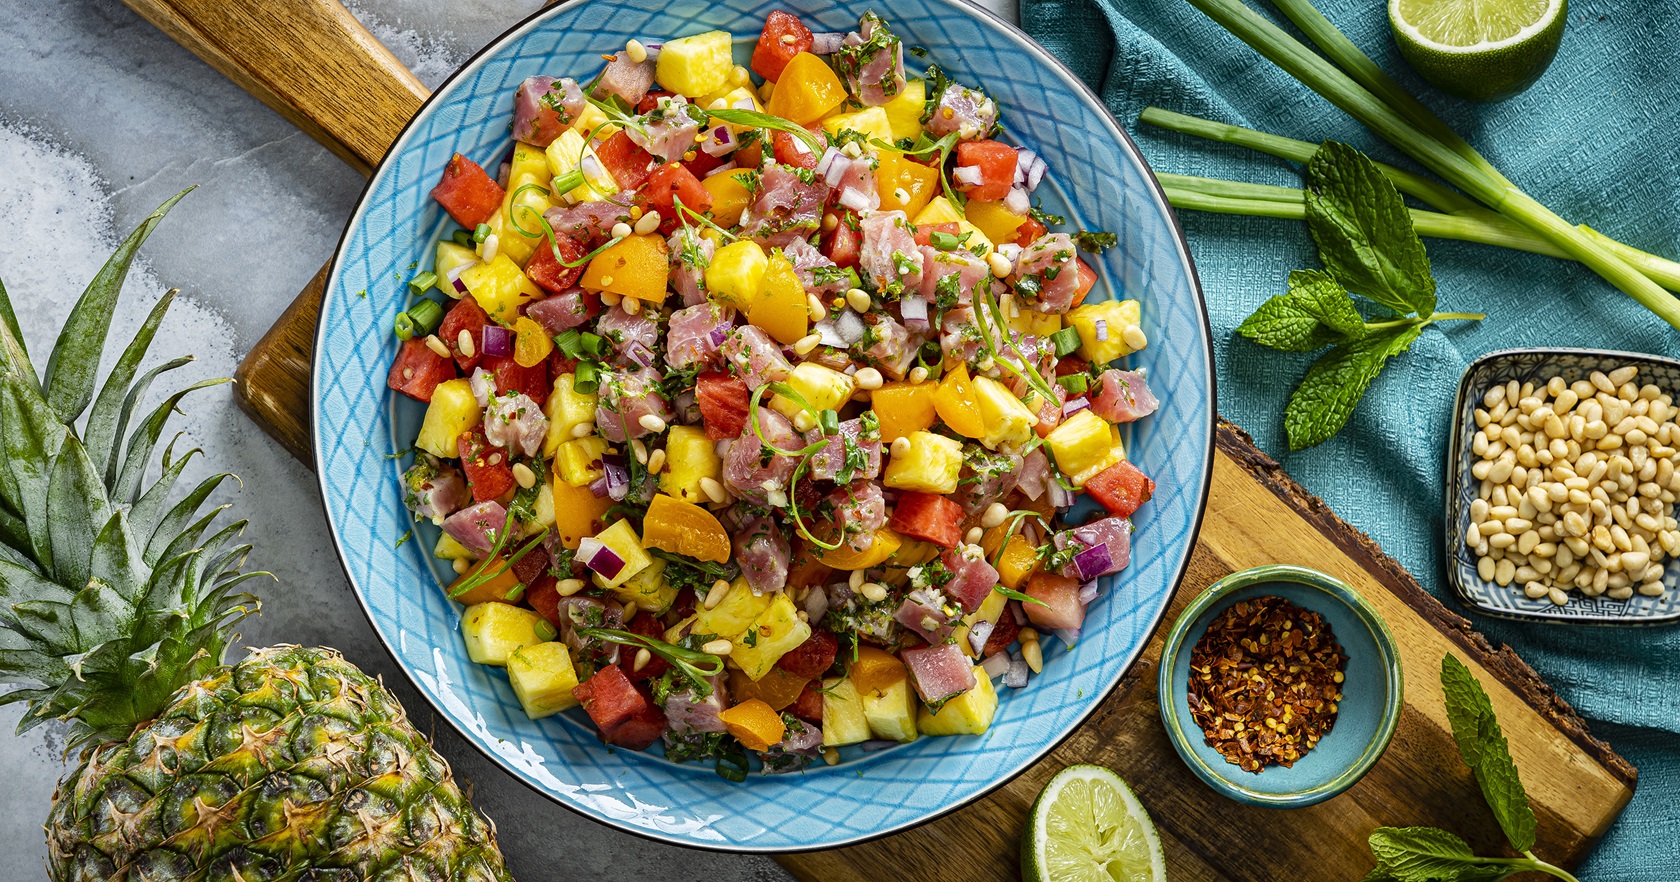
  • Combine vinegar, honey, lime zest and juice, garlic, parsley, mint and red pepper in medium bowl. Add tuna and toss to evenly coat. Set aside.
  • Stir together pineapple, watermelon and red onion, in large bowl. Spoon over tuna. Sprinkle with green onion and nuts.

Serving Suggestions

Serve your tantalizing Yellow Fin Tuna Poke with:  

unrecognizable cook putting onigiri into container
  • white rice
  • cauliflower rice
  • brown rice 
  • avocado slices
  • sriracha mayo
  • black sesame seeds 
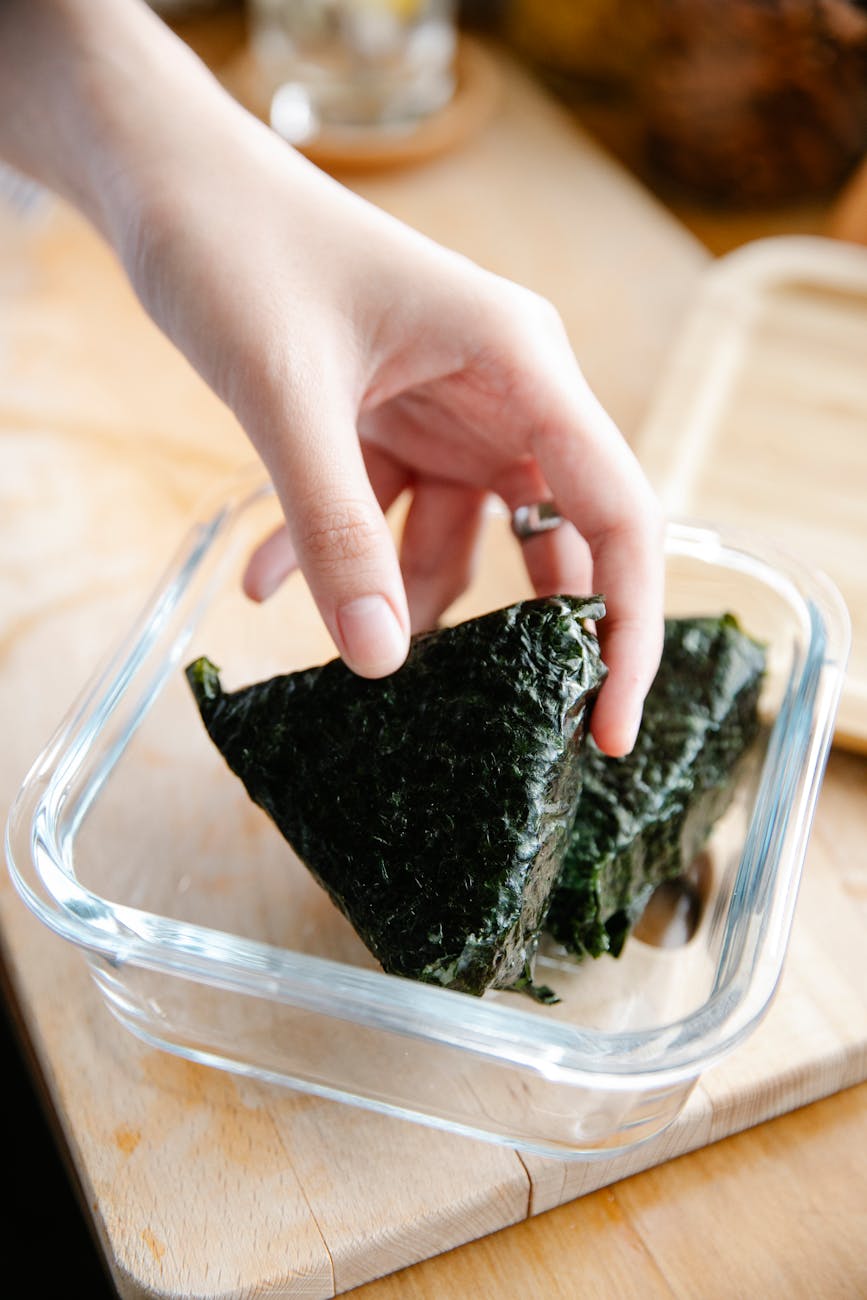
  • nori sheets

Crafting the Perfect Bowl of Yellowfin Tuna Poke

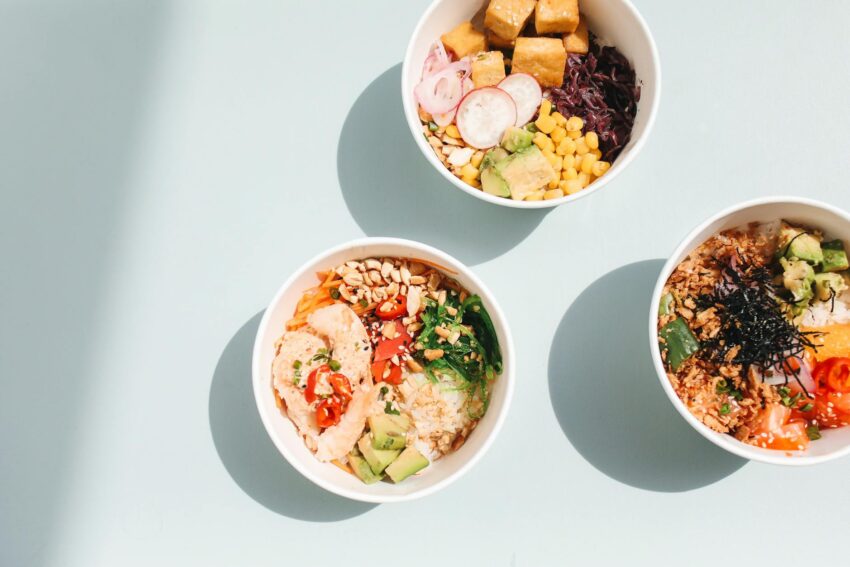
Now comes the fun part. Poke bowls are a great way to use up a variety of items from the fridge or freezer.  

Step 1: Sushi-Quality Yellowfin

A sushi-grade quality is non-negotiable as we will be enjoying this dish on the raw side. sushi-grade tuna can usually be found in specialty or high-end grocery stores, I found mine at Whole Foods in the freezer section – it was even on sale! You can also purchase sushi grade fish from many grocery store sushi counters.  

Step 2: Cube with Care

Handling tuna, especially when it’s to be enjoyed raw, deserves attention. Think precision and uniform cubes of about 1/4-inch in size. This not only aids in even marination but ensures a pleasant mouthfeel.  I recommend cutting the fish when it is still frozen to prevent tearing.  

Step 3: The Marinade Matters

When crafting a Yellowfin Tuna Poke, the marinade is the soul of the dish. This recipe combines honey, red wine vinegar and lots of lime juice and zest and red onion.  

Step 4: Add More Produce

Every great dish has a produce sidekick, and the Yellowfin Tuna Poke is no exception. Sky is the limit.  Add daikon radish, cabbage slaw or crunchy carrots for color.  

Step 5: The Bowl Build

Take a large bowl and layer the base with a sticky grain, whether that’s traditional white sushi rice, or a health-conscious substitution like cauliflower rice or brown rice. Place the marinated poke salad on top, then artfully arrange your toppings.  Think – avocado, seaweed salad, or edamame.  

Step 6: The Final Splash

Some extra drizzles of the marinating sauce, a dollop of spicy mayo, a couple of dashes of sesame seeds, and perhaps a wedge of lime to brighten the flavors, and your ultimate Yellowfin Tuna Poke bowl is ready to be relished in all its healthful glory.

Tips and Tricks for the Freshest Poke Bowl Experience

Tip 1: Keep It Cool

Yellowfin Tuna Poke is at its prime when its components are cool and freshly assembled. Keep it chilled until the moment of serving.

Tip 2: Spice Sensibly

Use spice to enhance, not to dominate. The same goes for the spicy mayo—less can certainly be more in this case.

Tip 4: Serve with the Right Sides

Traditional sides include edamame, pickled ginger, or even kale for those seeking a heartier accompaniment. Choose your sides wisely to complement the dish and your preferred taste.

Tip 5: The Deconstructed Roll

Transform the poke experience into a deconstructed sushi roll by serving the ingredients alongside a bed of leafy greens or even in a nori wrap for a handheld taste adventure.

Is Raw Tuna Safe to Eat?

Addressing the question that often stops poke enthusiasts in their tracks—Is raw tuna safe? Here’s the raw truth. When sourced from trusted vendors, and prepared and stored properly, the risks are minimal. Always look for the word ‘sushi-grade’ to ensure a certain level of safety in handling and quality.

Cooling in Confidence

Rapid and sustained cooling prevents bacteria growth. If the fish is not to be consumed immediately, keeping it in an airtight container, placed on top of ice, ensures it stays out of the temperature danger zone.

pinterest pin for poke

The Health Check

For those with medically restrictive diets or concerns, it’s best to consult a professional before including raw fish. But for average, health-conscious consumers, the occasional inclusion of Yellowfin Tuna Poke can be a fantastic addition to a well-rounded diet.

​Nutrition Benefits
Lower in sodium

This recipe relies on the natural salinity from the yellowfin tuna and does not used added soy sauce or coconut aminos for flavor.  This makes this recipe a great fit for anyone who is concerned with sodium, blood pressure or overall heart health.  

Heart-healthy fat

Tuna is a natural source of healthy fats such as omega-3 fatty acids. These fats have been shown to improve heart health, reduce inflammation in the body, and may even help with cognitive function.

Lean protein

Yellowfin tuna is a great source of lean protein, making it an ideal choice for those looking to build muscle or maintain a healthy weight. It also contains essential amino acids that our bodies need for various functions, including tissue repair and hormone production.

Macro Friendly

This recipe delivers protein and carb macros with little fat. It’s made with whole foods and is perfect on it’s own for a low macro day, or it can be combined with more macro dense foods for regular macro or feast day. Check out this post to learn more about macros and the FASTer Way to Fat Loss.

Tuna poke in a blue bowl

Yellowfin Tuna Poke

Prep Time 10 minutes
Total Time 10 minutes
Course Appetizer
Servings 8
Calories 118 kcal

Ingredients
  

  • 1 tablespoon red wine vinegar
  • 2 tablespoons honey optional
  • Grated peel 1 lime
  • 2 tablespoons fresh lime juice
  • 1 garlic clove finely chopped
  • 2 tablespoons finely chopped fresh parsley
  • 2 tablespoons finely chopped fresh mint
  • 1/8 tsp crushed red pepper
  • 3/4 pound sushi-grade Yellowfin tuna cubed
  • 3 cups fresh DOLE® Tropical Gold® Pineapple cut into chunks
  • 2 cups watermelon cut into chunks
  • 1/4 cup finely chopped DOLE Red Onion
  • 1 tablespoon DOLE Green Onion chopped
  • 1 tablespoon pine nuts

Instructions
 

  • Combine vinegar, honey, lime peel, lime juice, garlic, parsley, mint and red pepper in medium bowl.
  • Add tuna and toss to evenly coat. Set aside.Stir together pineapple, watermelon and red onion, in large bowl. Spoon over tuna. Sprinkle with green onion and nuts.

Nutrition
Calories: 118kcalCarbohydrates: 17gProtein: 11gFat: 1gSaturated Fat: 0.2gPolyunsaturated Fat: 1gMonounsaturated Fat: 0.3gTrans Fat: 0.01gCholesterol: 17mgSodium: 22mgPotassium: 336mgFiber: 1gSugar: 13gVitamin A: 425IUVitamin C: 36mgCalcium: 20mgIron: 1mg
Keyword low macro, poke, protein
Tried this recipe?Let us know how it was!

About Me

I’m Melanie.

I’m a chef, registered dietitian, foodie, wife and mom.
If you’re looking for quick and healthy meal inspiration that supports your health goals while feeding the rest of your family (including the kiddoes) well, then you’ve come to the right place!

Melanie Marcus Selfie