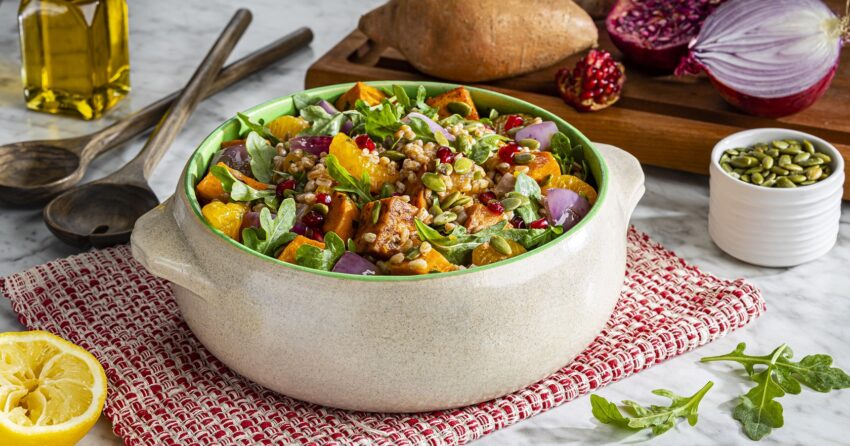
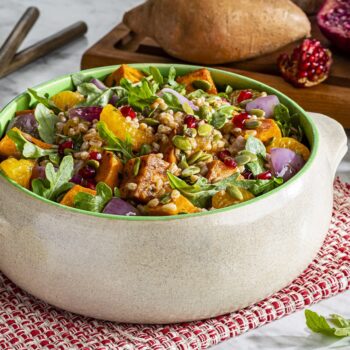
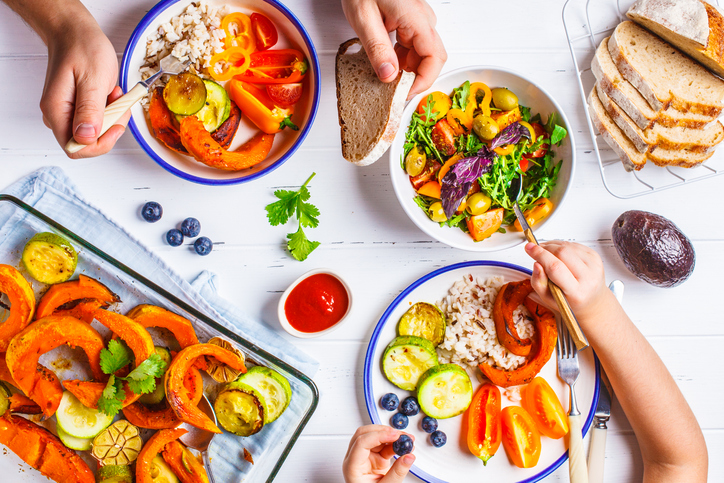
When the calendar turns to November, my usual salad just won’t do. I usually turn to warm and comforting foods, but I find that roasted vegetables on top of arugula are just one of those hearty salads that you just want seconds of! I love this as a meal prep lunch for the work week, but it would also be a beautiful and unexpected addition to any Thanksgiving table.
I am the Registered Dietitian for Dole Food Company and they generously covered the cost of ingredients for this recipe.
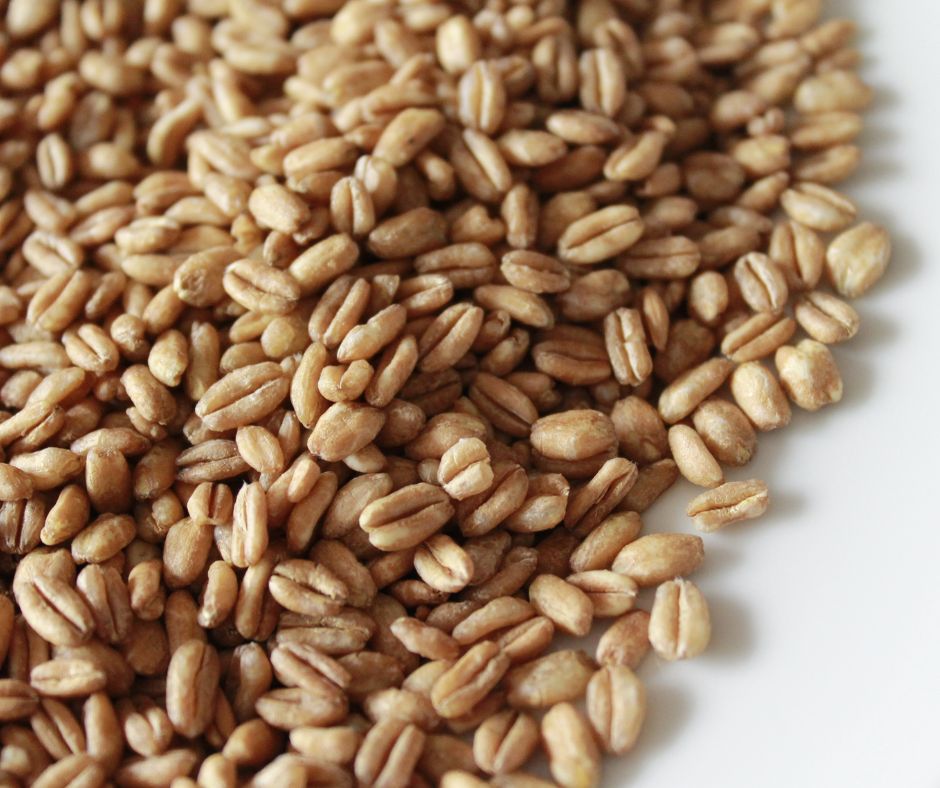
What is farro?
Farro is an ancient grain that has a nutty flavor and a pleasantly chewy texture when cooked. It looks a lot like barley. The great thing about it is that it doesn’t get mushy, even if you overcook it!
Ingredients you need for Harvest Farro Salad
farro
red onion
sweet potatoes
olive oil
salt and cinnamon
lemon juice
chopped fresh parsley
honey
baby Arugula
pomegranate arils
pepitas or pumpkin seeds
Tips for putting it all together!
Prepare your farro in advance, according to package directions, remove excess liquid once done cooking.
Use a rimmed baking sheet, lined with nonstick foil when roasting vegetables.
Let the farro and veggies come to room temperature before laying salad.
Substitutions & Additions
Instead of sweet potato you could use butternut squash
If you don’t have canned mandarins, use fresh!
If you don’t have farro you could use barley, wheat berries, quinoa or whole grain brown rice.
Carmelized brussels sprouts would be an amazing addition
A beautiful garnish would be goat cheese or feta cheese crumbles.
If you don’t have pomegranate arils you could always use chopped apple.
If you don’t have lemon juice you can use tangy apple cider vinaigrette or vinegar instead!
Nutrition Rundown
While this salad isn’t gluten free because of the farro, it could easily be made without gluten by substituting another whole and hearty grain. Try quinoa!
This recipe is naturally vegan and vegetarian and chock full of antioxidants from ingredients like arugula, pomegranate, sweet potato and pepitas!
Farro is an excellent source of fiber which helps keep us full, but it also helps keep our digestive system regular and happy! It’s also a wonderful source of complex carbohydrates which provides that immediate satisfaction for the brain, but has the added fiber to be a longer burning fuel for the body. Farro also contributes iron and magnesium to the diet.
How to cook farro
I just followed the package instructions which was to use 1 cup dry farro and 2 cups of water. Bring them to a boil and then reduce down to a simmer and cook for about 40 minutes until all the water was absorbed.
PRO TIP: rinse your farro after it’s done cooking to prevent further cooking!
What to do with leftover farro
I has leftover farro when preparing this recipe, so if that’s the case with you, here are a few ideas to help you.
Serve it like oatmeal with milk and honey
Fry it up like fried rice with veggies and an egg or shrimp
Preheat oven to 425°F; line a rimmed baking pan with nonstick foil. Prepare farro as label directs; cool.
Toss onion, potato, 1 tablespoon oil, ½ teaspoon salt and cinnamon in a large bowl; spread on prepared pan. Roast onion mixture 25 minutes or until golden brown and tender, stirring once.
Whisk lemon juice, parsley, honey and remaining 1 teaspoon salt in a separate large bowl; whisking constantly, slowly drizzle in remaining 3 tablespoons oil to emulsify. Fold in arugula, Mandarins, farro and onion mixture. Makes about 7 cups.
Serve salad sprinkled with pomegranate arils and pepitas.
Move over huge bags of sugary candy, festive fun is more important than ever!!
Can the words healthy and Halloween really belong in the same sentence? According to research published in the Journal of the American Medical Association, they should! Healthy options are now more than ever! This research found that childhood obesity rose significantly during the pandemic, especially in children 5-11 years old. Whether the weight gain was a result of food choices or children being more sedentary, the gain was about 5 pounds which equals the weight increase from the past 20 years! This perfect storm of ready to eat and junk foods, meal fatigue and lack of activity during quarantine makes the focus on healthy holiday celebrations much more important this year.
This article has been adapted from an article originally written for Dole Food Company.
While candy is a focal point for most kids, Halloween truly has a lot more to offer children — spooky costumes, magical activities and the opportunity to incorporate festive meals throughout the day.
Celebrating the holiday season is not about taking any of that away, it’s about enhancing the Halloween experience while pumping up the nutrition in a fun way.
Melanie Marcus MA RD
And truthfully, with a little creativity, healthy Halloween snacks are sooo simple to make and they deliver a huge payoff because you kids won’t have sugar overload, or the inevitable crash afterwards!
Read on for healthy Halloween recipes and activities to enjoy the holiday in a healthy way.
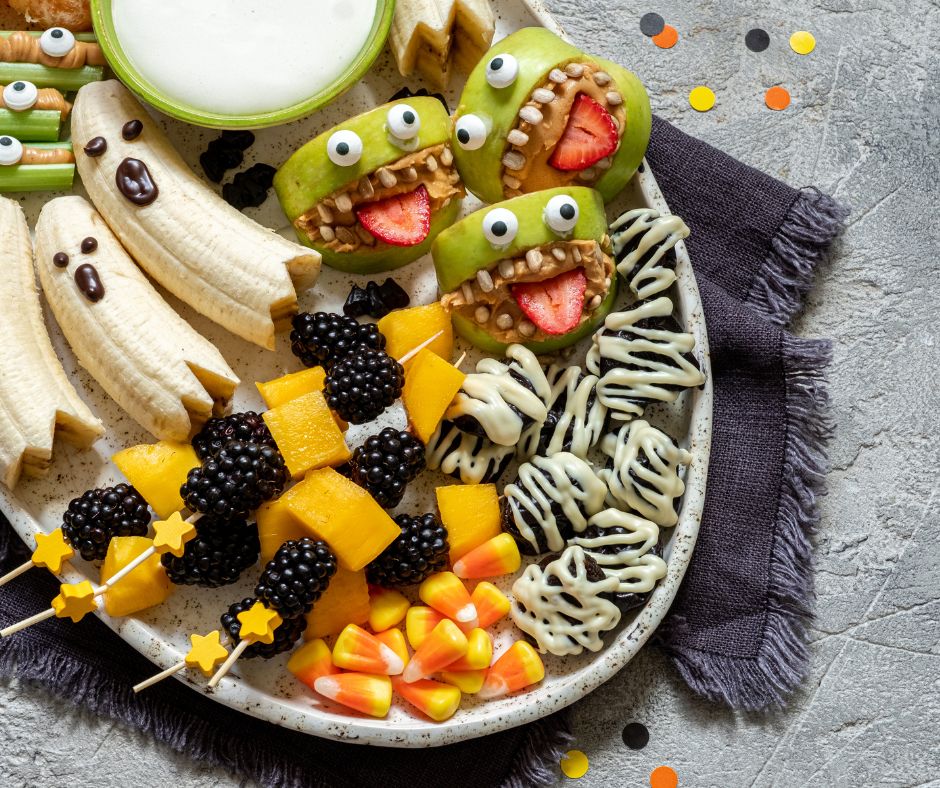
Here are 23 recipes for the whole family to enjoy – without the added sugar!
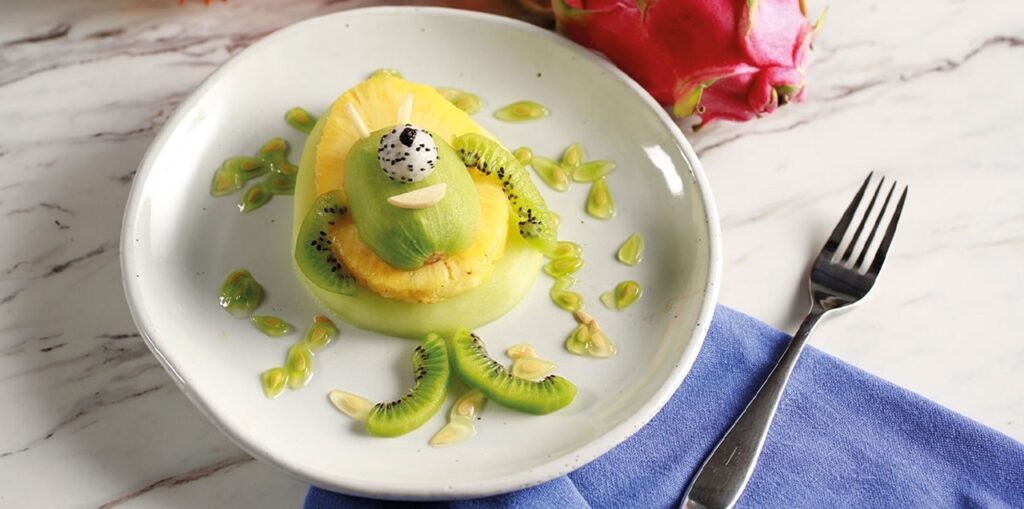
Start your day with a breakfast that any monster would enjoy! These Mike Wazowski Fruit Stack served with yogurt are balanced and super fun!! My kids LOVED them!!
Lunch time can be fun too!! Turn any sandwich into a spider sandwich with this trick – Cut your favorite sandwich into a circle using a large cookie cutter. Lay pretzel sticks between layers (4 on each side) to resemble spider legs! Use olives to create spider eyes on top!
Dole Mike Wizowski Fruit StacksDole Ghost BananasWitching Hour Fro WhipDole Crazy Eyes
Jazz up dinner with Pumpkin Stuffed Peppers. Turn your favorite stuffed pepper recipe into a jack o lantern of a meal by cutting out eyes and a mouth in your bell peppers before stuffing and baking!
Try this Witchy Dip for a fun halloween snack! Turn Dole avocadoes into a spooky delight by serving homemade guacamole in a shallow oval bowl. Top half the dish with blue corn chips to form a witch’s hat. Then add shredded carrots for witch’s hair, a mini pickle for a nose, olives for eyes and red pepper for a mouth!
A creative way to serve energy bites is to turn them into Bat Energy Bites! Take your go-to energy bite recipe and add two candy eyes, plus broken blue corn tortillas for wings for a festive treat!
A go-to healthy snack are banana ghosts. Simply cut your peeled banana in half. Roll in yogurt and unsweetened coconut flakes then use mini chocolate chips for eyes and enjoy!
Another banana based favorite are banana mummies! Wrap your banana in fruit leather and add candy eyes for a mummerific snack!
If you’re little one loves PB&J, try making Dole Crazy Eyes. Start by thinly slice a baguette into ovals and spread with peanut butter. Top with a single banana slice and blueberry and use raspberry jam to create squiggly red lines coming out of the banana.
A great way to get kids to eat their greens is by making Franken-smoothies! Take any green smoothie recipe and pour into a clear plastic glass that has been decorated to look like Frankenstien. So simple and so easy!!
Another simple and fun snack are strawberry ghosts! Just take white chocolate and microwave at 10 second intervals (stirring in between) until soft. Then drizzle horizontally across your strawberries, finishing off with candy eyes! You can also use any other melted chocolate or dark chocolate that you like!
Party guests will love candy corn parfaits. Just take small drink cups or clear cocktail cups and layer diced papaya followed with diced fresh pineapple and topped with your favorite cool whip, whipped cream or even vanilla greek yogurt for a protein packed version! Totally festive and easy! Try them at your next school party!
Make Monster Mouthes with apple slices for lips, slivered almonds and marshmallows for teeth and strawberries for tongues! Super fun!!
Another easy school snack are clementine pumpkins! You can leave them whole and use a black food marker to draw pumpkin faces. Go all the way by slicing small celery sticks to insert in the top for a stem!
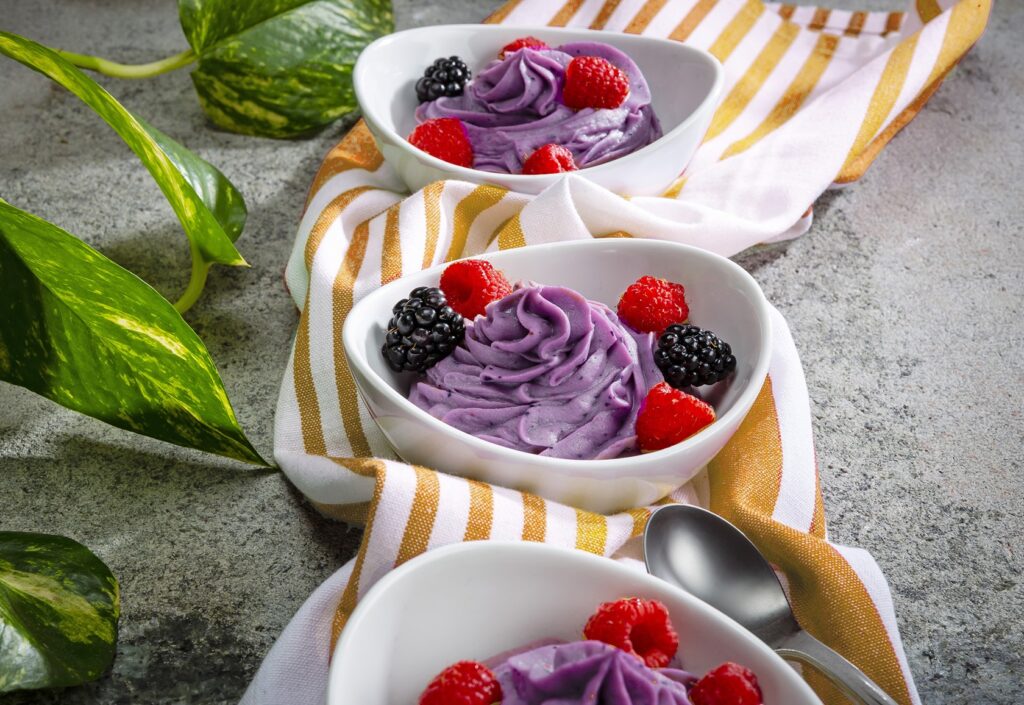
Or check out this Witching Hour Fro Whip inspired by everyone’s favorite Sanderson sisters!
I recently saw a dietitian create witches fingers out of Moondrop grapes which I thought was so cool. The grapes are naturally the shape of fingers and when you add an almond sliver for a nail, it couldn’t be more realistic!!
Little witches brooms are simple to make with mozzarella string cheese! Cut the string cheese into 3 equal sized pieces and cut slices length wise about 2/3 of the way across each piece to make the bristles of the broom. Then insert a thin pretzel rod into the cheese!
How about serving hummus in the shape of a pumpkin! To make “pumpkin” hummus, just take your knife or spoon to create a pumpkin shape and then top with a celery stick or cucumber log for a stem!
Another perfect way to get kids to way their veggies are with Green Slimesicles. Popsicles made with fruit and veg to give green slime a whole new meaning.
Create a Halloween veggie skeleton! This one is easy- just use your imagination to create a skeleton with fresh cut vegetables! The sky is the limit! Use
Serve up your greens with these intimidating Meanies! The concept will feature your favorite salad in classic Halloween style, and they’ll add flair to your table scape too!
Wash everything down with a deliciously scary mocktail! These Sparkling Ghouls are complete with cranberry blood!!! eek
Dole Sparkling Ghoules
What to stock up on to make Halloween snacks a breeze
Toothpicks
Candy Eyes
Chocolate in various colors
Parchment Paper
Mini chocolate Chips
Mini marshmallows
Slivered Almonds
Black food marker
Clear plastic cups
Straws
Make a Halloween Pineapple Jack-o-lantern!
Nothing says Halloween fun like jack o’ lanterns!! But instead of using a pumpkin, why not use a pineapple! You can eat the inside and then create a fresh fruit centerpiece that everyone will be talking about!
Cut the bottom of the pineapple off using the serrated knife, then cut around the inside edge of the pineapple, keeping the walls of the pineapple about 1" thick for support.
Use the knife and spoon to remove the pineapple flesh, including the core, until nice and clean. Place the pineapple flesh in a bowl to eat.
Using the serrrated knife, carefully cut out your face!
Place the finished pineapple on a plate and enjoy the look and taste of your creation!
when it gets dark, place a lit LED candle on the plate under the pineapple Jack-O-Lantern
October is truly an exciting time of year, and if you think about it’s more like a full blown Halloween season, it’s not just one meal or afternoon of sweet treats anymore. There are neighborhood Halloween parties, festive school lunches to make, halloween class parties, annual parades, and costume contests that make for the perfect opportunity to enjoy healthy treats. There will be plenty of sweets to enjoy, but be sure to offer healthier options too!
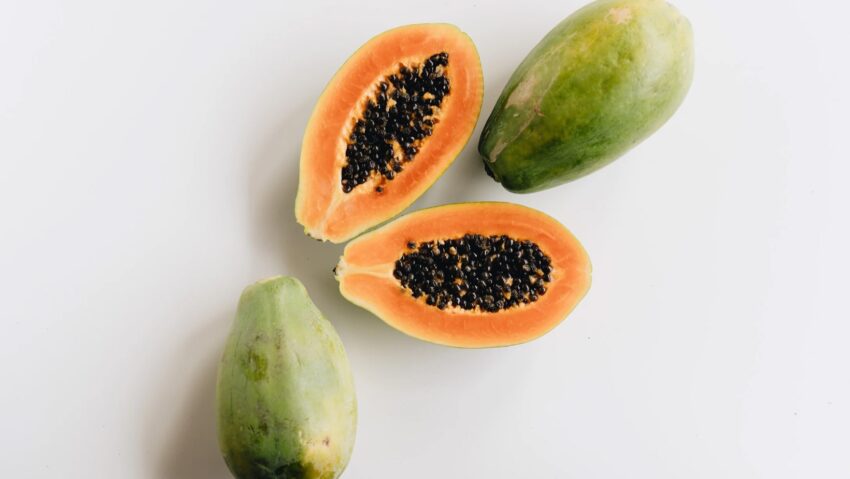
While there are all different types of papaya or “pawpaw”, all of them are native to tropical regions such as Central and South America, Mexico, Hawaii. Local grocery stores near me carry Mexican papayas and the brand they had today was Chula Vista. They are large football shaped fruit, weighing about four pounds and are green when unripe. The inside can range from yellow to deep peach or bright orange flesh that has the texture of mango, with the sweet flavor of melon. They also have hundreds of black seeds inside which are normally removed, but don’t worry, they’re edible! Read on for how to cut papaya in different ways and why you want to do it!!
In addition to Mexican papaya, you may also see Hawaiian papaya in the U.S. Either way, they will most likely be green, so just pick one that is heavy for it’s size with clean, unblemished skin. Ripe papaya should have a sweet aroma and papaya skin should hold an impression when squeezed gently. Handle gently to prevent bruising. And beware, fresh papaya will continue to ripen at home. Peak season is late Fall through early Spring. Though, like pineapple, in the US papaya are available and ready to eat year round.
How do you know when it’s ripe?
When you get it home, it will likely need a few days to ripen to a nice yellow color. Unripe papaya is green and should be stored in a cool dry place. I remember my grandfather wrapping it in newspaper and leaving it on the counter in the cool laundry room to become ripe at room temperature.
Papayas are kind of like bananas, where they’re not so sweet when they’re green, but they’re really enjoyable to eat when they’re deep yellow, even slightly spotted.
Papayas are best enjoyed when they are 3/4 yellow. Overripe papaya may blemish and develop soft spots. If this happens, cut it right away.
How to ripen papaya at home
Store green papaya wrapped in newspaper or in a paper bag in a cool dry place for 2-3 days until it is no longer green, and is turning yellow. The more yellow and spotted the papaya, the riper it is. Once it is ripe, or turning yellow, it should be cut. It can be stored in the fridge to stall ripening, if you’re not quite ready to cut it yet.
What you need to start cutting
cutting board
chef’s knife
paring knife
spoon
optional: vegetable peeler
Slice in half the long way, then scrape out seeds.
How to cut your papaya
Remove the paper from your papaya
Rinse under cool running water.
Using a sharp knife, cut the papaya in half, longways.
Then cut off the ends of the papaya.
Using a large spoon, remove the black seeds and discard, or set aside to add to salad dressings for a peppery bite!
At this point you can use a melon baller to scoop out kid friendly rounds!
OR I like to use a chef’s knife to cut into long strips, about 3/4 inch thick. For me, this is the simplest method.
Then use a paring knife to remove the papaya skin along with any black spots
Then I either serve in strips or cut into smaller pieces.
I’ve seen people remove the skin of the fruit with a vegetable peeler, but it can be a little cumbersome. If you want to remove the skin before cutting the fruit halves, I recommend turning the “papaya boat” or half, upside down so the flat side is on the flat surface of the counter top so the slippery fruit is more stable.
Slicing and dicing papaya.
What does papaya taste like?
Mexican papaya is firm and juicy, but not quite as intense as Hawaiian papaya, which are much smaller in size.
Papaya has a sweet taste similar to other melons and can have a musky flavor when overripe. If you don’t like the flavor of papaya at room temperature, you may like it chilled.
What do you do with papaya seeds?
The small round black seeds inside the papaya are actually edible! They have a peppery flavor and can easily be incorporated into salad dressings or marinades.
If that doesn’t sound good to you, compost them or discard.
How to serve papaya?
Chilled with a little lime juice
Chop it into a fruit salad with other tropical fruits such as mango and banana
Papaya salsa made with red onion
Use papaya halves as their own bowl! Fill them with tuna salad, fruit, yogurt or cottage cheese.
Add papaya to salad
Consider adding papaya to lunchboxes as an interesting and tasty addition
Add to holiday fruit baskets.
Add a papaya salad to your brunch spread
Pair with grilled meat and seafood for a pop of color and balance.
Add papaya to marinades to take advantage of their natural tenderizing properties
Cut a papaya to pair with food from Indian cuisines
Juice it or add to smoothies!
What flavors go well with papaya?
meat
poultry
smoked meats
avocado
chilies
lime
lemon
tropical fruits
coconut
ginger
How to store papaya?
Store in an airtight container for several days in the refrigerator.
Chunks can also be frozen. I recommend freezing them on a large sheet pan first. Then place frozen chunks in a zip lock bag, remove as much air as possible and then place back in the freezer for up to three months!
How does papaya fit into my macros?
Just like most fruit!
Make a mental note to fit it into your next regular or low macro days!
Portion it out into 1 or 2 cup servings for an easy grab and go lunch!
1 cup : 16g Carb, 2g Fiber, 1g Protein, 1g Fat
Papaya Nutrition
Papaya is low in calories and rich in nutrients and has a lot of health benefits. List most fruit, they’re low in calories and a good source of fiber and other important nutrients.
Just one cup of pieces has…
62 calories
1g protein
.5g fat
16g carb
2g fiber
29mg calcium
264mg potassium
53mcg folate
68mcg vit A
88mg vit C
3.77mcg vit K
2650mcg lycopene
And so much more!! 2
They’re high in vitamins A, C, K and folate, fiber and potassium!
They’re also rich in antioxidants carotenoids and phenols.
It also contains an enzyme called papain, which aids digestion.
Papaya was ranked first in a study that compared 40 different fruits for their Dietary Recommended Intake of nine vitamins, potassium and fiber.3
It’s combination of vitamins A and C, fiber and potassium make it a super heart healthy fruit.
Red flesh papaya fruit are a good source of lycopene which is an inactive source of Vitamin A that has been linked with reduced risk for lung, prostate and stomach cancers.1
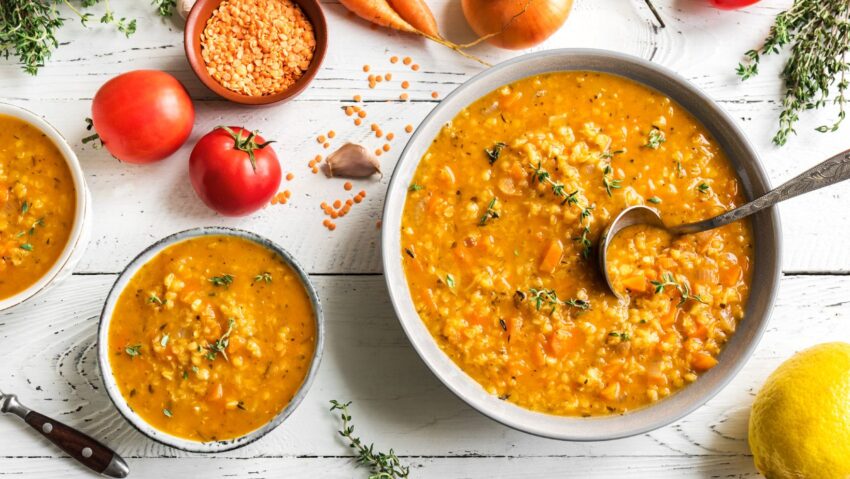
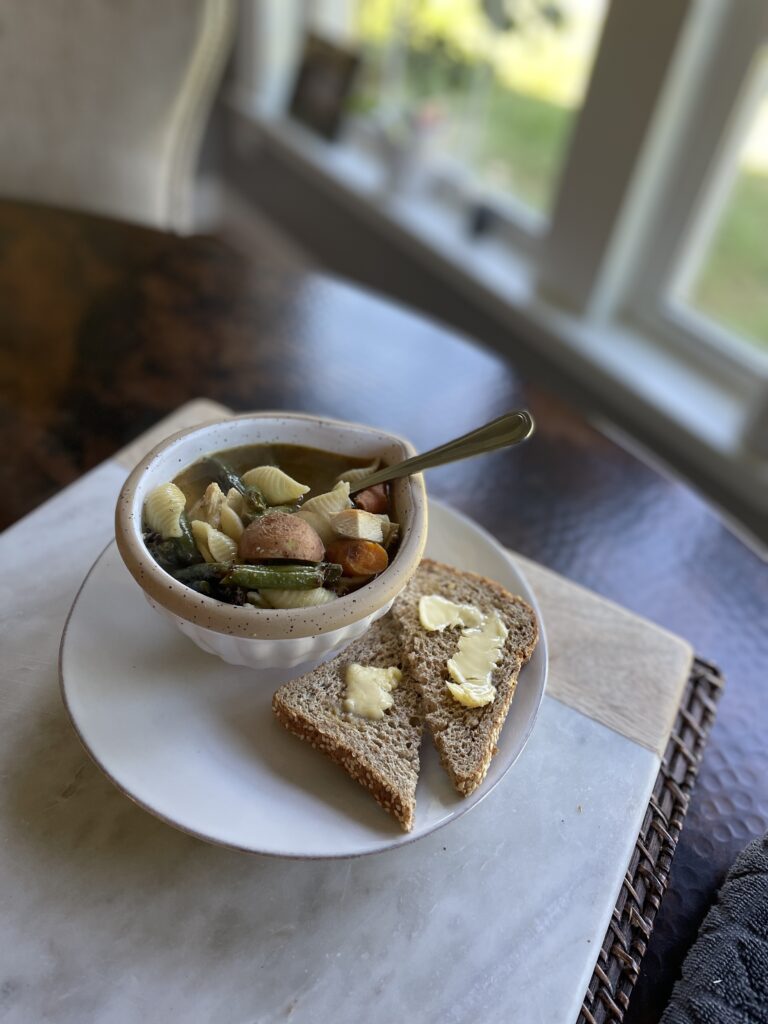
I got home from Costa Rica last week the seasons had turned. It was chilly and windy and seemed as though sweater weather had set in. As I went through my pantry to get a few ideas for weekly meals – the bright split red lentils stood out at me. I got them at a European market on the other side of Charlotte over the summer, but now is their time! I saw a red lentil soup recipe from Trader Joe’s that is simple and easy… but I used it as inspiration to make this one, which is even easier and can be made on busy weeknights without much effort. If you’re in the mood for a hearty soup – READ ON!
They have a very mild flavor, even slightly sweet which makes them a good introduction to the lentil family for you or little ones!
Ingredients and substitutions
Split red lentils – aka red split lentils, these little guys cook up quickly so I don’t recommend substituting with other types of lentils such as brown lentils, yellow lentils or green lentils. You could, but the cook time will be longer, and the beauty is that it’s an easy lentil soup recipe for any weeknight. It has simple ingredients and doesn’t require a long cooking time to ensure everything is cooked properly.
I do suggest however, to rinse lentils in a fine mesh sieve under cold water. Run your fingers through the lentils to be sure small stones or other debris are not included.
If you can’t find split red lentils, plain red lentils cook quickly and will work just fine in this recipe!
Chicken broth – You can substitute with 32 ounces of vegetable stock or water and bouillon cubes if all else fails!
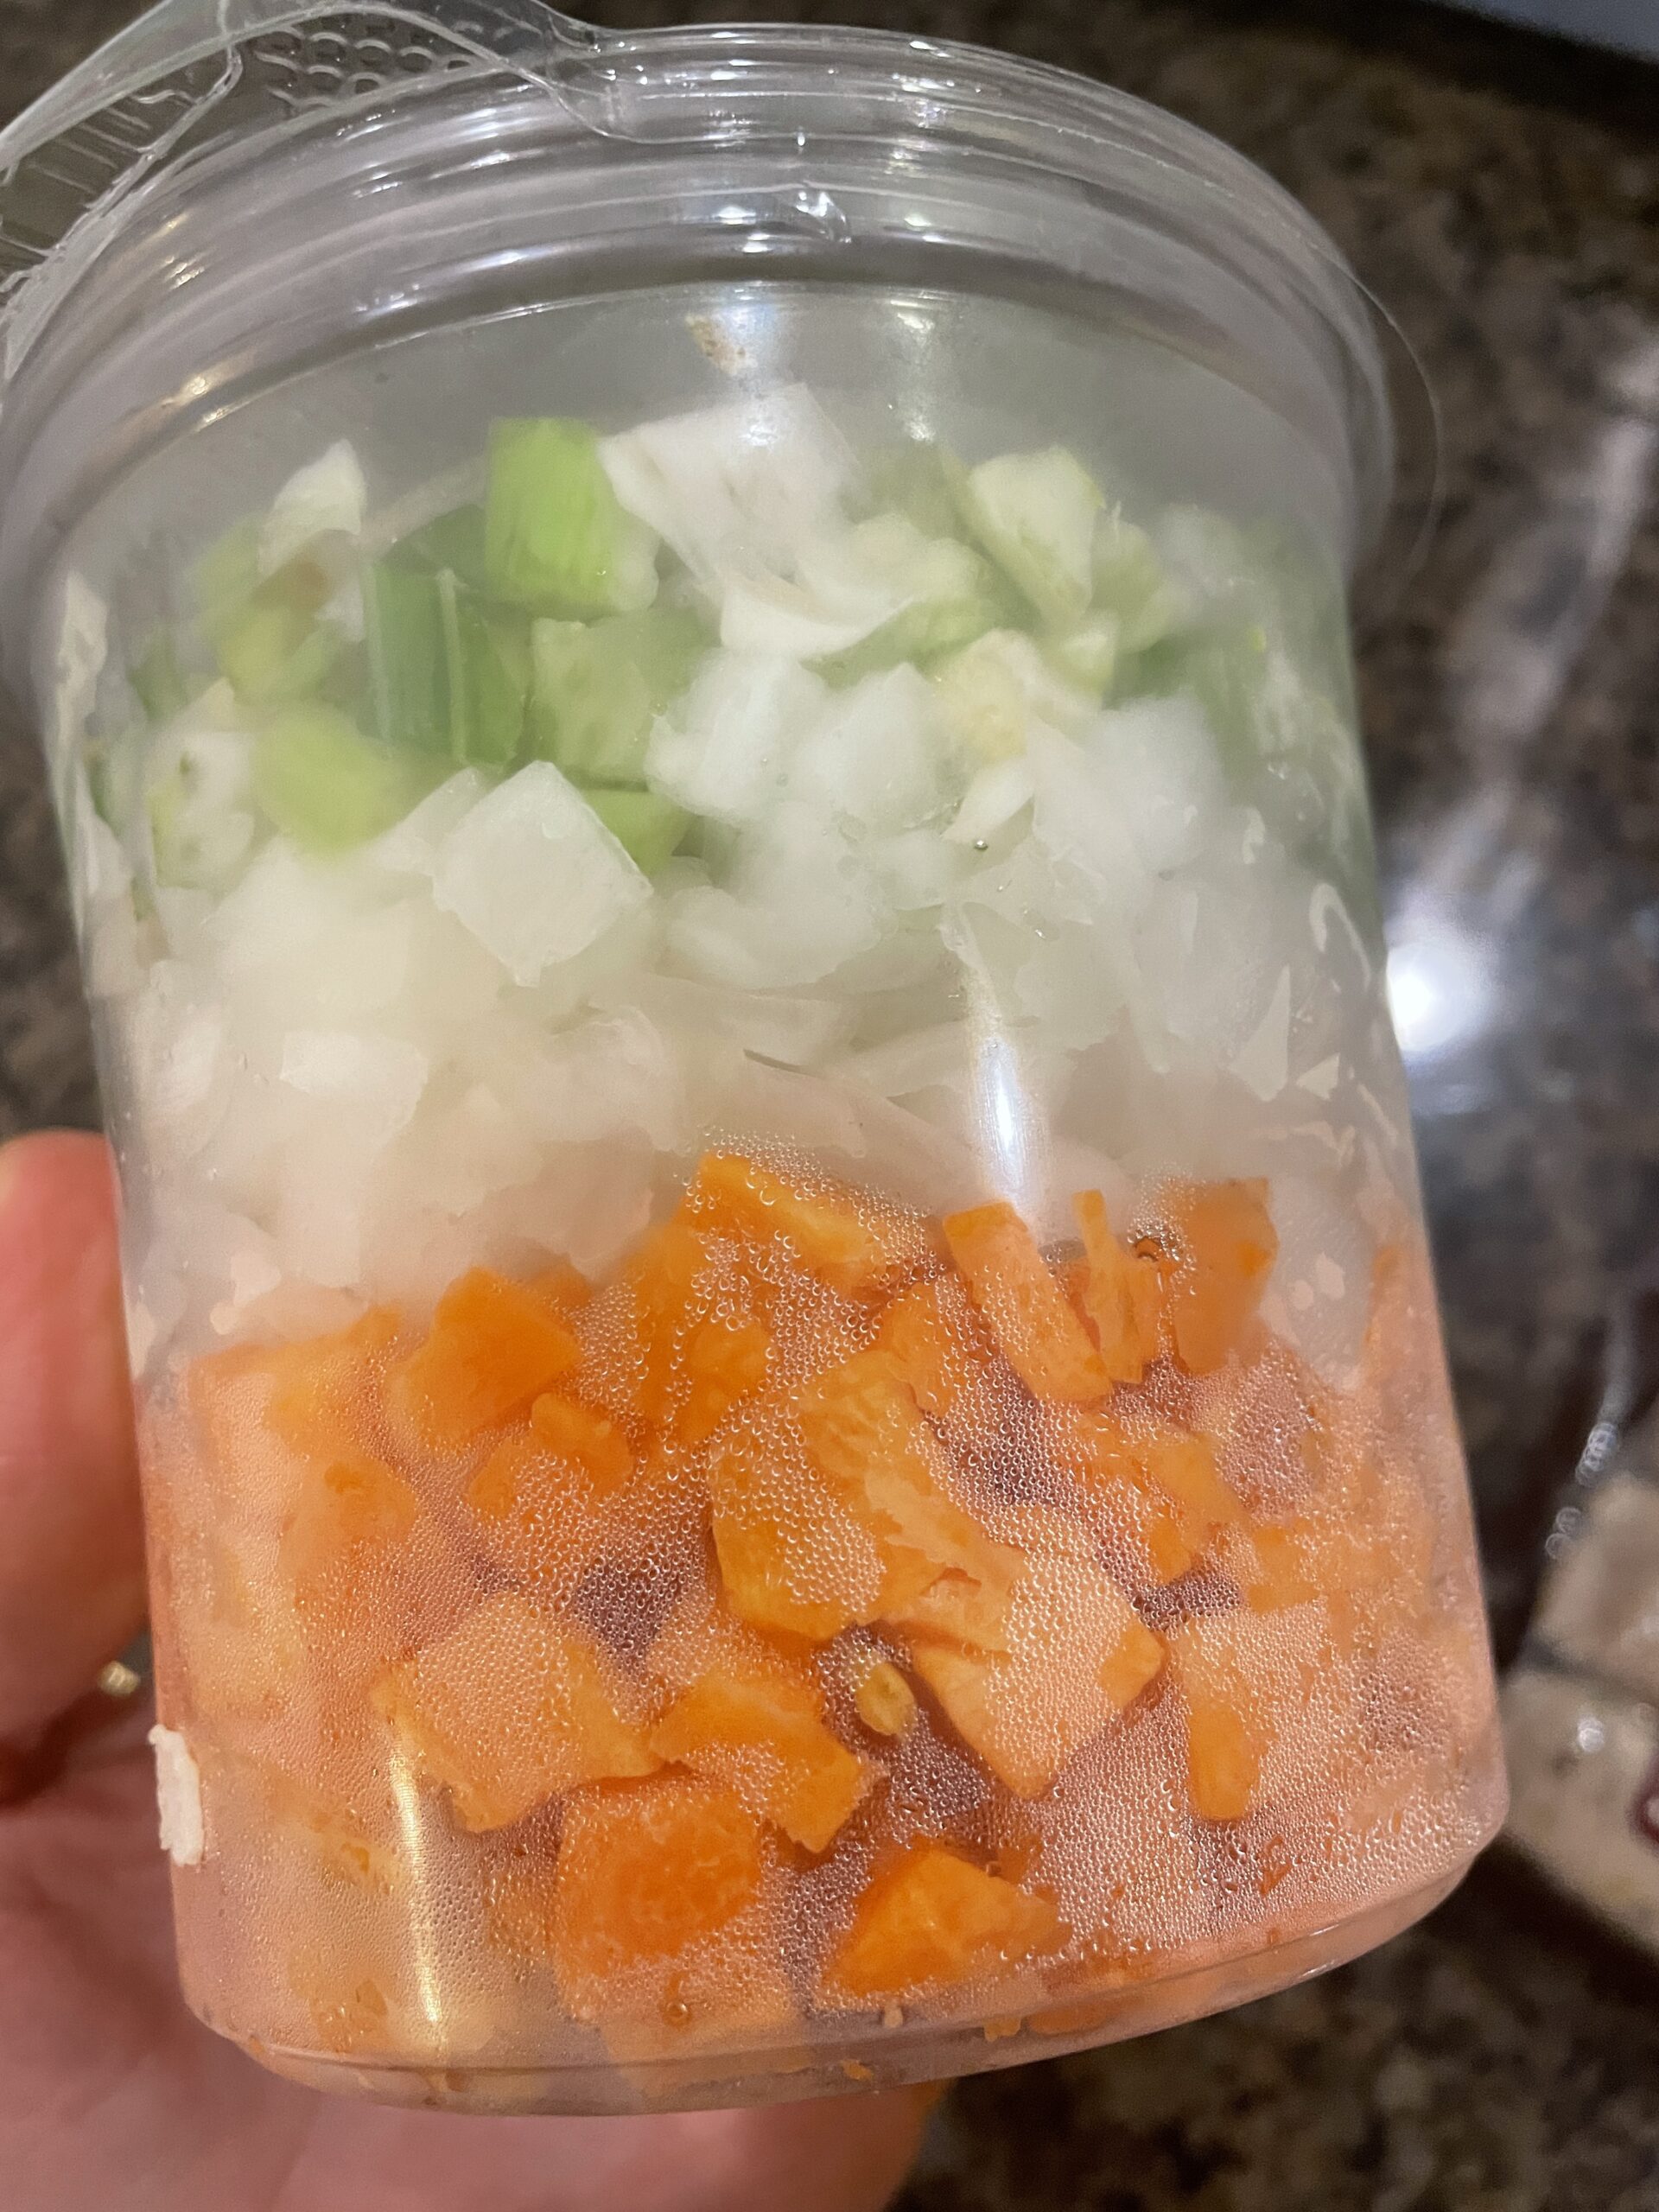
Mirepoix – This is my major shortcut. The original recipe calls for just onions, but can you ever go wrong with carrots and celery too? If I go to Trader Joes, during the winter, I always pick up pre-cut mirepoix. This way I can literally throw together a healthy meal that can be eaten right away or stored in the freezer for a quick meal. Alternatively, I could cut my veg the old fashioned way or blitz them in the food processor (but that’s less appealing because it’s more to clean).
Yellow or green squash – For me, these say “summer”, but they do add a nice texture to this soup, and obviously a lot of nutrition. You could leave them out or substitute with a few handfulls of baby spinach.
Can of tomato sauce – This helps contribute to that beautiful orange color, but if you don’t have them a can of diced tomatoes or even a few Tbsp of tomato paste will do. Tomatoes add umami to any dish, so don’t skip them!
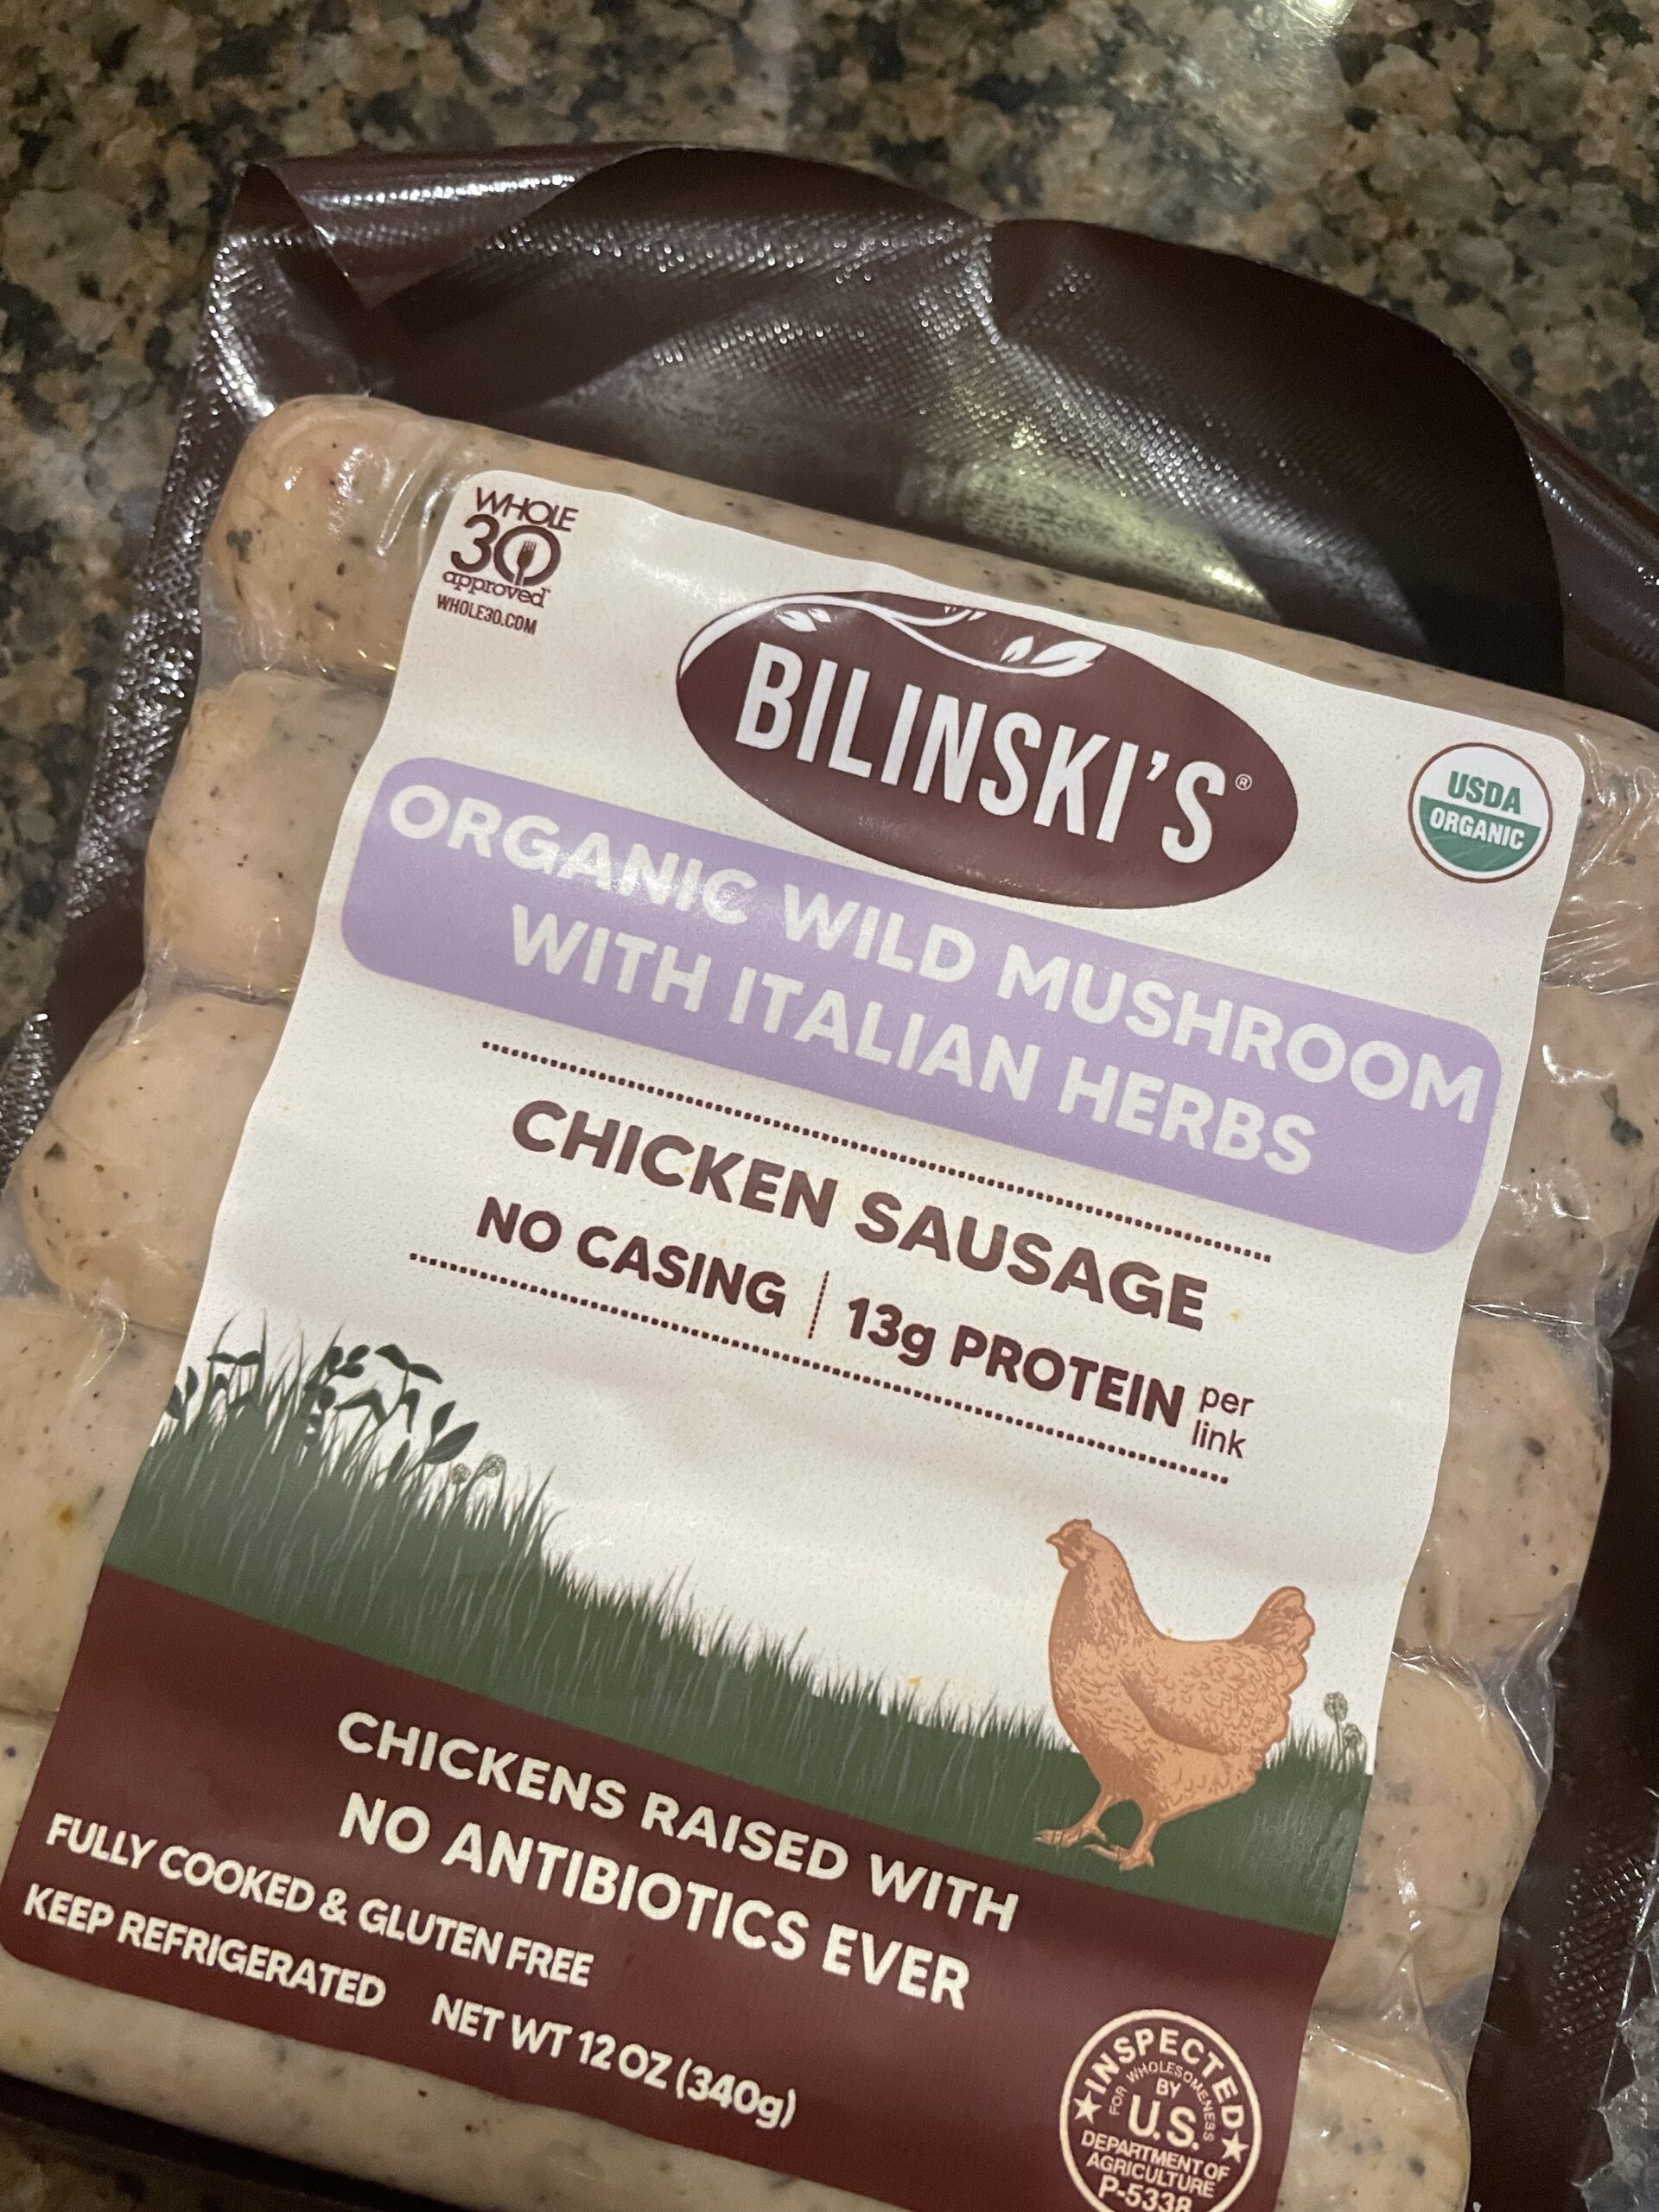
Chicken sausage – This ingredient could be left out, but I think it adds great flavor plus lean protein! I opt for a variety with mushrooms, but any flavor you like will work well. Alternatively, you can add any of your favorite plant-based protein options just before serving.
Olive oil – You can use any neutral oil like avocado or canola, but olive adds great flavor. Use it if you have it. Butter will work too!
Salt and black pepper – This is obvious, but my secret ingredient is Seasonello. I love this stuff and I’ll have to dedicate an entire post to it. It’s an Italian seasoning salt that makes every dish feel homey to me. I highly recommend buying it as a seasoning pantry staple.
Using a large pot or Dutch oven, heat olive oil over medium-high heat, add mirepoix and zucchini. Let it cook until translucent.
Next add the sausage. Let it cook until browned. Then add remaining ingredients including lentils, stock, tomato sauce, salt and pepper and cook over medium heat until lentils are fully cooked through.
Variations
You can easily improvise with this recipe and add anything from sweet potatoes to coconut milk to deepen the flavor. Indian spices, curry and fresh ginger are great additions to this soup!
You can also make a smooth version by reserving your sausage after cooking. Then simply use an immersion blender to blend the soup until it yields a smooth creamy consistency. Sometimes it is worth the extra step, but other times, I want something that has a little more texture.
You’re probably wondering if you can make this in an instant pot. And you probably could. Just be sure to cook your vegetables well and brown your sausage before adding the rest of the ingredients. But it won’t save you that much time, this recipe can be done in under an hour.
Can I make this dish vegetarian?
You sure can! Leave out the sausage- don’t worry you’ll get plenty of protein from the lentils! And of course, swap in your favorite vegetable broth instead of the chicken broth.
What to serve with red lentil soup?
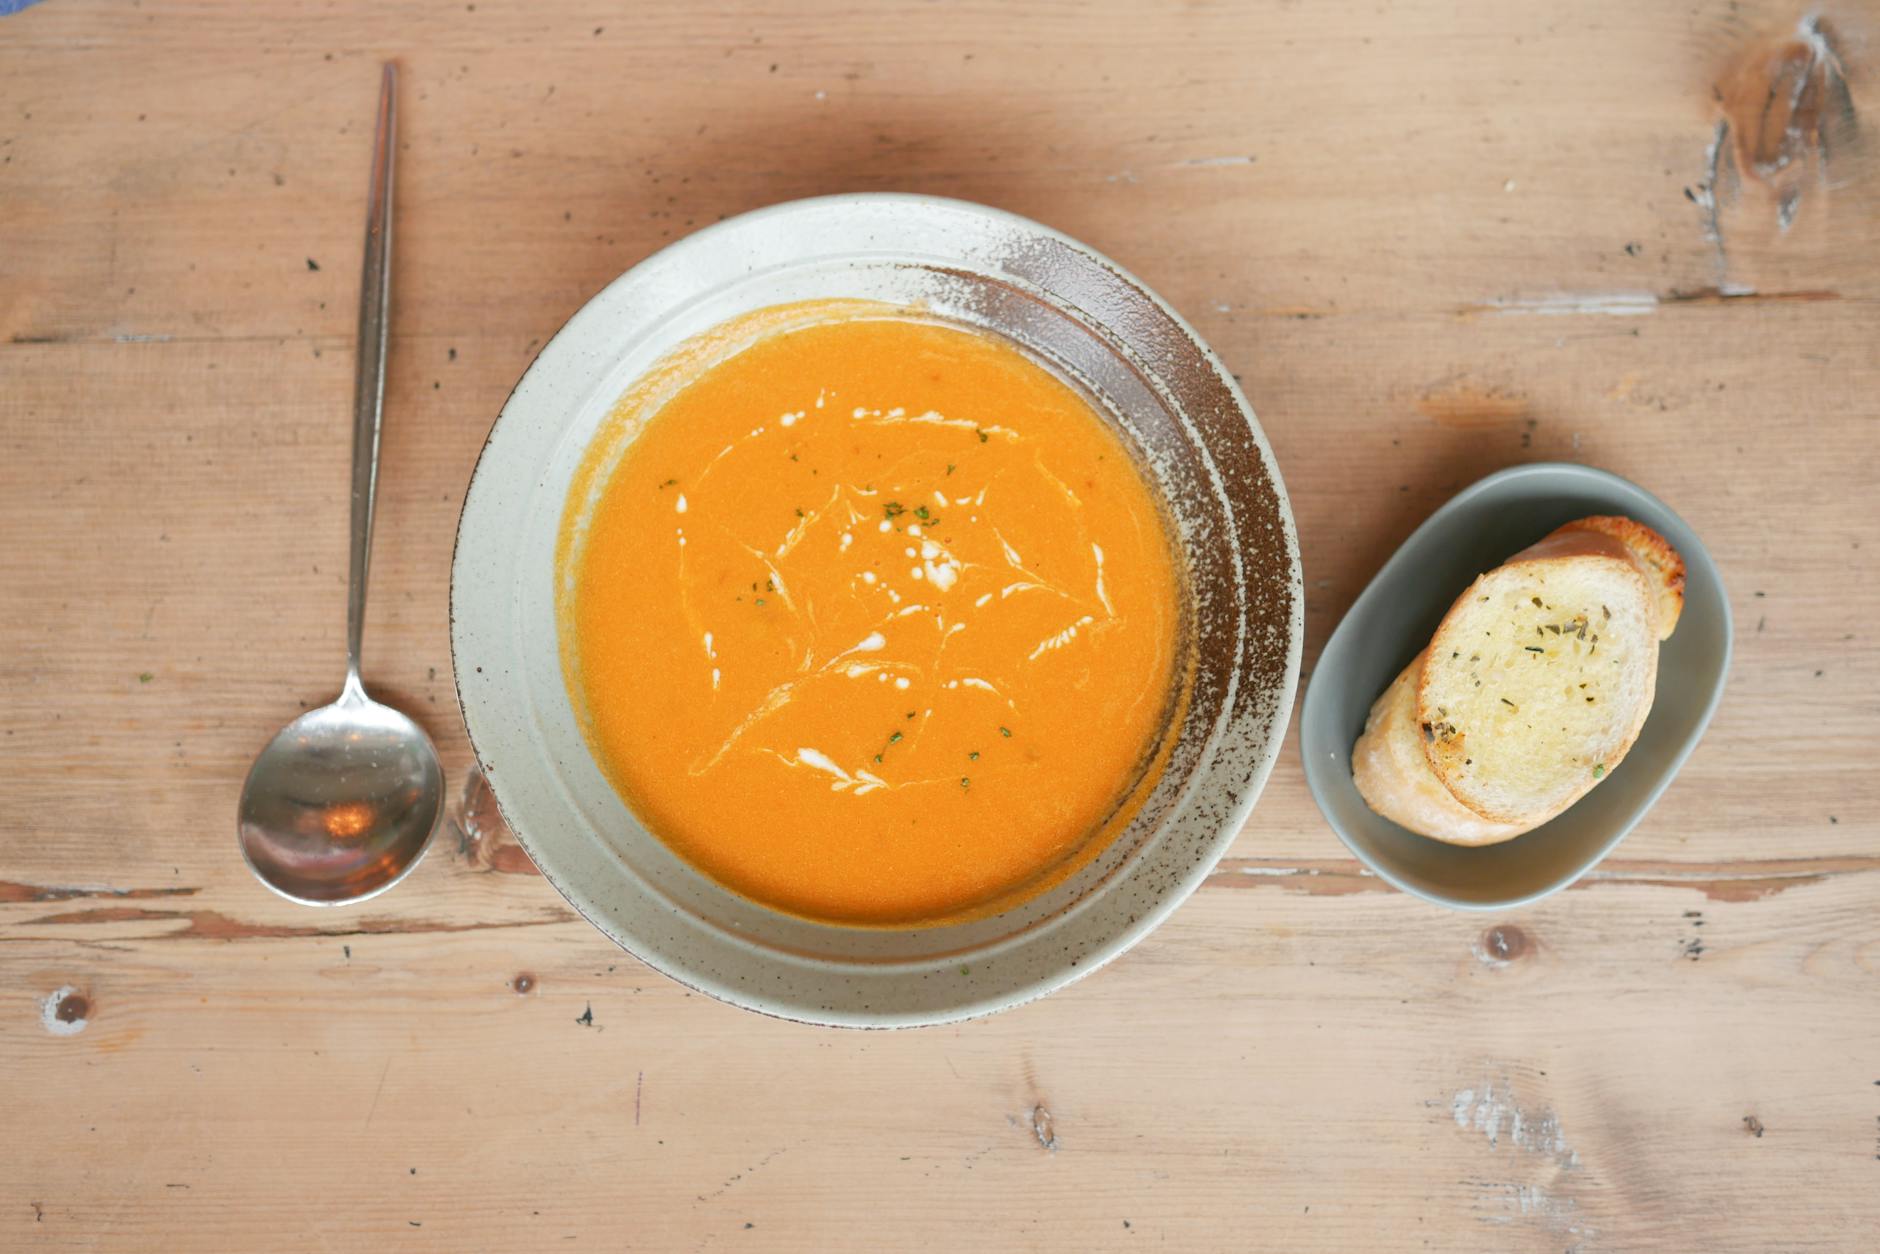
Crusty bread or pita
Side salad
Greek yogurt or sour cream
Squeeze of fresh lemon juice or lime juice
How to store leftovers
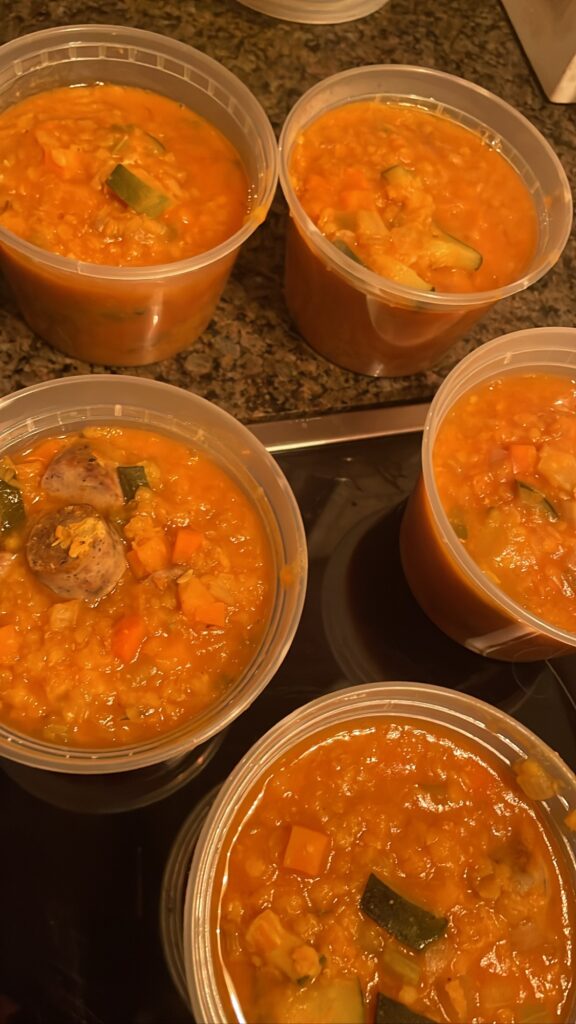
After you let the soup cool, I recommend dividing into 4 equal portions in 1/2 quart containers. I love to re-use to-go containers here! Once they’re in the fridge you can store in an airtight container for 4-5 days or label and freeze for another day. The portion sizes are hearty and it tastes even better the next day!
What else can I make with red lentils?
While I haven’t tried all of these… I think they’re worth experimenting with to use up your bag of lentils!!
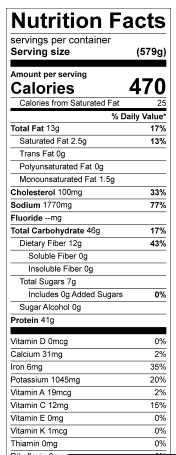
Just 1/2 cup serving of these red lentils have 358cal, and 24g protein. That’s equal to the protein you’d find in any poultry, meat or seafood serving! It also delivers an important source of 11g fiber 7g iron, 650mg potassium, 48mg calcium, 59mg magnesium, 3.6mg zinc.1
Fiber is a superstar in this dish. Each serving provides 12 of the 25-35 recommended grams of fiber you need in a day. Fiber helps keep us regular and helps support blood sugar control and cholesterol levels! We should all be aiming to reach recommended fiber intake daily.
Protein is the last nutrient I’ll call out for this recipe. With 41g per serving, you can be sure you’ll feel satisfied after eating this soup! The lean protein and fiber combo won’t leave room for any cravings in-between or after meals. Let me know if you try it!
How does this recipe fit into my macros?
I like to divide this recipe into 4 portions. If you like smaller portions, I’d recommend dividing into 6 equal portions.
With 4 portions you have 470 calories (which fits well into my macros as a hearty meal). It has 13g fat, 48g carbs, 12g fiber and 41g protein! It’s ideal for a regular macro day!
To say life with kids is hectic, is a complete understatement. Between school, work, sports, birthday parties and family visits there is always something going on – and I think moms everywhere will agree with me, time for meal planning is precious. So in the spirit of sharing things that are too good to be true…read on for my experience with these Dole Sheet Pan Starter Kits.
So in the spirit sharing things that are too good to be true… read on for my experience with these Dole Sheet Pan Starter Kits.
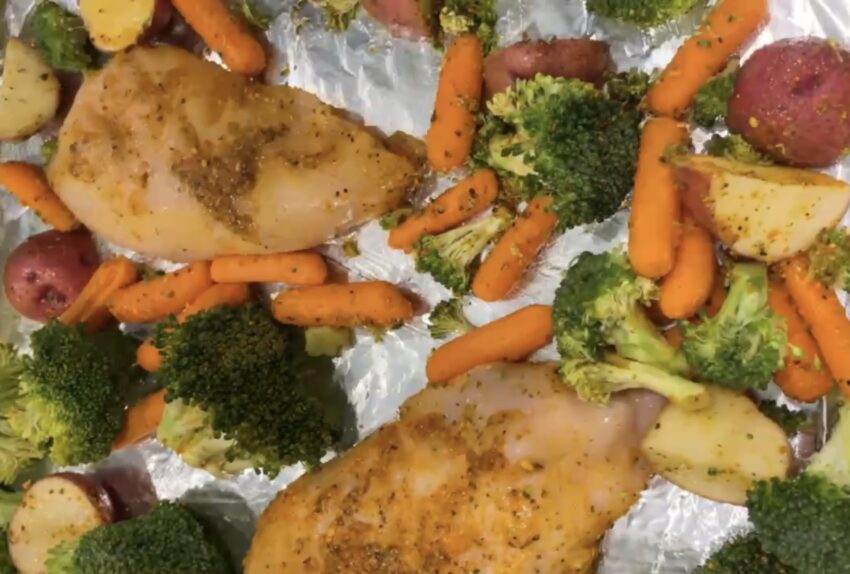
Ever since culinary school, I loved roasting. My culinary school partner in crime, Tracy, observed early on, that there’s nothing I loved more than a good roast – or anything that can be made in the oven. And what’s not to love? It’s an easy, hands off, clean way to get dinner on the table using a conventional sheet pan. So when Dole came out with a new line of sheet pan starter kits I was ecstatic. There are three popular flavors, including French Onion, Homestyle Roasted Herb and Lemon Parmesan flavor varieties. They include a combination of ready-to-roast vegetables including red potatoes, whole baby carrots and broccoli florets or green beans, plus a delicious seasoning packet. All you need to do is add your favorite choice of protein to the fresh vegetables and roast for 30-35 minutes.
And if you’ve been getting recipe inspiration online (AKA Pinterest trend data), you know about the growing sheet pan meal trend. It’s everywhere.
Sheet pan dinners make for easy cooking and even easier cleanup!
So on their own, these unique products fill a consumer need and offer a flavorful meal experience, but it actually gets better! Each of the distinct flavor varieties can be transformed into a completely different meal. Let me explain.
Bonus- with these sheet pan starter kits you can completely transform dinner into soup or a savory pasta meal with just a few additions!
When you make your new sheet pan meal starter kits at home, you’ll get a perfectly seasoned and balanced plate that includes protein, carbohydrate and fat (we recommend olive oil). But, we experimented further with the kits to see how we could transform them into soups and wraps, meals that could be made on the grill, even breakfast sheet pans, perfect for brunch! I’ve personally tried them all and couldn’t believe that one truly got better than the next.
Just in case you’re new around here, I am a registered dietitian and nutrition and health communications manager for Dole Food Company. Dole generously covered the cost of ingredients for these recipes, but all of the opinions are my own!
Use Dole Sheet Pan Starter Kits to make healthy meal solutions!
The combination of lean proteins with fresh Dole vegetables is more versatile than you would think and the perfectly paired seasoning packet provides more than enough to create these dishes below. Each of these recipes can be found at Dole’s website.
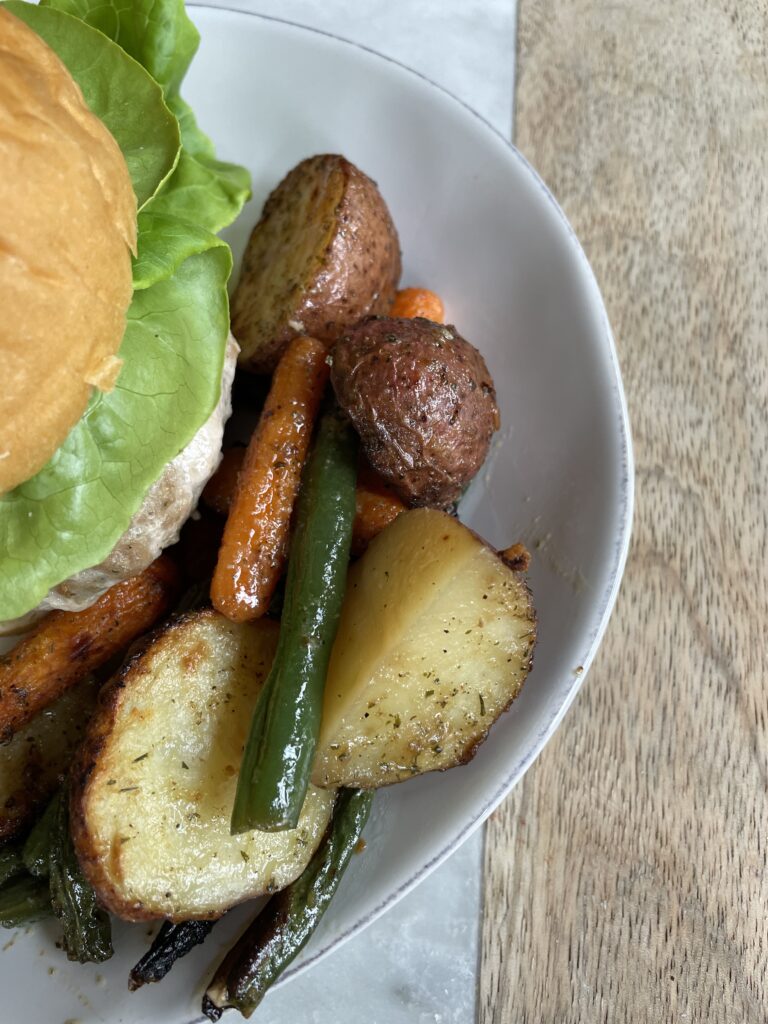
French Onion Turkey Burgers with Veggies
This was a no brainer! Combining the seasoning packet with extra lean ground turkey was easy to do and it all roasted together in the pan. The simple addition of truffle aioli (I used a vegan version from Trader Joe’s) was so good!! It’s seriously crave-able.
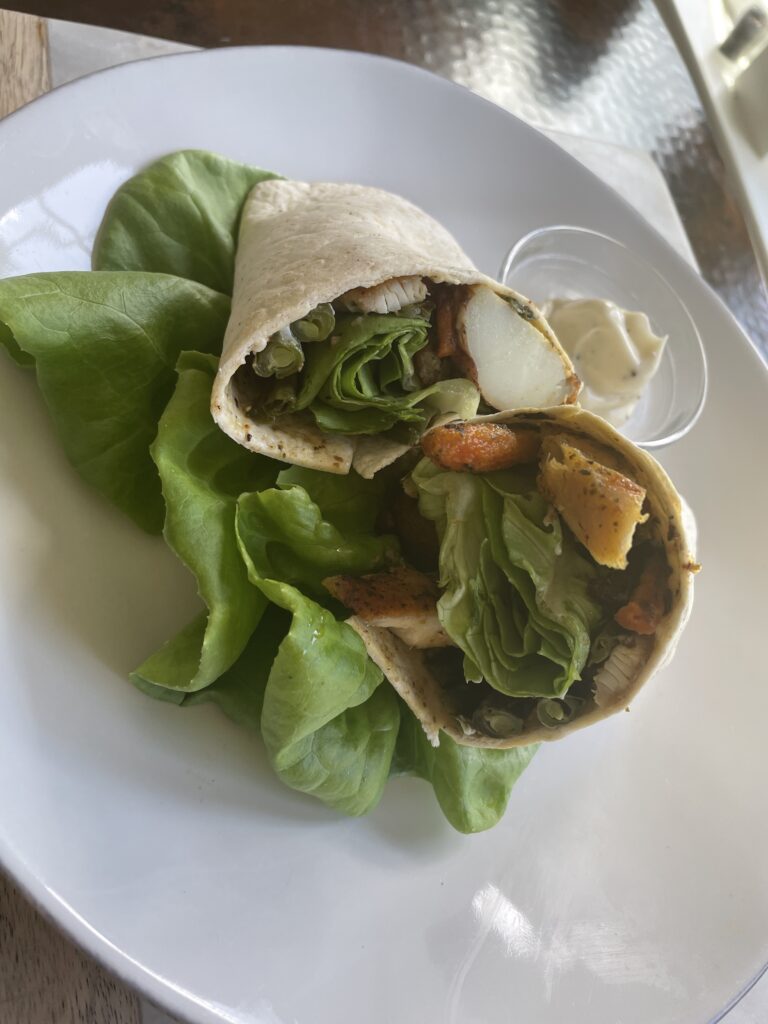
Sheet Pan French Onion Sandwich Wraps
I loved this for leftovers. (If you have any!). Just reheat them and drop into your favorite wrap with mayo.
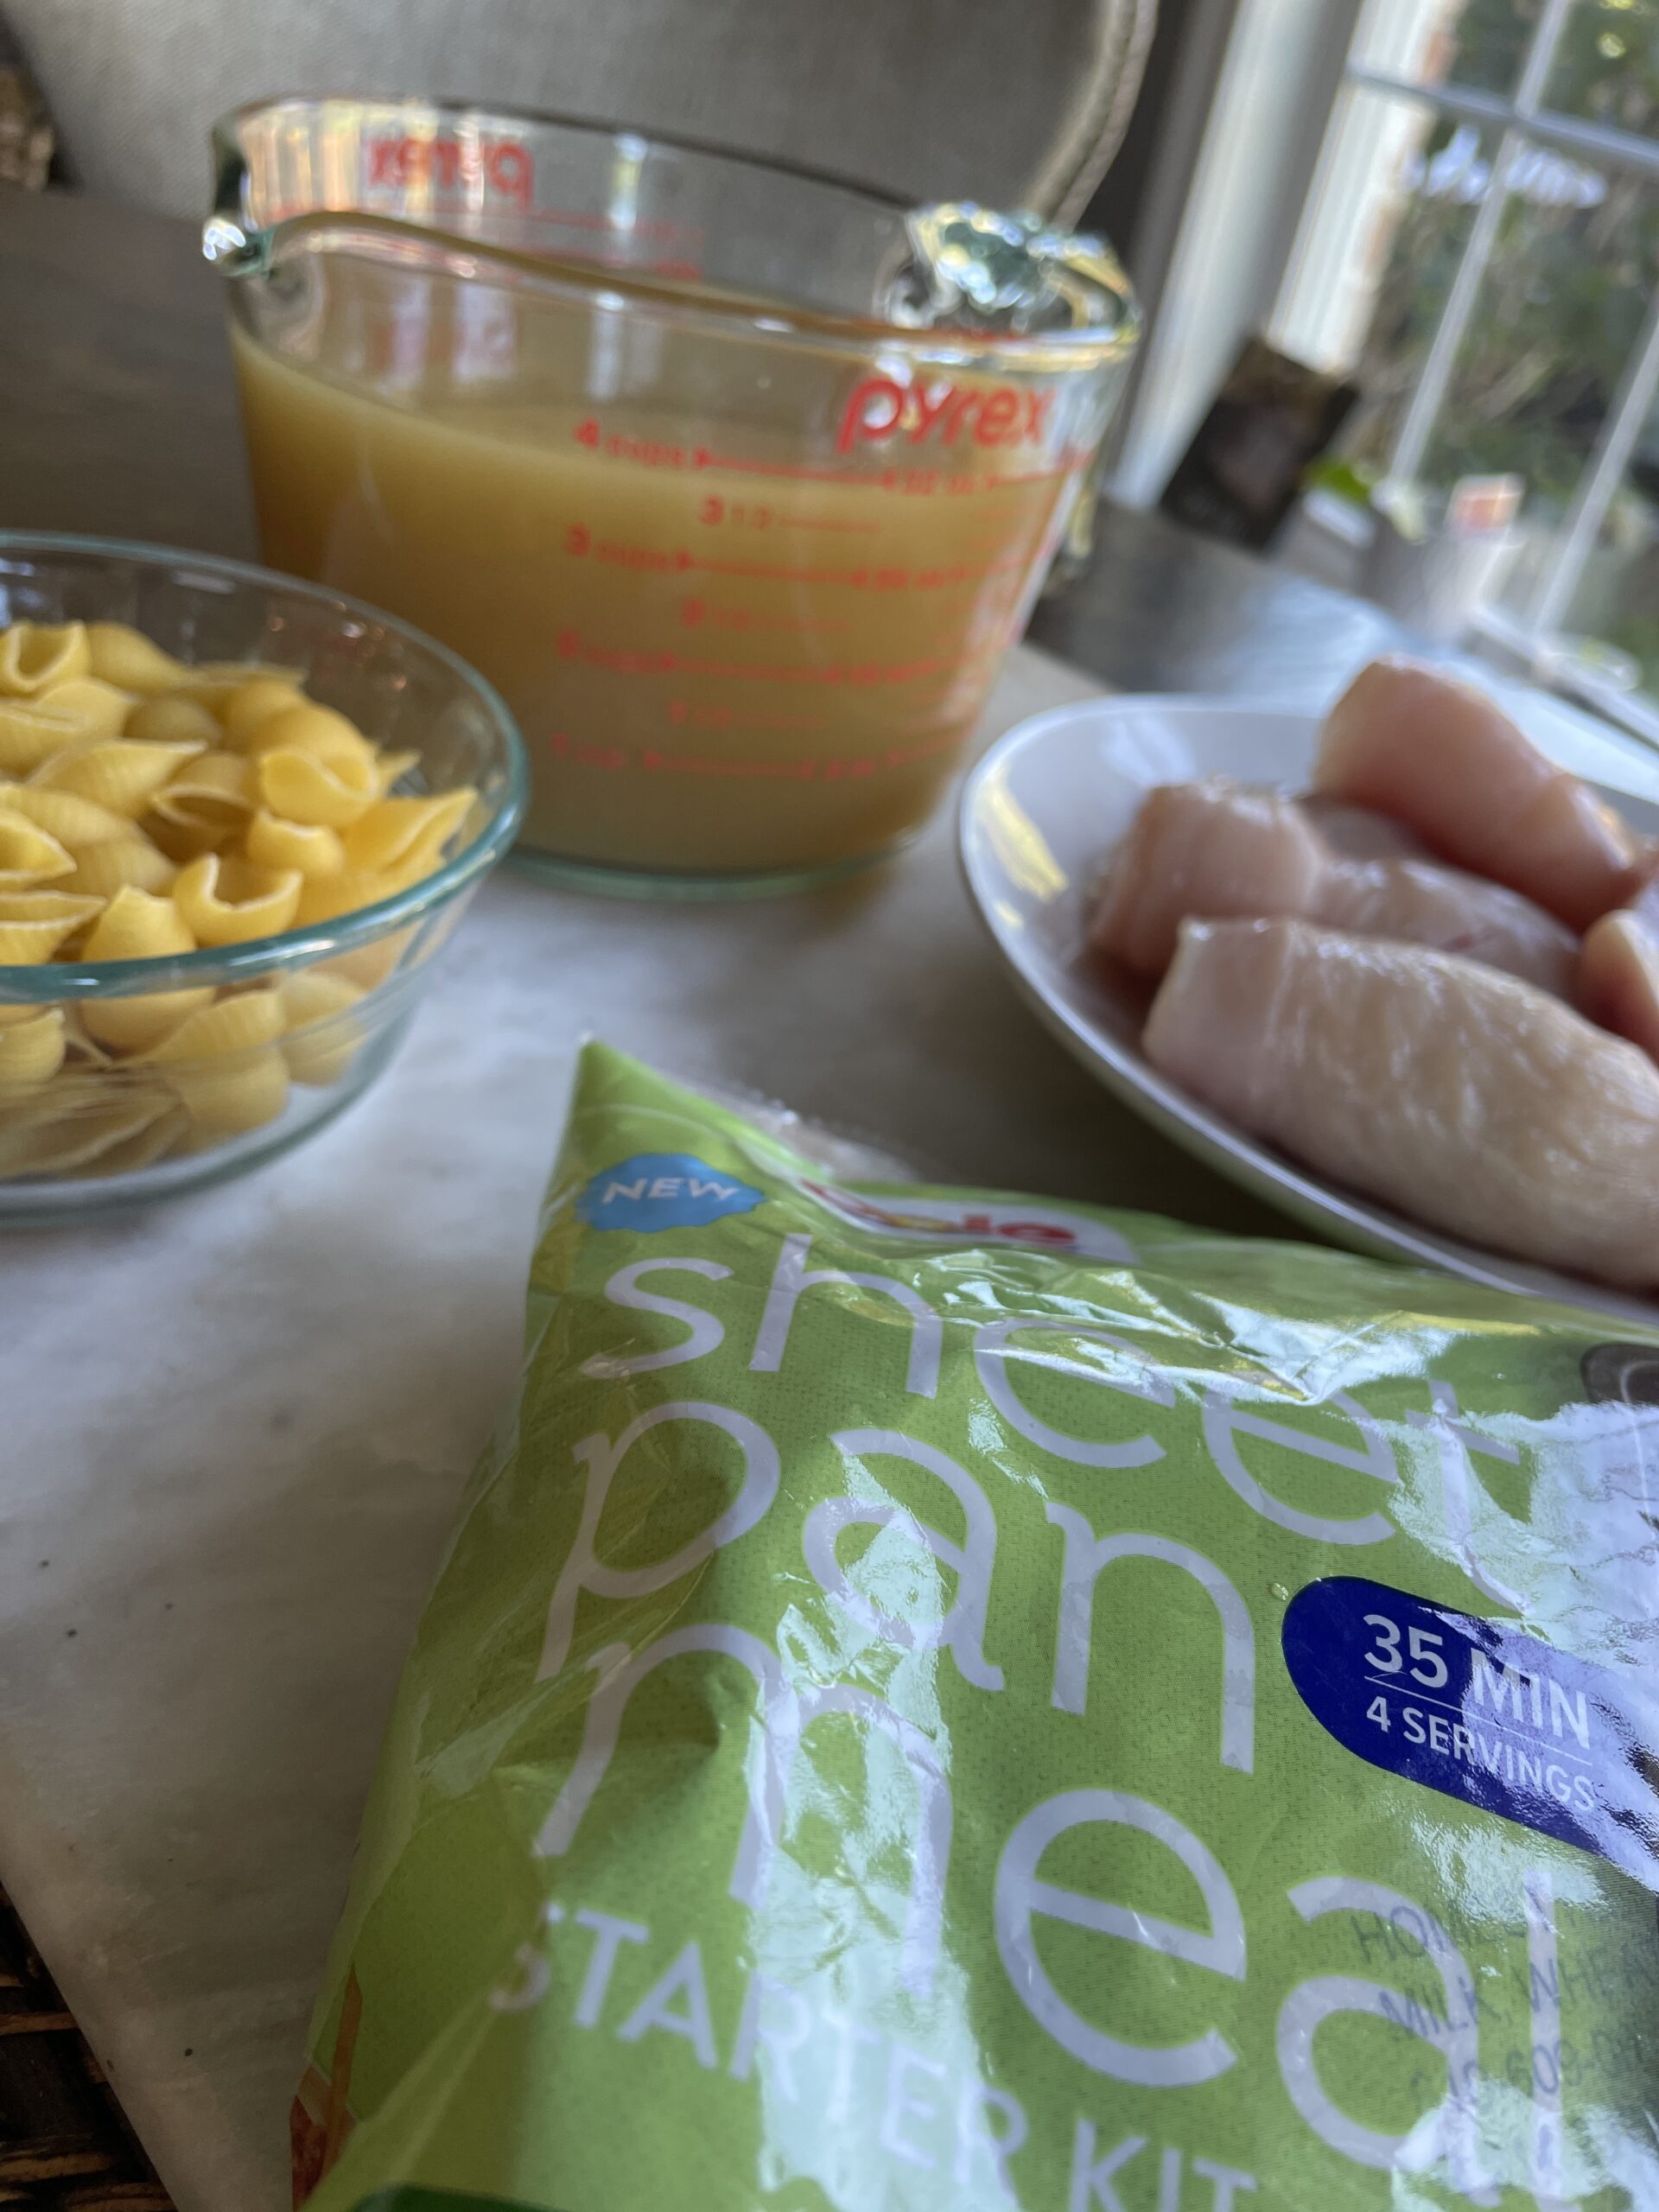
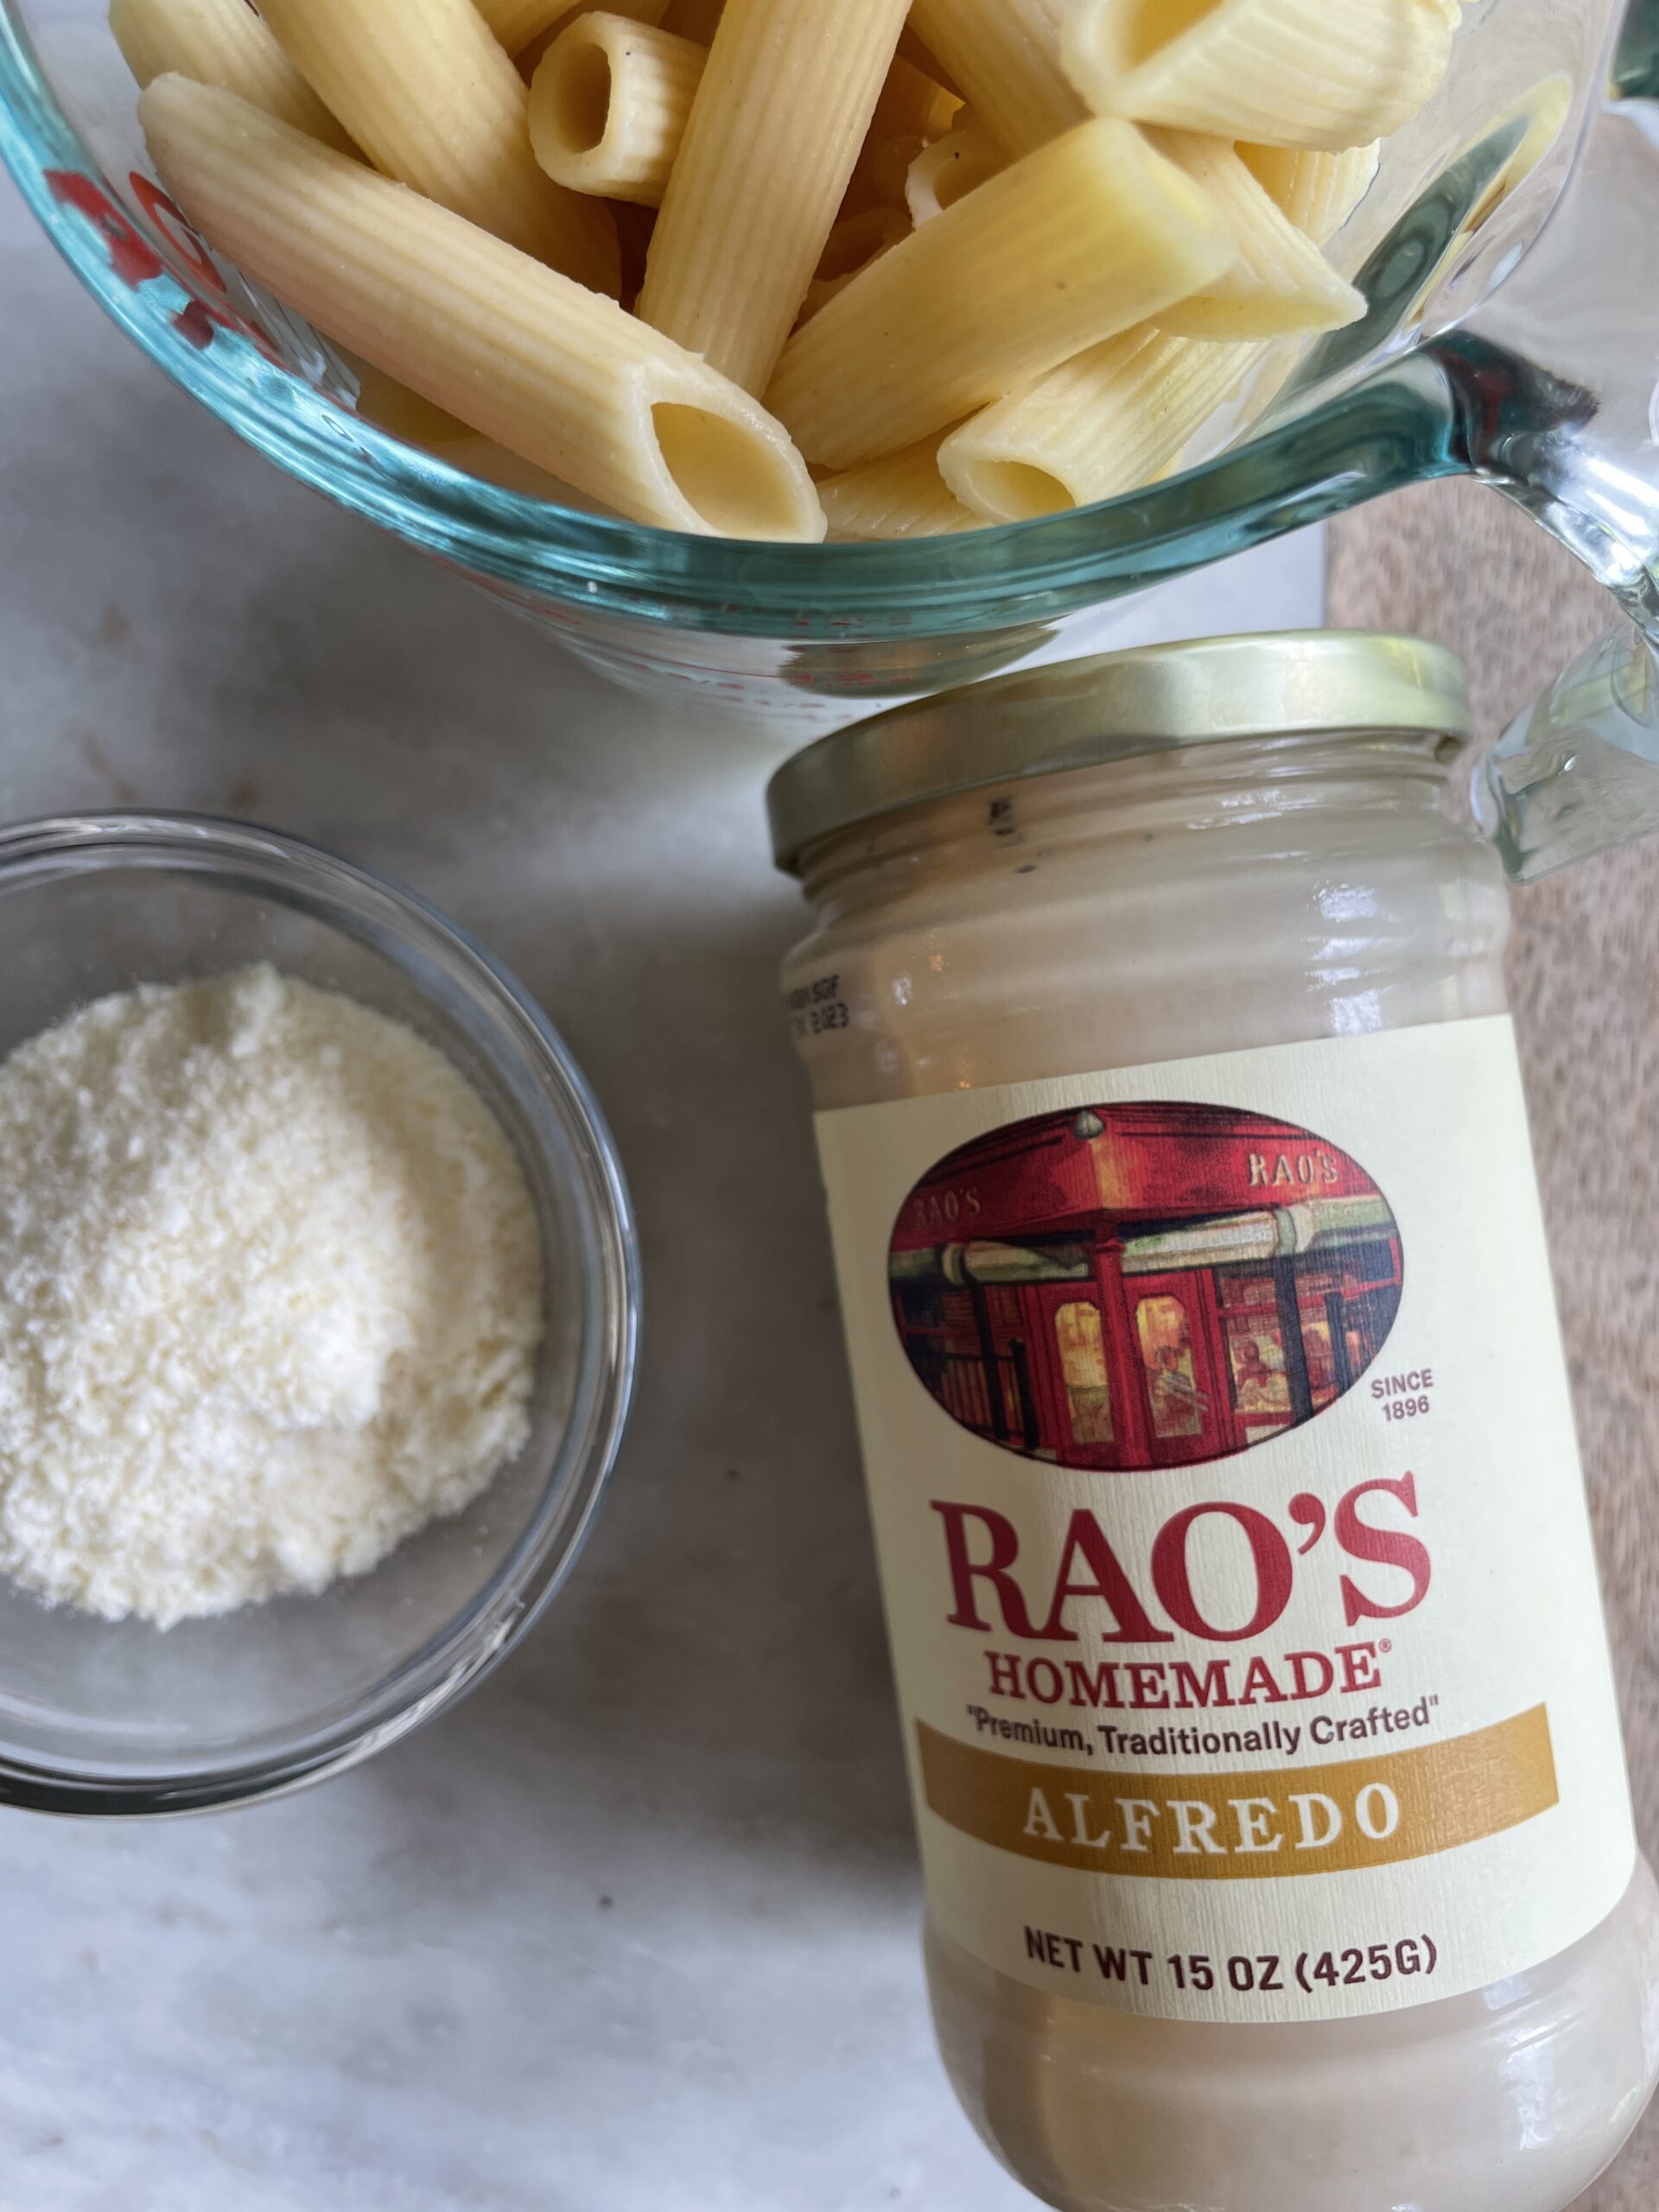
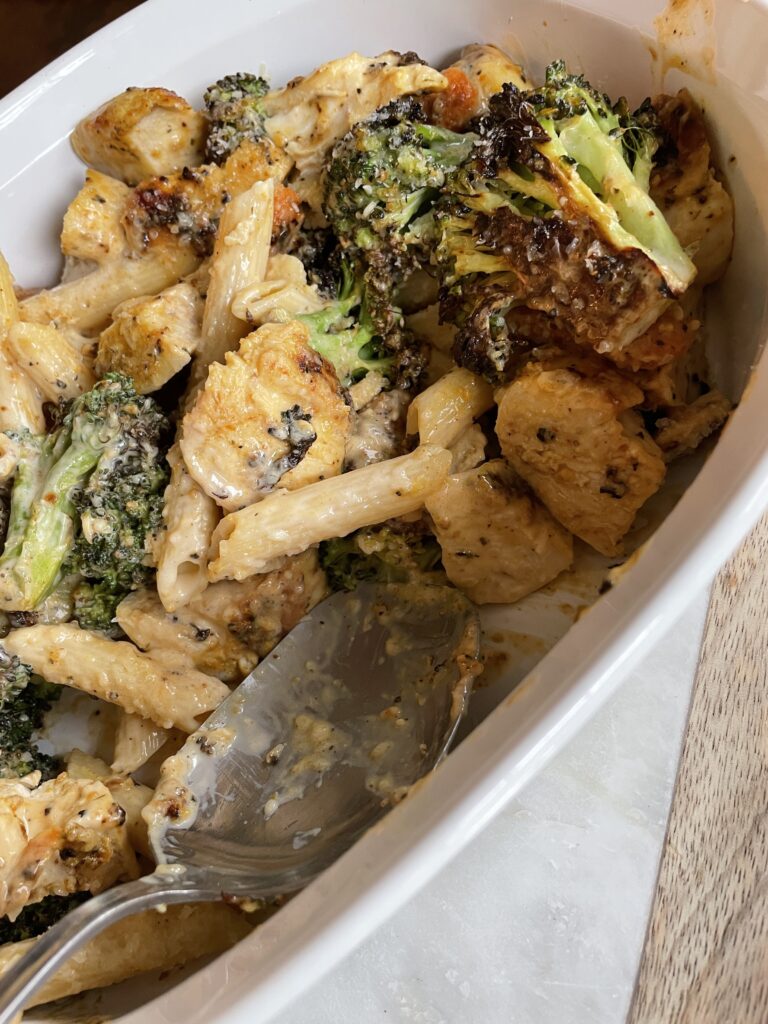
Lemon Parmesan Sheet Pan Pasta
Who doesn’t love a pasta night? This is the perfect meal for aspiring athletes. It’s a great way to carb load with whole foods that taste delicious. It’s also a good solution for leftovers. All you need to do is add pasta, parmesan cheese seasoning and a jar of your favorite sauce – I used Rao’s Alfredo – and bake until cooked through. It was a major crowd pleaser.
Breakfast Sheet Pan Meal
Talk about a way to impress your guests! Just replace the cooked chicken or add eggs to your protein of choice for a hearty breakfast for a crowd.
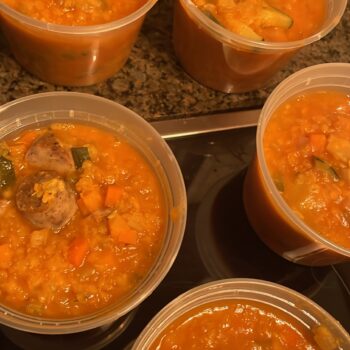
Roasted Chicken & Vegetable Soup
The fresh-cut vegetables make soup a natural choice to transform this kit. After roasting as directed, add ingredients to a stock pot with chicken broth. It’s that easy.
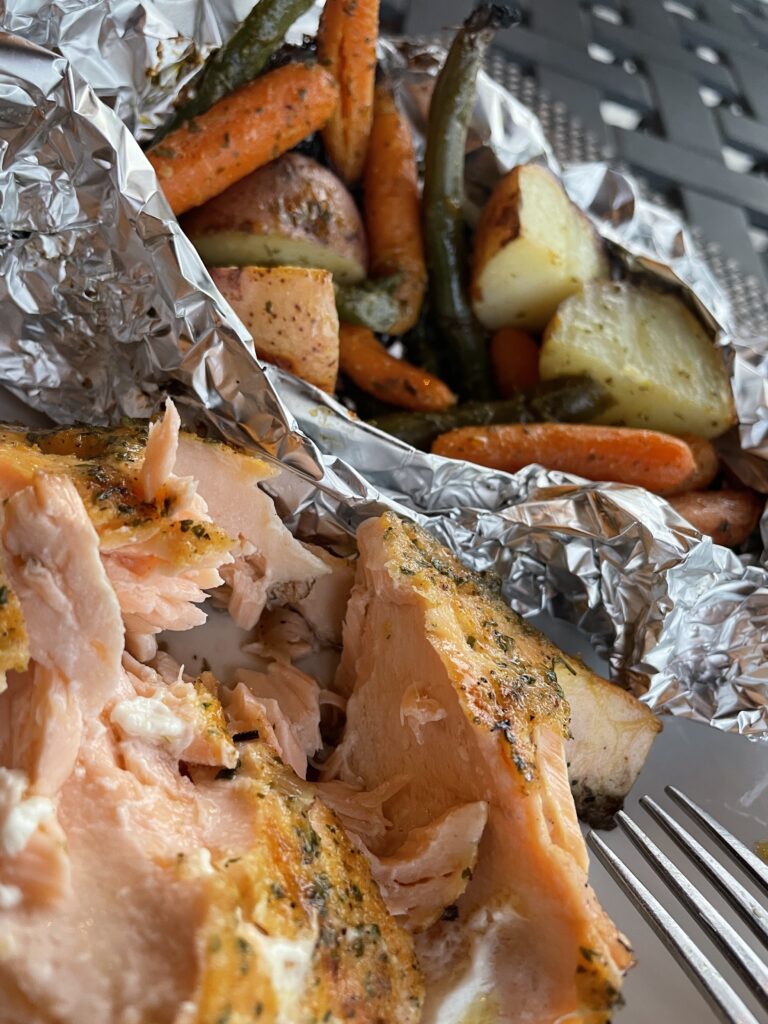
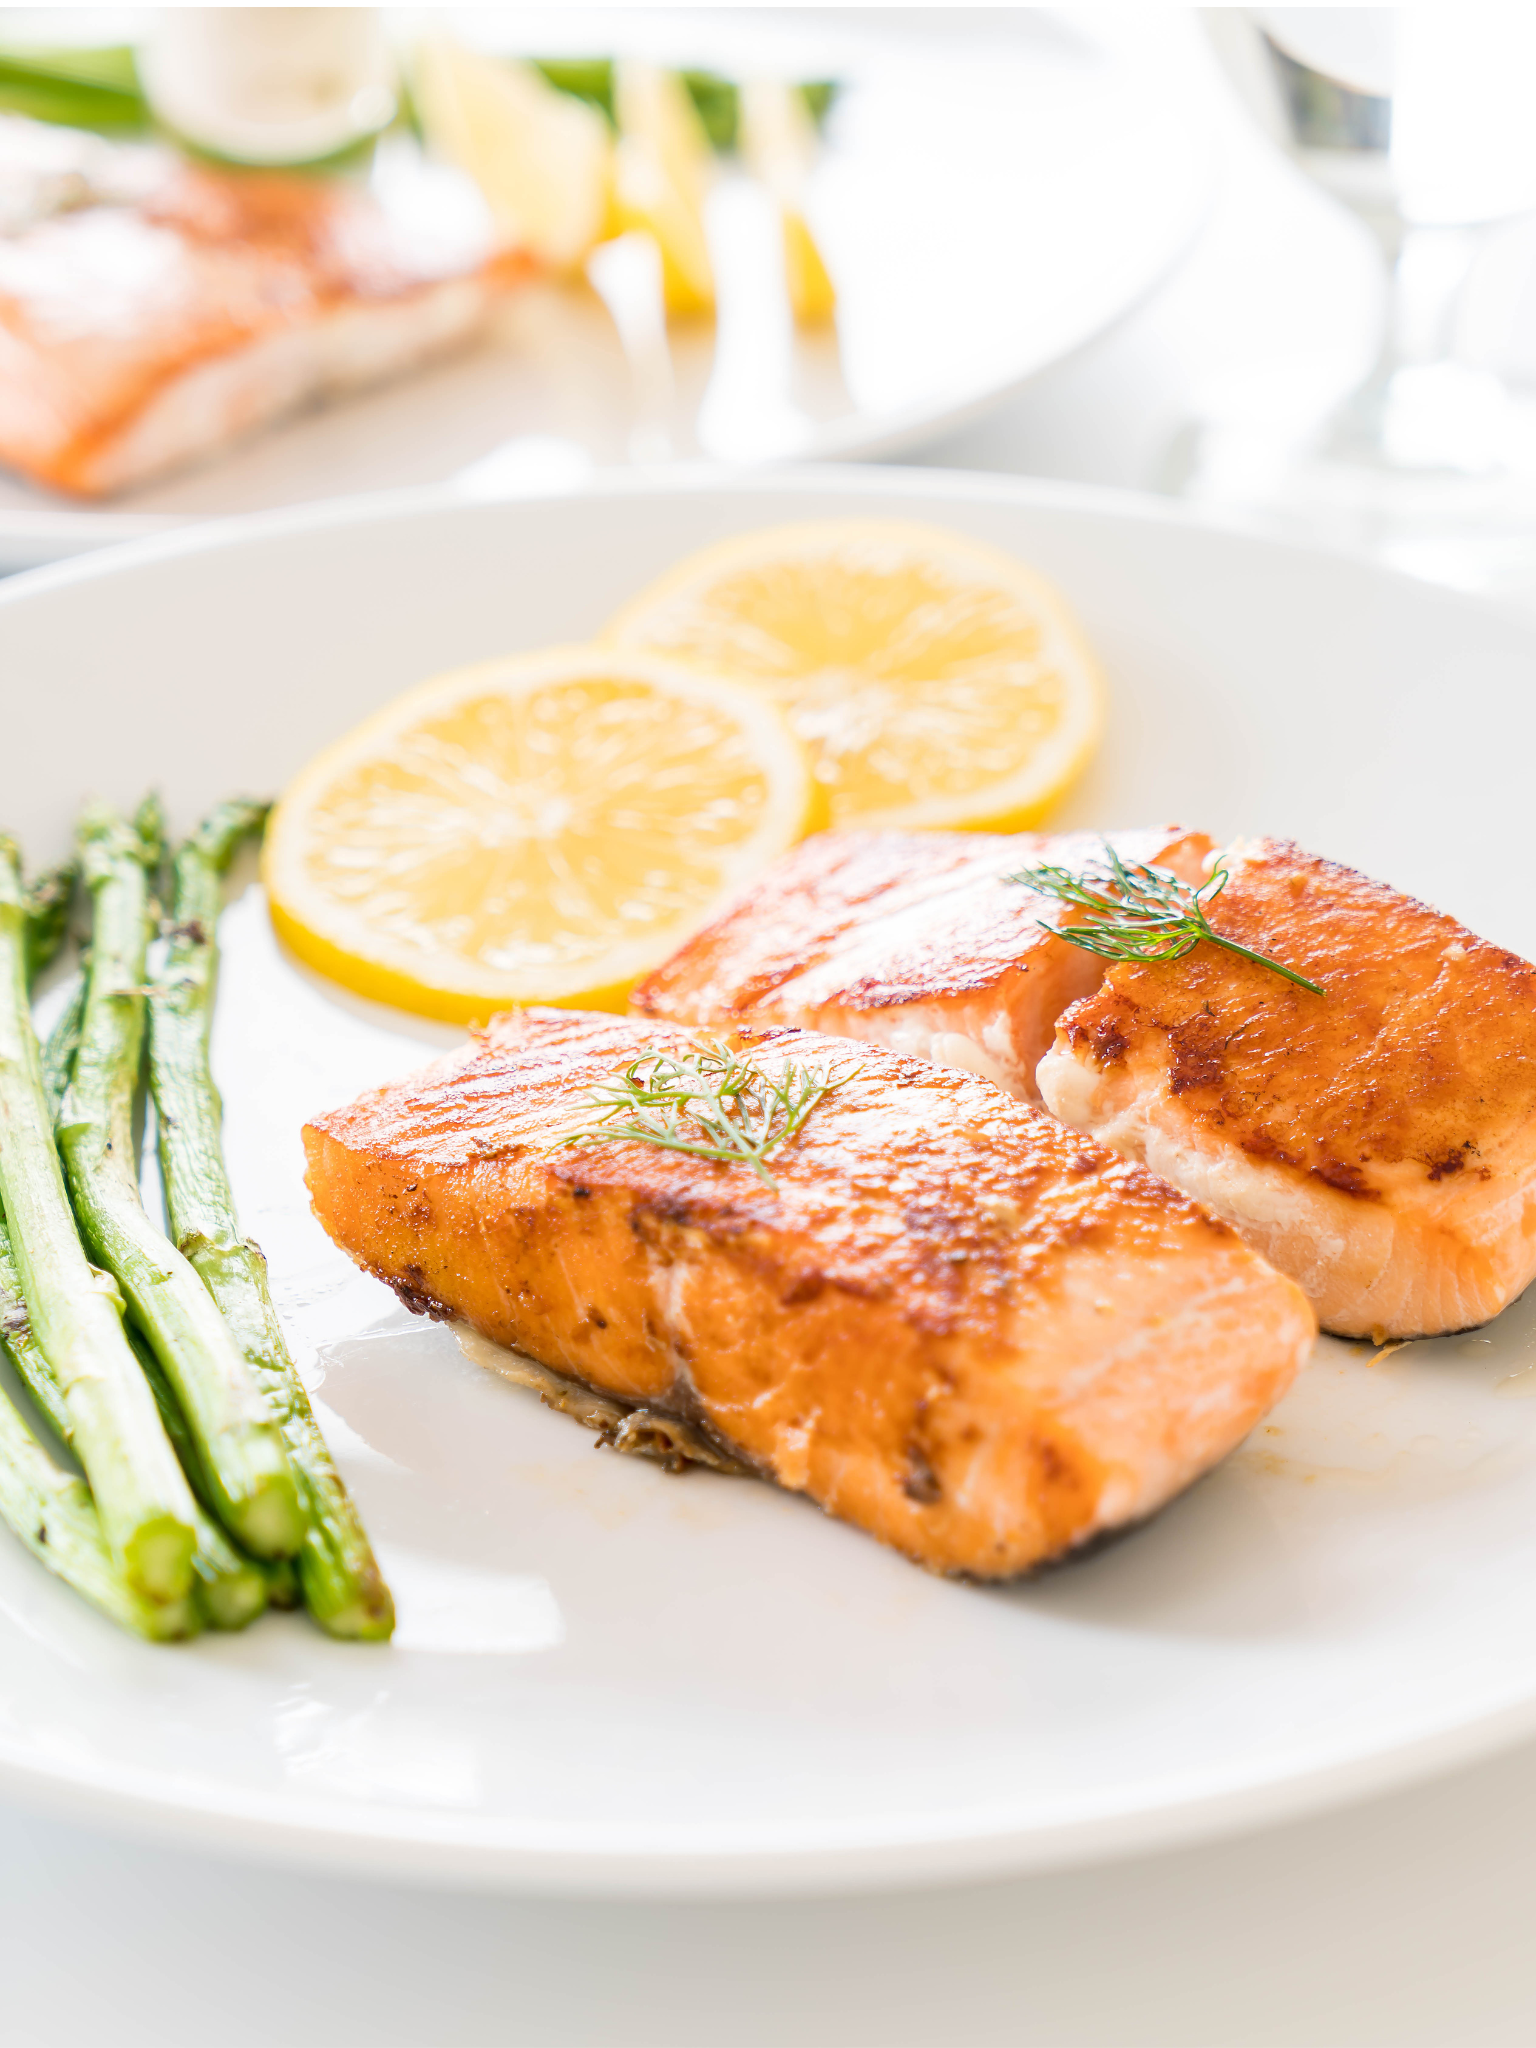
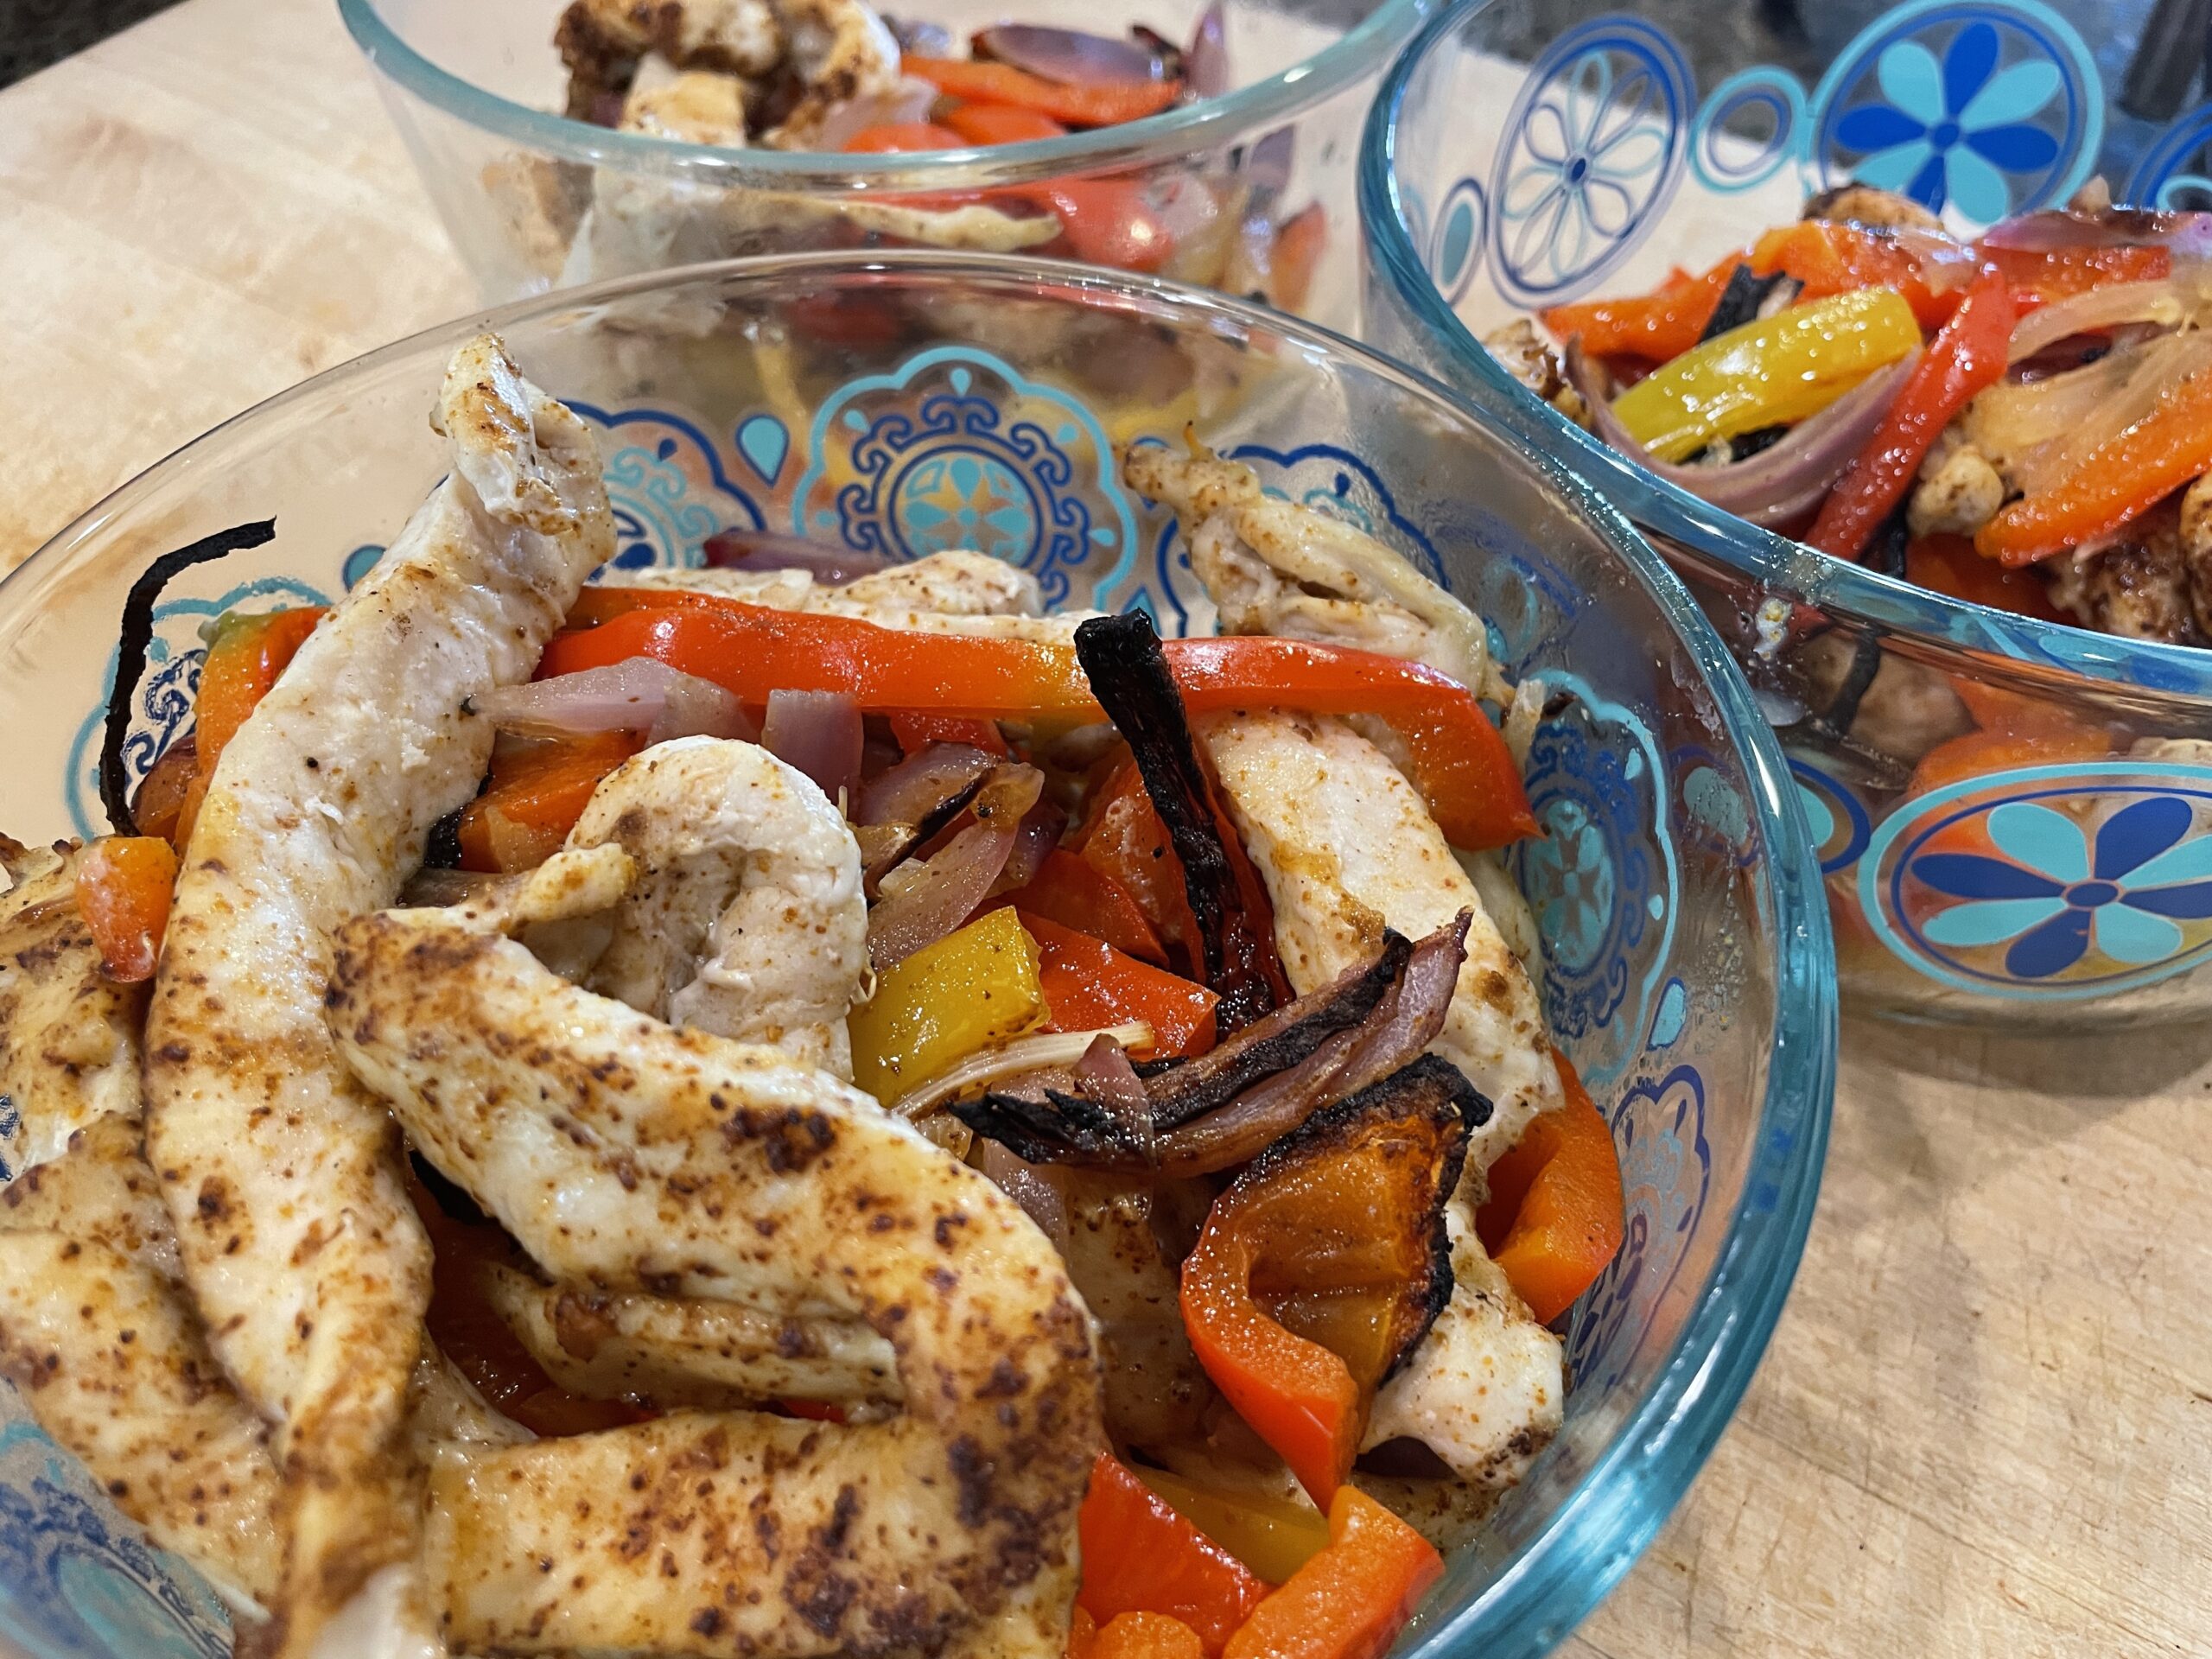
Herb Salmon & Foil Pack Grillers
We love cooking on the grill to keep the heat out of the kitchen, and these foil packets were so easy to throw on the grill. They didn’t need to be babysat or anything. My children loved the salmon and got a kick out of seeing their veggie foil packets!
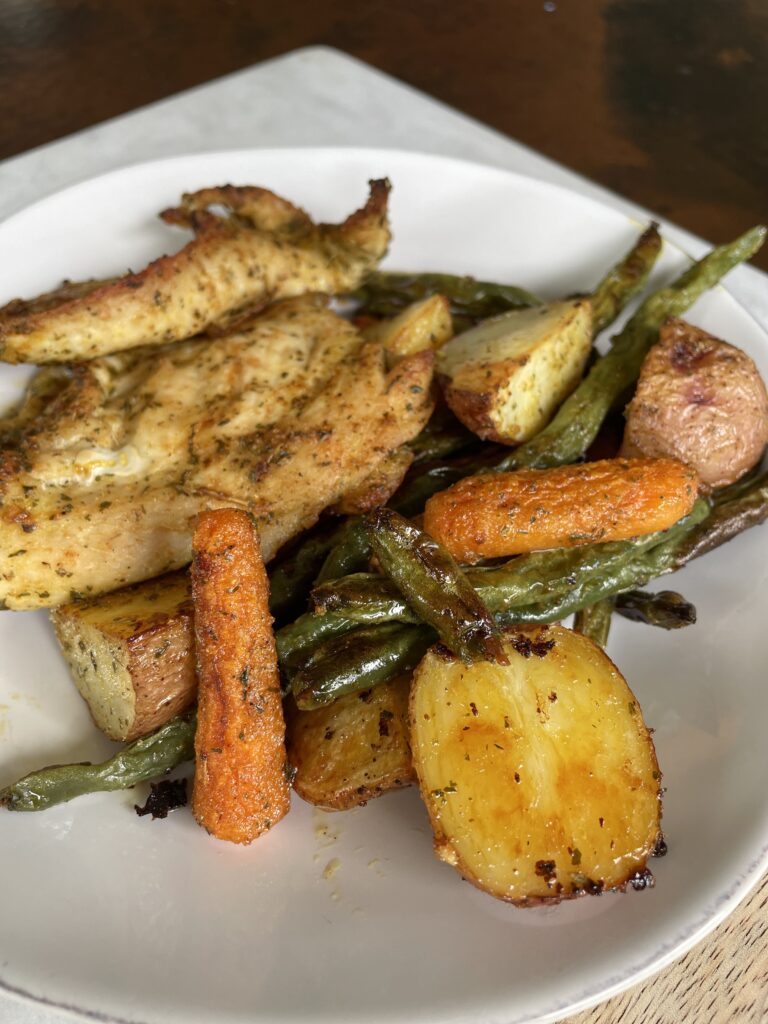
So grab your favorite protein – chicken, salmon, pork, ground beef, different varieties of seafood – whatever and you can literally have one of these fresh vegetable meals on your table in 30 minutes.
One of the best things you can do for your health is to eat more servings of fruits and vegetables each day. And these Dole sheet pan meal starter kits help overcome a major hurdle for busy consumers which is time! It eliminates the need for a lot of specific ingredients, and limits that daily decision fatigue of – what’s for dinner!
Are Dole Sheet Pan Meal Starter Kits Macro Balanced?
They are!! These kits are perfect for a regular macro day if you’re following the FASTer Way to Fat Loss and if you’re tracking macros, it’s easy to see where your carbohydrate, fat and protein are coming from. The potatoes help ensure you get a source of whole food carbohydrate to fuel your workouts, and you can use any protein you like! If I’m meal prepping for myself, I like to use a little less seasoning and then break out into 2 hearty portions.
When prepared as suggested, the Lemon Parmesan has 340 calories, 17g Fat, 18g Carbohydrate, 3g Fiber and 29g Protein.
But like I said, you can easily modify oil and protein choices for your needs!
So where do you find them?
Distribution started in select markets in the United States, but recently I have been able to find them near Charlotte and friends of mine in New Jersey have also tried them! I hope to see additional future flavors and new products come out soon… after-all there’s nothing better than single-pan meal options to get restaurant-quality meal on the table!
For more recipes and meal inspiration check out these links
Little ones love to stay busy and if you’re a parent, then you know that children love to get involved with whatever YOU are doing. From dusting to washing dishes or even sharing your meal, if you’re doing it, then your toddler wants in on the action. Why not take advantage of their enthusiasm to teach a new skill and build better cooking habits for the whole family?
Cooking with children is a great way to help them build confidence and lay the foundation for healthy eating as they grow. Research also shows that cookin meals at home resultsin eating fewer calories, and negative nutrieints like saturated fat and sugar- even when you’re not trying to lose weight! So why not try new foods together while teaching children this essential life skill?
Melanie Marcus MA RD
Here are five tips for cooking-up healthy habits in the kitchen:
Dress for the part! Pull out the aprons and get everyone in costume. If you really want to be official, check out this Dole printable chef’s hat. Children will love to personalize their own before getting busy in the kitchen!
Give them a seat at the table (literally)! Instead of sitting little helpers on the counter, get them a step stool so they can see the counter – most importantly, what’s in that big bowl – or sit them in a booster seat at the table so they can help measure, mix and complete other age-appropriate tasks. This keeps them interested and safe. And remember to always wash hands before getting started! That is food safety 101!
Mise en place! This is French for “everything in its place.” Set out your ingredients on the counter in pre-measured amounts that match the recipe. Maybe your child can help measure dry beans or flour? Or pull items out of the pantry? To hold little ones’ attention, start following the recipe directions only after everything is prepped. Start with simple recipes to minimize tantrums.
Prepare for spills! Have your kitchen towel handy and put a garbage bowl on the counter is the best way to help clean along the way. It’s always easier to stay on track with recipes when you have a clean workspace.
Set a fun table! The best part of cooking is eating! While dishes simmer or bake away, have children set the table. If they’re too little to handle carrying your fine dishware, use paper! And don’t forget the placemats. This Dole placemat will keep the kiddo’s coloring until their dinner is ready to eat. And older kids might enjoy personalizing a downloadable menus and recipe cards to turn your kitchen into a French bistro!
Jules and Max eating their fruits and veggies after helping in the kitchen 🙂
How to choose healthy recipes to make with your little chef
Start with simple snack foods. It could be as basic as having younger children use small cookie cutters to make shapes out of melon.
Other healthy snacks to try could be apple slices with hummus dip. Have children slice the apple with a safety knife and scoop dip into a bowl.
Look to your family traditions. What foods have meaning to your family. Is there special sweet treat or holiday food you can tell a story about?
Take a trip to the farmers market or grocery store and let your little chef choose an ingredient to work with.
Have your little kids scan through cookbooks or magazines to choose kid-approved recipes by looking at pictures.
What about something simple and easy that even picky eaters will love? Check out these simple banana oatmeal cookies.
If all else fails get a ball of whole grain pizza dough from the grocery store. Shape into a round and top with your favorite sauce, cheese and olive oil. You can top with veggies of choice and a green salad for a delicious dinner.
Small sized and safe tools empower children to take snack time into their own hands the healthy way!!
Benefits of cooking with kids
What’s better than sneaking a little extra reading time. Have them read the list of ingredients or point out letters of the alphabet.
They learn important math skills from measuring out ingredients!
They become familiar with kitchen tools
They can hone fine motor skills when the write out the shopping list.
It’s the perfect time to talk nutrition and the benefits of eating lots of colorful vegetables!
It’s an excellent way to spend one on one quality time.
It’s a great time to forget the stress and focus on the task at hand – for parents and kids!
Picky eaters are more likely to try new things if they’ve made them!
Things to consider buying to make cooking with kids easier!
Plastic chef knives give small hands the freedom to do the same thing you do! It makes them feel special and can motivate them to do prepare foods on their own!
A kid safe kitchen stool. These are built with safety in mind, to get kids up at counter level while ensuring they don’t fall.
Cookie cutters of all shapes and sizes. These again, are a fun way to add creativity to meals and snacks – especially fruits! My daughter loves to makes shapes out of melon and then skewer them onto toothpicks.
Bonus: Kids are more likely to try foods that they help prepare in the kitchen! Take advantage of that opportunity to make family meals that include fruits and vegetables and other healthy ingredients that improve diet quality.
All foods are made of macronutrients or macros for short. Any food that makes it’s easy to identify and count macros is “a macro friendly food” in my book. But I’ve also seen it used as a way to describe foods that give you the most volume of food – which if you’re used to limiting calories and portions- is a very welcomed thing! There are a lot of macro friendly foods and we’ll go into all the details below.
The great thing about macro friendly foods is – they are minimally processed and family friendly. As a mom of two, there is nothing worse than having to make a separate meal for me and another for the kids. When I prepare meals like those described below, everyone is happy because the flavors are familiar, they’re easy to deconstruct if you have picky kids and you know exactly what your macros are for the meal!
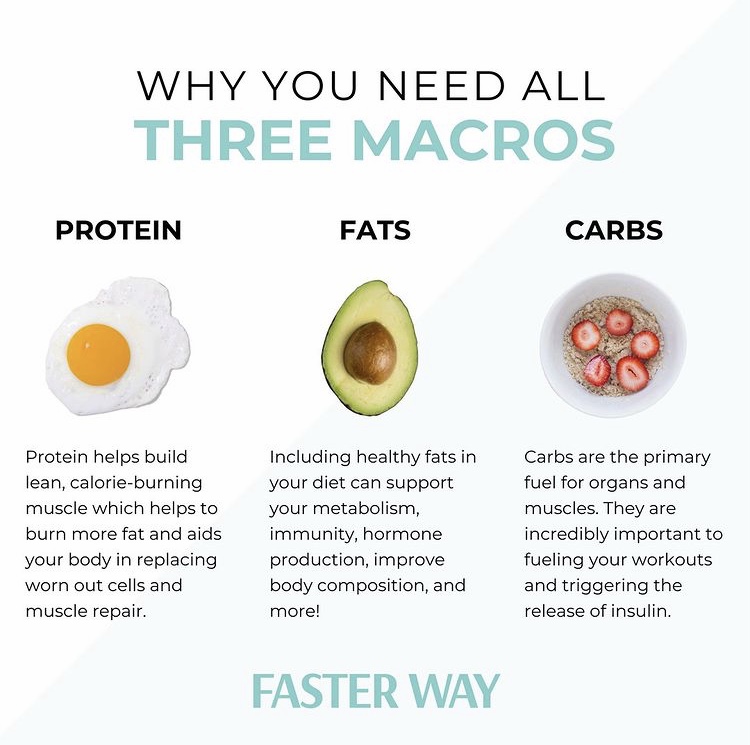
There are three types of macros: Protein, Carbohydrates and Fat. Each one has a different job. They help us build new tissue like muscles, give our brains energy and help regulate our hormones!
Don’t confuse tracking macros or macro friendly foods with low calorie, or low fat diets. You can track macros as part of any diet plan, whether you’re gluten free, vegan, vegetarian or aiming to gain weight, gain muscle or lose body fat. Your macro goals just need to be set correctly – and by a professional!
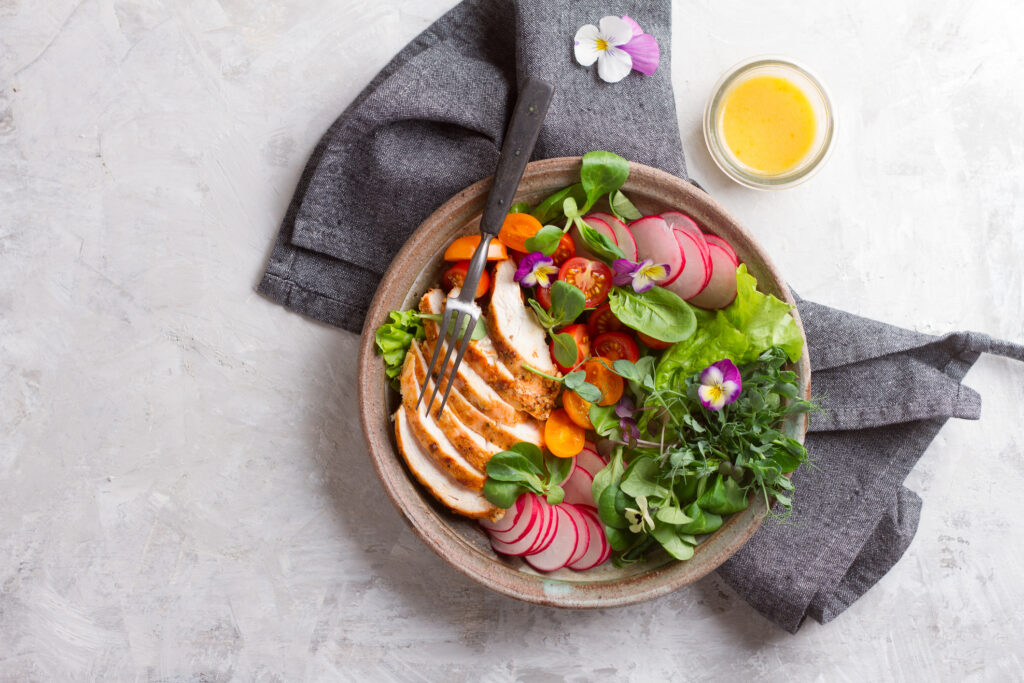
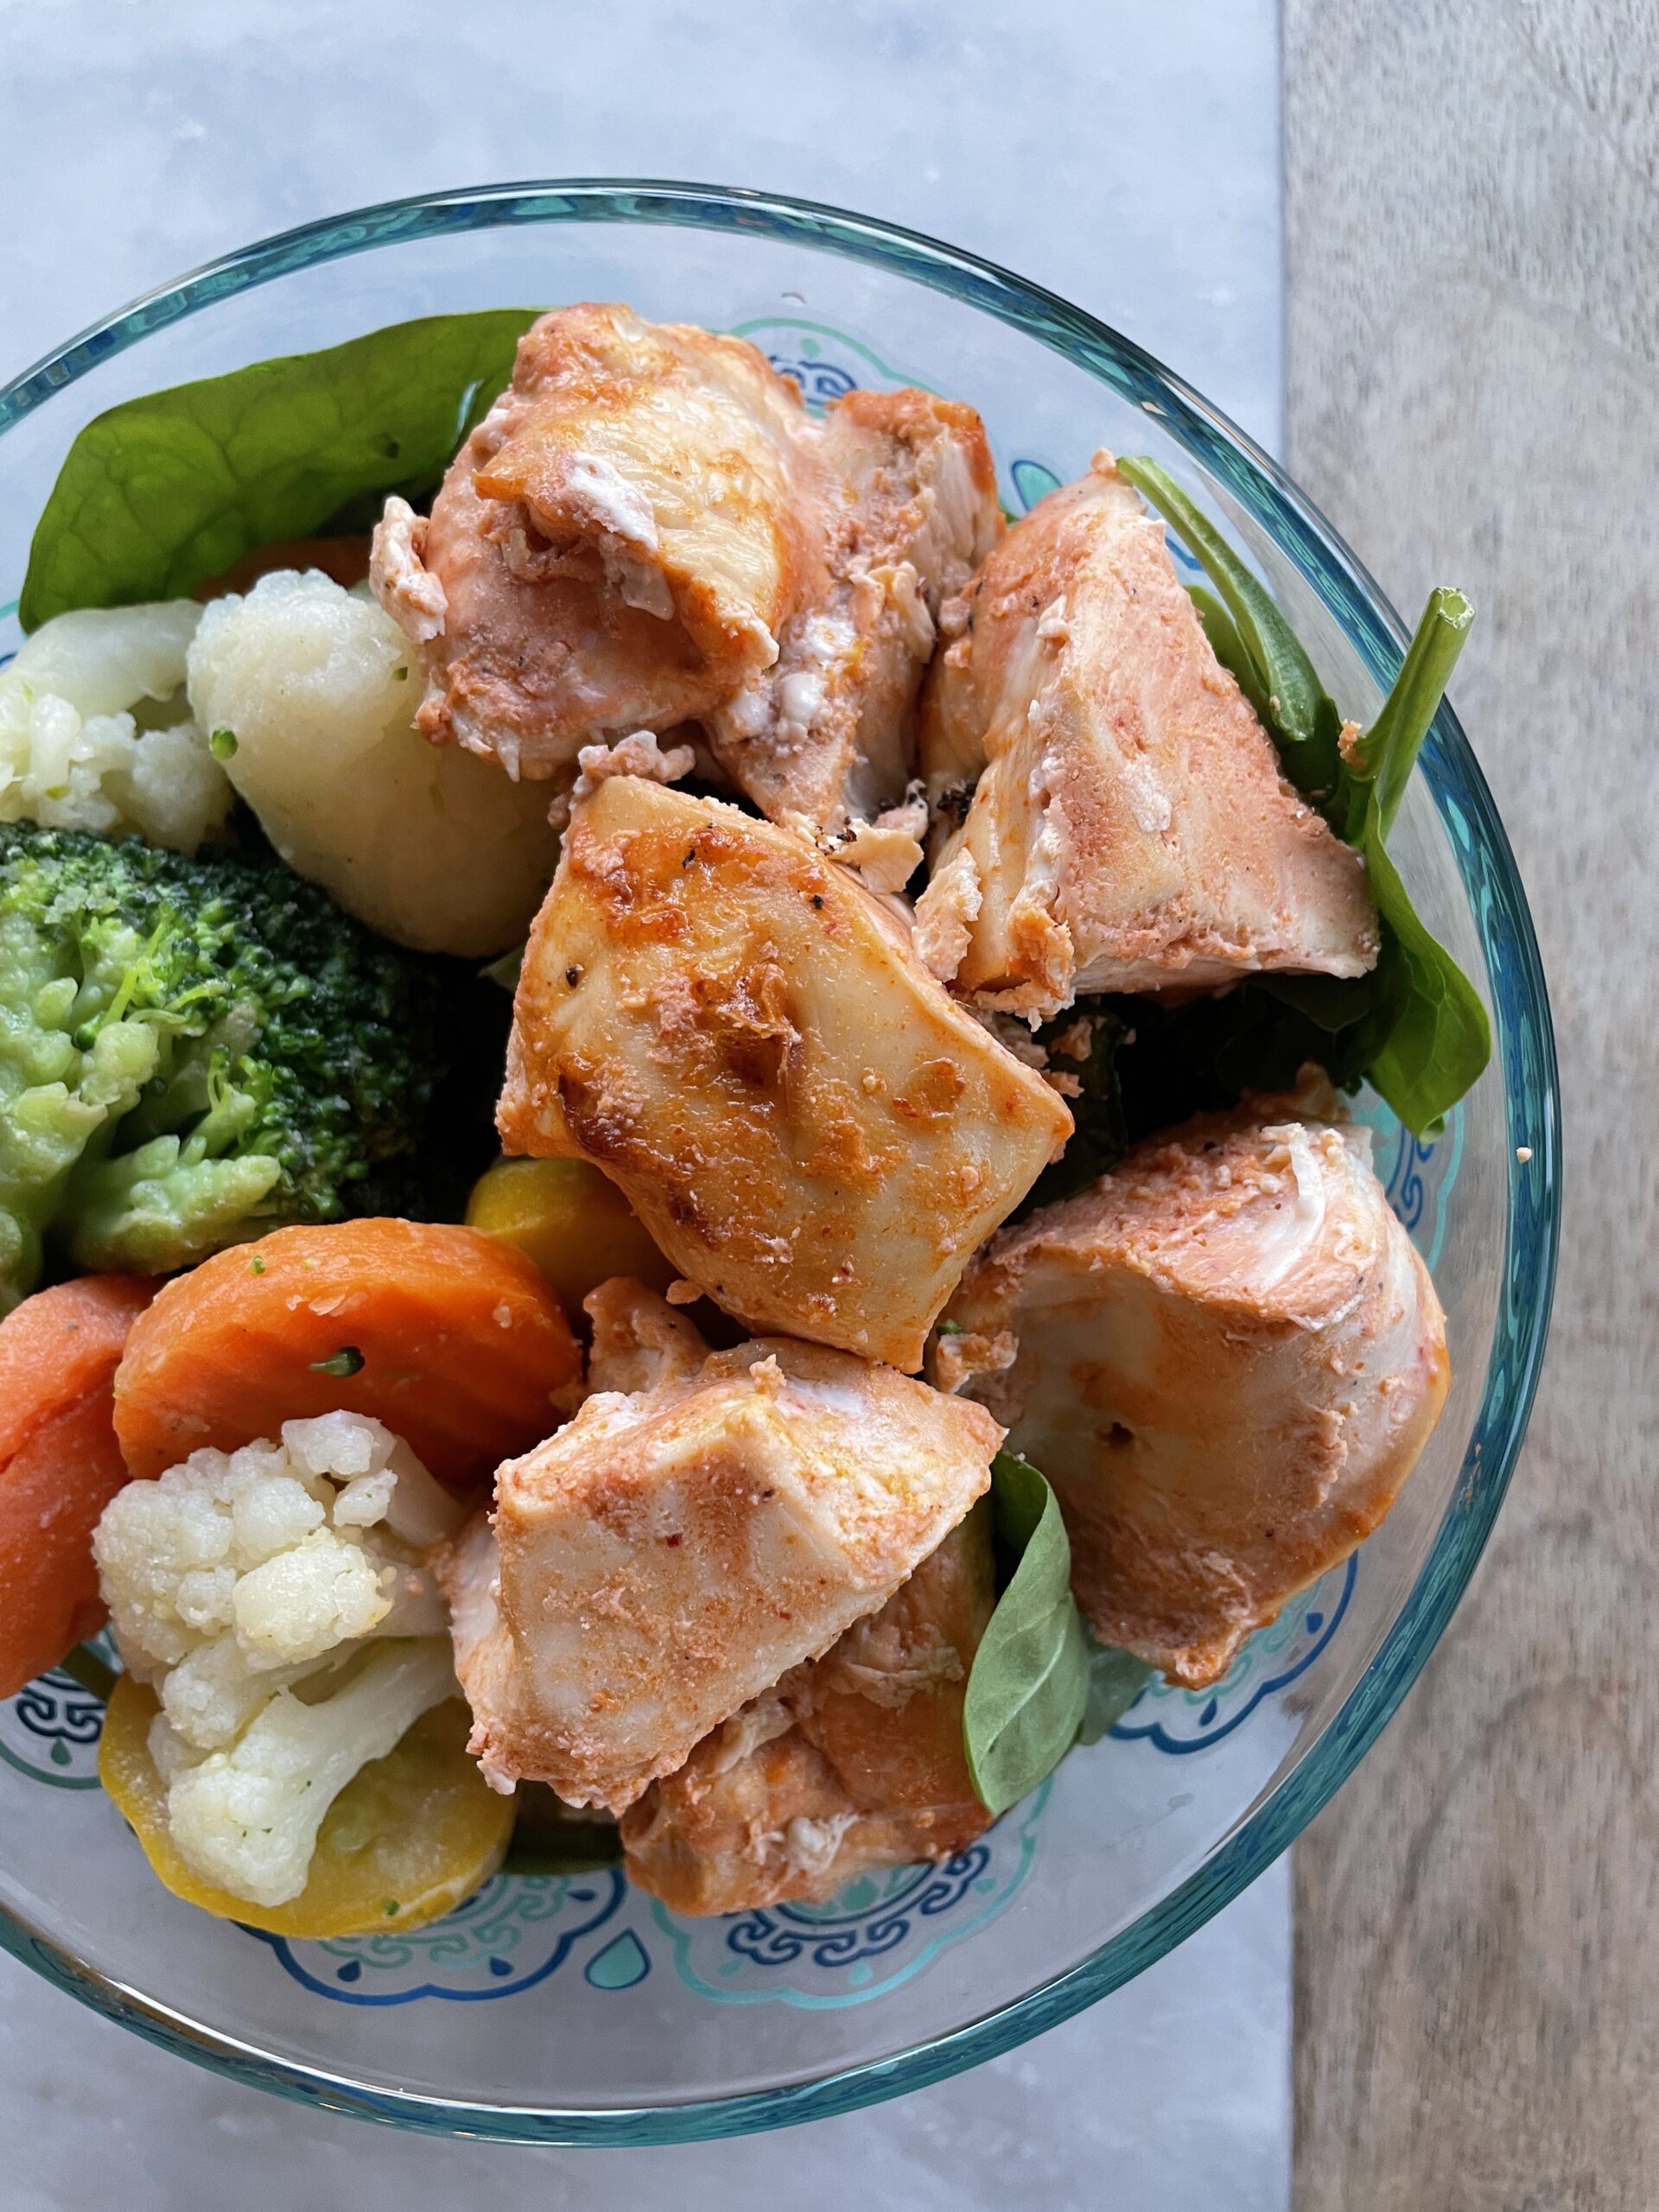
An easy dinner that is macro friendly could look like roasted sweet potatoes, grilled chicken breast and broccoli drizzled with olive oil. A meal like this includes all three macros (is a complete meal!) and it’s easy to see where the g protein, g fat and g carbohydrates are coming from! Chicken = protein, sweet potato = carbs and olive oil = fats!
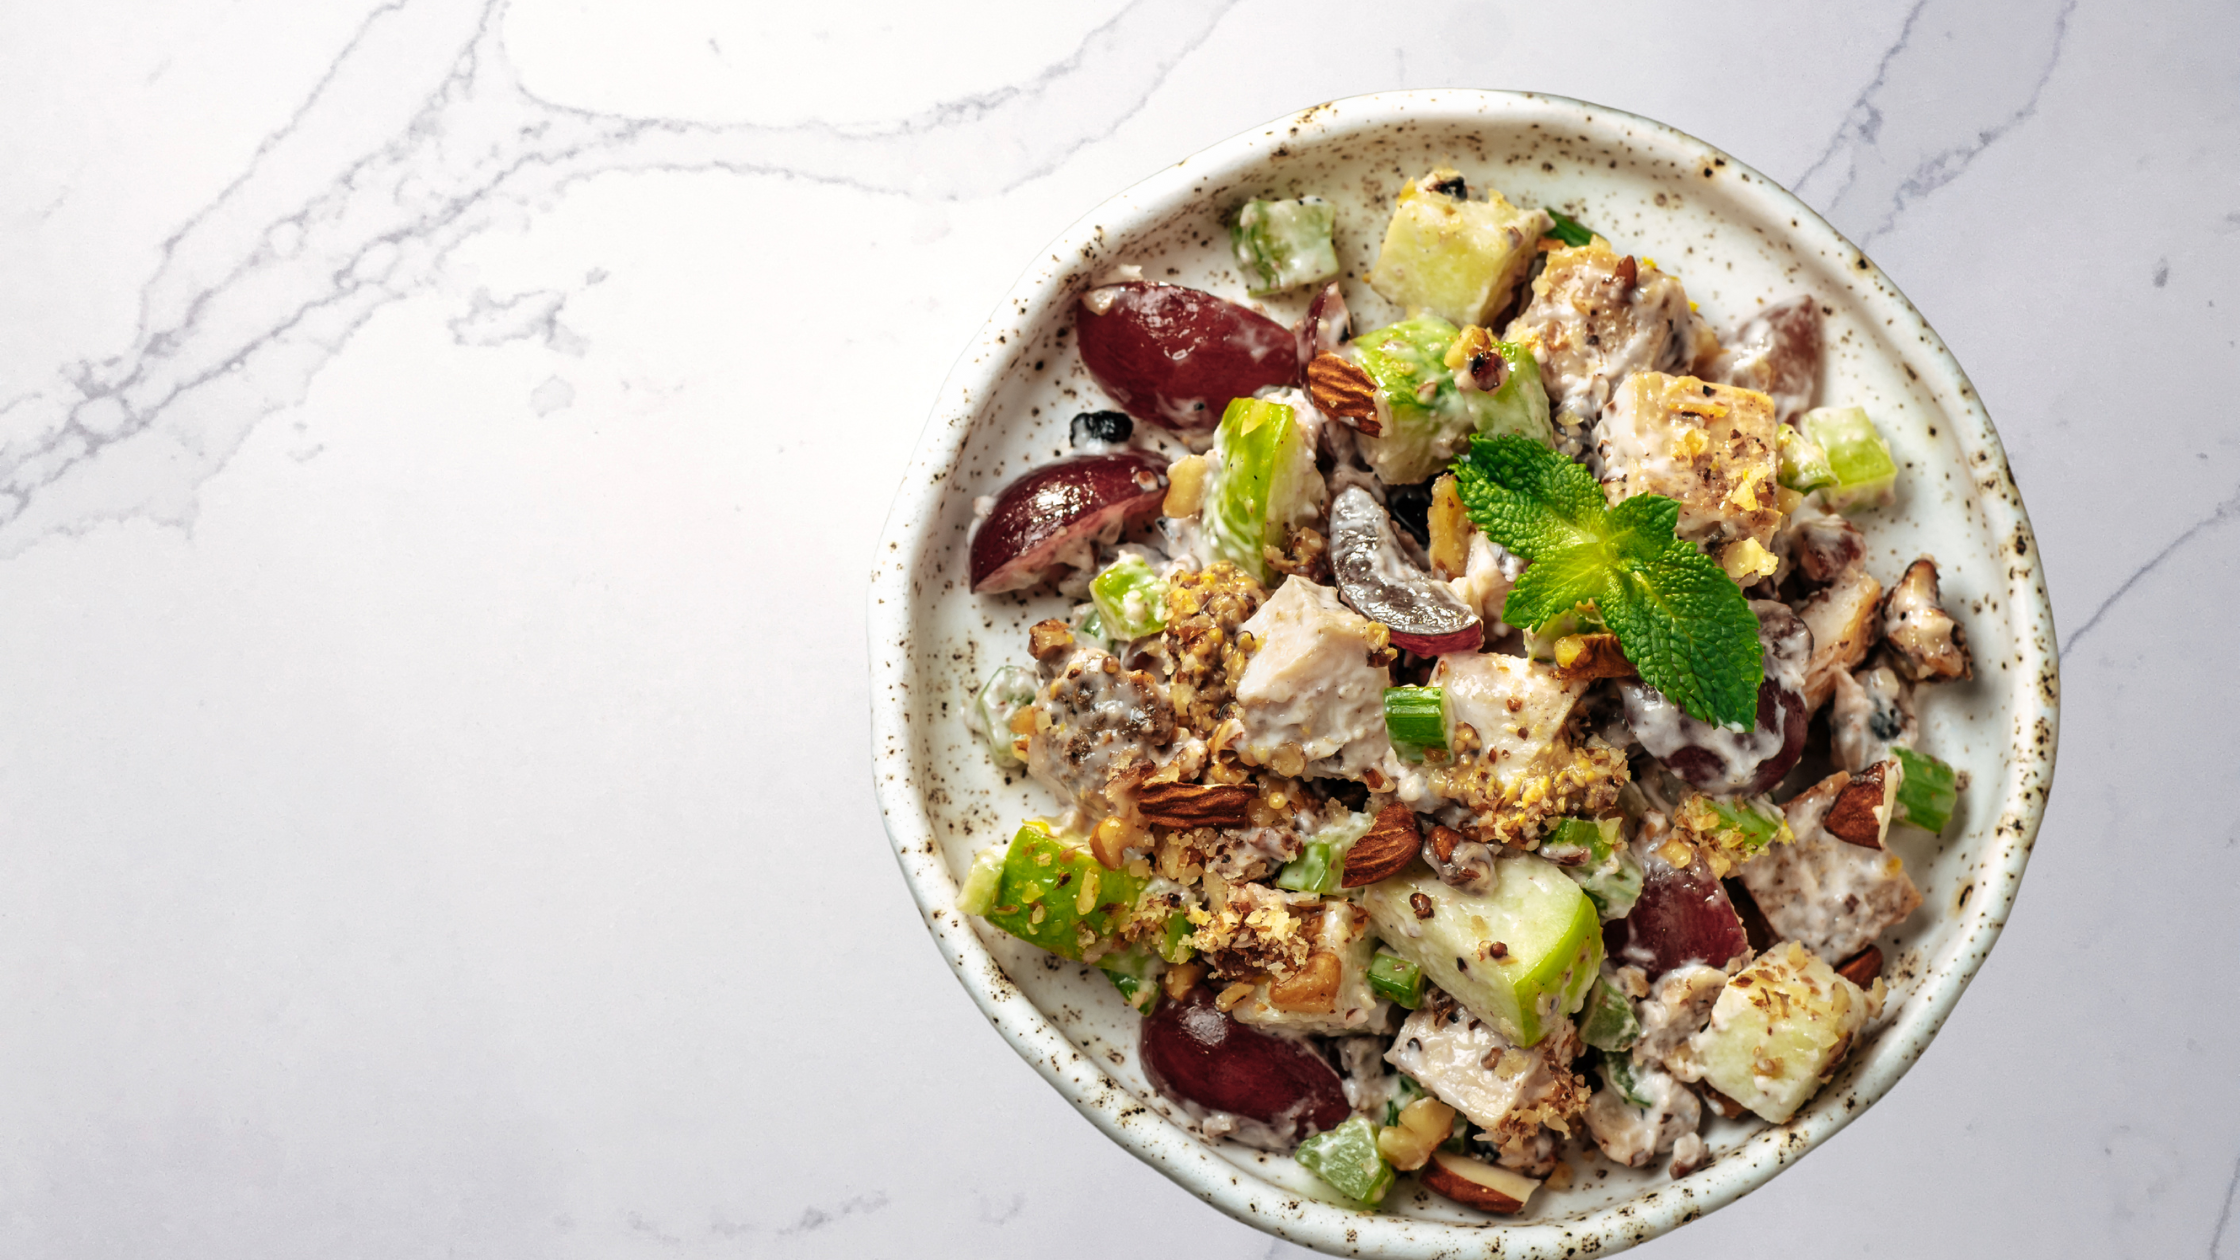
Macrofriendly salad with vegetables, chicken breast and edible flower for balanced dinner
Macro friendly sources of lean protein
If your goal is to lose fat, your goal should be to get enough protein at each meal. I recommend having 3-4 ounces of protein at each meal or snack to keep yourself feeling full.
Chicken breast
Greek yogurt
Eggs and egg whites
Lean ground turkey
Lean ground chicken
Protein shakes (check labels)
black beans
Protein bars (check labels)
As a rule of thumb, one ounce of lean protein = 7 g protein. Protein provides 4 calories per gram.
Macro friendly sources of higher fat protein
Chicken legs
Ground beef
Flank steak
Filet mignon
Chicken thighs
Salmon
Low fat or fat free cottage cheese
Unsweetened Greek yogurt
High protein snacks include: beef jerky, dried turkey sticks, edamame, hard boiled eggs, deli meats and protein shakes.
Macro friendly source of carbohydrate
Sweet potato
White potato
Brown rice
White rice
Quinoa
Bananas
Apples
Most fruit in general
Carbohydrates provide 4 calories per gram.
Wheat products such as bread, tortillas, english muffins, pancakes and French toast are sources of carbohydrate, however they are also sources of fat and potentially sugar which make tracking their macros tricky. One bread that I do like is Ezekiel Bread. It’s minimally processed made from sprouted wheat and has higher protein than other breads. If you want to include breads in your diet choose whole grain options where the first ingredient is whole wheat and sugar is not in the first three ingredients.
Macro friendly sources of fat
Not all fats are created equally. Some fats like those found in fatty fish, olives and avocados are healthy fats. Research has shown us that these fats promote heart health and desirable cholesterol levels. Fats that are solid at room temperature, such as those found in red meat, butter, even full fat coconut milk are sources of saturated fat which should be limited or avoided especially if you’ve been diagnosed or are at risk for heart disease.
Olive oil
Avocado
Shaved coconut
Macadamia nuts
Nut butter
Salmon
Fat provides the body with 9 calories per gram.
Tips for shopping at the grocery store
The simplest way to ensure you have macro friendly foods in your cart is to shop the perimeter! But trust me, there are a lot of amazing macro friendly foods in the center aisles of the store too.
In the produce aisle, everything is fair game. Stock up on fruits and veggies for your meals and snacks. I like to go into the week with at least three vegetable options in the fridge. My go-to’s are broccoli, spinach and bell peppers but I may get more depending on what looks fresh and how many nights I will be cooking! Macro friendly produce items: broccoli, spinach, bell peppers, potatoes, tomatoes, onions, leafy greens, endive, salad mixes, garlic, melons, bananas, apples, peaches, pineapples, berries and the list goes on and on.
Moving onto the deli. I like to get some deli meats for quick lunches that are high in protein. Sandwiches don’t take much time to put together and they’re a great way to create a macro balanced meal. (think bread, meat, veggies, and mayo or oil)
In the meat and seafood department, you can go with either fresh or frozen protein options. I usually get 3 protein options for the week. This gives me a chance to meal plan healthier options that will fit in my macros, and in case I don’t get to cook it all, I can just freeze what I don’t use for later. Chicken breast is always a good option to pick up for a quick baked or macro friendly grilled chicken. Lean ground beef is good for meal prep, taco Tuesday or meat loaf. Shrimp are a superfast and delicious way to be sure you get all the grams of protein you need for your goals.
In the dairy section is where you’ll stock up on eggs, Greek yogurt and skim milk. Unsweetened almond, coconut or cashew milks are other lower macro alternatives to have on hand for delicious recipes and smoothies.
When you turn the corner to the frozen aisles the macro friendly foods will be generally less processed without added sauces. (Though you can scan barcodes and manually add macro info from the nutrition facts panel to most macro calculators). My favorite frozen buys include spinach, kale, collards, broccoli, cauliflower rice, peas, chopped onions, and vegetable medley – I recommend the unsauced versions so you can add freely to recipes and track macros as needed. Sauced versions like those from Green Giant do make for convenient sides that the whole family will like- they have veggie tots that are a big hit with us too!
The center aisles of the grocery store are where you can get your basics for quick meals. Pick up 90 second brown rice packets, tuna fish, canned beans of all kinds and your favorite low sodium seasonings. Seasonings are a great option to change up your meal prepped protein throughout the week in a flavorful way. This is also where you’ll find your oatmeal, tomato sauce, bean based pastas, whole grain cereals, jerky, trail mix, nuts, nut butters and more. You just need to read labels a bit more 🙂
Is ice cream macro friendly?
When I think of macro friendly meals, I think of all three macros. I want all three macros on my plate, at the very least two macros. Having all three macros is the perfect way to ensure that you’re hitting your target numbers by the end of the day.
That said, ice cream is very high in fat, sugar with very little protein.
This doesn’t mean you can’t eat it, it just means that you want to log your portion accurately, and try to modify your eating the rest of the day to compensate. There are macro friendly ice creams out there (Halo Top and Arctic Zero) that are higher in protein, and even use lower fat milk and sugar substitutes but you need to ask yourself this important question. Am I eating ice cream to meet my protein goals? or am I eating it for the enjoyment of food. For me- when I am in the mood for ice cream, nothing else will do. So I account for real ice cream in my macros, even though it’s high in fat and sugar. I guess that’s what makes counting macros so great – you can make food choices that work for you and your food preferences!
Tips for counting macros with homemade recipes
In general, it’s easier to count macros when cooking from scratch and eating whole and unprocessed foods.
Tracking macros doesn’t mean you need a detailed recipe though. The key to tracking macros with recipes is to add to your tracker in the portions used OR follow the recipe exactly as written.
Then portion out according to the listed serving size. For example, if you make a crustless quiche and it serves 8, simply cut it into 8 equal portions and use the nutrition information to log your macros. If you’re like me and 1 serving isn’t enough, you can easily double your portions, just be sure to multiply your macros by 2 when logging them.
Weigh out ingredients using the tare function on your scale. When I’m making homemade meatballs for example – place the mixing bowl on top of the scale. Then add ingredients by weight. Hit tare after each ingredient so the scale zeroes out. My favorite part of measuring ingredients this way is that there are much fewer dished!! No need to wash measuring cups or spoons!
When cooking or combining foods during cooking, my number one tip is to use the tare feature on your scale. Not only is it accurate, but you have significantly fewer dishes to do after cooking!
Meal prep these macro friendly foods each week
hard boiled eggs
steel cut oats
baked sweet potato
grilled veggies
grilled or baked chicken breasts
Here are some easy recipes for the whole family
Bonus! Most of these recipes are from popular supermarket chains like ShopRite and Trader Joe’s that have an easy add to cart feature. Just click the recipe, select ingredients that you need for the week and send to cart!
These are easy ways to combine macro friendly foods into delicious meals! While the macros aren’t listed, these combos are easy to add to your macro tracker – and each combo includes protein, fat and carbohydrate to be sure you’re macro balanced!
Chocolate banana smoothie – 1 cup unsweetened almond milk, 1 frozen banana, 1 scoop chocolate protein powder, 1/2 cup frozen cauliflower crumbles, 1T chia seed.
Cauliflower hash brown egg cups – Spray a muffin tin and layer 1/4 cup cauliflower, 1/4 cup frozen hash brown, 1 egg, salt and pepper – bake at 350 F until set!
Black bean bowl – 3/4 cup microwaveable brown rice, 1/2 cup black beans, 2T salsa, 2T sour cream, cilantro.
Classic chicken dinner – Roasted potatoes and baked chicken breast with steamed broccoli – just log your portions accordingly!
Warm salad bowl – Start with a bed of greens, add 1 cup of warm rice, add leftover herb chicken breast and top with diced cucumber and your favorite salad dressing
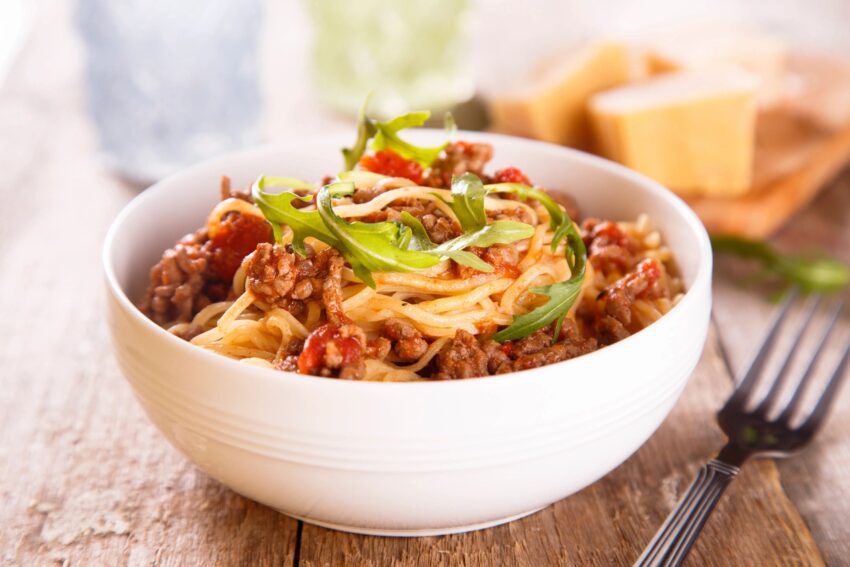
Chicken cutlet or grilled chicken with sauce, mozzarella cheese and basil for all of the flavors of chicken parmesan
You can never go wrong with a big salad – just be sure to make a meal out of it and invite all the macros to the party. Add shrimp, beans or lean steak, top with corn, onion and salsa for southwest flavors that win every time.
All of these are easily added to macro tracking calculators and will start you off with generally balanced meals. Portion sizes can be increased or decreased for your needs.
Making macro-friendly recipes is easier than you think!
How do I know what my macros should be?
A great way to find out your macro goals is to talk to a registered dietitian. Everyone has different macro goals based on activity level, lifestyle and body composition goals. It’s no one size fits all. And often, once macro goals are set, they will need to be reassessed and tweaked.
If you’re thinking about macros as daily allowance or “limits” – try to think of them as minimums in order to reach your goals!
We all have specific nutrient and macro needs based on our health and fitness goals, and tracking macros is an effective strategy to make well balanced and complete meals. Often weight loss programs focus on calories, which shifts the emphasis away from the three macronutrients and their important functions in the the body. The good news is when you include all three macros (according to your specific needs and goals) you can expect see changes!!I
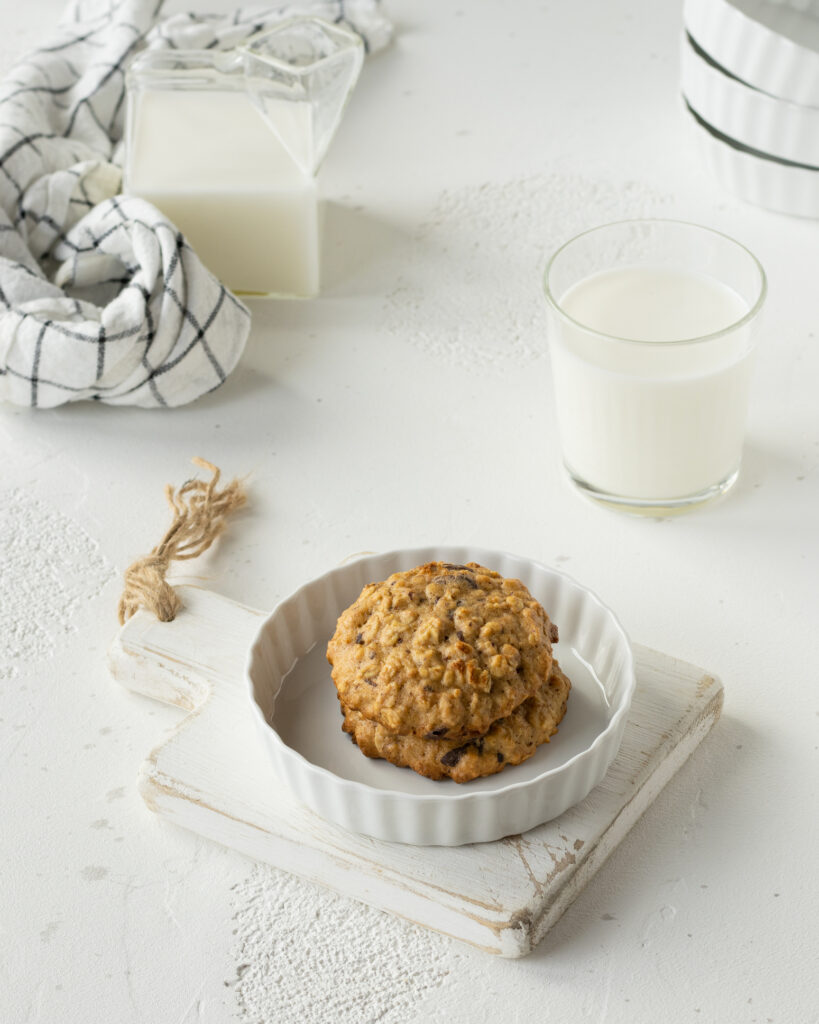
These 3 ingredient banana cookies from Dole Food Company are a #momfavorite. They’re not complicated to make and they have a touch of natural sweetness that satisfies! Plus my daughter loves to get involved with making this easy recipe from start to finish – which means she’s more likely to eat them! Their wholesome ingredients are a natural fit for vegan diets making them the perfect treat. I’ve also heard them referred to as oatmeal breakfast cookies and after trying them they are like a portable and more convenient replacement for your bowl of oatmeal!! Check out the full recipe below!
While I am a full time registered dietitian with Dole Food Company, this post is not sponsored in anyway!
These cookies are a major win. They’re packed with nutrient dense foods like rolled oats, nut butter of choice and bananas! Let’s go over the nutrition benefits of each:
Rolled Oats – These complex carbohydrates are full of fiber which is known for slowing digestion. It also helps stabilize blood glucose levels avoiding spikes in blood sugar. Research consistently shows that fiber slows digestion and helps us feel fuller- for longer too! These carbs also help fuel the brain making these healthy cookies a perfect morning treat!
Nut Butter – Especially a single ingredient peanut butter is the perfect combo of fiber, protein and health promoting fats. Research suggests that those who eat peanut butter at breakfast tend to eat less for up to 12 hours afterwards! In general, when looking for peanut butter, avoid those with hydrogenated oils and added sugars.
Bananas – These household staples are a powerhouse for nutrition. Known for their potassium content, one medium banana provides 9% or 422mg which offers major heart health benefits and can help support a healthy blood pressure. Among other things, they also have a decent amount of soluble and insoluble fiber which support heart and gut health respectively!
Making breakfast cookies from the culinary perspective…
Like I said, these aren’t complicated to make, but that’s what makes them so great! All you need are three ingredients, mix them together and then bake! They’re so easy to make, even a child can do it!
Do I have to used rolled oats?
There are three main types of oats. Steel cut, rolled and quick oats.
Steel cut are hearty, filling and nuttier that rolled or quick. But they will not work in this recipe. Steel cut oats are the shape of little pellets and will not absorb enough liquid from the bananas and peanut butter to make a proper batter.
Rolled are convenient and often called for in baking recipes. I like the texture rolled oats give this recipe, but quick oats will work well too!
About the bananas
Overripe bananas, either fresh are frozen are the star ingredient.
If you’re going with fresh bananas – make sure they are overripe for the sweetest cookie! In general, the more blemished and ripe the better! This is the perfect recipe to keep on hand when your bananas are turning spotted. Bananas are sweetest at this stage!
Use frozen! This is totally fine to do, just caution you may have a bit more liquid than if you use room temperature bananas. So if the dough feels extra sticky add 1-2T additional tbsp oats.
What are the best type of oats?
This recipe uses rolled oats because I think they provide a great texture.
You can use quick cooking oats too! They will just absorb more liquid during the baking process.
I don’t recommend substituting oat flour for the rolled oats in this recipe. The amounts would have to be tweaked for it to be a successful banana cookie recipe.
When it comes to the PEANUT BUTTER…
If you want something slightly sweeter, then use traditional peanut butter like Skippy or Jif that tend to have added sugars. Normally, I would suggest avoiding added sugars from a nut butter, but in this case the sugar makes for a great tasting three ingredient cookie!
If you’re trying to limit added sugar, I recommend using an all natural peanut butter. Look for one that has simple ingredients. There are many that have a single ingredient: peanuts!
This recipe will work with any nut butter that you have on hand. You can use creamy peanut butter or chunky varieties of cashew, peanut, or seed butter. Almond butter works well too!
Chewy vs Crispy?
If you want them chewier, I suggest cooking them about 12 minutes.
I like them a bit crispier so I go 15-17 minutes.
Optional add-ins
Get creative with your add-ins! These breakfast cookies are really delicious on their own, but they’re so easy to customize for your taste. There are plenty of options to experiment with. Try these versions!
Add 1/2 cup mini dark chocolate chips to the dough before portioning out, or just sprinkle a few on top of each one for a little hint of chocolate.
Add 1/2 tsp cinnamon to the dough.
Sprinkle with Monkfruit sweetener or brown sugar before baking for an added touch of sweetness.
Sprinkle with Maldon sea salt before baking to play up the sweet and savory balance.
Add 1/2 cup chopped walnuts or pepitas.
Add 1/4 cup ground flax seeds to the dough for heart healthy fats.
Helpful tips
I don’t recommend adding sugar like maple syrup or honey as it will make the dough wetter. But you could add 1-2tsp if you’re hoping this cookie recipe will solve your sweet tooth cravings! Just be prepared with added 1-2T rolled oats.
If you want to make a double batch, I recommend combining ingredients separately for best results.
I recommend rolling these into balls or using a small ice cream scoop to get even sized cookies. Then pat them down with your fingers to get that traditional cookie shape. The cookie dough won’t spread out or flatten during the cooking process.
Bake cookies until the top is slightly golden. And they are quite forgiving even if you over bake them!
Store them in an airtight container in the fridge for 5-7 days. When we make a batch they never last more than a day or two!
Other tools you need…
parchment paper – use it to line your baking sheet for easy clean up.
large mixing bowl – for mixing
cookie sheet – for baking
I like to mix these by hand, but you could always use a food processor if you want a fairly smooth consistency.
As a mom…
I use this recipe as a healthy cookie or activity for my daughter to make from start to finish. She peels the bananas (if we are using fresh), and then mashes away!! I help measure the peanut butter and then we add the rolled oats together. She’s able to mix everything together on her own which is a huge confidence builder!
Next, I line the baking sheet and show her how to use a small ice cream scoop to portion out equal size balls. We then pull out the mini chocolate chips for an extra special little topping as we press down the cookies to a flat disc shape together.
We made these cookies just this past weekend. It was raining and I think we had all had reached our limit for screen-time and just needed a change of scenery. I knew I had bananas that needed to be frozen or used, and we always have some kind of nut butter and oats, so we were golden. Twenty minutes later we had cookies (and breakfast for tomorrow!). It’s really the perfect activity for kids. The total time commitment is very low!
Tracking Macros?
Be sure to divide batter into 12 even cookies.
Each cookie has 106 calories, 6g Fat, 10g Carbohydrate, 3g Fiber and 3g Protein.
I feel like the coolest mom when Jules exclaims “I can’t believe we’re having cookies for breakfast!”
When do I make 3 Ingredient Banana Oatmeal Cookies?
Make them for a quick breakfast (EVEN DURING THE WEEK) to enjoy at home or on the go! They’re the perfect portable version of oatmeal.
They’re my go-to guilt free after dinner treat especially when we top them with dark chocolate!
When the kids are looking for something sweet and I want them to have a healthy dessert.
Make them with sun butter for an allergy friendly lunch box snack.
Preheat oven to 350 degrees. Line rimmed baking pan with parchment paper.
Mash bananas in a medium bowl with the back of a fork; whisk in peanut butter. Stir in oats and optional add-ins, if desired; using 2 small spoons, drop about 1 heaping tablespoon dough 2 inches apart on prepared pan.
Bake cookies 12 minutes or until lightly browned; cool on pan 5 minutes, then transfer to a wire rack to cool completely. Makes 12 cookies.
Tips: You can add mini chocolate chips, chopped fruit or nuts or even ground cinnamon to make these a bit fancier!
I first learned about the FASTer Way to Fat Loss, (FASTer Way or FWTFL for short) in 2018. I must have noticed it in someone’s IG profile and thought – what is FWTFL?
As a foodie and a registered dietitian mom, following anything related to health, wellness, restaurants or food is up my alley. It’s my business to be in-the-know.
And on my road to becoming a dietitian, I tried every diet out there – weight watchers, atkins, keto, vegan, Mediterranean, beach body and my personal favorite and Gweneth Paltro recommended unsustainable fad – The Dr. Joshi Diet. I mean, the crazier and more limiting they are, the better right?
As every health professional worth their salt already knows – that is not the case!
As much as diet culture pushes a calories in, calories out one size fits all approach, lets face it – most of the time these are quick fixes, and unsustainable for the long term. So when I saw FWTFL, I had to investigate.
Melanie Marcus RD
Initial Research
My initial google search in 2019 rounded up mostly influencer recommendations for the program but very few health professionals had weighed in. I did find one dietitian who called the program out for being too complicated. She described it as throwing everything at the kitchen sink and totally overwhelming. Which could be true if you try to piece it together from the FWTFL website and implement on your own. That said, I just kept following The FASTer Way on IG and continued my research. I checked out the blogs, looked employees up on Linked In and learned several dietitians were on the leadership team and helped develop the program. I also took to Pinterest to see what resources I could find there. And then I found the coaches.
The FASTer Way’s key differentiator are the coaches.
Men and women, nurse practitioners, dietitians, physicians, moms, dads, teachers and more – all who live the program day in and day out, sharing their experiences, motivating new and potential clients in online but also in everyday life. FASTer Way has a certification for coaches who then facilitate the program.
Next, I started to follow a few. They shared their meals, grocery hauls, weekly meal plans and recipes. They shared what they fed their families, and what their portions looked like. It all seemed pretty normal. They talked about FWTFL strategies like intermittent fasting and carb cycling and they were living examples of how busy moms and dads, grandmothers and professionals, no matter their stage of life (even during pregnancy) were incorporating the FWTFL into their daily lives.
I even called my dietitian friends to see if they’ve ever heard of it.
After over a year of scoping it out, I bit the bullet, paid the $199 (at the time) and enrolled in the new client experience with the coach that resonated with me – Liz Baynard. She was a post partum, doing her thing, fitting workouts in daily, feeding her family well and she was reaching her health goals. Nothing crazy, nothing unrealistic – totally attainable.
My first round of the FWTFL was October 2020. My doctor cleared me for activity after Max was born and I was ready to hit the ground running. I never looked back. Six months in, I became a certified coach for the FASTer Way and it has brought me more joy as a health expert than I could have ever imagined. Working with clients in a very personal way, nudging them towards achieving their health goals – this is why I became a dietitian.
Whole food nutrition is one of the key pillars of the FASTer Way.
28 reasons why I love the FASTer Way to Fat Loss
In the food department
1. Anyone can do it. It can be completely modified to meet you where you’re at. Whether you’re a new breastfeeding mom, or a college student trying to figure out eating on your own! If you’re recovering from a surgery and can’t work out or you just had bariatric surgery and have been told you can’t do any form of fasting. Whatever the limitation is, there’s a way to talk through it with your coach to customize the program for you.
2. It’s based in science. This is where the macro tracking, intermittent fasting, whole unprocessed foods comes in. The programming is also looked at cyclically so that you’re not always in a calorie deficit – because that’s not really effective.
3. The focus is actually on building lean muscle in order to rid fat. It’s not just about becoming as small as possible. It’s about becoming strong and empowered. Teaching clients the power of their food choices and how that effects their bodies.
4. Intermittent fasting is way easier than I thought! I actually have more time!One of my favorite things is that I don’t need to worry about having breakfast. Instead, I can focus on feeding the kids, packing schoolbags, putting my makeup on and go.
5. You don’t need to purchase additional apps like My Fitness Pal to track macros. The FWTFL app has a macro tracking feature and library and makes macro tracking complete and easy. No additional apps needed!
6. Success isn’t measured by the scale. Instead we learn to look at non scale victories including measurements, photos, energy levels, how clothes fit and sleep quality.
7. You can eat out! Whether you’re traveling for work or dining out more because you don’t have time to cook – the FWTFL can work for you! We track macros (protein, carbs and fat) not just calories. Most restaurants post this info for easy tracking, plust the FWTFL app also has cool features that allow you to add personal favorites or use their library of items for stress free tracking.
8. I can still have my coffee. One of my favorite times of day is when I sit down with my cup of coffee before the rest of the house wakes up. That’s my time to get my day straight and wake up at my own pace.
9. Recipes and meal plans are delicious AND optional. People ask me all the time if I can provide them with a meal-plan for weight loss. I mean all the time. And for me as a dietitian, I love that the recipes use whole foods and are easy to put together. If you’re just not sure where to start with healthy eating, the meal plans are a lifesaver. They’re also ideal for busy people who just want to know what to eat for the week. They even come with a weekly shopping list to make your online ordering a breeze. It’s all found in the FASTer Way to Fat Loss App!
10. FOOD FREEDOM! You can eat whatever you want. And by this I mean, if it fits in your macros, log it and move on. I’m not saying you should eat a twix bar every day, but if you do choose to indulge, you can. And it’s no big deal.
11. Food isn’t emotionally charged anymore. Going through the program actually helped me undo some “diet think” that I didn’t realize I had! Food was always a very emotional, impulsive and comforting thing for me. But after truly looking at food as fuel to help my body build muscle – I’m able to enjoy foods like chocolate, bagels, and pizza without overeating, or guilt.
12. You don’t have to make different meals for yourself vs the rest of the family. Is there a bigger win for moms or dads who cook for the whole family?
13. You don’t feel deprived or hungry. There is actually a lot of food to eat every day. I often see clients struggling to eat enough!
14. Protein supplements and collagen are not required. You can get all the protein you need from whole foods. However, the FASTer Way to Fat Loss team developed a protein supplement that provides 20g per scoop with only 90-98calories. It has little to no carbs and fat, they offer collagen too. It’s not necessary, it’s only an option if you want an easy form of protein to add to your routine.
15. The macro calculation is rooted in having you eat as much food as possible – while reaching your health and body goals! For me, food provides a lot of enjoyment, so it’s a major bonus!
About the FASTer Way to Fat Loss workouts
16. The workouts are FAST. I do not like working out. I never have. I always thought I needed to be running and doing cardio to lose weight. I hated getting red and sweaty, it was never for me. I actually do these workouts during my lunch break at home or even at the office. Each day a workout video is posted in the FWTFL app. The head coaches walk you through every exercise and suggest ways to modify up or down depending on your ability.
17. Every workout can be customized. You can challenge yourself up modify down every and that’s OK! I was always completely intimidated at the gym and didn’t know the first thing about lifting weights. With the FWTFL workouts, I was able to try workouts in the privacy of my own home, modify as needed while gaining strength and confidence.
18. The workouts are effective. The combination of strength training and high intensity workouts are key to keeping your body in a fat burning zone.
19. You don’t need special equipment. There may come a time when you want to upgrade your workout equipment, but you really don’t need anything to get started. Splurge for the strength bands if you want some resistance at a low cost.
20. Workouts are constantly changing. And they are strategically paired with the macro cycle for maximum effectiveness.
Maybe the most important and the most underrated things about the FASTer Way.
21. You learn the foundations at a pace that help support new healthy habits. It takes at least 21 days to form a healthy habit. Your first six week round gives you a fresh start and lays the foundation for healthy habits. Plus your coach can help you pace things out and support you with extra trainings and resources to help you succeed, the way you need to learn.
22. You have a support system – always. This is the role of your personal coach. The head coaches at the FASTer Way to Fat Loss are constantly delivering tips through the app. It’s cool because it reminds you why you’re doing this. Also, seeing my clients support each other – in many cases TOTAL strangers, is really a beautiful thing.
23. It’s sustainable! Once you start to trust the process you’ll see that you can have an off day and get right back into it without punishing yourself. It’s all about progress, not perfection.
24. I haven’t stepped on the scale in about a year. This has done wonders for my mental health. Stepping on that scale and then allowing the number to impact my mood has been awful. And I know better than anyone that one pound of muscle is way smaller than one pound of fat. But for some reason the number that all goes out the window when I step on the scale. Now, I focus on how clothes fit, energy levels, sleep quality and even how much weight I’m using during workouts as measures for success.
25. Macro tracking isn’t forever. This can seem overwhelming at first. But I see it as a way to collect data about how you eat. It’s a way to learn what foods you lean into, and more importantly, it’s a way to learn about the portion sizes that make you feel your best.
26. You can find the coach that is right for you. If you’re going to start the FWTFL, take the time to look up coaches and see who you vibe with. Everyone is different and we are all motivated in different ways. If you take the time to sign up with a coach who you trust and feel comfortable with, your success will be that much greater. And while it’s not the norm, you can actually contact the FWTFL, to change your coach if you feel that you need to!
27. It provides much needed structure for the person that’s tried everything. I’ve had so many clients that “have tried everything”. Like me, they wanted to make progress on their health goals, they just didn’t have the structure or support to get them there. With a good faith effort, there is no doubt in my mind, you will find success.
28. Support continues even after your 6 week new client experience. The FWTFL calls this VIP membership. It’s ongoing monthly access to the FWTFL programming through the app. You’ll keep access to daily workouts, macro cycle changes, macro and water tracking, seasonal challenges with cool prizes and your personal coach.
What is the FASTer Way to Fat Loss?
It’s a digital nutrition program that combines intermittent fasting, macro tracking, carb cycling and fitness to maximize fat loss while building lean muscle. You learn about these topics at length with your FASTer Way Coach. It may be through daily emails, small online groups or through the FWTFL App.
When you first sign up you are enrolled in the “New Client Experience” which will start on a specific day. It lasts for six weeks and is referred to as a “round” of the Faster Way. As soon as you sign up you’ll get instant access to the app and your coach will get in touch with you to sort out the details.
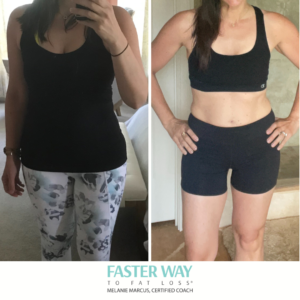
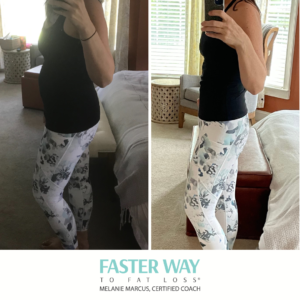
Never in a million years did I think I’d be sharing progress photos like this! These are a result of being consistent. Not perfect. And they just keep getting better!!
The FASTer Way to Fat Loss is NOT FOR YOU if:
Staying accountable and in touch with your coach daily seems like too much.
If you like the idea of shifting your diet, but maybe you’re just not quite ready to make the change.
When you start living the faster way you realize a healthy lifestyle isn’t about being perfect. It’s about enjoying life and finding a balance with food and exercise that helps you reach your goals.
Start your weight loss today!
I’m excited to help you achieve your health goals! Connect with me on Instagram @miss_nutritious_eats or on Facebook @Missnutritiouseats. Share your questions, and let’s begin your journey to feeling your best today!
About Me
I’m Melanie.
I’m a chef, registered dietitian, foodie, wife and mom. If you’re looking for quick and healthy meal inspiration that serves YOU and your family well, then you’ve come to the right place!
About Me
I’m Melanie.
I’m a chef, registered dietitian, foodie, wife and mom. If you’re looking for quick and healthy meal inspiration that serves YOU and your family well, then you’ve come to the right place!
Getting kids to eat well and form healthy habits – good habits – takes time. It takes lots of time, persistence and the knowledge to know it’s a long game. Nothing is going to happen overnight, trust me!
Positive, Healthful Habits: August Is Kids Eat Right Month™
The 2020-2025 Dietary Guidelines for Americansnoted that some school-aged children are not eating enough of the recommended amounts of certain food groups. As a result, they may not be consuming the nutrients they need to support their growing bodies or engaging in the physical activity they need to stay healthy.
YOU! The parents and caregivers play a big role in children’s nutrition and health, teaching kids about healthful foods, being a good role model and making sure physical activity is incorporated into each day.
August, which is Kids Eat Right Month™, is a great time to reevaluate your family’s eating and physical activity habits and take steps to make positive, healthful changes.
The Academy of Nutrition and Dietetics is encouraging families to take the following steps:
Shop Smart. First, encourage a healthful lifestyle. Get your children involved in selecting the food that will appear at the breakfast, lunch or dinner table.
Cook Healthy. Secondly, involve your child in the preparation of meals with age-appropriate tasks. They will learn about food and may even be enticed to try new foods they helped prepare. Check out my Healthy Hot Dog recipe!
Eat Right. Next, sit down together as a family to enjoy a wonderful meal. It’s also an opportunity to share the day’s experiences with one another. Family meals encourage healthful family relationships and good eating habits.
Healthful Habits. You can help kids form great, healthful habits by setting a good example. With each meal, fill half your plate with fruits and vegetables, choose lean protein foods, and make at least half the grains your family eats whole grains. For beverages, drink water or milk over drinks with added sugars, and opt for calcium-rich foods with meals and snacks.
Get Moving. Aside from being a great way to spend time together, regular physical activity is vital to strengthen muscle and bones, promote a healthy body weight, develop social skills and build self-esteem. Encourage preschool children to be active throughout the day. Older children and adolescents need at least 60 minutes of moderate-to-vigorous activity daily, according to the U.S. Department of Health and Human Services’ Physical Activity Guidelines for Americans (2nd ed.).
Get Talking. Lastly, eating right can sometimes be a challenge for kids, particularly if they are picky eaters, but experts say that a conversation can help. Talk to your children about the foods they enjoy and introduce them to new foods from a variety of cultures to expand all of your horizons.
Raising healthy kids is totally possible. Just stay consistent and know it will sink in eventually. Good habits take time 🙂
Eliminate mealtime pressure by enjoying meals together with children – after all they learn by example! It’s is a powerful way to get them to try new flavors, textures, and get the nutrition benefits of healthful and tasty food!