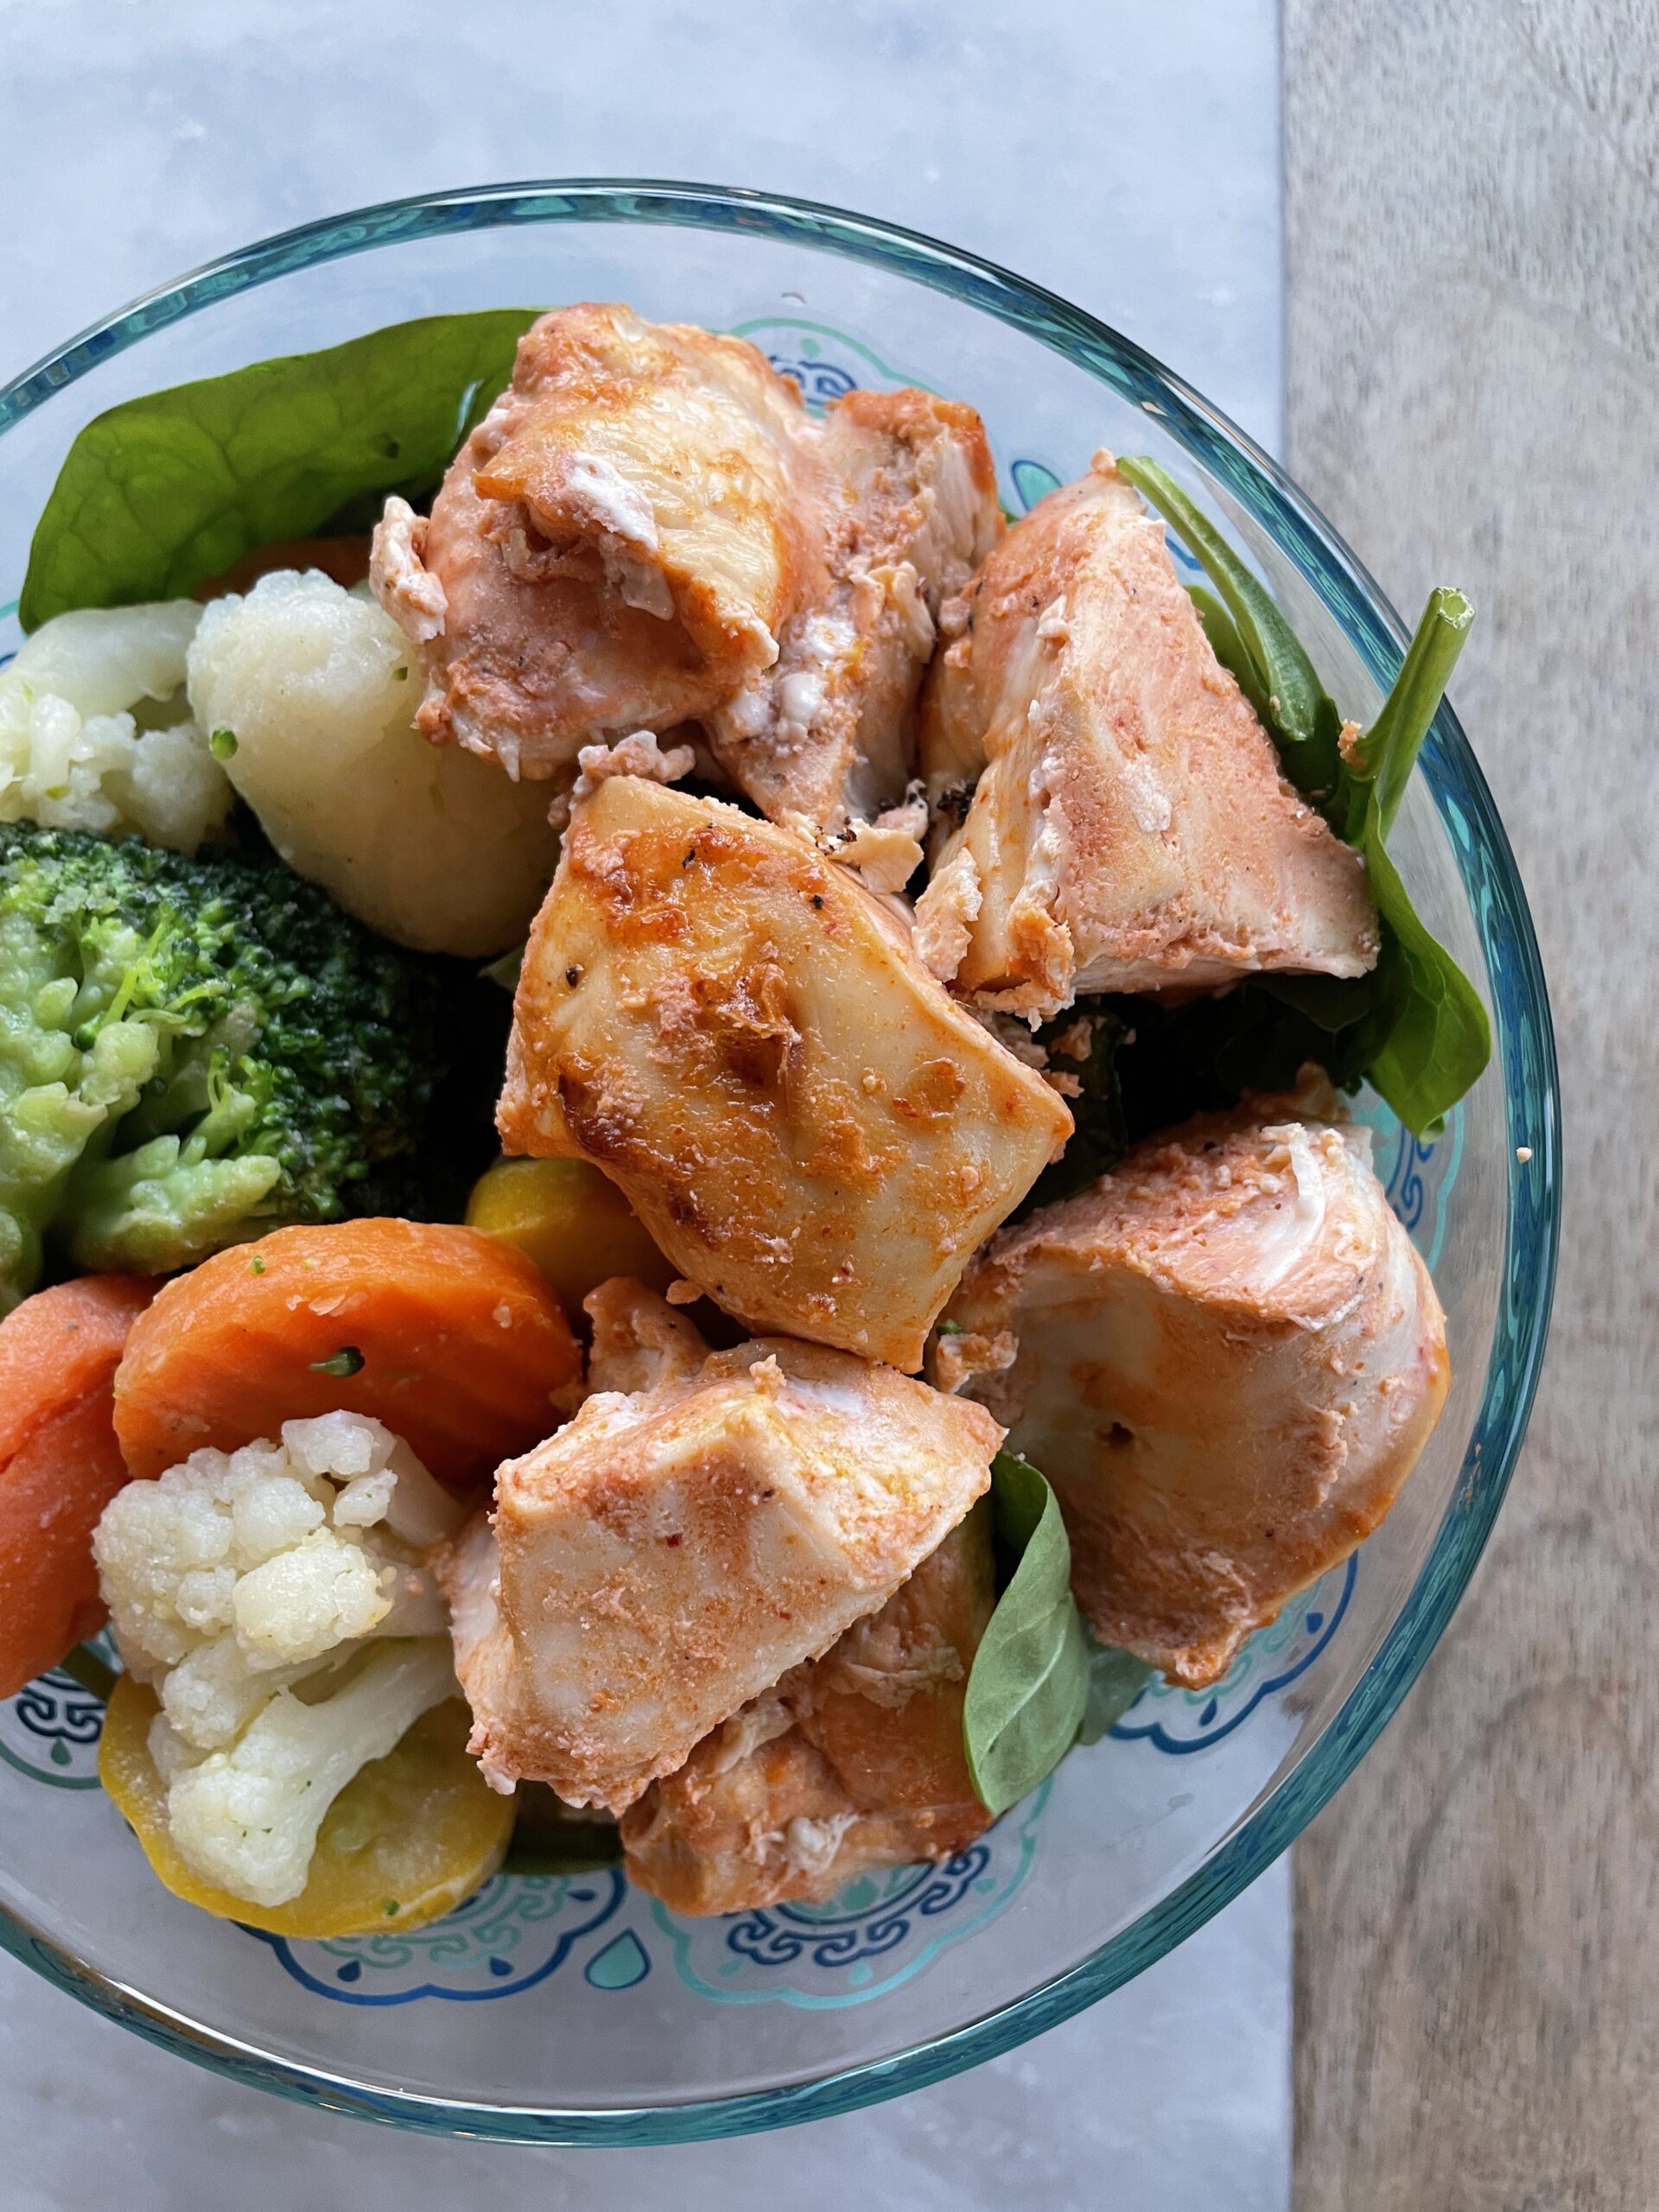
I came across this recipe a few years ago in one of my cookbooks and it’s been a staple ever since. I make it often during summer grilling season and it’s so easy to remember that I can make it while away on vacation! The marinade time is relatively low making it a good option for weeknight meals too. It’s one of my favorite chicken recipes because it requires very little prep work and they have so much flavor!
Chicken pieces – I like to use boneless skinless chicken breasts cut in to 1-inch pieces. Boneless skinless chicken thighs also work well. If you don’t want to make kabobs, you can use your favorite cut of chicken and bake or roast until 165F.
Greek yogurt – The original recipe calls for full fat greek yogurt. I’ve made it with fat free Greek and plain yogurt and it also worked well.
Red curry paste – This is the secret ingredient. It’s where maximum flavor and color comes in. I prefer the Thai Kitchen brand. If you can’t find it, try a mix of tomato paste, garlic and fresh ginger, red chili powder and lemon zest.
Kosher salt and olive oil
Other equipment
Wooden skewers or metal skewers
Instant read thermometer
Outdoor grill, gas grill or indoor grill pan
Baking sheet to place raw chicken skewers
Plastic wrap
Plastic gloves
How to make yogurt curry chicken skewers
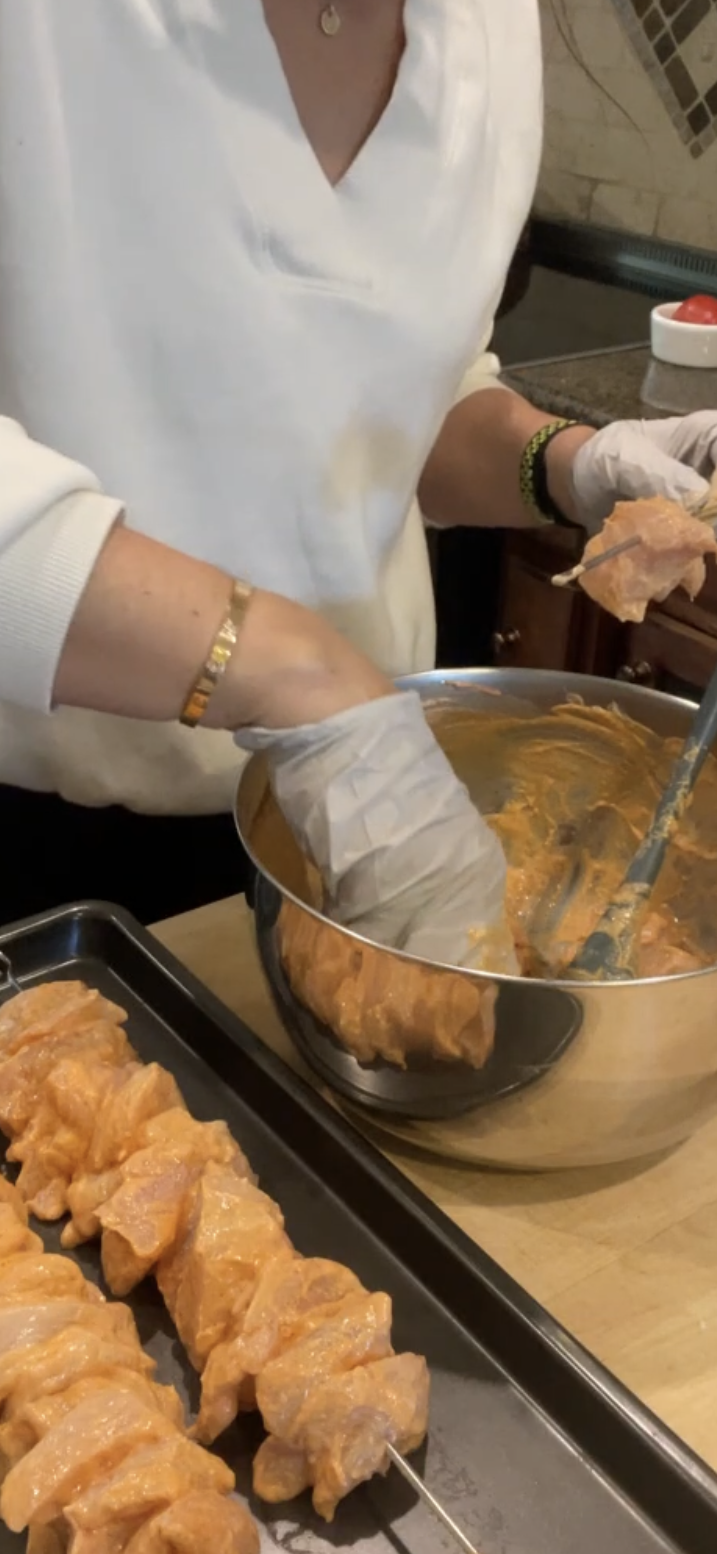
First, combine the plain greek yogurt, curry paste, salt and oil in a large bowl. Mix well and set marinade ingredients aside.
Next, cut your chicken into one inch pieces if necessary.
Place pieces of chicken into marinade. Once coated, place chicken onto skewers, cover with plastic wrap and place in the refrigerator for 20 minutes.
For best results, preheat your grill to ensure grill grates are hot.
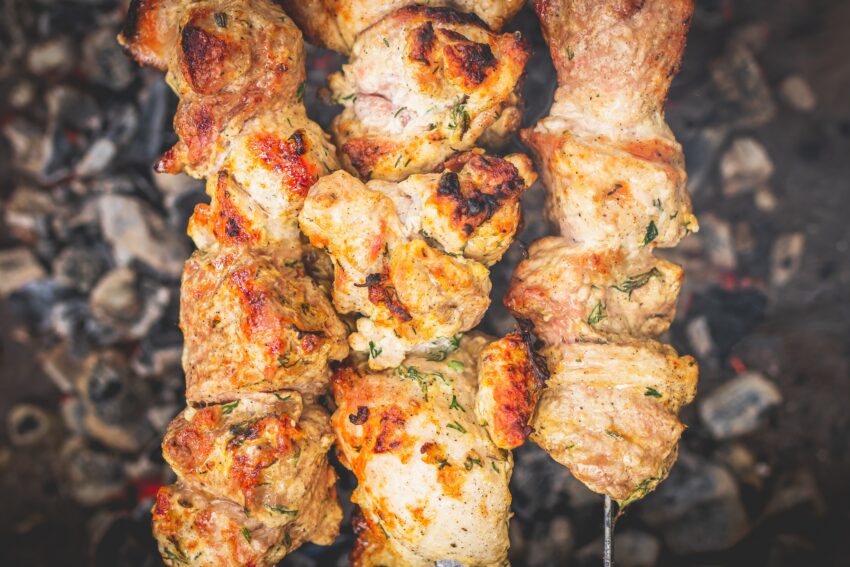
Place skewers onto prepared grill and let cook for about 25 minutes, turning once half way through. Skewers should be golden brown and reach an internal temperature of 165F when done. Discard extra marinade.
Store leftovers in an airtight container for 3-5 days in the refrigerator.
Yogurt is a good source of healthy bacteria for your gut. That same live active bacteria also happens to be what makes it a good marinade, tenderizing your chicken within a short amount of time.
What to serve with these easy chicken skewers
Serve cooked skewers with…
Roasted red onions and broccoli
Warm pita bread
Traditional Greek salad with tomato, olives and feta
Small side salad
Roasted potatoes and a squeeze of fresh lemon juice
Sliced cucumber and tzatziki
Hummus and stuffed grape leaves
Nutritional information and macros
This grilled chicken is versatile for regular macro and low carb days. This recipe makes 6, 5 oz cooked portions with the following macros. If you need other macro friendly recipes check out my chicken fajitas, egg roll in a bowl or pulled chicken recipes! All super easy and macro friendly.
Calories: 221
Fat: 7g
Carbohydrate 1g
Protein 35g
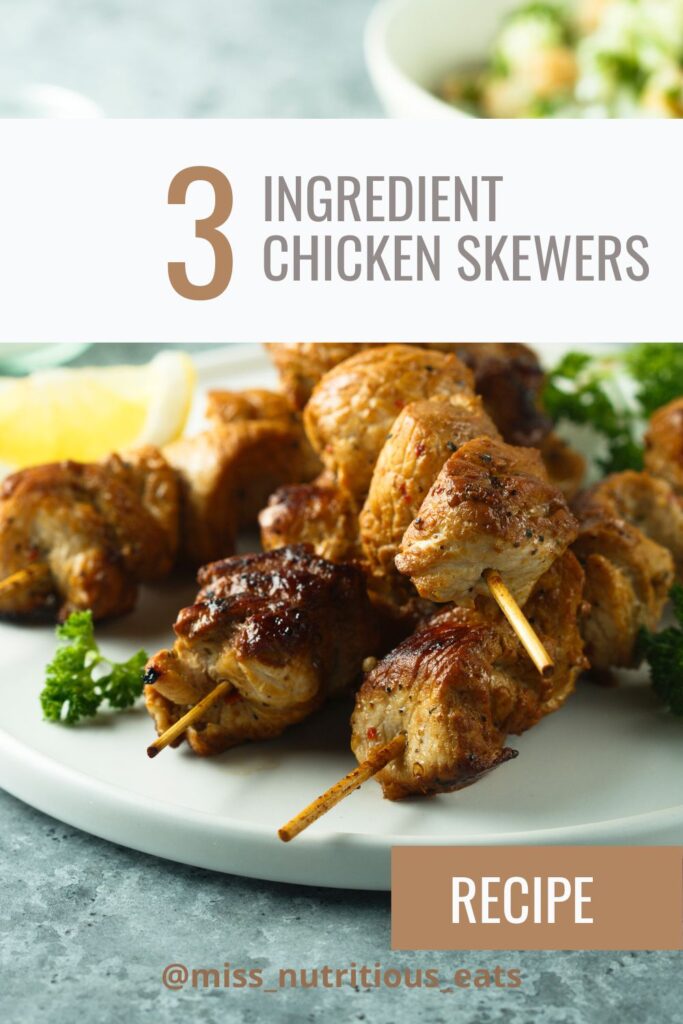
Yogurt Curry Chicken Skewers
This recipe couldn't be faster to throw together, and it's a complete crowd pleaser.
I’m a chef, registered dietitian, foodie, wife and mom. If you’re looking for quick and healthy meal inspiration that serves YOU and your family well, then you’ve come to the right place!
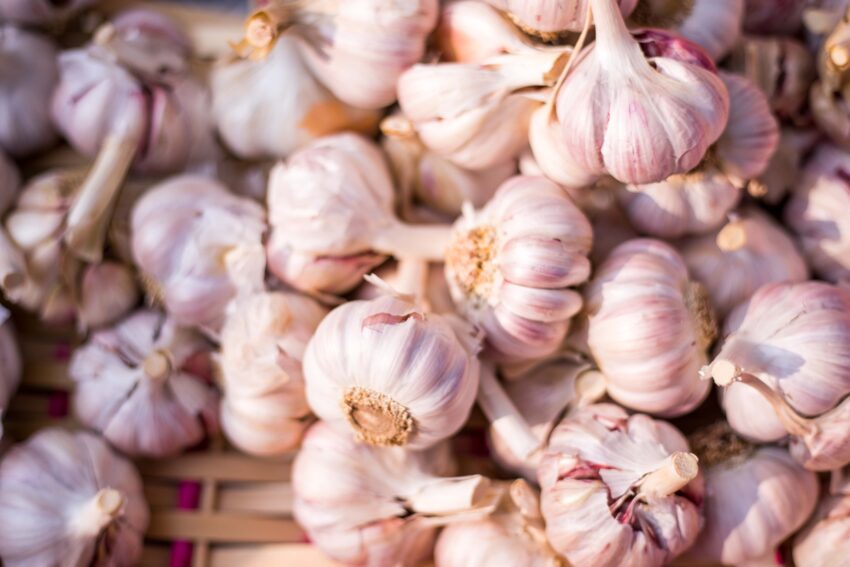
I’ve been giving this a lot of thought lately. It’s funny because, I can vividly remember chatting with a girlfriend – pre marriage, and babies – when I explicitly said “if you have any respect for yourself and cooking – you should never use jarred garlic.” She called me fancy pants and that was the end of that! Anthony Bourdain has been quoted as saying something similar too.
Jarred pre-minced garlic will never replace fresh cloves (that is where you get the best flavor). But if peeling and slicing garlic is a step of cooking that is getting in the way of YOU cooking meals at home, I say use the jarred garlic. And don’t feel guilty about it! As you start to cook more, or circumstances change, you may have more time to give to the cooking process, and your choice of garlic may change too!
But now that I’m in another phase of life, I see (both garlic and cooking) differently. I just don’t have the same time to enjoy the art and process of cooking at every meal. Instead, home cooked family meals are a way to be sure my husband and I and the children are eating health(ier) food instead of fast food or takeout alternatives. They’re a way to be sure we’re eating enough fruits and vegetables, and a way to save money on expensive takeout.
Since culinary school I’ve practiced the technique of mise en place. I would choose an elaborate recipe based purely on flavor or presentation, purchase ingredients in the most fresh and unprocessed form and then prepare everything according to the ingredients list. So if a recipe called for sliced garlic. I would buy garlic bulbs at the local grocery store, break off the fresh garlic cloves, peel and slice until I had enough for the recipe. Then I’d move onto the next ingredient.
Today, it’s a different story. I am open to any and all grocery store shortcuts or new products, anything that will save me time and money and help get a home cooked meal on the table – VERY QUICKLY.
Types of garlic and garlic products
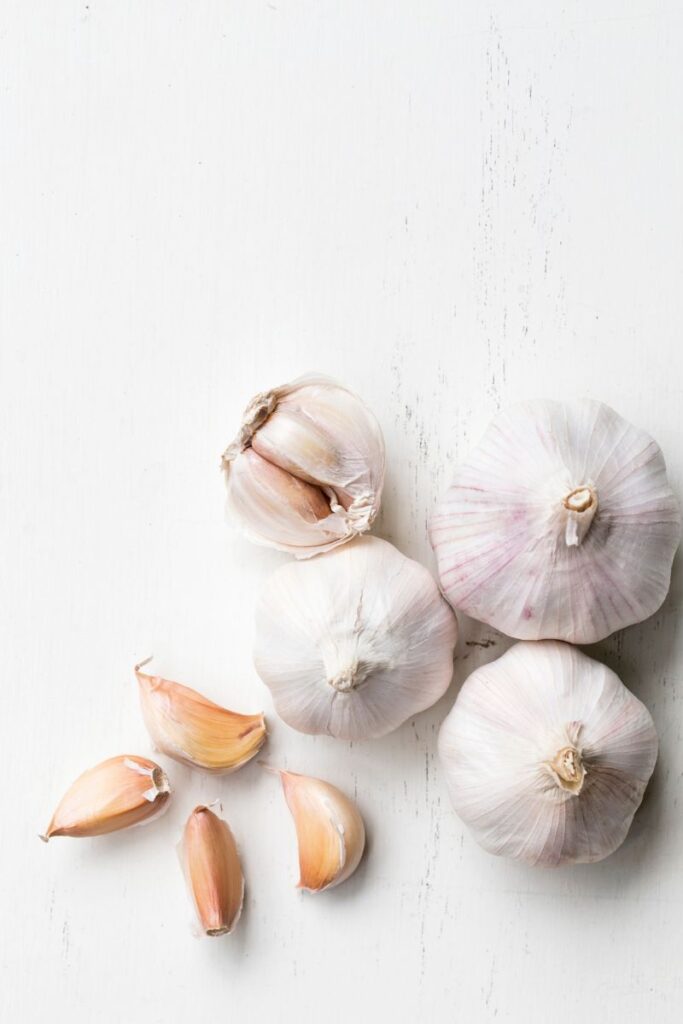
Raw whole bulb garlic can be found in the produce aisle. They’re covered in a white papery skin and last for quite some time at home when stored in a cool dry place. Not the refrigerator. These will have a stronger flavor than other “processed” garlic options.
Elephant garlic is a favorite of mine because 1 clove is equal to at least 2-3 normal cloves so it’s less labor to peel and easier to slice.
Black garlic is more earthy and not the same as traditional white garlic.
Aside from the traditional raw forms of garlic, you can also find other garlic products. Experiment with using different sources of garlic next time you make a pasta sauce or salad dressing. Then use wha you prefer.
Pre-peeled whole cloves of garlic can be found in produce sections. Caution with these because once you open the package, they will need to be used within a week or so. So unless you need a lot of garlic, buying these large bags may not be the money and time saving solution for you.
Garlic paste is usually in the refrigerated section of the grocery store, but has more additives.
Chopped garlic in small jars in the produce section of your grocery store, usually they’re sold in water or olive oil.
Frozen garlic cubes are great because one cube is equal to one clove of garlic which makes easy measuring.
Dried garlic in the spice aisle in the form of dehydrated garlic cloves or garlic powder. These are best for dry rubs.
Garlic salt is a mixture of garlic powder and salt.
What is in jarred garlic?
The main ingredients are garlic, water and citric acid which is used as a preservative to prevent oxidation and browning.
Converting teaspoons to cloves
Half a teaspoon of jarred garlic is equal to one clove of fresh garlic. Jarred is not as strong as the fresh stuff, so you can get away with using a little bit more.
If you ask me, there’s no such thing as too much garlic.
Benefits of jarred garlic
Convenient option for last minute meals – think stir fry, garlic bread, soup, salad dressing or marinade starter.
It has a longer shelf life than other garlic products such as garlic paste or pre-peeled cloves
No need for a garlic press
Time saver when you don’t have time to mince garlic
It can remove the mental hurdle of needing to peel and slice garlic which can be tedious
No smelly hands
Negatives of jarred garlic
You won’t get the same quality aroma filling your home – you need fresh for that!
Nutritionally, jarred garlic doesn’t have the same health benefits because it has been pasteurized or heated during the packaging process.
It loses it loses it’s antibacterial properties and has lower levels of allicin, a compound which may prevent certain types of cancers.1
The garlicky flavor is not as strong as fresh raw garlic.
It has a stigma, and your foodie friends will always hold against you.
It can develop an off putting odor and flavor after it’s been open for too long – so be sure to keep an eye on the expiration date.
What are signs of spoilage?
If your jarred garlic started to have an off odor or becomes discolored it’s time to toss it. It can last several weeks in the refrigerator, especially when it’s sealed and stored properly. When using garlic, be sure the spoon being used is clean to avoid cross contamination from other foods.
The bottom line
Jarred pre-minced garlic will never replace fresh cloves (that is where you get the best flavor). And some dishes are not a good fit for jarred garlic – like anything you’d eat raw. But if peeling and slicing garlic is a step of cooking that is getting in the way of YOU cooking meals at home, I say use the jarred garlic. And don’t feel guilty about it! As you start to cook more, or circumstances change, you may have more time to give to the cooking process, and your choice of garlic may change too!
Recipes you can use jarred garlic in
1
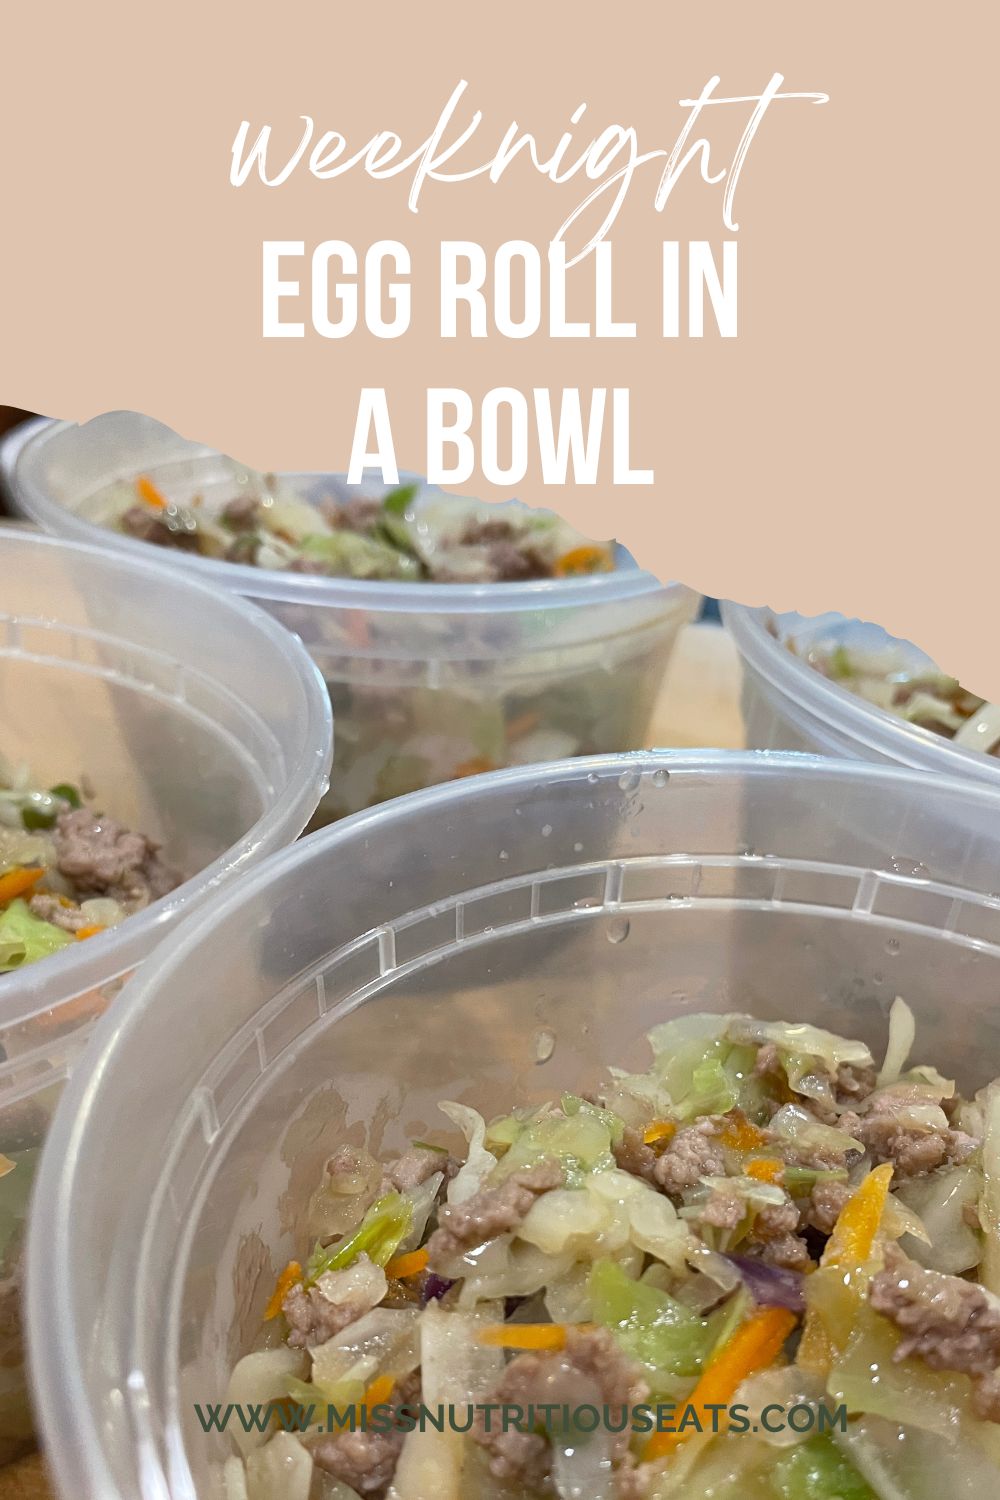
Egg Roll In A Bowl
Easy weeknight recipe that comes together with basic pantry staples and 2-3 fresh ingredients from the store!
I’m a chef, registered dietitian, foodie, wife and mom. If you’re looking for quick and healthy meal inspiration that serves YOU and your family well, then you’ve come to the right place!
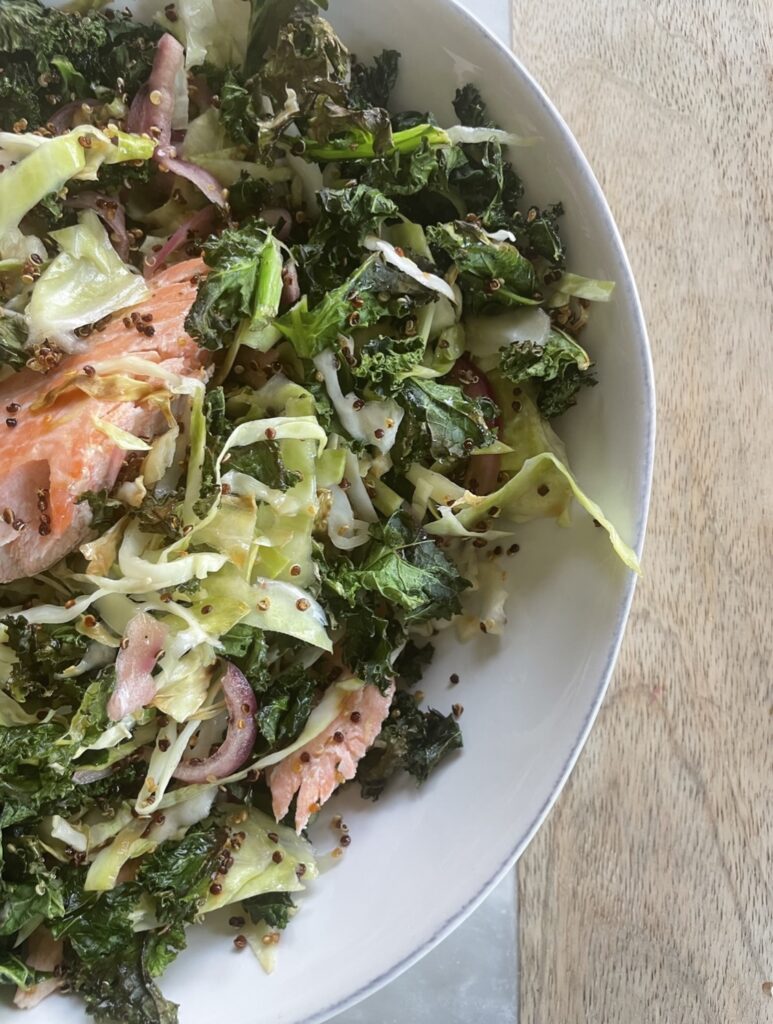
When I heard baked salads were trending on TikTok, I was intrigued and as a dietitian, pleasantly surprised. Baked salad is simply a variety of roasted vegetables that are eaten as a warm salad – which is perfect for winter eating! To me, baked salad recipes are the 2.0 of sheet pan meals. They’re an ideal way to increase your servings of vegetables and they’re very easy to make. I tested
This recipe is inspired by the version made by Justine Doiron, it’s the perfect balance of sweet and bitter, soft and crunchy. Her’s used chili oil, which I didn’t have on hand, so simplified a bit, either way, I really enjoyed it when I made it for the first time. It even reheated will as leftovers too! Just think of it as a roasted vegetable salad with fun crunchy bits on top. Let me know if you try this cozy dish and happy baked salad season!
I tested this concept as part of my work for Dole Food Company, but all opinions are my own!
cabbage – Not only is cabbage inexpensive, they’re a cruciferous vegetable, loaded with nutrients. Brussels sprouts or pre cut slaw mix would work well here too, if you don’t have cabbage.
kale– Kale is a hearty green that stands up to the heat of roasting. Collard greens are a good substitute if necessary.
red onion – This recipe called for red onion within the dressing, a yellow or white onion could also be used here. If you want to skip the warm dressing agrodolce all together, just use your favorite oil based salad dressing instead.
quinoa – I used a red quinoa, but white quinoa could also be used. If you don’t have quinoa, you can create breadcrumb mixtures that will provide the same texture as crispy quinoa. Sourdough croutons, crispy chickpeas or pumpkin seeds would also work well!
honey – maple syrup or agave could be used instead.
herbs such as sage and rosemary sprig.
red wine vinegar – A rose vinegar or a white vinegar would also work well here. I caution using apple cider or balsamic vinegar as their flavors are much stronger.
olive oil – since this oil is heated, don’t use extra virgin. Regular olive oil or other neutral oil such as vegetable or avocado oil would be fine.
kosher salt and black pepper
Variations and serving suggestions
Experiment making your own version of baked salad with these ideas.
Roast sweet potatoes, butternut squash cubes or other winter vegetables for a splash of color and vitamin A.
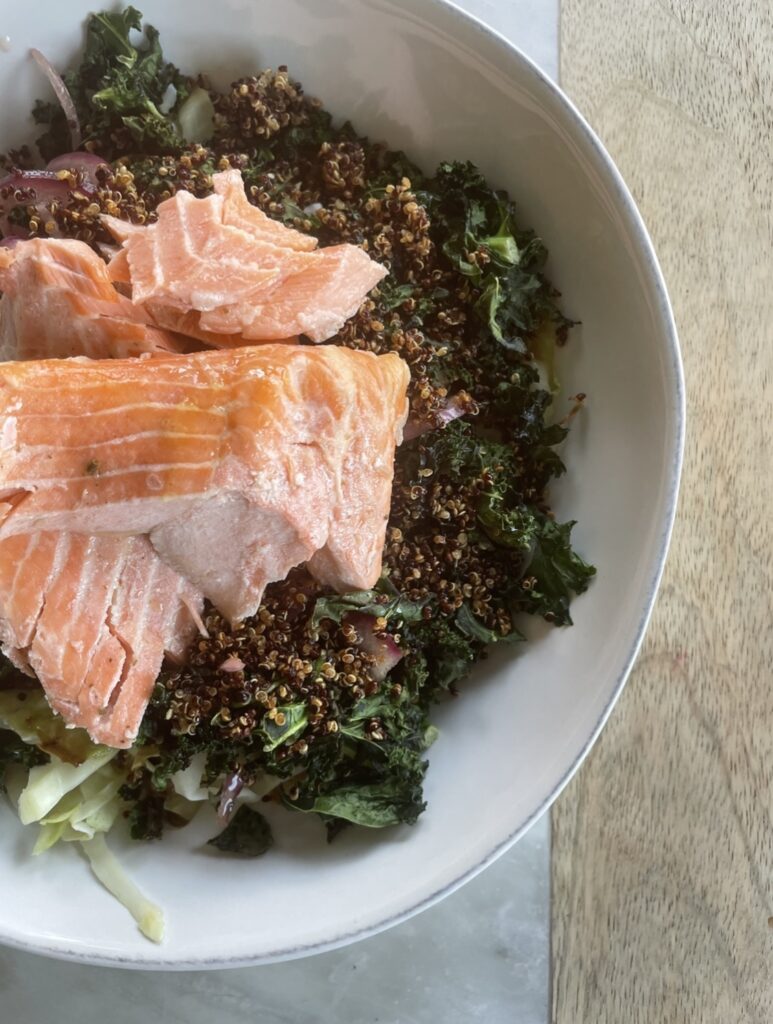
Top with roasted chicken breasts or poached salmon to create a meal that even meat eaters will love.
Pan sear goat cheese rounds to create a baked goat cheese salad as a fancy DIY first course at home.
Enjoy as a light lunch topped with chickpeas or roasted tofu.
Try roasting grapes, tomatoes or peaches for a sweet twist!
Which ever combination you choose, you won’t go wrong by adding a squeeze of fresh lemon juice before serving.
How to make baked salad
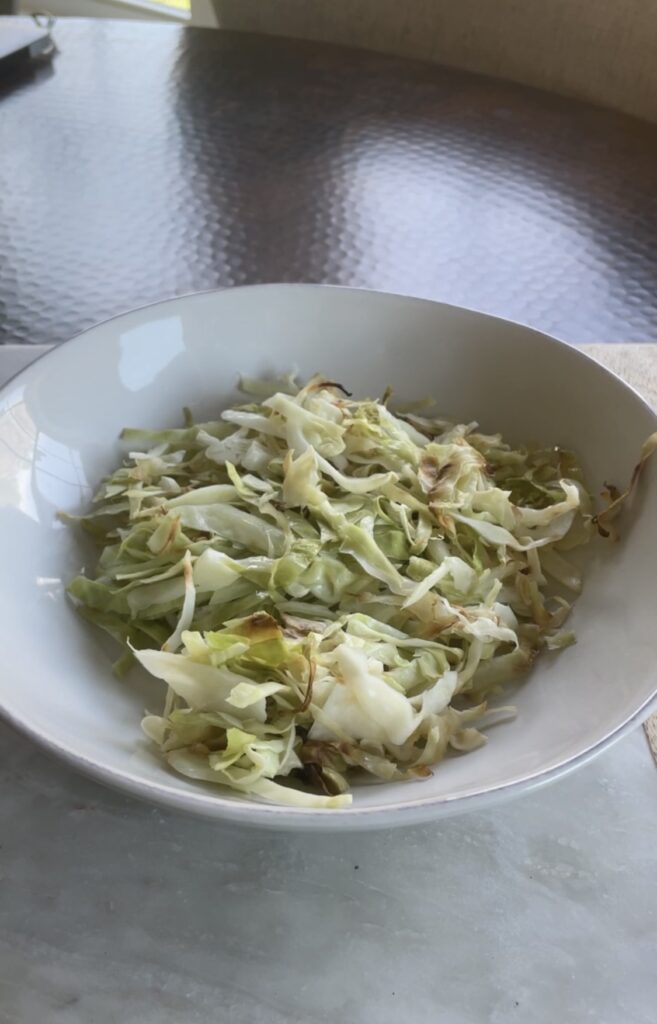
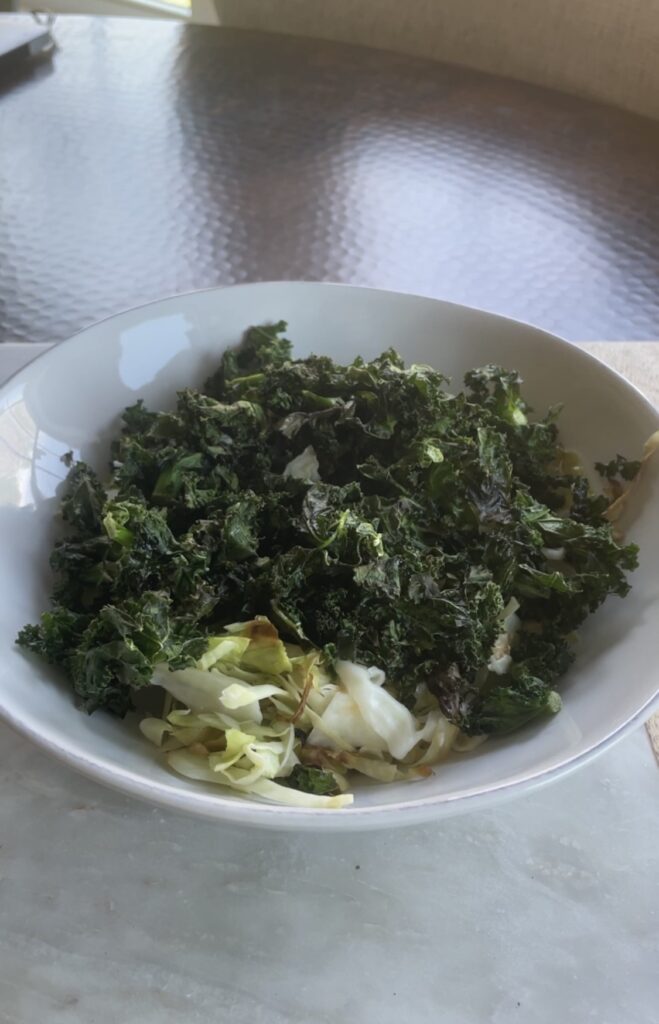
Start by thinly slicing the cabbage and kale. I used a mandolin to slice the cabbage into uniform strips and I took a shortcut with pre cut and pre washed kale.
Coat the cabbage and kale with olive oil, and place into a 400 F oven. Bake the kale for 8 minutes or until fork tender, leaving the cabbage in for a total of 20 minutes, until golden brown.
Cook quinoa according to package instructions and then spread onto large baking sheet, spray with olive oil spray and sprinkle with pinch of salt and pepper or Seasonello. Bake at 375 until crisp, about 20 minutes.
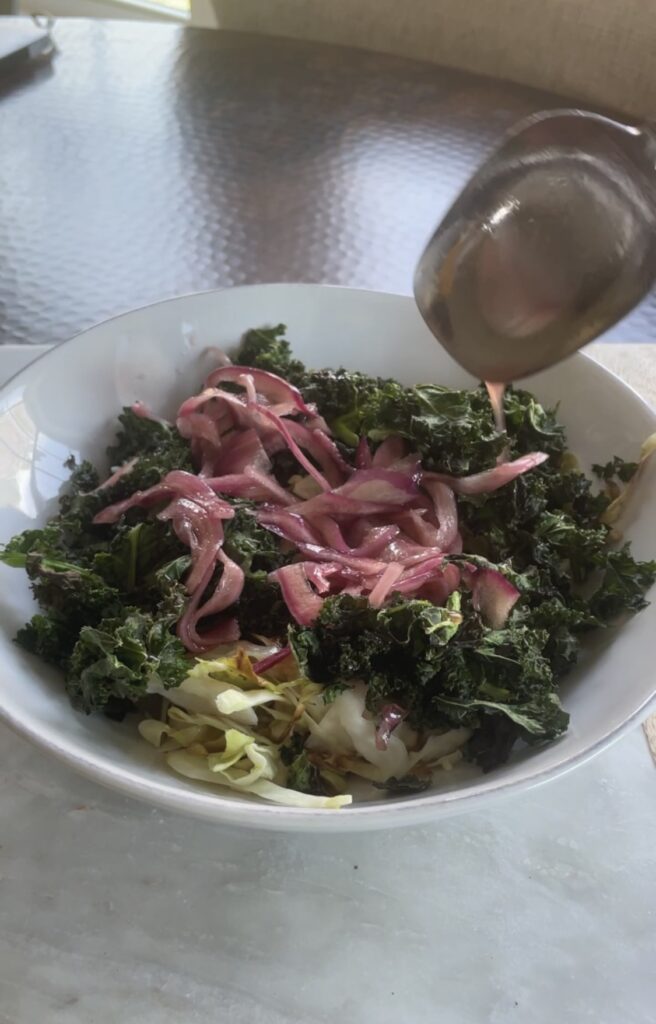
In a medium saucepan heat 1teaspoon olive oil with rosemary and then add honey mixture. Let simmer for 2 minutes add vinegar and then pour over sliced red onion in small bowl. Set aside.
When quinoa is toasty, layer the salad in one large bowl or divide into 3 or 4 smaller ones for meal preps!
Ingredients not to use
Roasting vegetables is one of my favorite things to do to increase flavor without a lot of work. In my opinion, nearly any vegetable can be roasted, but you may just want to watch out for the few below.
Delicate leafy greens such as spinach or spring mix. They will not stand up to the heat from the oven!
Avocado – While I’ve had success grilling avocado, I don’t suggest roasting it, in this way.
Cucumber – They will take longer to roast and will likely need seasoning to enhance the flavor.
If you want to use these items, I would suggest adding them raw just before serving.
Why you should try baked salads
They’re delicious.
They’re a hands off way to meal prep healthy lunches for the week.
This recipe is a good base that plays nicely with other ingredients to create variety.
Nine out of 10 Americans don’t eat enough fruits and vegetables – add more to your diet without sacrificing flavor.
This is an easy way to enjoy a warm cozy dish outside of salad season.
It makes amazing leftovers!
It’s a perfect fit if you’re following a low carb or Mediterranean style diet.
About Me
I’m Melanie.
I’m a chef, registered dietitian, foodie, wife and mom. If you’re looking for quick and healthy meal inspiration that serves YOU and your family well, then you’ve come to the right place!
Every mom needs an easy slow cooker recipe that the whole family will love. Bonus points if it can transform from one meal to another without comment from the peanut gallery – this hack will do just that! This cooking method is a great way to result in tender chicken that can be used in a multitude of ways. Think of this as your protein meal prep for the week. In fact, you can cool and freeze half of what you make for a future easy dinner too! It’s easily a week’s worth of chicken for 2-3 people.
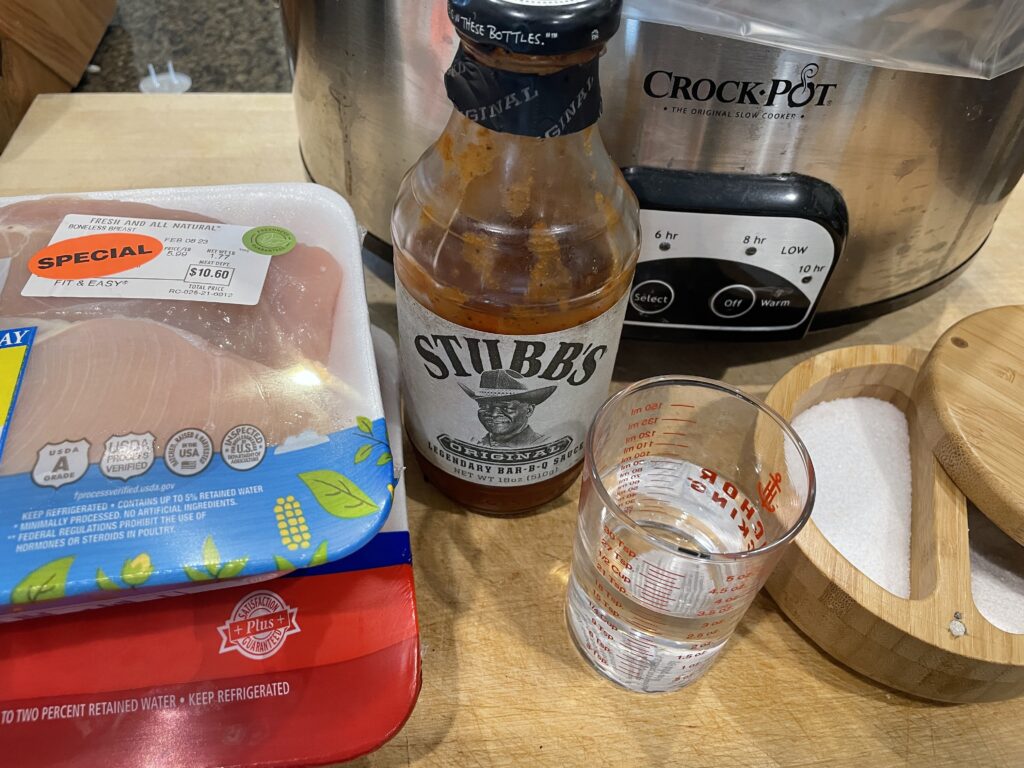
Boneless skinless chicken breasts and/or boneless skinless chicken thighs, plus kosher salt
BBQ sauce – use your favorite barbecue sauce, we like to use Stubb’s.
Water – you can also use a low sodium chicken broth for added flavor here!
Optional ingredients
If you have spices on hand you can enhance the sauce ingredients by adding a tsp of smoked paprika and a tsp of garlic powder or onion powder. If you like heat, you can add a few tablespoons of hot sauce during the cooking process. Another version of this recipe is slow cooker Mexican chicken which is made by swapping bbq sauce for mild or medium salsa.
Step by Step instructions
First line your slow cooker for easy clean up. Slow cooker liners are a must for me, they make the entire process including cleanup very hands off.
Next add your raw chicken breast and thighs to the bottom of the slow cooker. Sprinkle with salt.
Top with water and bbq sauce
Cover and cook on high for 3-4 hours or low for 6-8 hours
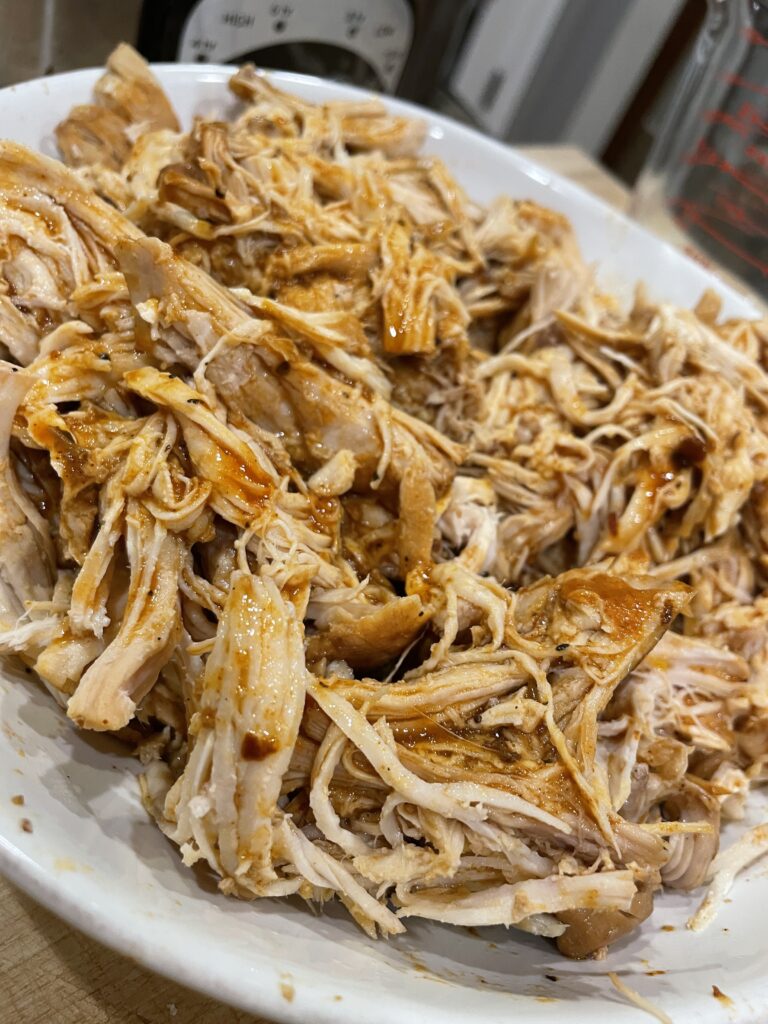
When chicken reaches an internal temperature of 165F, remove pieces from slow cooker and place in large bowl.
I like to shred using two forks, but you can also use a hand mixer to quickly pull apart the cooked chicken. Just be sure to use a low speed!
Then ladle 1-2 cups of the liquid from the slow cooker bbq chicken over the pulled chicken, allowing it to reabsorb.
The rest of the liquid can be discarded, but if you’re going to re-heat leftover pulled chicken later in the week, you may want to hold onto the extra sauce.
Lastly, if you’re feeding a crowd, return the pulled chicken to the slow cooker to keep warm for serving.
Store leftover pulled chicken in an airtight container in the refrigerator for 3-4 days or freeze for up to 3 months.
Step by step images
After cooking for 8 hrs on lowPulled chicken with sauce on topTurned into Andy’s dinner
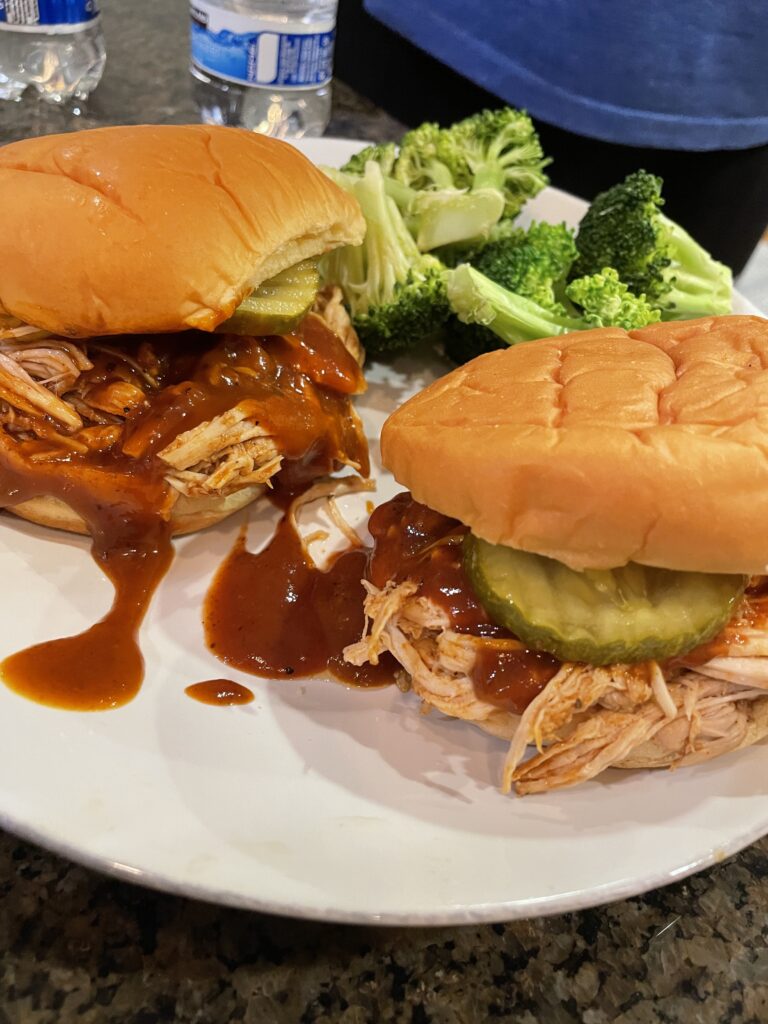
Ways to eat your pulled chicken
On whole wheat hamburger buns with pickles and red onion
With potato salad and string beans
Make BBQ chicken sandwiches on a hearty bread
With roasted sweet potato and a side salad
With corn tortillas, sour cream and coleslaw
Stuffed inside a baked potato with black beans and salsa
Macros Breakdown
240 calories
10g fat
5g carbohydrate
29g protein
0 fiber
This is truly the easiest bbq chicken recipe out there. There’s a little prep in just making sure you have chicken pieces and your favorite bbq sauce on hand, but other then that, it’s ideal for busy days!
I’m a chef, registered dietitian, foodie, wife and mom. If you’re looking for quick and healthy meal inspiration that serves YOU and your family well, then you’ve come to the right place!
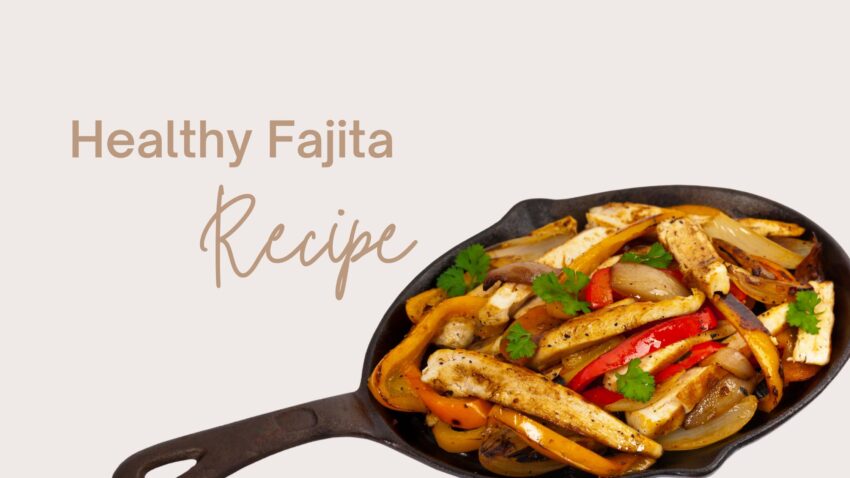
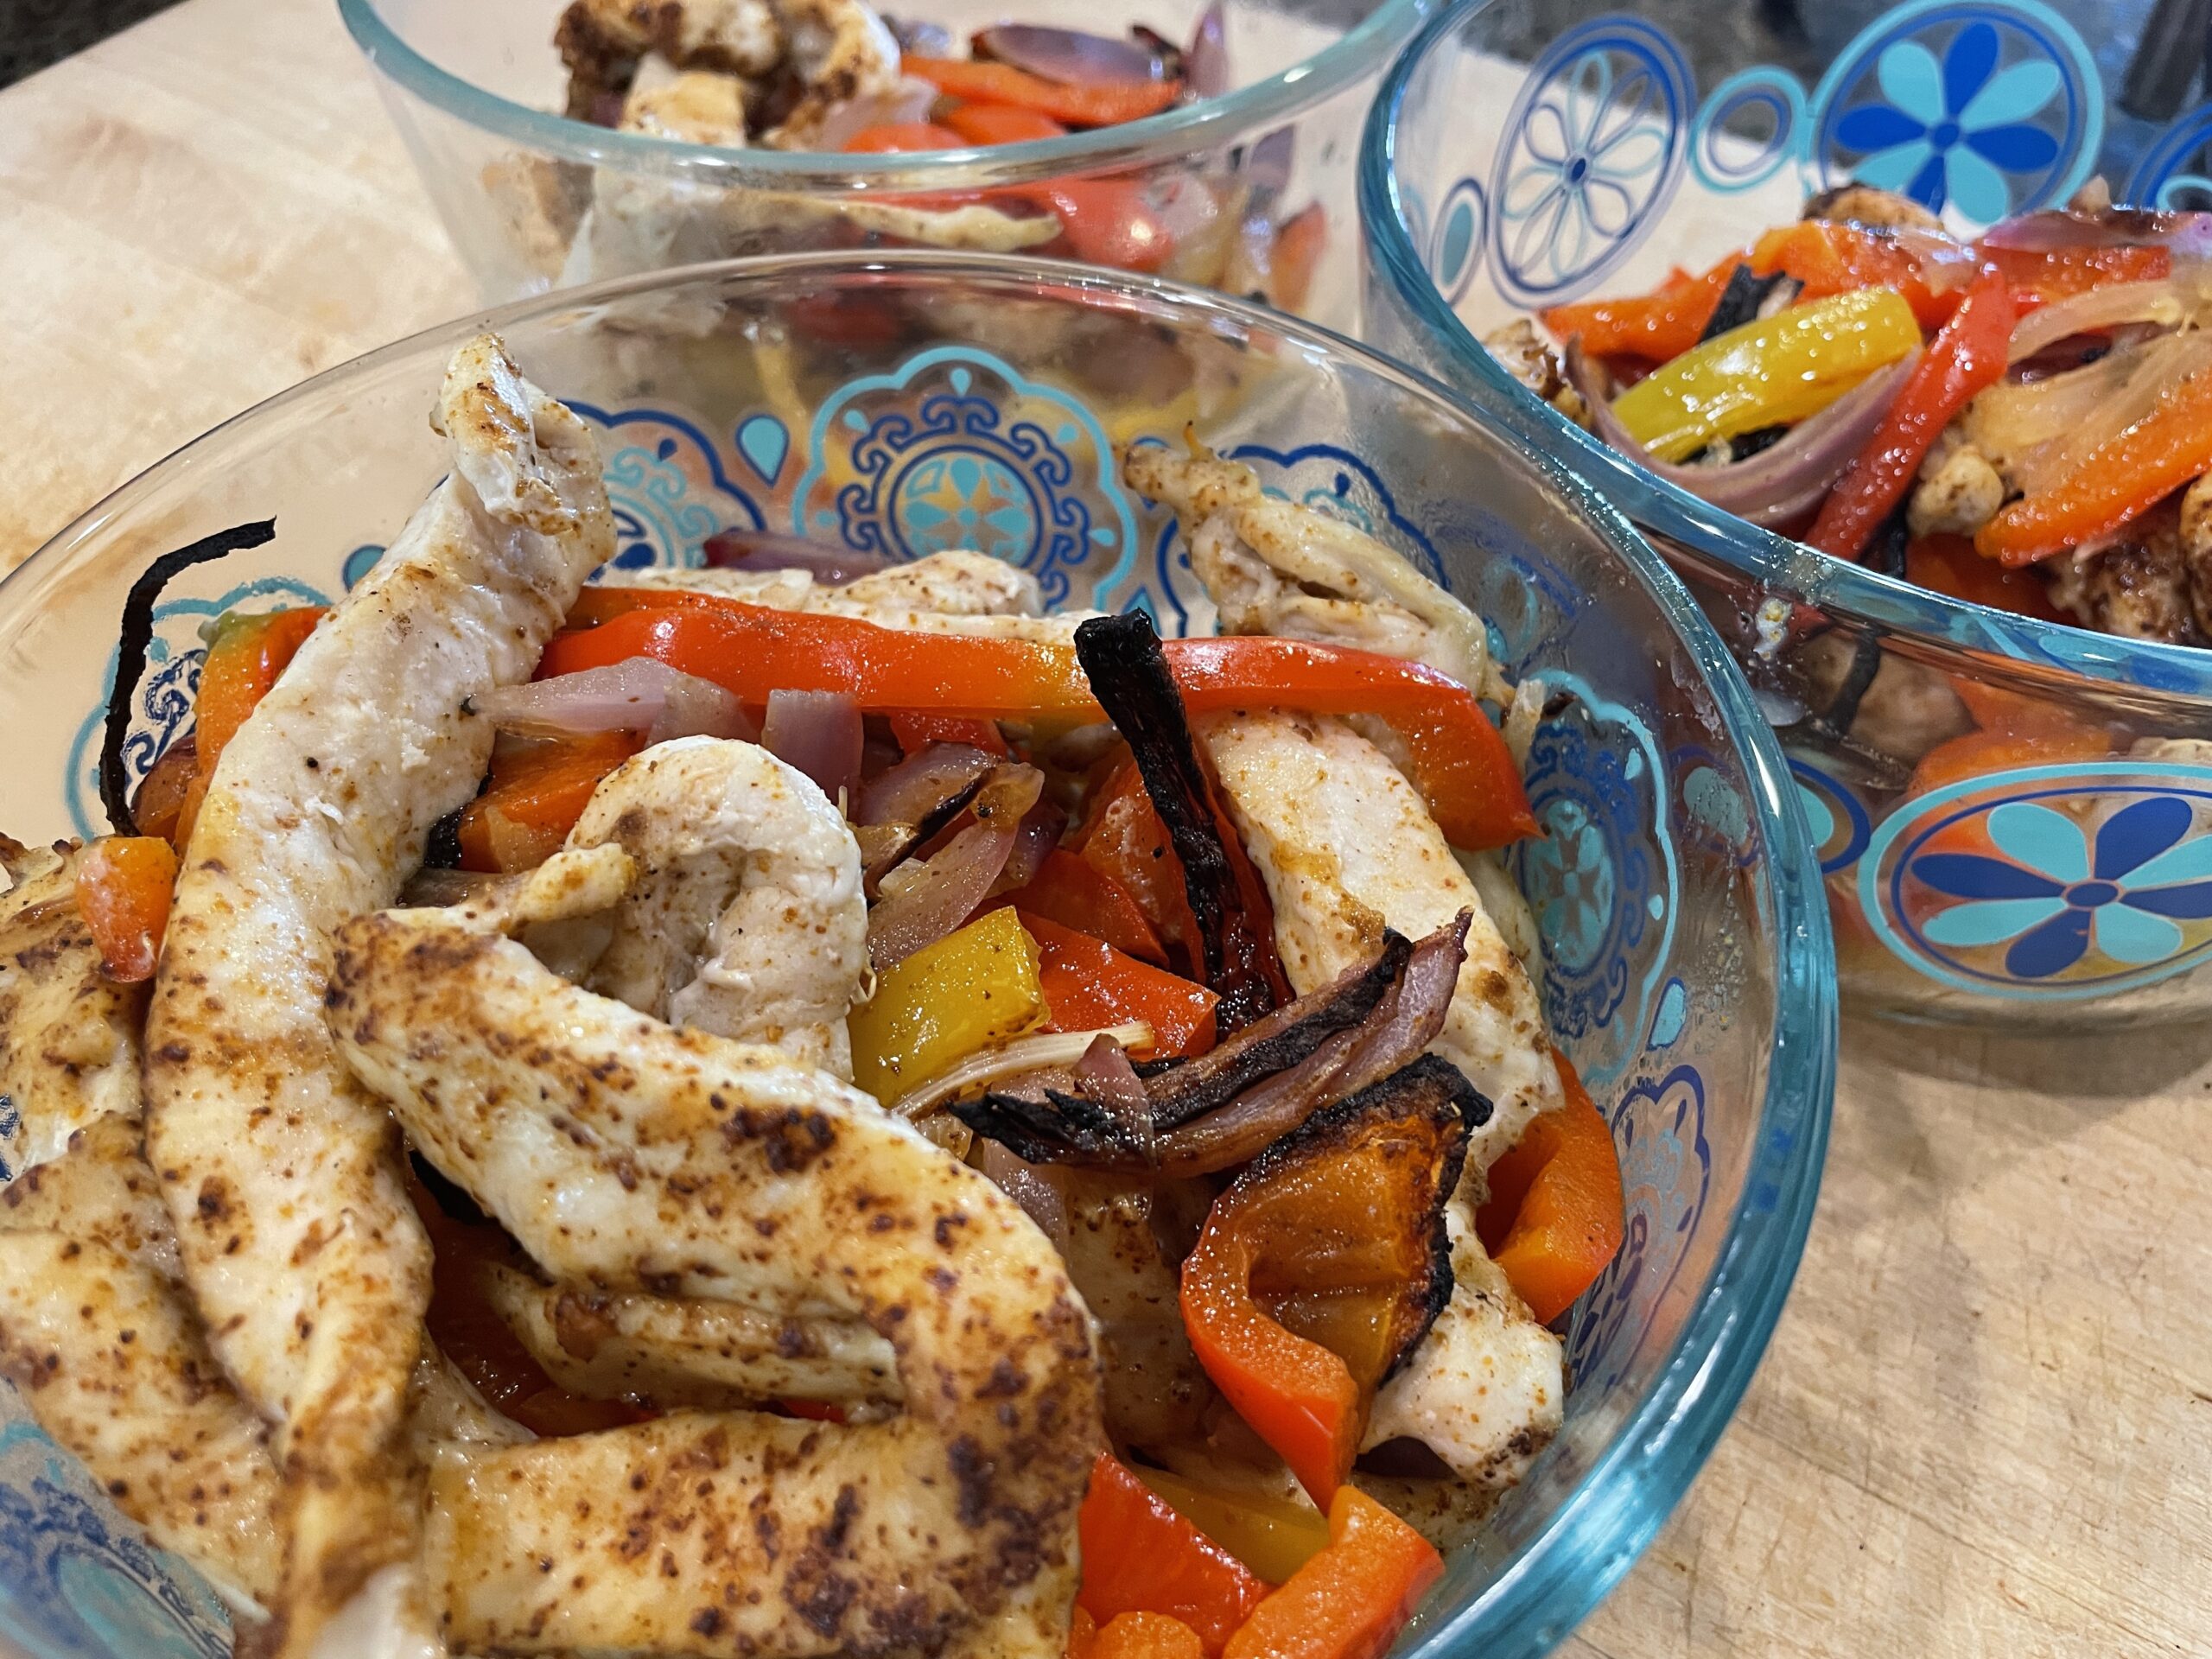
One great thing about this recipe is that you make our own spice mix using chili powder, salt and pepper. This helps simplify cabinets from excessive pre-made spices like taco seasoning and fajita seasoning which can overdue sodium.
Easily double the recipe to meal prep for the week, or make dinner for a crowd.
Limit clean up by pulling this meal together with a simple sheet pan!
This base recipe can be served up in a variety of ways and is a healthy option no matter what your dietary restrictions are.
Store leftovers in an airtight container in the fridge.
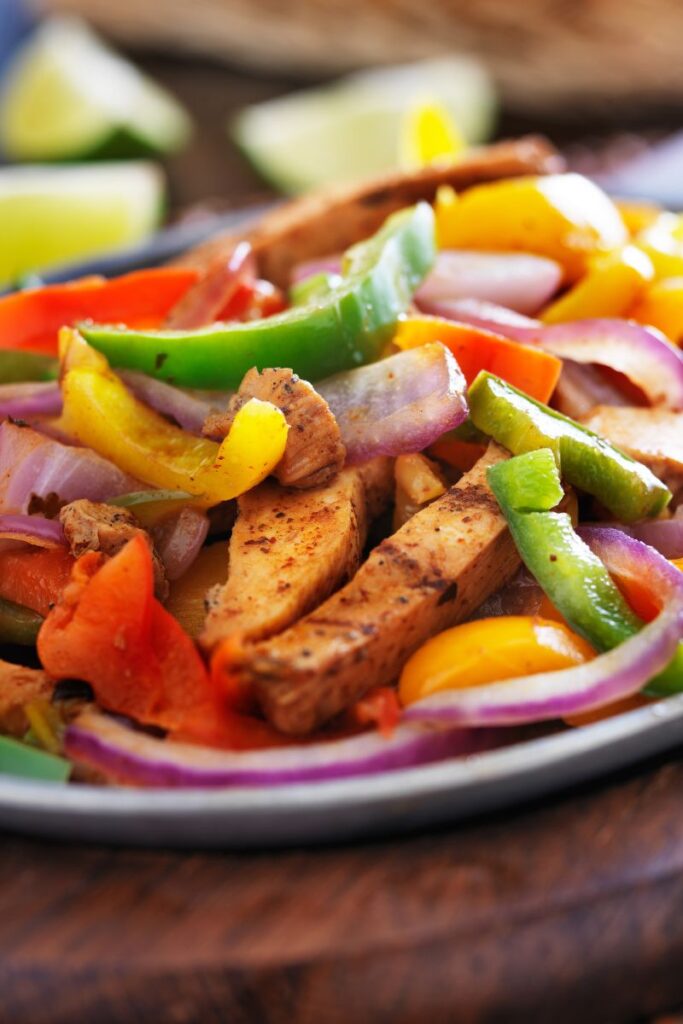
First let’s talk about the cooking method. Roasting anything on a sheet pan means you’re using less oil and letting the oven do it’s job to impart texture and flavor by dehydrating foods on the pan making it a healthier option.
Next, it uses lean chicken breast which is an excellent source of protein.
Half of this recipe is made from vegetables. Onion strips and red peppers, basic ingredients that are a source of valuable nutrients for immunity and gut health including vitamin c and fiber.
This recipe can easily be modified to accommodate a gluten free diet and it’s a natural way to eat more plant. So if your’e trying to live a plant forward lifestyle, then be sure to bookmark this page for your weekly menu! It’s also a good recipe to have on rotation if you’re trying to achieve a healthy weight or maintain a healthy weight.
Ingredients you need to make sheet pan chicken fajitas
olive oil or any neutral oil such as avocado oil
chili powder – you could add garlic powder or use a fajita seasoning mix if you have it on hand
boneless skinless chicken breasts – you could use boneless skinless chicken thighs, shrimp, steak or tofu but cooking times will vary.
lime/ lime juice
green bell peppers & red bell peppers – you can use any kind of fresh vegetables you’d like yellow peppers work well here too!
yellow onion – you could use red onion but it will be sharper, green onions will add color and can be left whole.
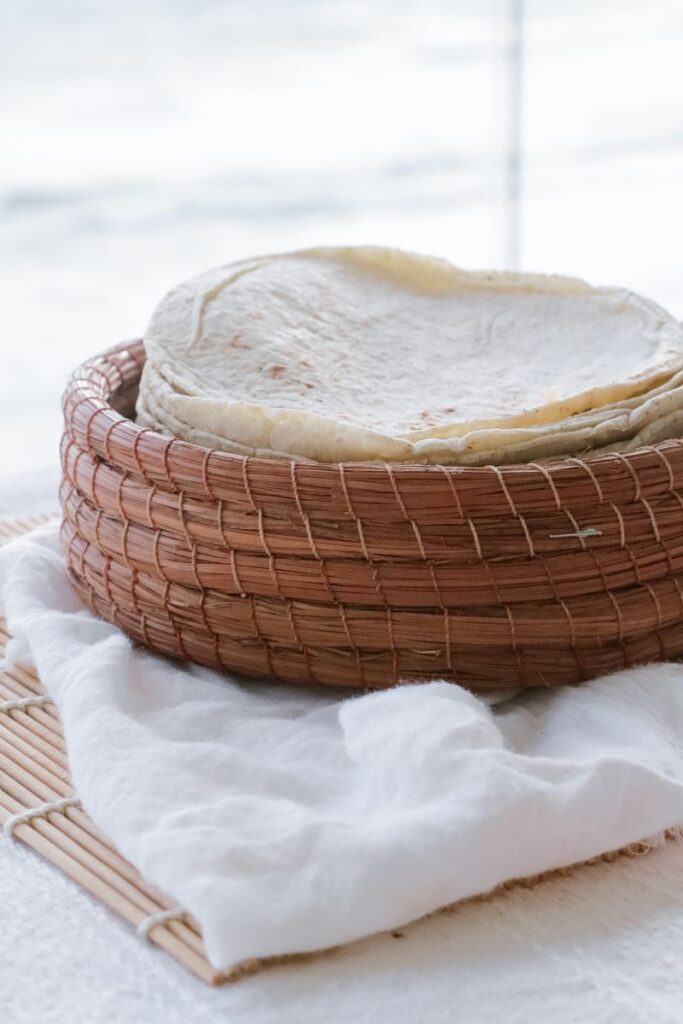
corn tortillas or flour tortilla – corn tortillas are naturally gluten free.
kosher salt and pepper
Optional ingredients and fajita toppings
Monterey jack cheese
Guacamole
Sour cream
Hot sauce
Salsa
Pico de gallo
Avocado slices
Equipment you need to make healthy chicken fajitas
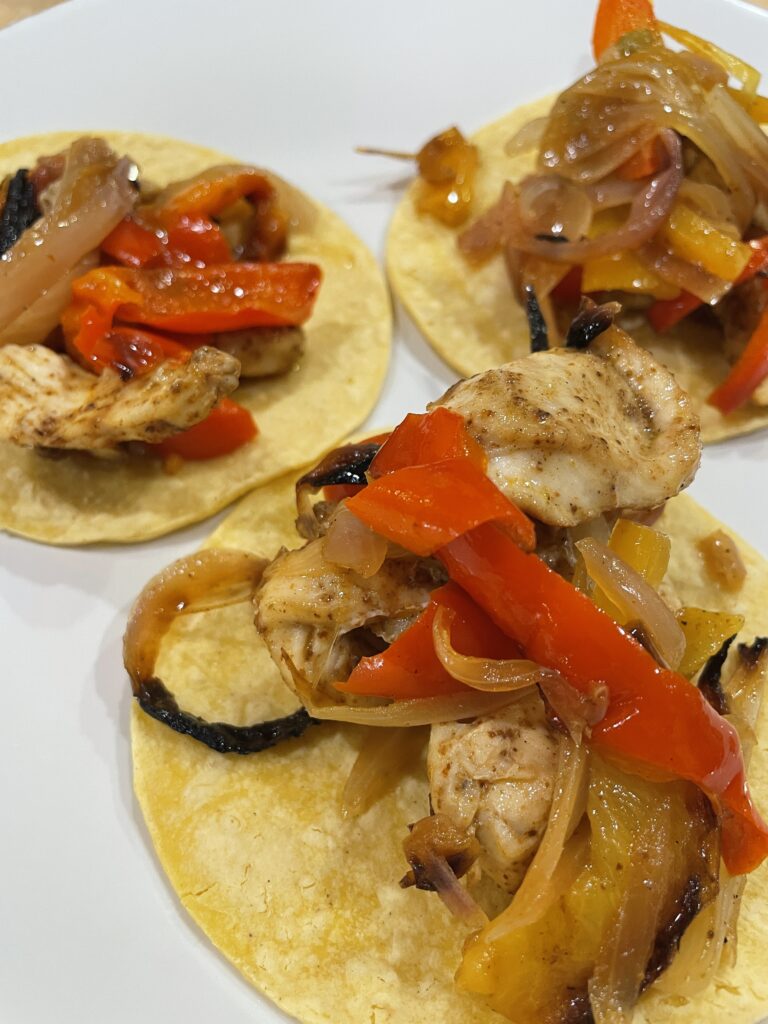
We’re keeping the equipment list simple by employing our trusty baking sheet. Other recipes may call for using a cast iron skillet, grill pan or instant pot, but I really think this is the simplest and cleanest way to make this great recipe.
Turn easy chicken fajitas into a complete meal
Enjoy your chicken strips and fajita veggies in warm tortillas with your favorite toppings
If you’re trying to follow a low carb diet plan, try wrapping this chicken fajita recipe in lettuce wraps made from iceberg lettuce
Another low carb option is to enjoy this recipe as a fajita bowl. Forget the wraps and rice, substitute riced palm noodles or cauliflower rice instead.
To amp up nutrition and fiber try serving with whole wheat tortilla or brown rice instead of white rice.
Serve with warm black beans for added protein and fiber
What are the macros?
If you divide this recipe into 4 servings, it will provide you with:
Calories: 292
Protein: 39g
Carbohydrate: 12g
Fat:11g
Fiber:4g
Note: Optional ingredients and tortillas of choice are not included in macros. It’s easy enough to log them separately as you customize your toppings and wraps! Learn more about macros here!
Viral butter boards are a TikTok trend that you can think of as the next charcuterie board. Instead of featuring a variety of meat and cheese, you basically make a compound butter, bring it to room temperature and spread it on a cutting board. Top it with herbs, nuts or a drizzle of honey, caramelized onions or diced red onion and enjoy eating with warm bread, pretzels or any other carb.
The original idea is credited to chef Joshua McFadden.
While visually appealing for a crowd, these beautiful butter boards are loaded with saturated fat and create an environment where you can very easily overeat too much butter. Which is problematic if you follow a heart healthy diet or are trying to lose weight. I do think it’s worth mentioning that they’re inexpensive and much more affordable than your traditional charcuterie board too!
What’s a serving of butter?
Butter is solid at room temperature and is a concentrated source of saturated fat. The American Heart Association suggests a diet of 5-6% saturated fat, which is about 120 calories or 13g. One tablespoon of butter has about 100 calories.
Saturated fats is limited because it’s solid at room temperature and contributes to cholesterol and risk of heart disease. Cheese, red meat and other full fat dairy products are also sources of saturated fat.
Healthy butter board ideas
The best way to lighten up your butter board is to look at lower fat or options with less saturated fat in general. Try making a homemade butter board using one of these combinations instead.
peanut butter + pumpkin puree served with apple slices, pretzels, graham crackers, banana circles
chocolate hummus served with lady fingers and strawberries
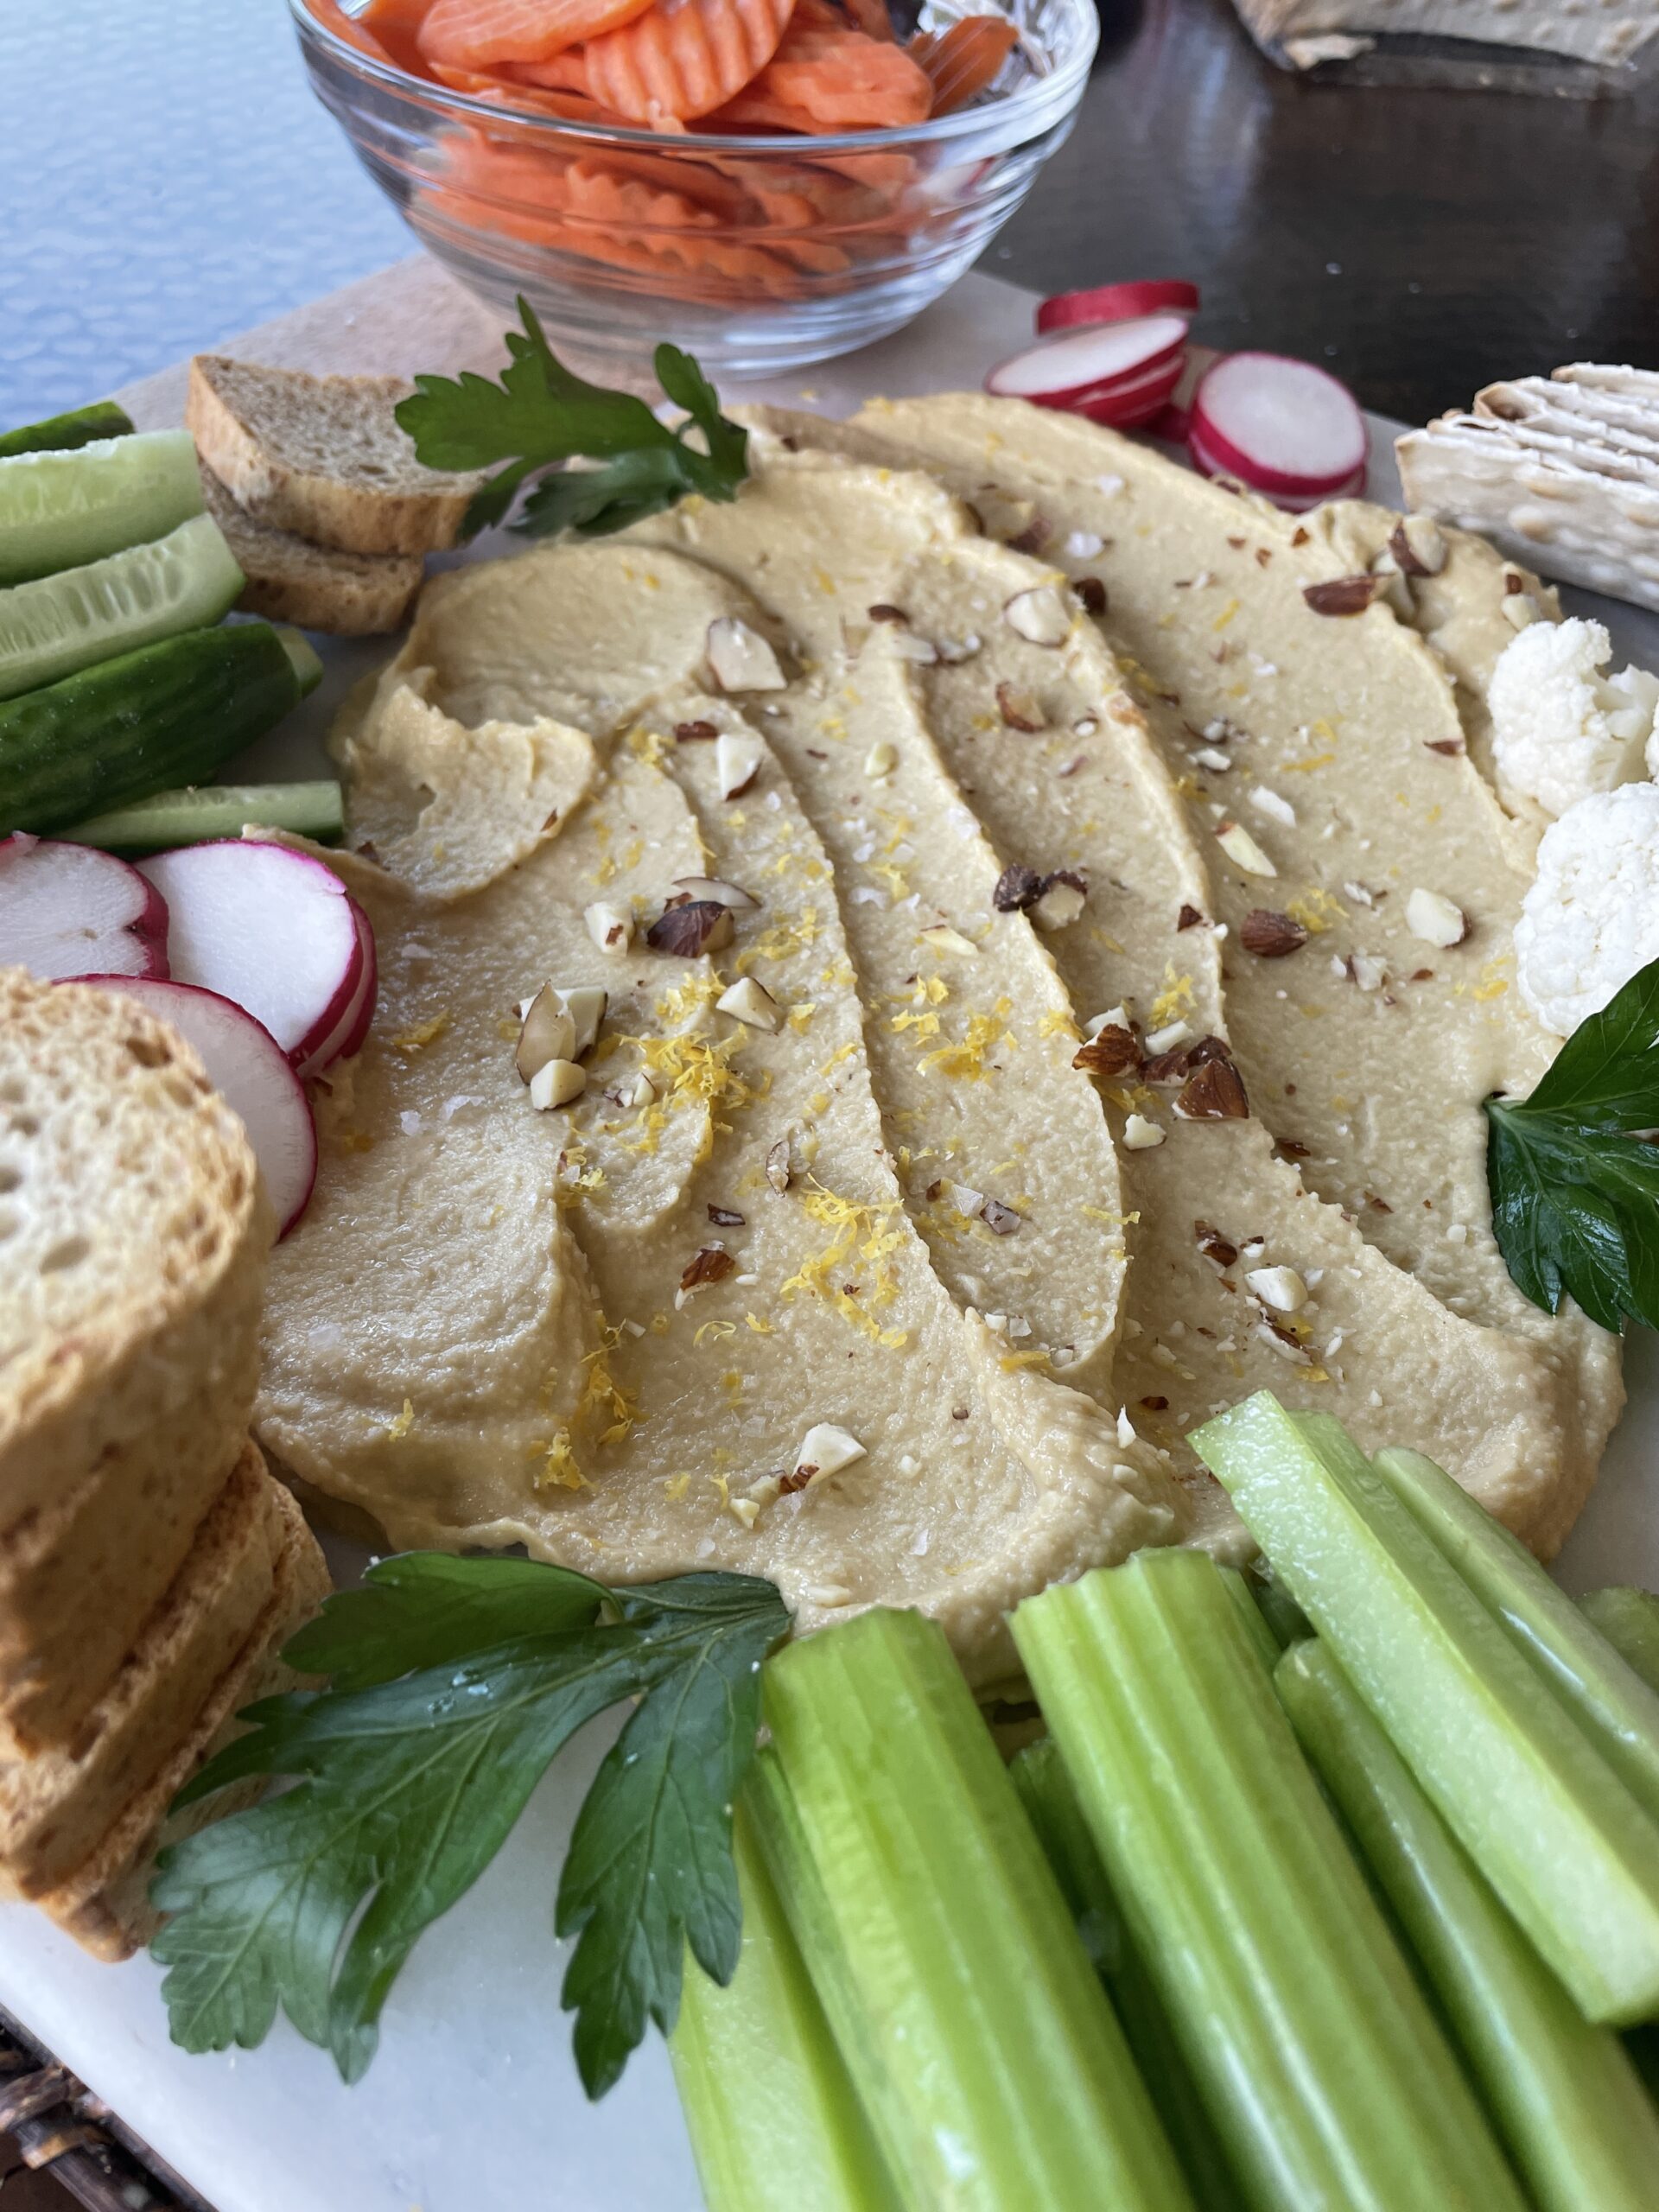
traditional hummus + black olives + olive oil + fresh herbs served with cucumber slices and pita
almond butter + cinnamon served with celery sticks and whole grain toast
fat free ricotta cheese + maple syrup + walnuts + chopped fresh mint served with dried fruit and pretzel rods.
A base of hummus or ricotta topped with the following:
fresh basil + garlic
cilantro + garlic + ginger
lime zest + chipotle
orange zest + orange slices + honey
diced jalapeno + lime
Ingredients for the viral butter board
The beauty is these boards are a combination of simple ingredients, perfect for a romantic evening for two or a larger dinner party.
softened butter
edible flowers
lemon zest
flaky sea salt- I like Maldon
black pepper
various herbs
variety of warm bread
wooden cutting board
Healthier combinations to try instead.
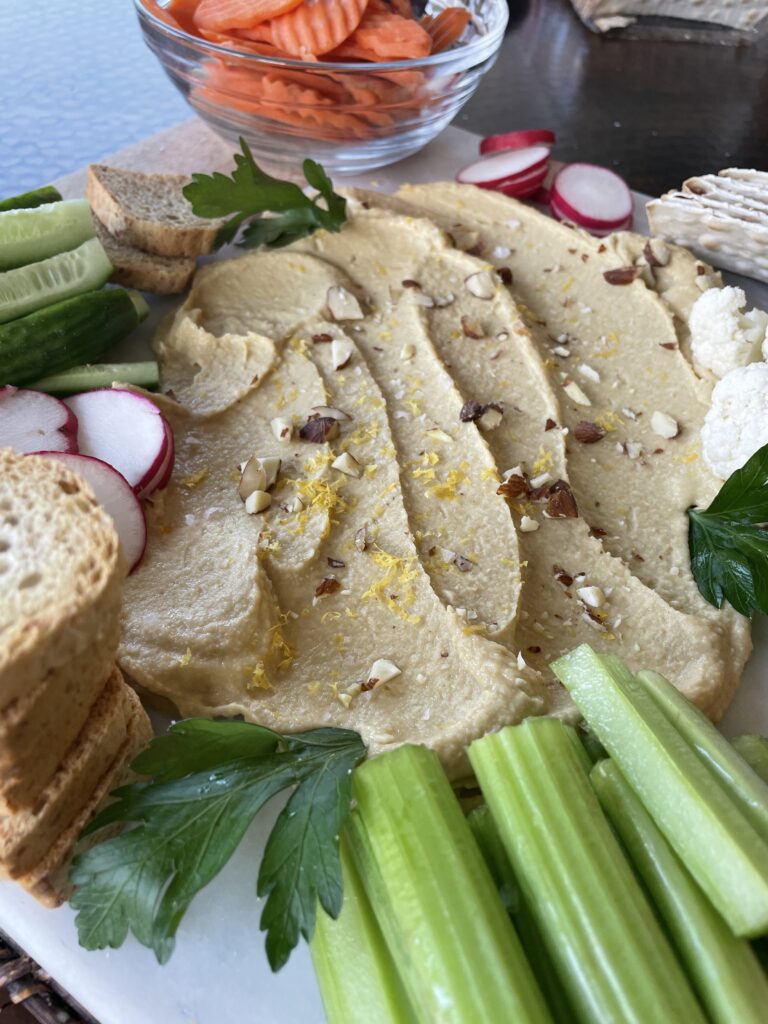
Hummus board – Try traditional hummus with EBTB seasoning, carrots, radishes, cherry tomatoes, fresh herbs and crackers
Sweet Hummus board – Use chocolate hummus sprinkled with white chocolate chips and pistachios. Serve with pretzel rods, apple, banana and strawberry slices, plus whole grapes and lady fingers.
Cream cheese boards topped with sweet or savory toppings.
Peanut butter board – Smooth or chunky peanut butter sprinkled with mini chocolate chips, served with berries, graham crackers, apple slices, pretzels.
Part skim ricotta cheese board – Drizzle with honey and walnut pieces and pomegranate seeds served with crusty bread and vegetables of your choice.
Are these boards safe?
While these boards are a fun way to enjoy an appetizer or dessert, they can easily create an environment for health risk. Avoid food borne illness such as salmonella typhimurium and e. coli by using a new wooden board or a non porous board. This will eliminate the risk of spreading any bacteria that may have found its way into any grooves or cracks in your cutting board.
Are you going to try this viral butter board trend?
Healthy Hummus Board
Instead of a calorie laden butter board, try this alternative.
I’m a chef, registered dietitian, foodie, wife and mom. If you’re looking for quick and healthy meal inspiration that serves YOU and your family well, then you’ve come to the right place!
This is a classic egg roll filling that can be thrown together with a few ingredients from the grocery store, especially when you have pantry basics on hand! It’s perfect for low carb eating and can easily be made into a balanced meal by adding brown rice. I love this easy recipe for quick weeknight meals when I don’t feel like cooking because it has all the flavor of egg rolls, and helps me meet my macro minimums. It’s a new favorite!
olive oil – or another neutral oil like canola or vegetable
ground pork – you can also use ground turkey, ground beef or ground chicken. 80% lean ground pork or beef are my pick for low carb days where you need higher fat to meet calorie needs.
onion – if you have a fresh onion, use it. Frozen diced onion works well here too. I wouldn’t recommend using onion powder because the onion provides a nice texture.
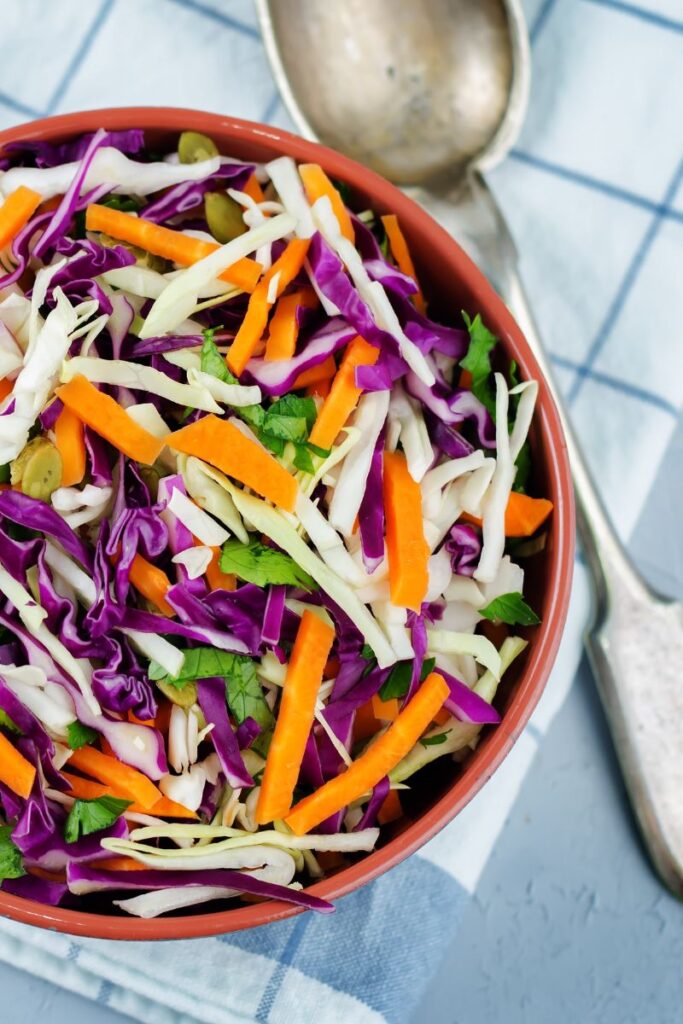
bag of coleslaw mix – or shredded cabbage and carrot mix or even a broccoli slaw mix, no extra work because everything is perfectly shredded into small pieces.
salt and pepper
garlic – fresh garlic is great but I love the Dorot frozen cubes. It’s such a great shortcut product, 1 cube is 1 tsp and all the work is done for you!
ginger – fresh ginger is amazing but again, the Dorot frozen cubes are my go to. No work required and they last a while in the fridge. I can only find them at Trader Joes.
low-sodium soy sauce – I prefer low sodium but tamari or coconut aminos are good options
rice wine vinegar
sesame oil – or toasted sesame oil, whichever you have on hand. A little goes a long way to add flavor, so it’s worth having in your pantry!
Optional ingredients
green onions
sesame seeds
sriracha sauce
red pepper flakes
egg roll wrapper
If you’re a first time cook, you have to try this recipe! It’s a great addition to your meal plan and can be enjoyed a bunch of different ways do you don’t get bored with it! Check out these serving suggestions for a healthier alternative
Serving suggestions
Low carb
Cauliflower rice
Bean sprouts
Water chestnuts
String beans
Regular macros
Brown Rice – add extra carbs and fiber
White Rice – more traditional addition
Quinoa
Indulgent
Wonton wrappers – put this delicious filling in wrappers, spray with oil and air fry until crispy for a healthier spin on egg rolls
Wonton strips – top with wonton chips for a crunch
Spicy mayo – for drizzling
Yum yum sauce – for drizzling
Hoisin sauce – for drizzling
Meal Prep Tips
Be sure to use a large enough skillet, especially if you’re going to double the recipe!
For best results use medium heat to be sure nothing burns
Divide filling equally among 4 containers
Leftover egg roll filling should be stored in an airtight container
Macros Per Serving
374 calories
29g Fat
9g Carbs
21g Protein
Be sure to check back for other low carb recipes.
Egg Roll In A Bowl
Easy weeknight recipe that comes together with basic pantry staples and 2-3 fresh ingredients from the store!
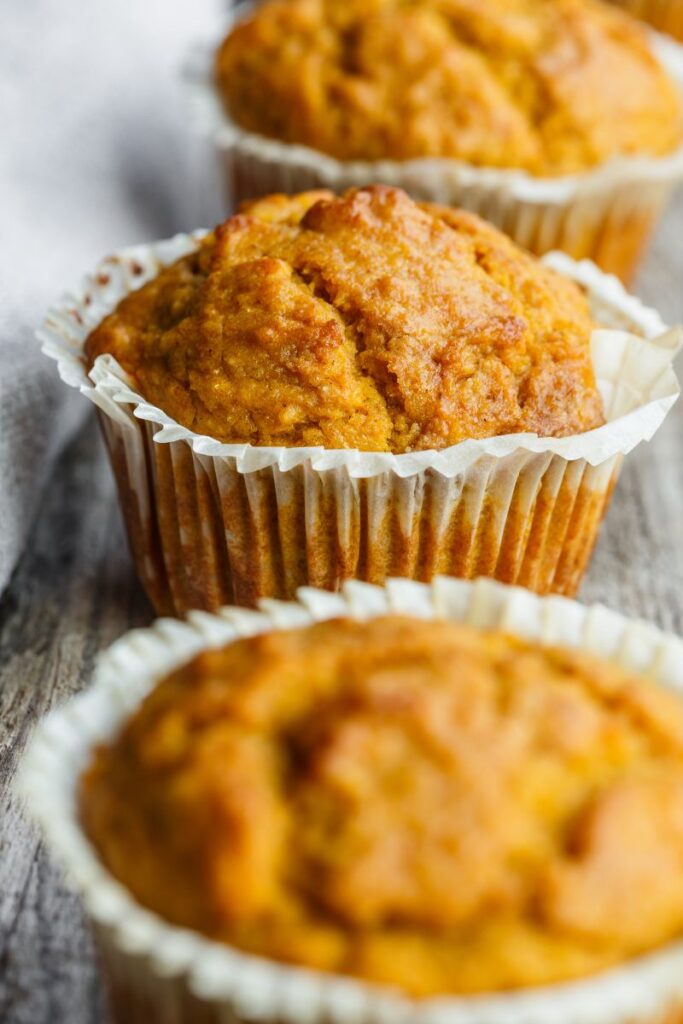
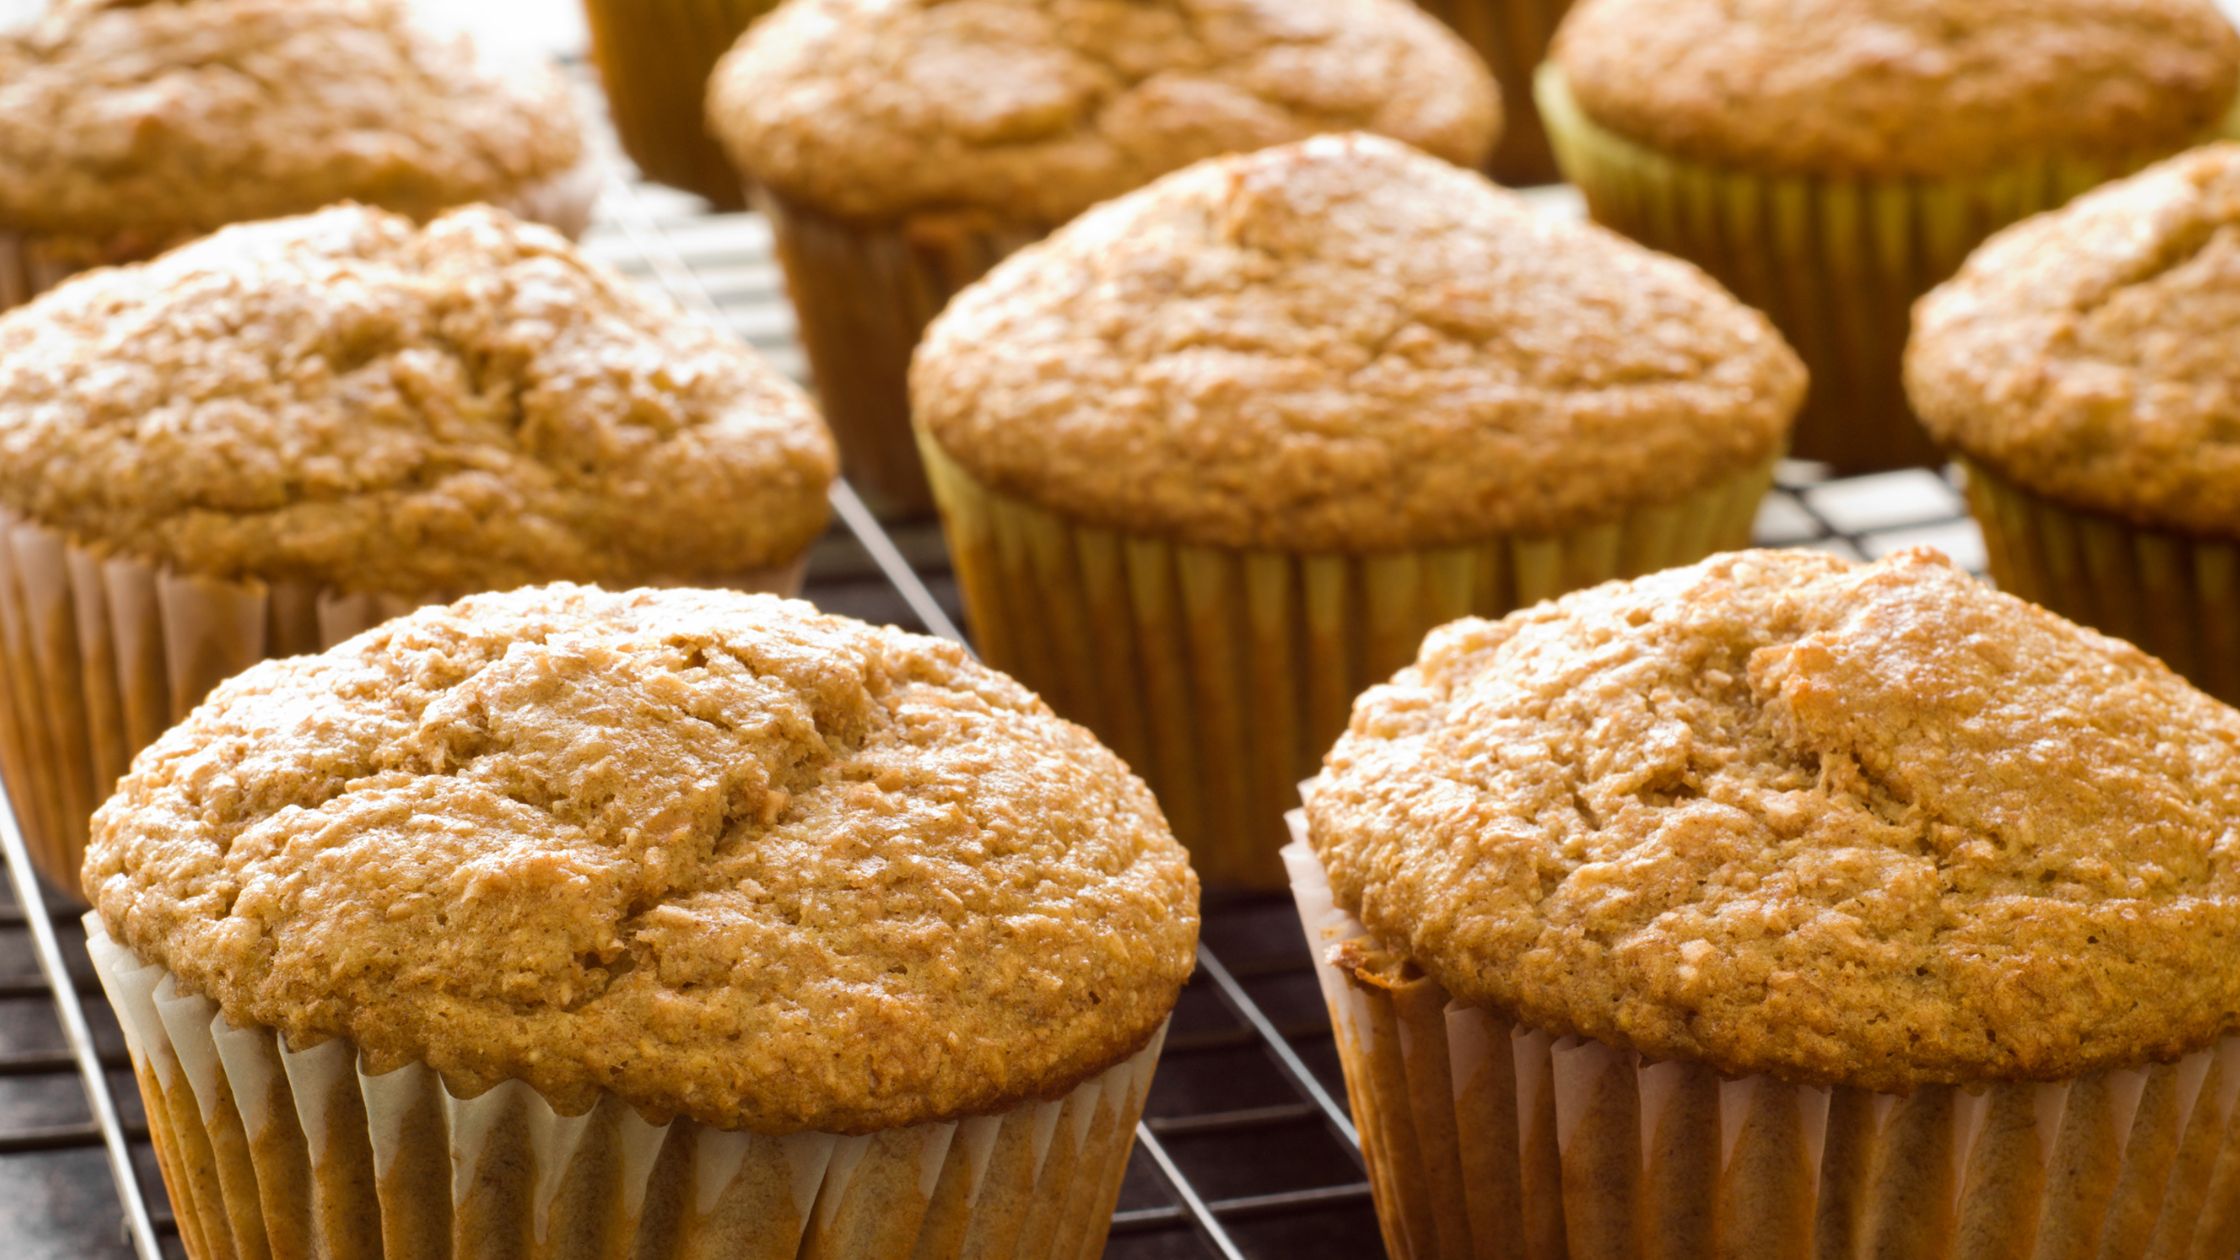
Muffins are on a weekly rotation in our house. Whether they’re store bought or homemade, we love them. Enjoyed with a hot cup of coffee or a tall glass of milk, does a better, more convenient go-to breakfast or snack exist? Delicious muffins are actually quite easy to whip up, and they can easily be made without eggs – and they’re super easy to batch cook! In fact, you can even make vegan muffins quite easily with just a few substitutions.
I found this recipe online several years ago, jotted it down in my kitchen notebook and have been using it ever since!
Eggs are a nutrient dense food to have in your fridge, but there are times when they’re not available. More recently, they’ve become quite expensive and are about 3x’s the price they were just a year or two ago.
There are also those with egg allergies or dietary preferences such as vegan that simply choose not to eat eggs.
Making egg-free banana muffins with a flax egg is a great way to incorporate healthy plant based fat into your diet as well. My kids don’t even know the flax is in there!
My favorite Banana Muffin Recipe
I’ve tried a lot of banana muffin recipes. Many are high in fat and refined sugars, and the “better for you versions” often flop. My favorite recipe uses a combo of apple cider vinegar and flax seed that just gives them an overall comforting flavor, especially when they come right out of the oven. I also love this recipe because I can make them in a large mixing bowl and don’t have to pull out the stand mixer!
Ingredients you need for these quick eggless banana muffins
ground flaxseed
whole wheat flour
all purpose flour
warm water
cinnamon
nutmeg
baking powder
baking soda
kosher salt
1% milk
apple cider vinegar
maple syrup
canola or grape-seed oil, any neutral oil
vanilla extract
mashed overripe bananas
mini chocolate chips
Additions and Substitutions
What if I don’t have apple cider vinegar?
White vinegar or lemon juice will work well too! I would not suggest using a balsamic vinegar because that flavor is quite distinct. If you don’t have any vinegar on hand, you can also leave it out.
What can I use instead of whole wheat flour?
For this recipe, I like to use a flour mixture. It helps limit the number of different flours that I have in my pantry. You could easily use a whole wheat pastry flour or a white whole wheat flour instead. Alternatively, I have used all white flour without an issue in this recipe. When I’ve used 100% all purpose flour instead of a blend, I’ve found the muffin batter was just a bit thick and needed 1/4 cup more milk.
What can I use instead of flax seed?
Use 2 eggs and omit the water instead! No problem :). Read more about the flax egg here.
What can I use instead of maple syrup?
The natural sweetness from mashed bananas is enhanced by maple syrup but you could easily use an equal amount of agave or even honey. In an absolute pinch, you could use white sugar in this recipe, but I prefer to recommend more natural sources of sweetness.
Which oil is best to use?
Almost any oil will work here. Vegetable oil, sunflower oil even olive oil will work if you like the flavor! Melted butter is traditionally used in muffins to create a fluffy texture, but we use oil instead. Because oil is a fat that is liquid at room temperature, it’s a more heart healthy alternative. Coconut oil would work in this recipe but it would increase the saturated fat and contribute a distinct flavor.
Can I leave the chocolate chips out?
Yes, but I don’t know why you’d want to! Just kidding, there is a time and place for everything. I often make them without any add ins, and they disappear just as quickly! You can also add raisins, white chocolate chips, chopped walnuts or fresh blueberries.
Can I leave out the milk?
If you don’t have milk on hand or follow a dairy free lifestyle, soy milk, oat milk or almond milk will work perfectly fine. You could also use lactose free milk, unsweetened vanilla almond milk or a light refrigerated coconut milk instead. You could also use full fat milk or even fat free milk if that is what you have on hand.
Next, prepare your muffin pan by lining with paper liners. If you don’t have muffin cups, spray the muffin tray with nonstick spray.
Then, combine all of the dry ingredients in a large bowl.
Combine, all of the wet ingredients in another bowl. I like to use a 4 cup measurer for this.
Then add half the dry ingredients into the wet, and mix until combined. Add the remaining dry ingredients.
Once combined, add your optional mix in’s
Pour batter in to prepared muffin tin. I like to use an ice cream scoop or 1/3 cup measuring cup to ensure they’re all the same size.
This is a good time to add more optional mix in’s to the top of the muffins! OR, skip mixing them in and just add a few for interest on top! This is what they do at the coffee shop with caster sugar. They sprinkle it on top for extra crunch!
Slide the tray onto the center rack of the oven. Be sure it’s a preheated oven!
Set timer for 20 minutes or until a toothpick comes out clean.
Let them cool down on a wire rack and store in the fridge in an airtight container for up to a week!
Eggless Banana Muffins
Healthy banana muffins made with flax and limited sugars
Next, prepare your muffin pan by lining with paper liners. If you don't have muffin cups, spray the muffin tray with nonstick spray.
Then, combine all of the dry ingredients in a large bowl.
Combine, all of the wet ingredients in another bowl. I like to use a 4 cup measurer for this.
Then add half the dry ingredients into the wet, and mix until combined. Add the remaining dry ingredients.
Once combined, add your optional mix in's.
Pour batter in to prepared muffin tin. I like to use an ice cream scoop or 1/3 cup measuring cup to ensure they're all the same size.
This is a good time to add more optional mix in's to the top of the muffins! OR, skip mixing them in and just add a few for interest on top! This is what they do at the coffee shop with caster sugar. They sprinkle it on top for extra crunch!
Slide the tray onto the center rack of the oven. Be sure it's a preheated oven!
Set timer for 20 minutes or until a toothpick comes out clean.
Let them cool down on a wire rack and store in the fridge in an airtight container for up to a week!
I’m a chef, registered dietitian, foodie, wife and mom. If you’re looking for quick and healthy meal inspiration that serves YOU and your family well, then you’ve come to the right place!
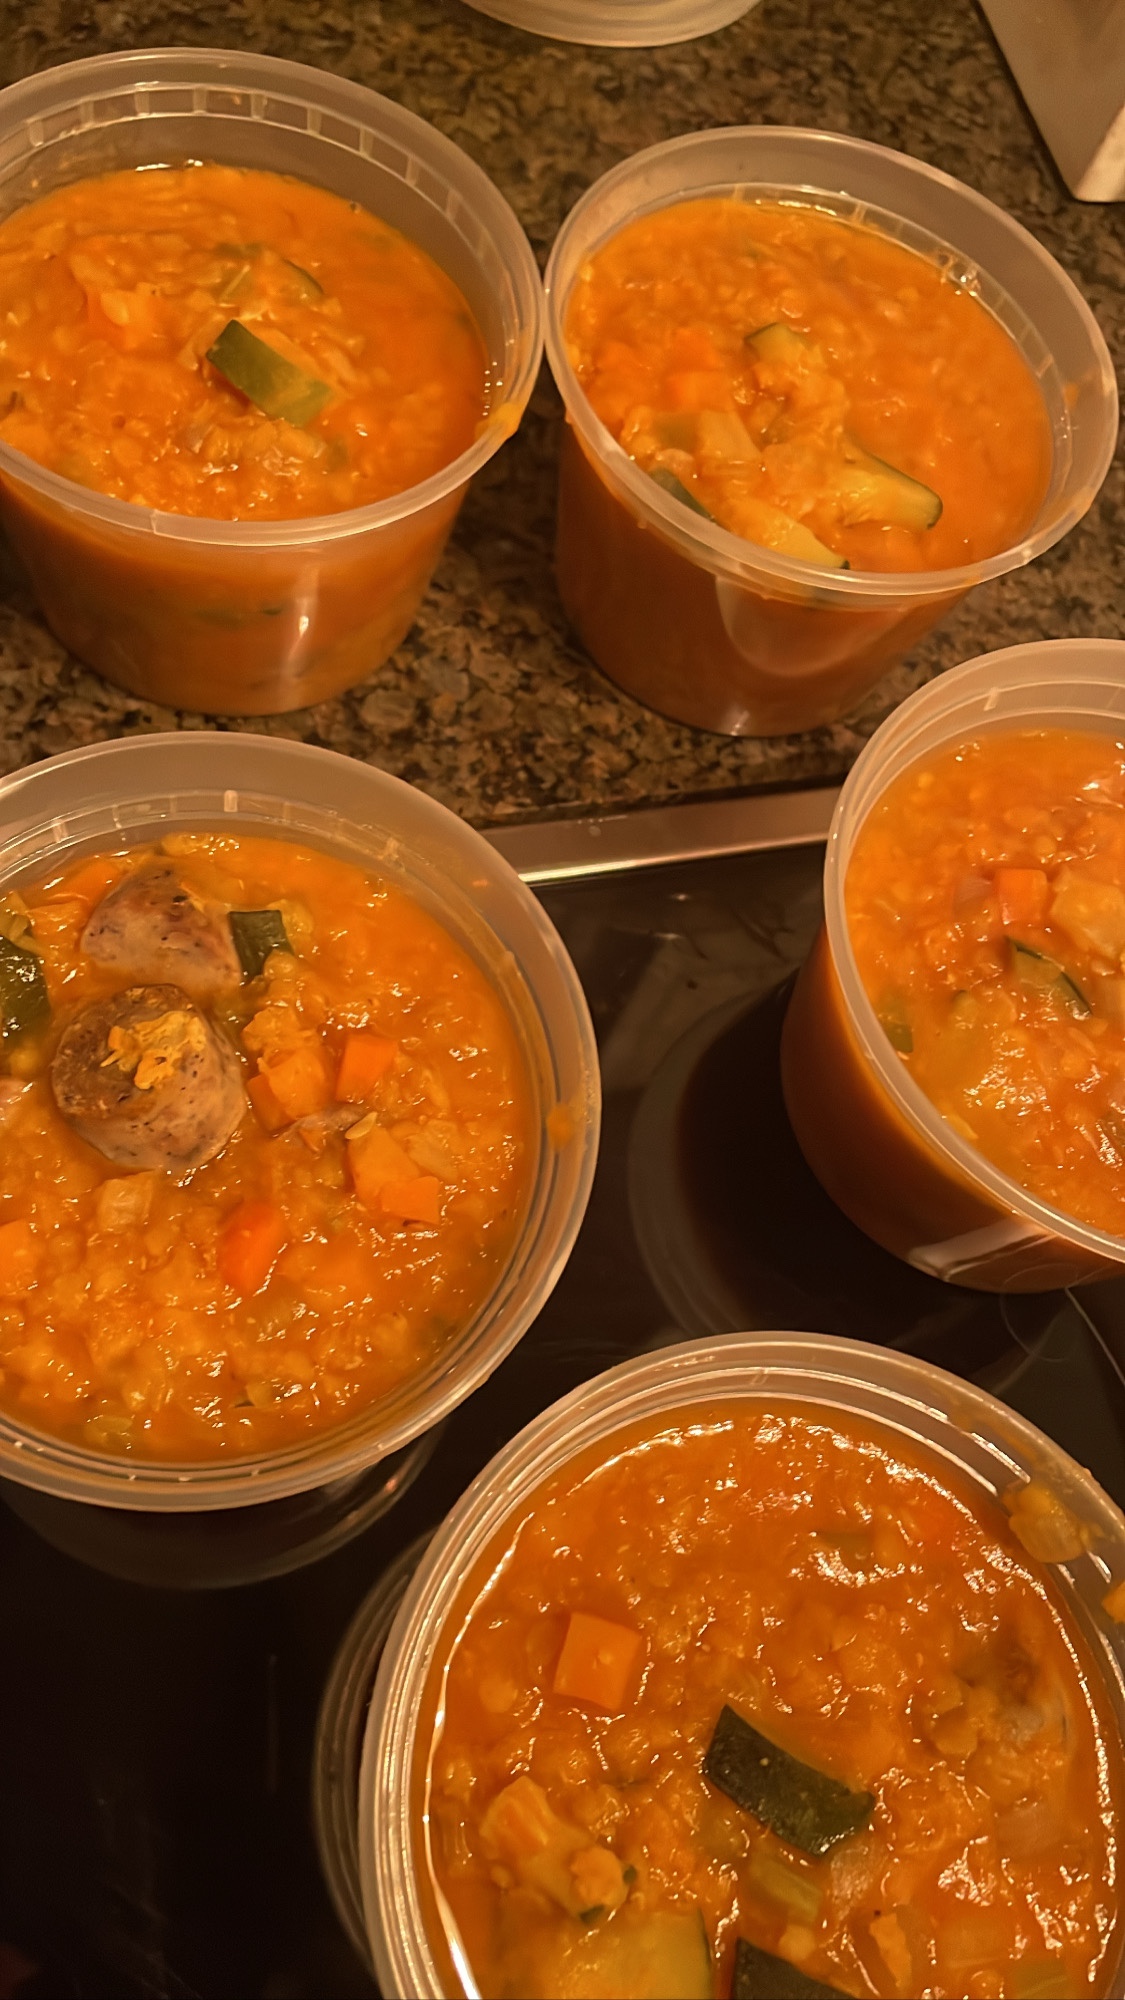
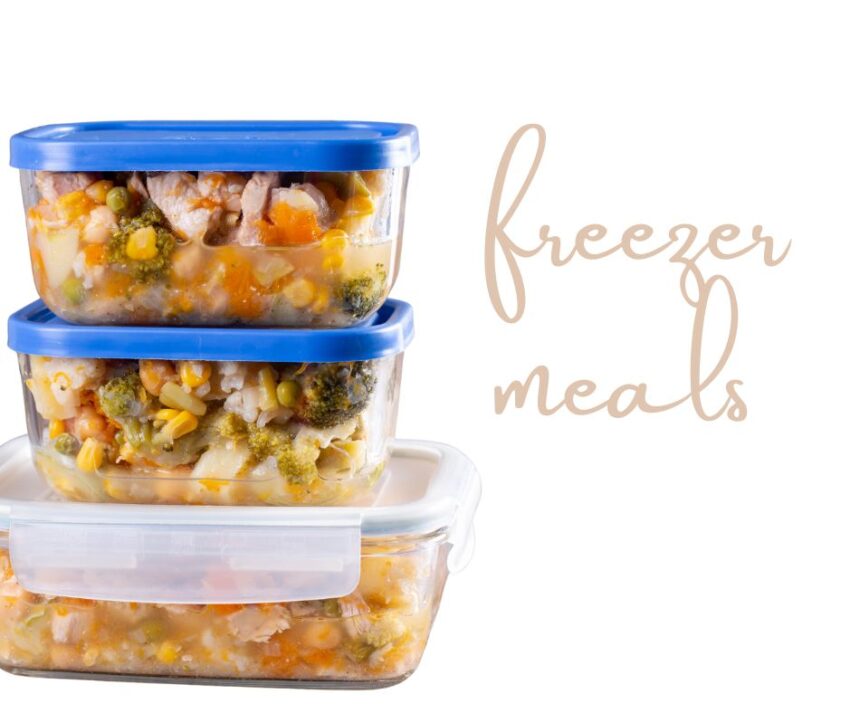
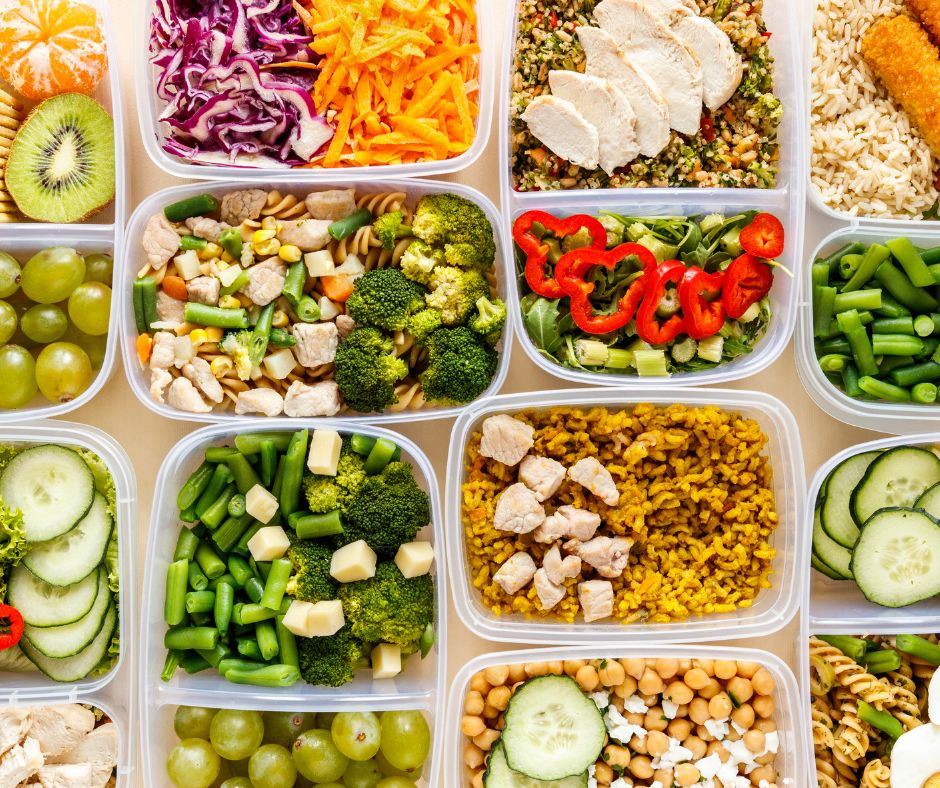
Let’s go a step beyond crockpot and freezer meals and talk about batch cooking as a time-saving strategy. With this approach to food, you dedicate 1-2 days a month (a couple of hours each day) to cook large quantities of your favorite recipes. I’m not talking about doubling – I’m talking about cooking big batch meals, like 3-4 times each recipe. It’s a great way to meal prep because you cook, freeze and store food for future weeknight meals while simplifying the cooking process. What can be easier than that? You cook once, have a variety of healthy meals available then you spend less time cleaning, meal planning and food shopping!
And let’s face it, when life is busy and time is short, there’s nothing better than gaining precious time to spend with loved ones or just doing more of what you want to do!
I love this concept for my family because it saves you time, money, cleanup, plus you’ll have a bunch of healthy recipes at your fingertips to get you through weeks ahead! If you’re only cooking for 1 or 2 you can divide into separate containers if you want to meal prep individual meals.
This method truly makes putting a good meal on the table a breeze.
When it comes to special equipment, you can almost always modify a cooking technique for another piece of equipment if necessary. So don’t worry if you don’t have a slow cooker or instant pot! Just don’t forget the labels, you need to know what you have in stock and the date it was made!
Tips for grocery shopping large meals
Whether you’re cooking nutritious meals or good ol comfort food favorites, shopping online will help you save so much time, especially when you need to pick up a bunch of ingredients! It’ll also help prevent food waste because you’ll be preparing purchased product right away, so it won’t go bad in the produce drawer!
First, identify your recipes by choosing 1-4 recipes that you enjoy eating. If you’re a beginner at this, start with one recipe and build up week after week. For example, you can start with a basic baked ziti and simply double the recipe.
Next make your grocery list. I recommend doing this online and double check sizes of product needed. For example, if a recipe calls for a 28oz can of diced tomatoes, be sure not to choose a 14oz can instead! Just use the search bar and add items to your list one by one! Couldn’t be easier. I’m always surprised at how much I save when I do this!
Consider making a Costco run to save on buying products in bulk. My main concern with Costco on a normal week, is that we won’t use a package of broccoli, pesto or even fresh fish up before it goes bad, but large-batch cooking calls for a lot of food!
If it’s summertime, check out your local farmers market to see what’s in season.
Pantry staples for batch cooking meals
Variety of spices – I like to buy these as needed and in small batches because they do expire and lose potency. They are also expensive and a little goes a long way.
Sweet potatoes and regular potatoes – nutrient dense, gluten free and taste great. THey’re a kitchen workhorse.
Onions and garlic – these are so healthy for you and they’re also major flavor enhancers!
Broth – I suggest always getting low or no sodium broth. This way you can control the amount of salt and the overall flavor.
Breadcrumbs – Gluten free or plain breadcrumbs are a pantry staple. Season as needed.
Olive oil – Save the extra virgin for your salad dressings.
Canned beans, lentils – Go with low sodium or dried.
Canned diced tomatoes, tomato sauce – common ingredients in soups, chili and pasta dishes.
Items like brown rice, white rice, wild rice and pasta can usually be made quickly to go along with your batch meal at the last minute. You don’t need to prep and freeze these.
What types of recipes are best for batch cooking?
Make your batch cooking a success by coming up with a menu plan that lends itself to reheating. With a little planning, you’ll have your own list of go-to recipes and enjoy the beauty of batch cooking for yourself – week after week!
Pasta dishes such as lasagna or baked ziti are – AMAZING!
Soups such as lentil or minestrone
Muffins
Enchiladas
Burritos
Casseroles
Sauces, such as tomato sauce or curry, or salad dressing
With batch cooking you worry about cleaning up less often!
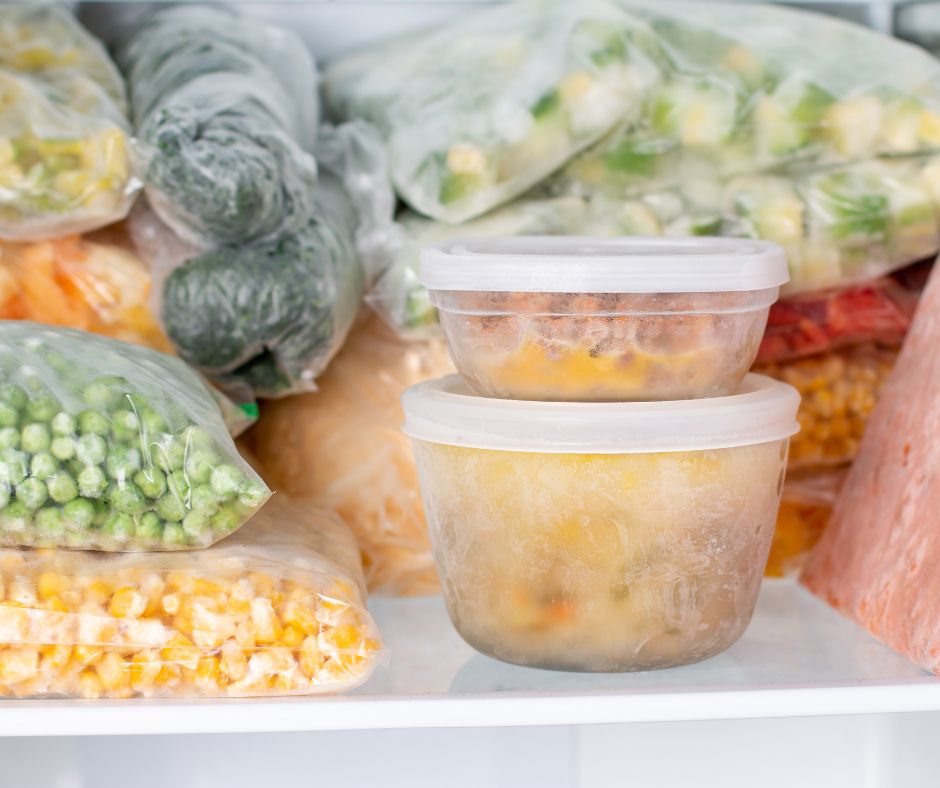
How to avoid freezer burn
The easiest way is to allow cooked food to reach room temperature on the counter and then chill before freezing. First cool food from 135 to 70 degrees within two hours, and then from 70 to below 41 within the next four hours. Seal in ziplock bag, wrap tightly with plastic wrap or enclose in freezer safe container, then label with the name of the recipe.
Shop in Bulk. Once you select recipes, take inventory of what spices, pasta and canned goods you have on hand and buy the rest. You may even find that you spend less money on groceries because you are laser-focused on specific dishes.
Have the right container! If you’re making lasagna or casseroles, choose freezer-safe glass ware, or save time on cleanup with recyclable aluminum trays. Keeping pans the same size helps maximize space in the freezer too!
Cool foods fully before labeling and freezing. First cool food from 135 to 70 degrees within two hours, and then from 70 to below 41 within the next four hours. Label each container with the name of the recipe and date it was made for easy recall!
Make a schedule – Keep your family traditions intact by writing in your Taco Tuesday’s or Pizza Friday’s and adjust your schedule accordingly! Just take 5 minutes to write out your monthly menu to help reduce decision stress and fatigue! And if it seems repetitive, try to remember what you ate yesterday for lunch – I bet no one will realize they’re on a rotation.
Make a schedule of your own, pop in your favorite recipes, and change it up as needed. Once you have a starting point your weekly dinner meals will go much smoother!
I’m a chef, registered dietitian, foodie, wife and mom. If you’re looking for quick and healthy meal inspiration that serves YOU and your family well, then you’ve come to the right place!
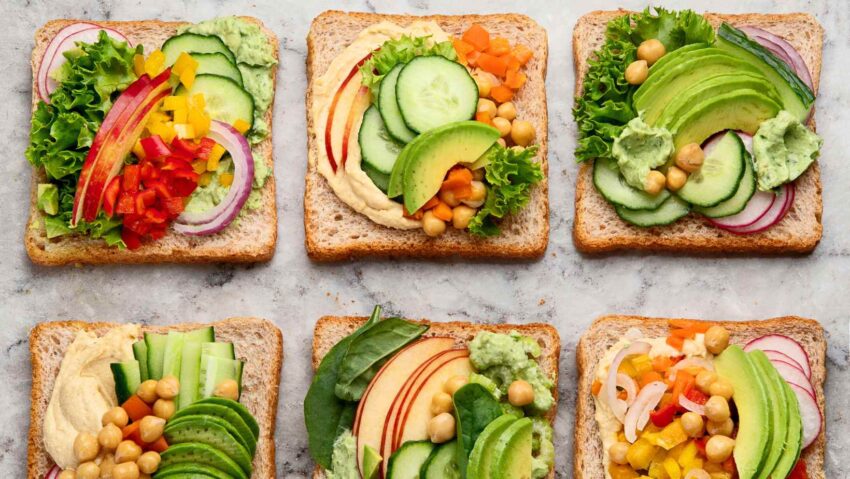
Going plant-based is one of the best things you can do for your body, your mind and your overall health. It doesn’t have to be a major decision that you overthink into paralysis either. It doesn’t mean you have to start an exclusively vegetarian diet or vegan diet (where you eliminate all animal products including dairy products).
All it means is that you have a new found focus on whole foods and plant-based foods – healthy foods, not necessarily eliminating all animal foods. It can be done slowly one meal at a time!
Check out these tips courtesy of Dole Food Company to start including more fruits and vegetables in your diet today!
But before we get into the tactical tips… lets overview why plant based is so good for you.
Health Benefits of plant-based eating
Research has shown that balanced vegetarian and plant forward diets can reduce the risk of chronic diseases including obesity, diabetes, high blood pressure, elevated cholesterol levels and some cancers! Some of these benefits, aside from weight loss include:
Lower body fat with a focus on healthy fats and lower overall calorie intake which lowers the risk for obesity, in turn lowering risk for type 2 diabetes.
Lower blood pressure, which could be a result of fruit and vegetables intake. But it could also be the result of other lifestyle factors unique to plant-based eaters such as increased exercise, lower alcohol intake and typically following a non smoking lifestyle.
Lower risk for heart disease which may be due to lower saturated fat intake in combination with antioxidants found in plant-based foods.
Digestive issues such as constipation and divercitular disease is diminished. This is likely the result of the high fiber content of fresh fruits, vegetables and plant-based alternatives.
Lower risk of some cancers including prostate, colon and rectal which are likely a result of higher fiber content of fruits and vegetables in combination with increased micronutrient and antioxidant intake! Additionally less fat tends to be consumed along with lower consumption of carcinogens.
Lower risk of kidney disease, kidney stones and gall stones. IT’s thought that lower protein content found in vegetarian diets plus increased intake of legumes and vegetables
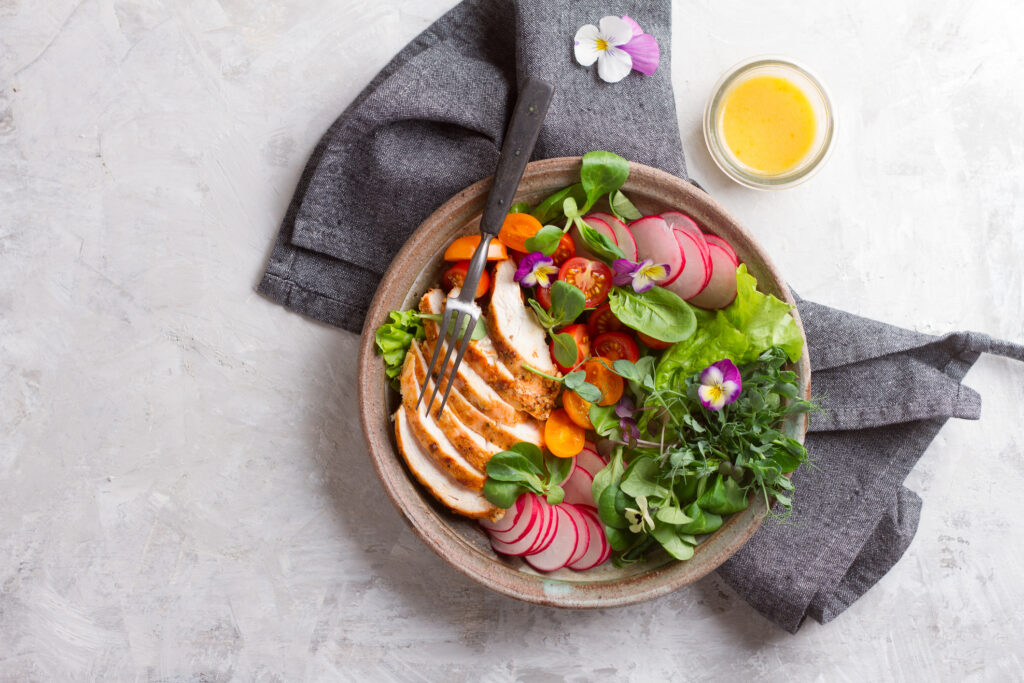
Omnivores plant forward dinner!
Tips for building plant based meals today!
Start by looking at what you can add. Which meals do you and your family already love? Are mac n cheese, baked ziti and pizza on the list? Let’s see how we can add more plants! Try adding chopped steamed broccoli into the cheese sauce, add sautéed peppers and onions to your meatloaf and pop open a salad kit to go along with pizza night. Viola, plant-forward dinners are served.
Explore with just one vegetable at first so you don’t overwhelm yourself. Think about how you could take a head of cauliflower and try incorporating it a bunch of different ways throughout the week. You could roast it whole as an entrée or, you could mash it like potatoes with nutritional yeast for a tasty side dish. You’ll gain a comfort level for what to do with it, so it doesn’t seem foreign.
Do a little research. Pick three new plant-based recipes that you really get excited about, it could even be a healthy snack recipe. Commit to trying them and then add them to the rotation. Going vegan or vegetarian can require different cooking skills so it’s best to start slowly.
Stick to what you know how to make – it’s a good idea, especially in the beginning. Do you have chicken salad on repeat for a quick lunch? Try using mashed chickpeas instead. Are Taco Tuesdays on rotation? Add more produce with this recipe that includes the DOLE® Ultimate Caesar Kit.
Lean on your grocery stores for meal prep. Will buying a pre-made mirepoix (chopped carrots, celery and onions) make a quick minestrone soup come to life for you? What about meal prep kids like Dole’s Sheetpan Meal Starter Kit?
Substitute, in full or partially! Take a meal your family already loves like meatballs or baked ziti and substitute half of the ground beef with whole plant foods like diced mushrooms or lentils. You could substitute all of the ground meat the celebrate meatless Mondays too!
7. Jump on the “bowl” craze. Literally, grab your favorite bowl, start with a base of greens and add from there! You could create a cold Buddha bowl with other vegetables and proteins or add cooked brown rice and curry for a warm option.
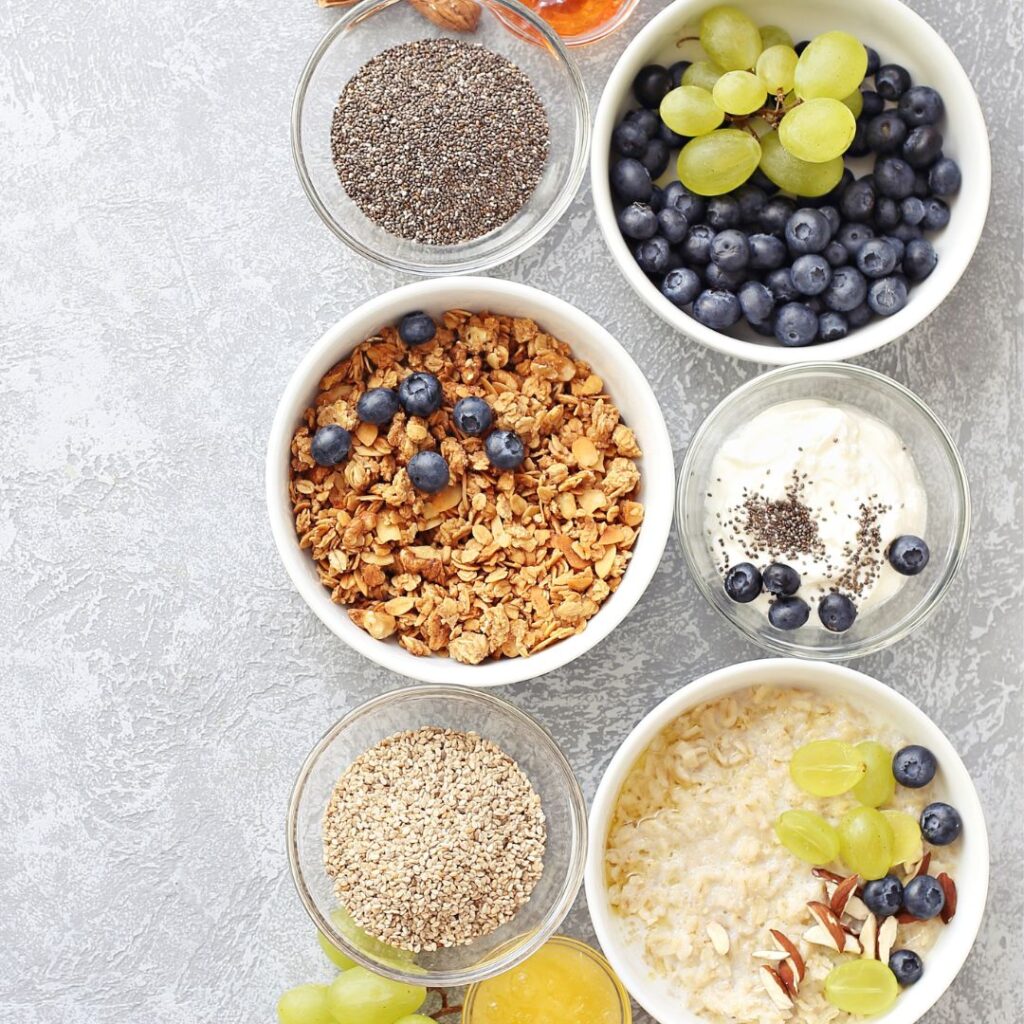
Remember that whole grains are plants too! Oatmeal, quinoa and farro are great additions to make at meals, and they’re particularly easy to have for breakfast!
Be sure to get enough protein! When going plant-based it’s easy to eliminate animal proteins and substitute them with vegetables. But, if you don’t add plant-based proteins, you will feel unsatisfied. Turn to beans, tofu, nuts, seeds, lentils if you’re looking for plant-based options!
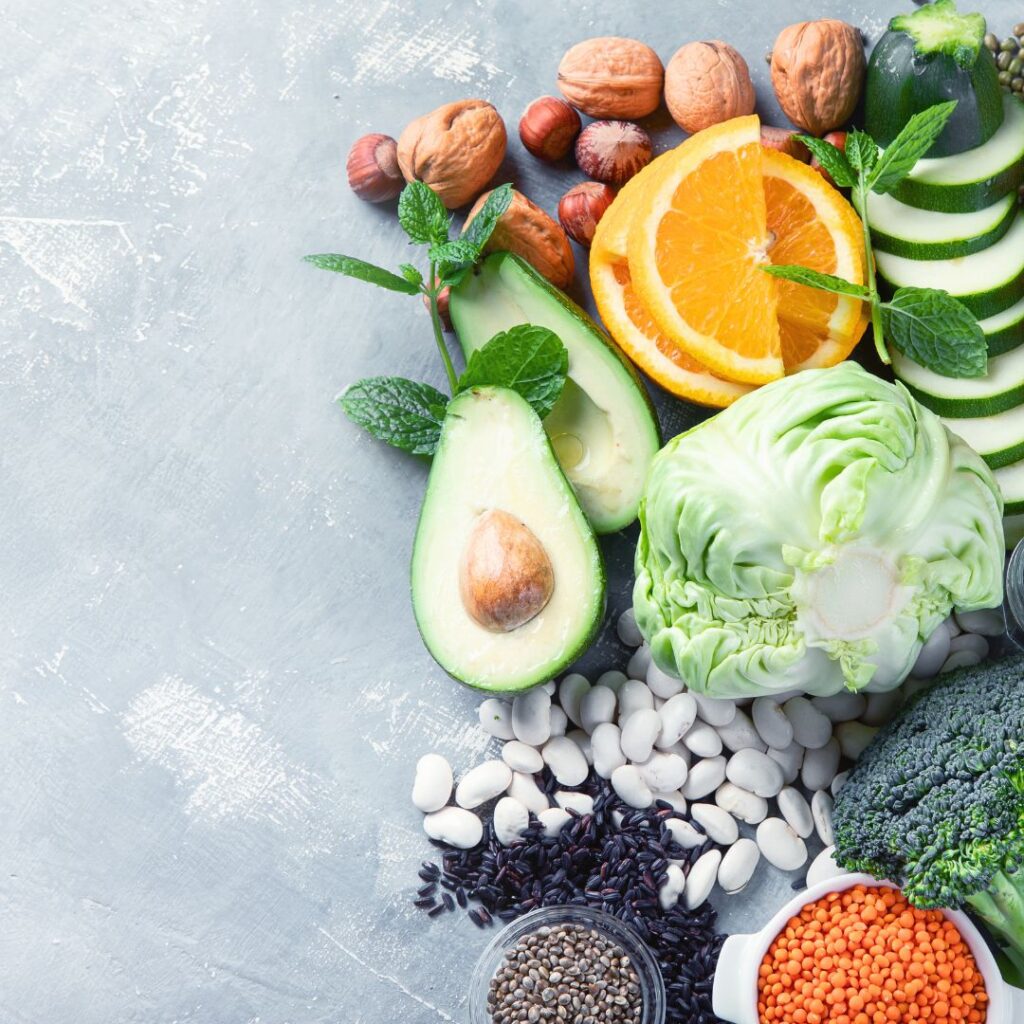
Foods to stock up on for your plant based journey
Nut butters – peanut, cashew, almond, walnut, chunky or sooth, they are all full of healthy fats plus protein and can add satisfaction to any meal, snack or smoothie. Just be wary, that many of the natural versions without added oils, sugars or stabilizers must be refrigerated for best quality.
Soy milk – yes, soy milk and soy products are most like milk and dairy when it comes to macronutrient profile of protein, fat and carbohydrates. Plus I happen to think it tastes better than a lot of the other dairy alternatives too! If you’re not a fan of soy, almond milk or coconut milk are fine options, but they will not offer the protein that traditional dairy or soy can provide.
Beans, beans beans – whether canned or dried, beans such as black beans, chickpeas and lentils are a pantry staple that ensure you can make a plant-based version of your favorite burgers and sauces.
Oatmeal – Choose from quick oats, rolled oats or unsweetened steel cut oats for a variety of uses. Traditional breakfast cereals have a lot of added sugar, but when you choose oatmeal, you have an ingredient that makes for a quick breakfast but can also be used in a variety of other dishes too.
Other meat substitutes – Think about tofu and seitan. You may want to pick up a brick for when you’re ready to move beyond beans and edamame!
Seasonings– Whether you already have a favorite blend or your looking for something new, I highly recommend finding a seasoning mix that you like. Mine is Seasonello. It is an Italian seasoning salt that is amazing on everything from poultry to tofu to veggies. I also recommend trying nutritional yeast if you’re trying to find a cheese replacement! It’s also a good source of B6 and 12!
A really good olive oil – (or two!) Choose a good quality olive oil for most cooking and then select a higher quality extra virgin oil for finishing dishes or dressing salads. A high quality oil can make a big satisfaction impact!
Leafy greens – Spinach, kale, spring mix, arugula are just a few. I suggest a variety of fresh and frozen for versatility!
Starchy vegetables – Potatoes, sweet potatoes, yams, yucca, corn, peas, and beets. Stock up on these for filling and colorful meals! Many can be found semi prepared in your produce department so you won’t have much prep to do at home!
If you are thinking about going all plant based or vegan, there is more to learn about vitamin B and vitamin D, these nutrients are primarily found from animal sources and may require supplementation. If you have questions or concerns about your unique nutritional needs, speak with your doctor or schedule a consult with a registered dietitian.
About Me
I’m Melanie.
I’m a chef, registered dietitian, foodie, wife and mom. If you’re looking for quick and healthy meal inspiration that serves YOU and your family well, then you’ve come to the right place!