Tag: mom life

Why I eat leftover salmon straight from the fridge

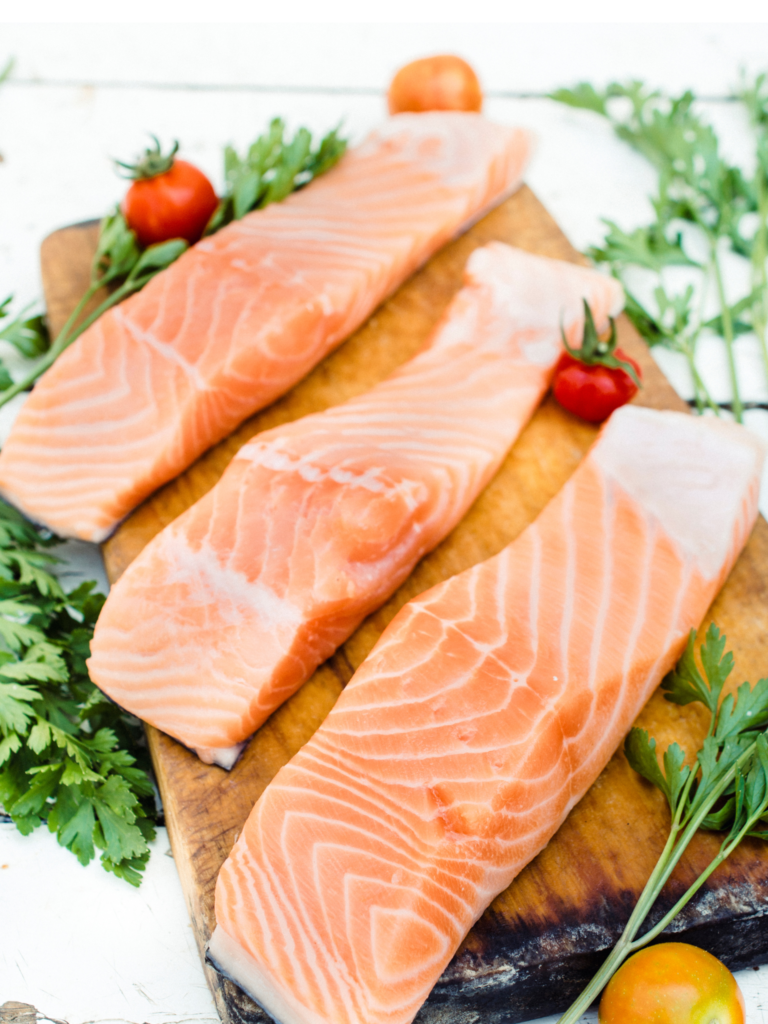
Atlantic salmon is a weekly staple for us when it comes to healthy eating.  (I’ll save why this is my preference for another post!) It’s a delicious fish that can be prepared in a variety of ways whether you’re buying fresh or frozen salmon from the grocery store.  

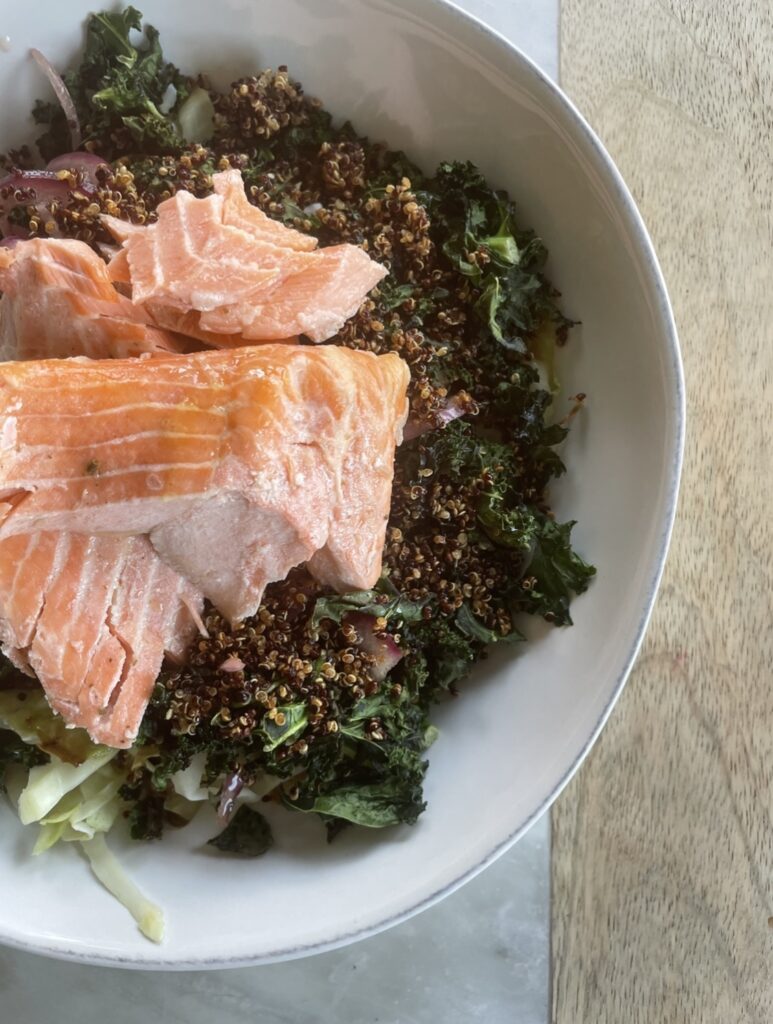
Leftover salmon from the day before is delicious protein source. Have you ever tried eating cold salmon? Personally, I think it’s the best way to eat it for convenience, taste and avoiding that fishy smell! Read on, and I’ll explain 🙂

The fastest way to prepare salmon

Jump to Recipe

Before Kids

I used to roast fresh salmon or defrosted salmon in my toaster oven or in a 400 F oven.  I would remove any excess moisture with a paper towel, coat with a bit of olive oil spray, season with Seasonello and top with lemon slices and roast for 15-20 minutes depending on the thickness of the fish.  Still a great way to prepare salmon, (and I still do when cooking for a large crowd), but on a normal weeknight, every minute counts.

After Kids

While the above method seems pretty quick and painless, I now have even less time and this is BY FAR, my favorite way to prepare salmon – bonus my husband even likes it too!  

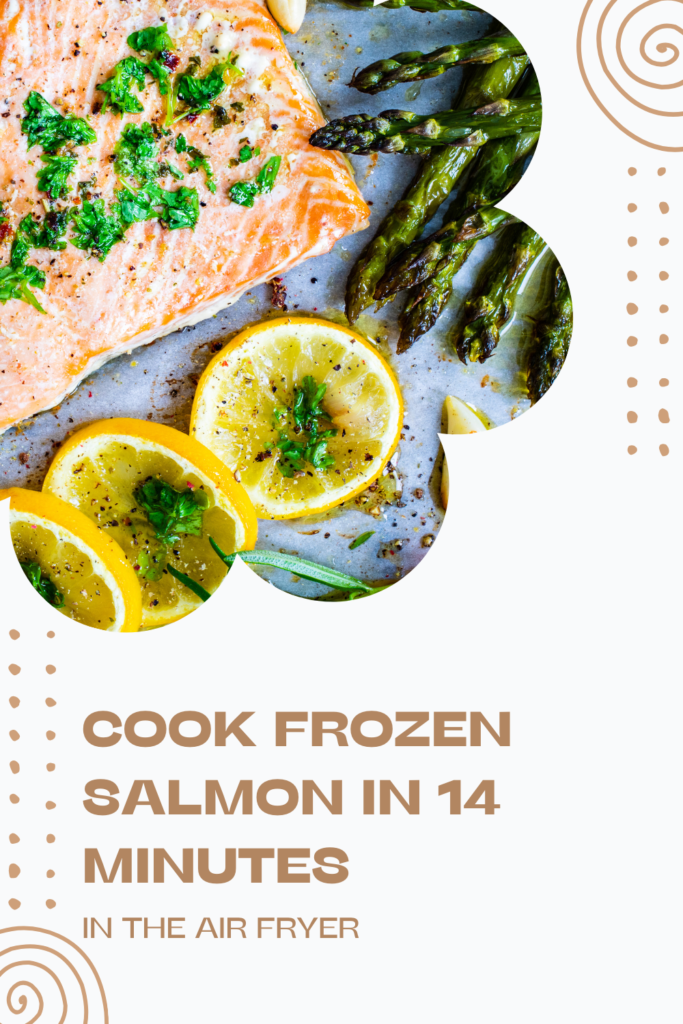
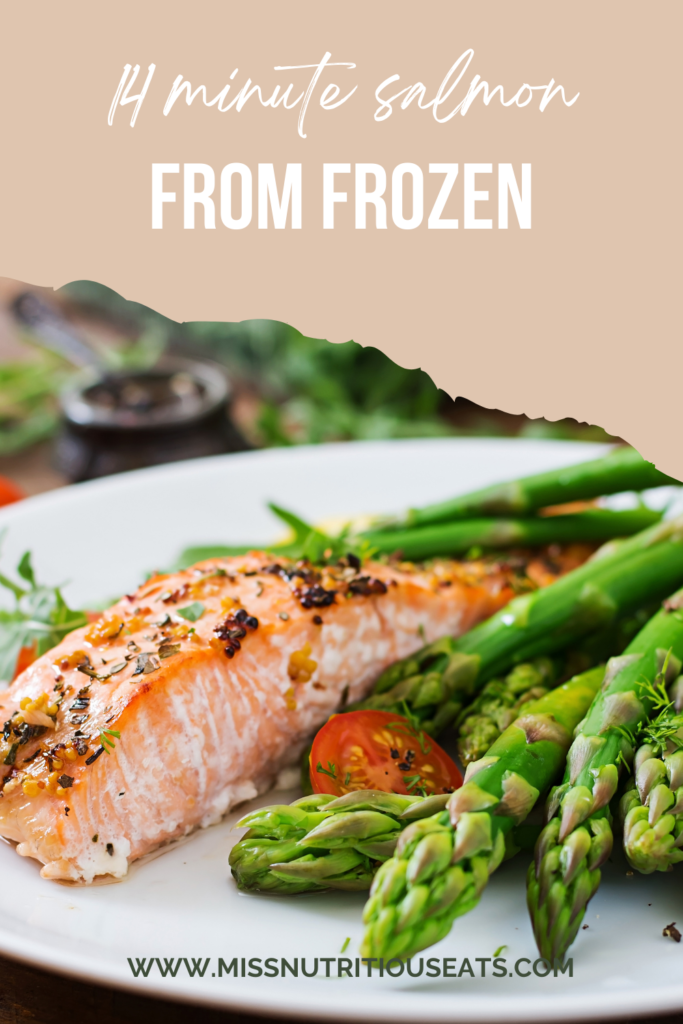
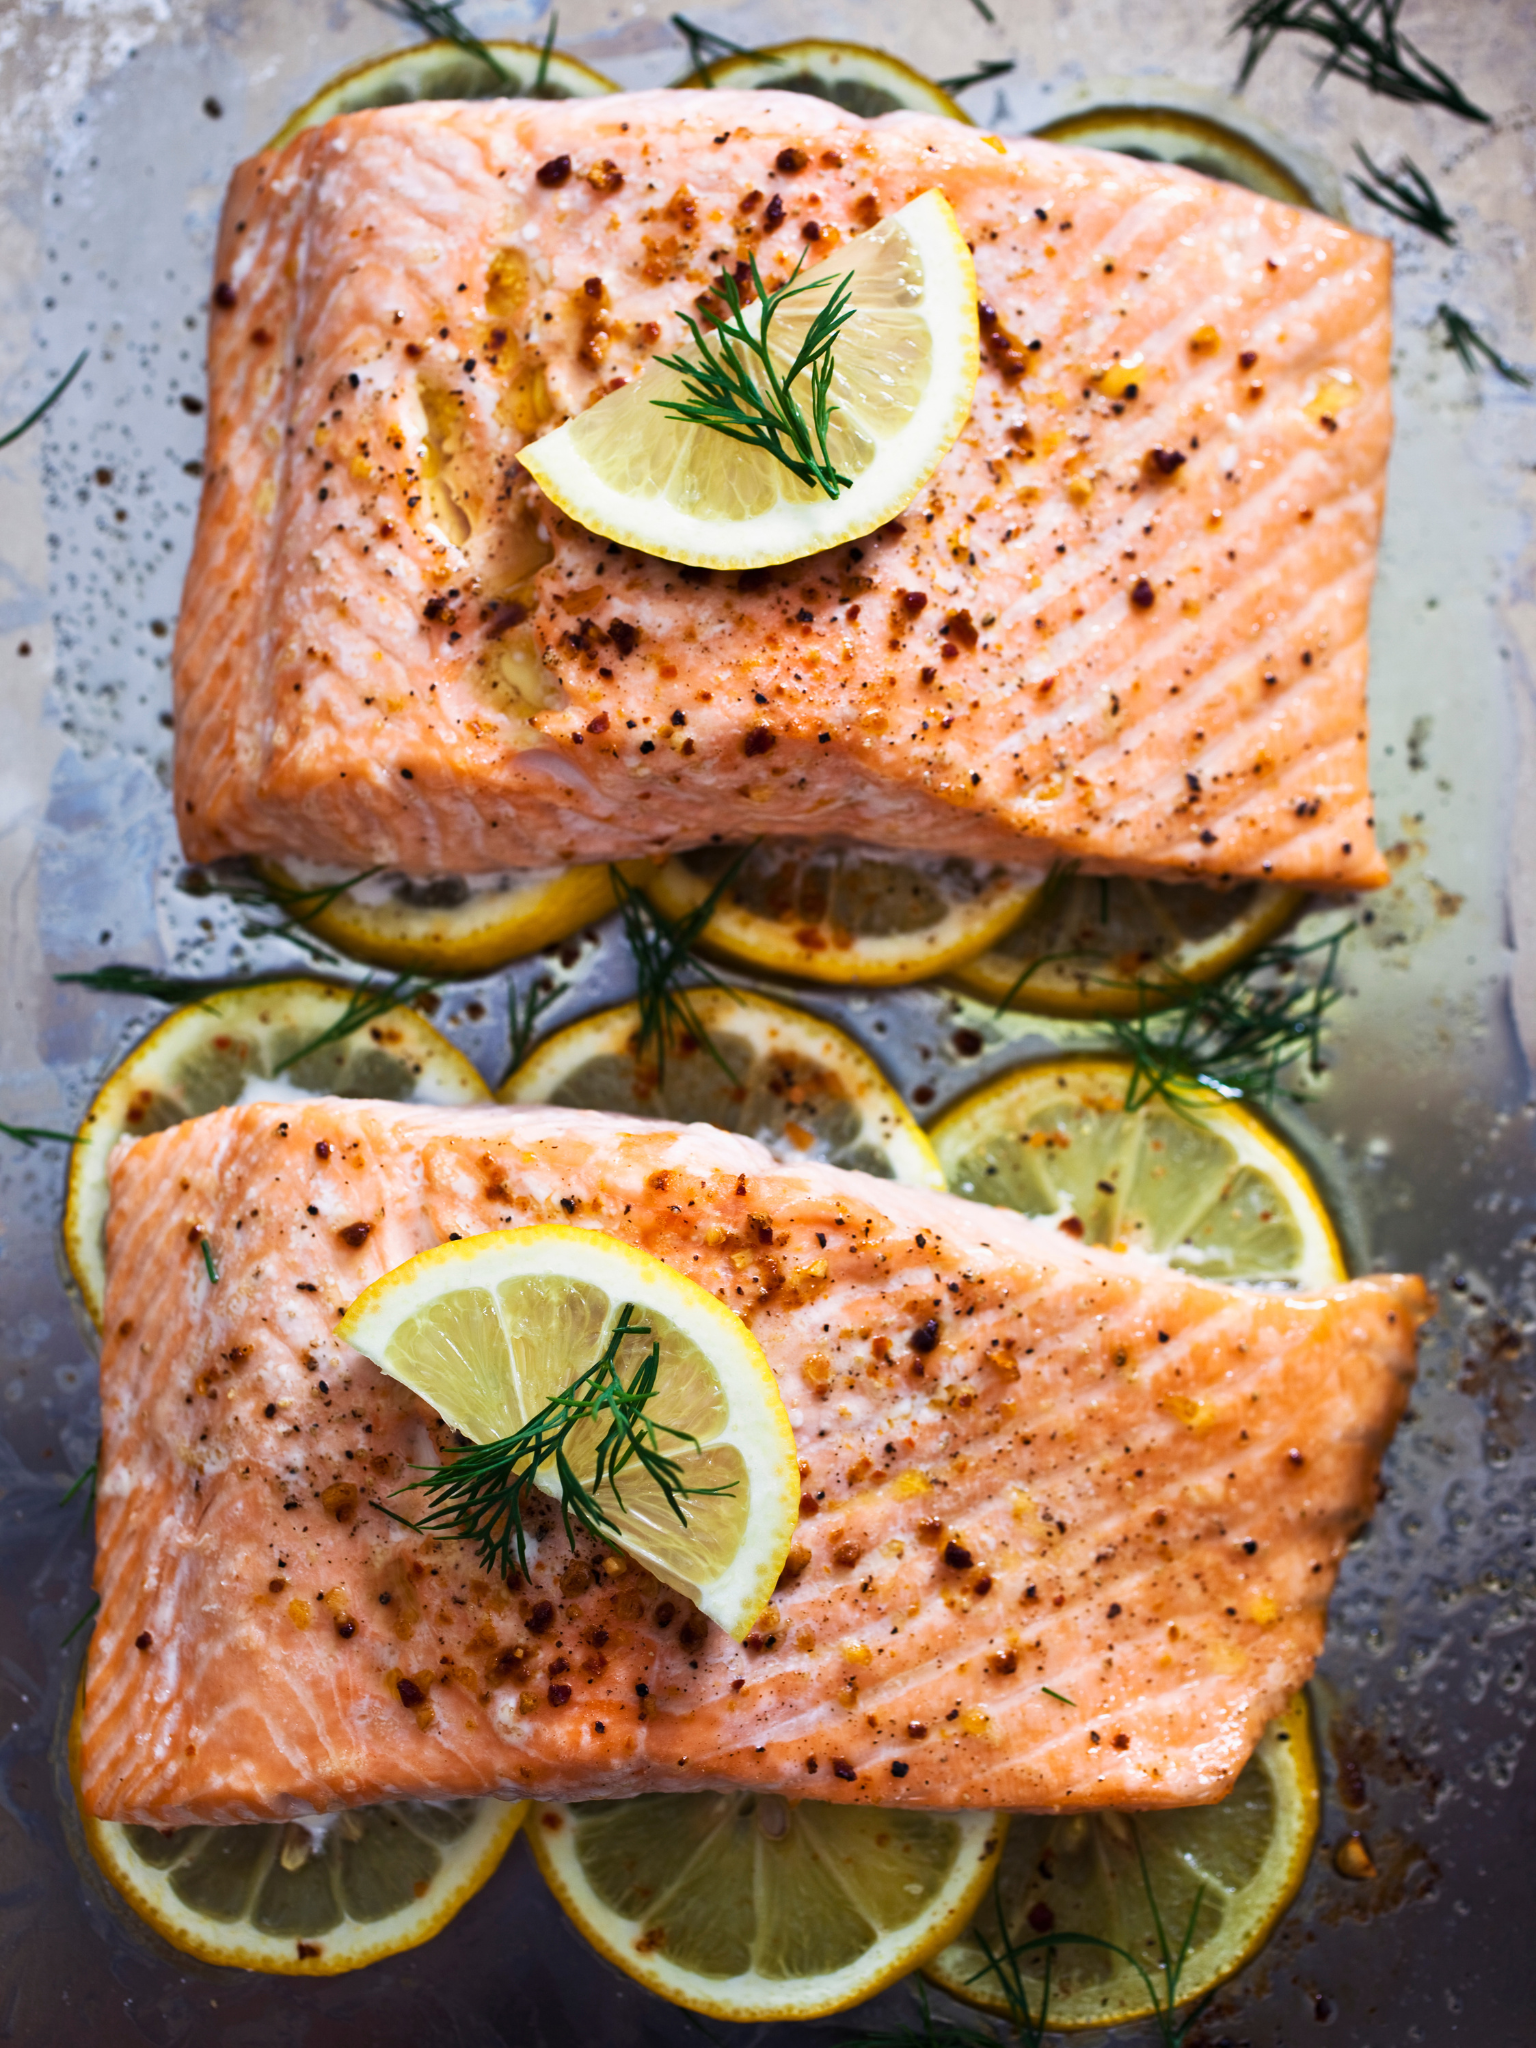
  1. Take a 6-8oz frozen salmon fillet out of packaging and place directly in 400F bucket air fryer.  
  2. Spray with olive oil spray, season with salt and pepper or Seasonello and top with lemon slices.  
  3. Cook for 14 minutes (from frozen) and serve!!  
  4. Salmon should look opaque and golden and reach an internal temperature of 145 F with a food thermometer when done.

When it’s cooked at a high temperature like this, the outside gets a little color to make it appealing and the inside is flakey and moist.  

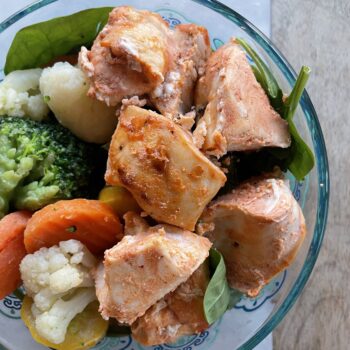
I can usually fit 3 salmon fillets in my air fryer and I usually try to make at least one extra piece of salmon for lunch the next day.  

How to store cooked salmon properly

Storing leftover salmon properly is crucial to ensure food safety and to maximize its shelf life. After cooking salmon, let it cool to room temperature before storing it in an airtight container or wrapping it tightly in plastic wrap or aluminum foil. This will keep it fresh for up to 3-4 days.

Why I eat cold leftover salmon straight from fridge

Now, back to the topic of why I eat cold leftover salmon straight from the fridge. There are a few reasons why this is a great choice.

Convenience: 

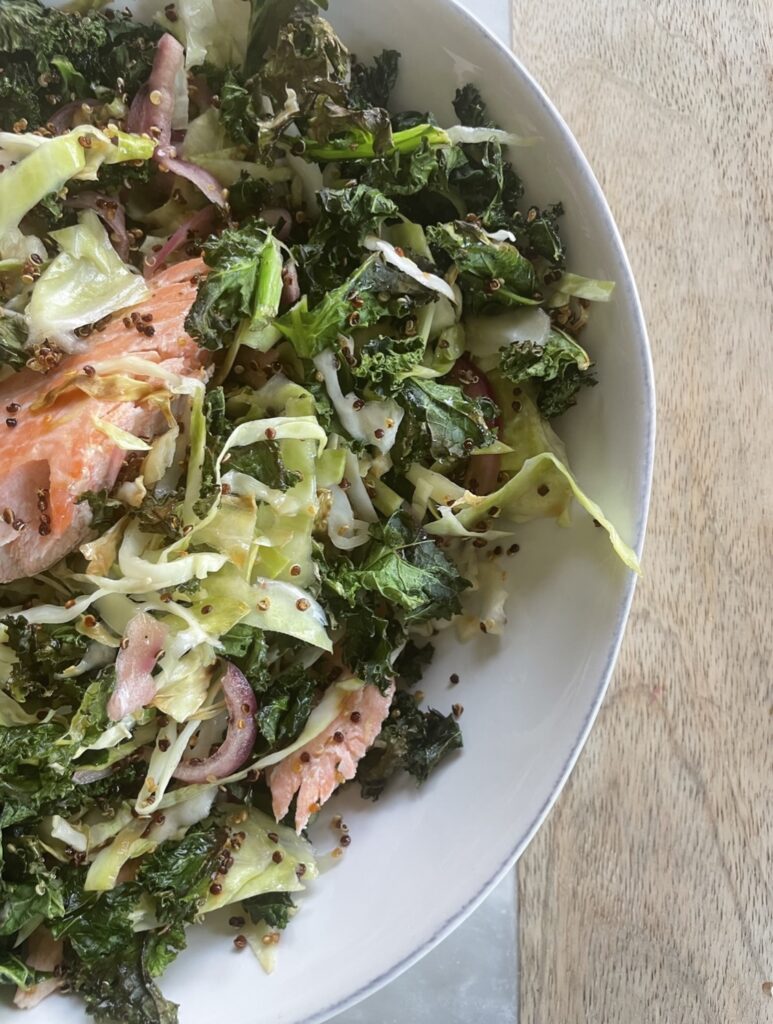
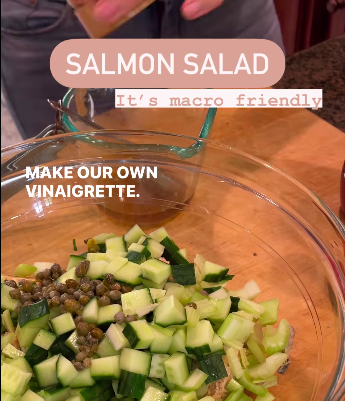
Eating cold leftover salmon is a great way to save time and effort. You don’t have to worry about reheating it or going through the whole cooking process again. I like to eat it as is, make salmon salad out of it, add it to a salad or even make a sandwich. 

Taste: 

As strange as it may sound, leftover cold-cooked salmon can taste even better than the first time you had it. The flavors have had time to meld together, and your taste buds may pick up on different nuances that you didn’t notice before. Because salmon is a fattier fish, it maintains a moist flaky texture too which makes it very satisfying to eat.  My kids prefer salmon cold too.  

No Fishy Smell:

There’s something to be said about office kitchen etiquette about salmon.  When you’re eating it, everyone knows it because of they fishy odors!  When you have it cold with your meal, it still tastes great, and won’t smell up the whole kitchen the way reheated fish does.  

Roasted salmon pinterest pin

Nutritional benefits: 

Salmon is rich in omega-3 fatty acids, which are important for brain function and overall health. Eating cold leftover salmon is an easy hands off way to get more of these beneficial nutrients in your diet.

Rich in Omega-3 fatty acids: Seafood, especially oily fish like salmon, tuna, and sardines, are excellent sources of Omega-3 fatty acids that are essential for heart and brain health.

High in protein: Seafood is a great source of lean protein, making it an ideal option for those looking to increase their protein intake without consuming excess calories or unhealthy fats.

Low in saturated fat: Compared to other animal proteins, seafood contains lower amounts of saturated fat. This makes it a healthier option for those looking to maintain cardiovascular health.

Contains essential vitamins and minerals: Seafood is rich in vital nutrients like vitamin D, selenium, iodine, and zinc, which play crucial roles in maintaining overall health.

Helps prevent chronic diseases: Regularly consuming seafood has been linked to a reduced risk of chronic diseases like heart disease, Alzheimer’s disease, and depression due to its high nutrient content.

Supports healthy growth and development: Seafood is especially important for children and pregnant women as it provides essential nutrients for proper growth and development.

Lowers inflammation: The anti-inflammatory properties of Omega-3 fatty acids found in seafood can help reduce inflammation in the body, which is linked to many chronic diseases.

Aids in weight management: Due to its high protein content and low calorie density, seafood can be beneficial for weight management by promoting satiety and reducing overall calorie intake.

To enjoy cold leftover salmon straight from the fridge, simply take it out of the container and enjoy, or let it sit at room temperature for a few minutes and top with lemon juice. 

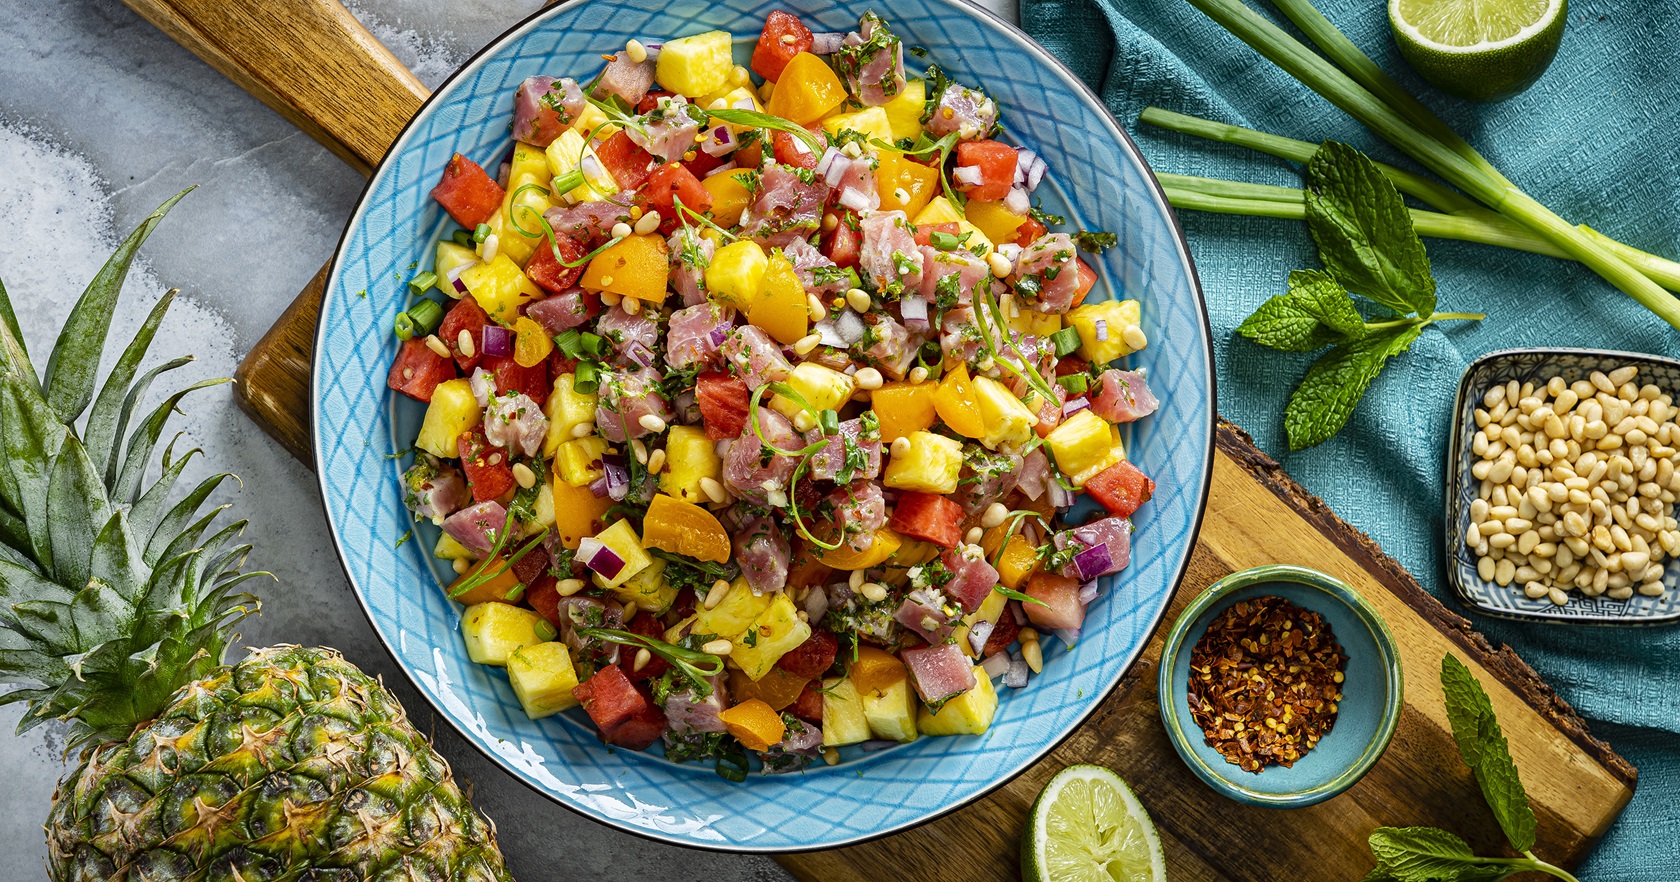
Other salmon recipes

I know my roasting method is basic, but it works and it’s delicious.  I’m not a fan of coating with cream cheese or feta cheese because it is already a good source of healthy fats.  And for basic weeknight meals, balance is important.  We talk a lot about that if you enroll in the FASTer Way and are focused on health too!  

1
Quick High Protein Salmon Salad
Use canned or leftover salmon to make this recipe.
Check out this recipe
2
Tuna poke in a blue bowl
Tuna Poke Salad
If you're loving salmon, use sushi grade salmon in this recipe instead of tuna!
Check out this recipe
3
salmon on top on lemon slices.
Baked Salad
Top this with salmon – it's soooo good!
Check out this recipe

You can easily turn leftover salmon into salmon cakes by combining with a bit of bread crumbs, chopped bell peppers, red onions and mayo or egg.  Form into salmon patties and cook over medium heat with a little olive oil on stovetop until brown and cooked through.  

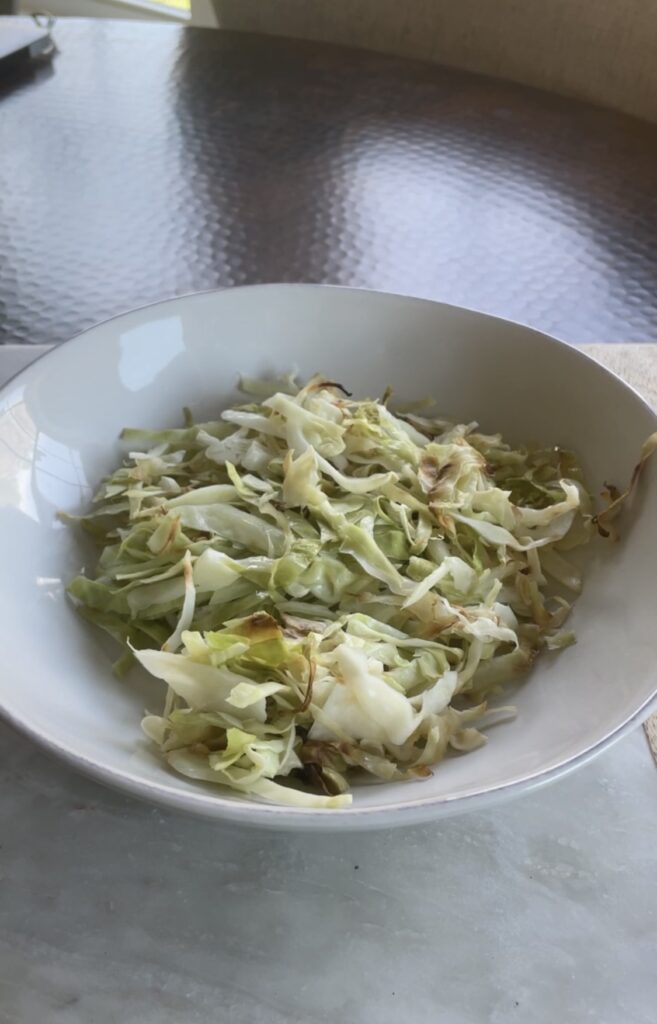
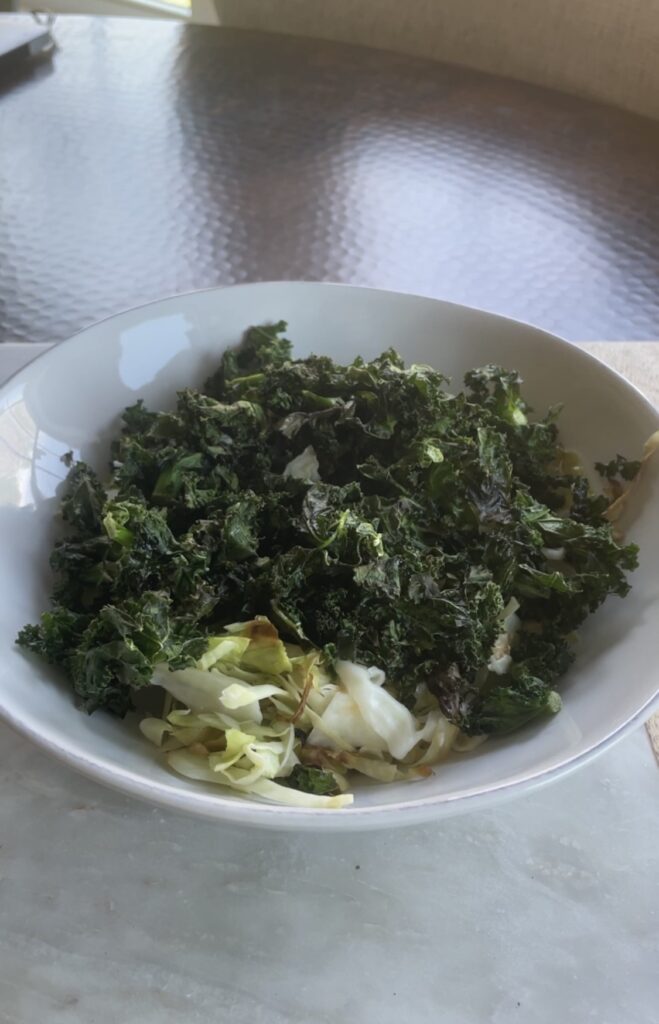
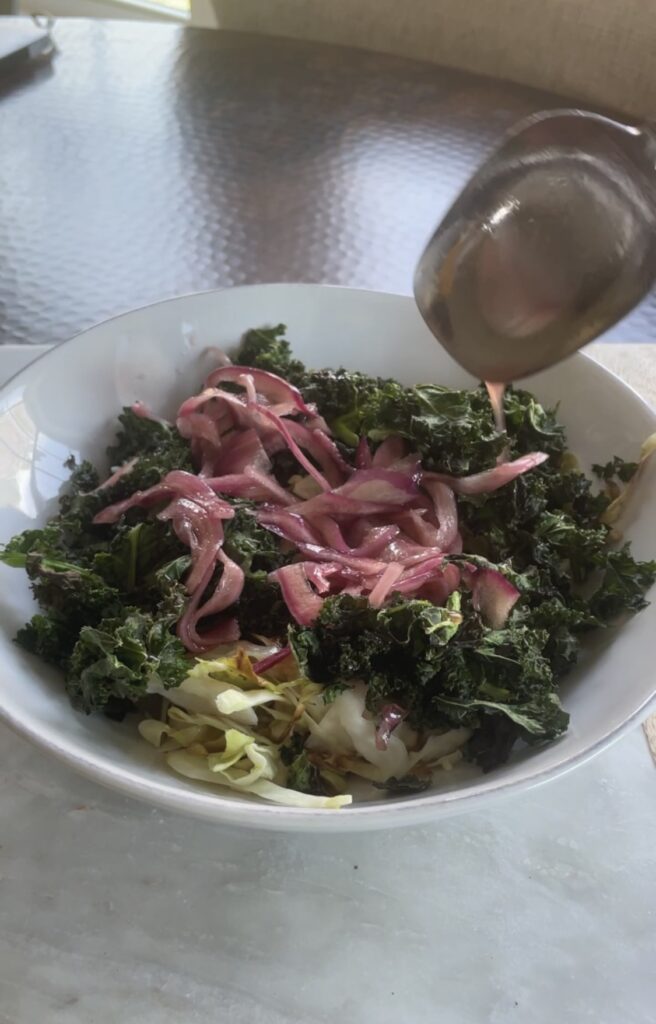
One recipe I do really love is this simple salmon salad, which you can make with canned or cold cooked salmon.  It would also be phenomenal over baked salad too!

Roasted salmon on plate.

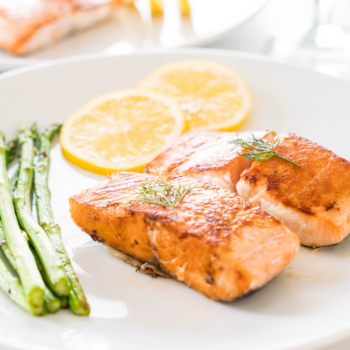
Air-fryer Roasted Salmon

Use salmon straight from the freezer.
Prep Time 1 minute
Cook Time 14 minutes
Total Time 15 minutes
Course Main Course
Cuisine American
Servings 1
Calories 242 kcal

Equipment

  • 1 basket style air fryer I have found if I use my other toaster oven style air fryer, I need to add a few minutes to cook time. And it tends to make a mess.

Ingredients
  

  • 6 oz Atlantic Salmon fillet, frozen I like Costco fillets
  • Seasonello or salt and pepper

Instructions
 

  • Preheat air-fryer to 400F.
  • Place frozen salmon on parchment liner in air fryer basket and let cook for 14 minutes.
  • Should reach an internal temperature of 145F with a meat thermometer when done.

Nutrition

Calories: 242kcalProtein: 34gFat: 11gSaturated Fat: 2gPolyunsaturated Fat: 4gMonounsaturated Fat: 4gCholesterol: 94mgSodium: 75mgPotassium: 833mgVitamin A: 68IUCalcium: 20mgIron: 1mg
Keyword air fryer, easy, fast, protein, simple
Tried this recipe?Let us know how it was!

About Me

I’m Melanie.

I’m a chef, registered dietitian, foodie, wife and mom.
If you’re looking for quick and healthy meal inspiration that serves YOU and your family well, then you’ve come to the right place!

Melanie Marcus Selfie

Mom’s Best Ever Whole-Wheat zucchini bread recipe

I enjoyed this delicious zucchini bread recipe frequently during my childhood. It was a go-to option for quick breakfast, an after-school snack, and as an adult, a sweet(ish) after dinner treat. One of our family favorites was the blueberry zucchini bread, baked to perfection in a bundt pan. During prime zucchini season, the irresistible aroma of freshly baked loaves would fill the air, waiting to be packaged and frozen for later indulgence.  What a great memory – and now I share it with my children.

Jump to Recipe

Now that I have my own garden, growing zucchini plants successfully has been quite the challenge.  I’ve learned first hand that squash bugs can take out your crop within a week if you’re not prepared – and to grow them in North Carolina is a labor of love.  After three years of watching my plants die, this year I was ready and have been able to grow amazing zucchini through August! If you are a successful gardener, bookmark this page so you can make this wholesome zucchini bread recipe anytime.  You won’t regret it!

Ingredients and Substitutions for Walnut Zucchini Bread

  • Walnuts – preferably toasted!  Always store walnuts in the fridge to maintain freshness.  
  • Eggs – It’s best to use room temperature eggs.  Also, you can use up to two flax eggs in this recipe if you want.  
  • Sugar – the original recipe called for 2 cups of sugar. If you want to limit sugar, you can go down to 3/4 cup instead – which is what I do! Coconut sugar can be used instead of white sugar if you like.  I don’t recommend using honey or maple syrup because they’ll add extra moisture.  
  • Vegetable Oil – any oil will work.  I’ve used canola oil, olive oil, coconut oil and rapeseed oil and they all turned out well.  Keep in mind that certain oils will impart flavor and potentially more saturated fat than others.  
  • Apple Sauce – I use unsweetened apple sauce to help keep the bread moist.  You can also use plain greek yogurt or mashed banana. 
  • Unsifted White Whole Wheat Flour – You can use half whole wheat (whole grain flour) and half white flour to  bump up nutrients from whole grains.  All purpose flour or AP flour will also work well.
  • Baking Soda
  • Salt
  • Cinnamon
  • Baking Powder 
  • Zucchini shred using food processor or box grater.  This recipe calls for two cups of grated zucchini, I tend to use about 2 1/2 cups or one large zucchini. But remember to remove the seeds!!  Smaller zucchini are more desirable for their smaller, more digestable seeds.  If your zucchini is large, you will need to scoop them out.  
  • Vanilla extract
  • Optional mix ins :  blueberries, raisins, chocolate chips, lemon zest
Jump to Recipe

It’s so good that I’ll even make it in winter!

About white whole-wheat flour

White whole wheat flour is a healthier alternative to traditional all-purpose flour because it is made from whole grains rather than refined grains. Unlike other types of whole wheat flour, white whole wheat flour is made from a variety of wheat that has a lighter color and milder flavor, making it more appealing to those who are used to the taste of white flour. White whole wheat flour retains the bran and germ of the wheat, which are packed with fiber, vitamins, and minerals that are beneficial for our health. 

How to make the best zucchini bread

I love a short and simple quick bread recipes, and this one is my favorite.  

  • First things first, preheat oven to 350F and line two bread pans (aka loaf pan) with parchment paper and spray with nonstick spray.  You can also use one bunt pan.
  • In a large bowl, beat eggs (plus flax eggs) if you’re using, sugar, applesauce and oil. I like to do this by hand, but you can use your stand mixer with paddle attachment.  
  • Next, in a medium bowl combine all of the dry ingredients.  Whisk flour mixture well before gradually adding to wet ingredients.  
  • Now mix in zucchini.  
  • Last stir in walnuts and vanilla.
  • Pour batter into prepared pan or divide batter into two loaf pans and bake at 350F for about 1 hour or until toothpick comes out clean.  Cooking time may vary slightly depending on the moisture content of the zucchini.    
  • When it comes out of the oven, set the pans on a cooling rack and cover with a clean kitchen towel.

How to freeze this classic zucchini bread

  • For best results, let your breads rest on a wire rack until cool to touch. This helps ensure that excess moisture has evaporated and doesn’t get trapped inside.  
  • Wrap tightly with aluminum foil.
  • Then label freezer-safe bag with date they were made.  
  • One loaf will fit into one gallon size plastic bag.  
  • Freeze completely in the coldest part of the freezer.  
  • When you’re ready to enjoy your zucchini walnut bread simply take out of the freezer the night before so you can have it the next day.

When to eat zucchini bread

1.  Serve for breakfast instead of store bought muffins.  

2.  Bring a loaf of zucchini bread to the office to share with co-workers

3.  Enjoy a warm slice with a little butter. There’s nothing like it.  

4.  Cut into individual slices and wrap with plastic wrap.  Store in a freezer safe bag in the freezer for a healthy snack anytime.  

The best part about this whole wheat zucchini bread recipe is that it makes two loaves!  It’s a quick bread batter that is sure to rival your favorite banana bread or pumpkin bread. For me, there is just something incredibly satisfying about this homemade treat – perhaps it was the inclusion of toasted walnuts, adding a perfect crunch to every bite.

Let me know if you try it for yourself!!  

Mom’s Walnut Zucchini Bread

Prep Time 15 minutes
Cook Time 50 minutes
Total Time 1 hour 5 minutes
Course Breakfast
Cuisine American
Servings 16
Calories 288 kcal

Ingredients
  

  • 4 each eggs
  • 1 cup sugar
  • 1 cup vegetable oil
  • 1 tsp vanilla
  • 2/3 cup unsweetened applesauce
  • 3.5 cups white whole wheat flour unsifted
  • 1.5 tsp baking soda
  • 1.5 tsp salt
  • 1 tsp cinnamon
  • 3/4 tsp baking powder
  • 2 cups shredded zucchini
  • 1/2 cup walnuts toasted and chopped

Instructions
 

  • Mix eggs, sugar, oil, applesauce and vanilla in a large bowl.
  • In another bowl, combine all dry ingredients.
  • Gradually add dry ingredients to wet ingredients.
  • Fold in zucchini and walnuts
  • Pour into 2 prepared loaf pans, or 1 bundt pan.

Nutrition

Serving: 16gCalories: 288kcalCarbohydrates: 33gProtein: 4gFat: 17gSaturated Fat: 2gPolyunsaturated Fat: 10gMonounsaturated Fat: 3gTrans Fat: 0.1gCholesterol: 1mgSodium: 343mgPotassium: 95mgFiber: 3gSugar: 14gVitamin A: 36IUVitamin C: 3mgCalcium: 37mgIron: 1mg
Tried this recipe?Let us know how it was!

About Me

I’m Melanie.

I’m a chef, registered dietitian, foodie, wife and mom.
If you’re looking for quick and healthy meal inspiration that serves YOU and your family well, then you’ve come to the right place!

Melanie Marcus Selfie

Easily clean the garbage disposal with citrus peels

Have you seen the TikTok lemonade trend? If you’ve tried to make the viral whipped lemonade or just as well known cowboy caviar, you may have excess of lemon or lime peels in your kitchen. (if you haven’t made them check out those links to get the recipes!) Do you wonder if it’s safe to put them down the garbage disposal? The answer may surprise you – yes, you can! It’s actually a great way to reduce food waste and reuse something that would typically just go to the bin. In this post, we’ll talk through why running these peels through the disposal is actually beneficial and how disposing of them properly will keep your sink in tip-top shape. Read on to learn more about citrus peel disposal and make sure everything from the cutting board to the drain runs smoothly!

Why put fruit peels down the disposal?

Putting citrus peels, such as lemon, lime and orange down the garbage disposal helps break them down into smaller pieces for easier processing while making your drain smell good! The citrus oil offer a natural smell to the disposal and can help reduce odors from food scraps that may linger. In addition to cutting unpleasant odors, it’s thought that citrus peels can cut the residue left behind greasy foods, effectively eliminating them. You can use orange peels, lemon rinds, lime peels or grapefruit skins – they all have natural oils with unique scents! Bu-bye bad smell!

4 Steps to run citrus peels down the garbage disposal

  1. When disposing of citrus peels, it’s best to cut them up into smaller pieces. Instead of putting whole lemons down into the blades of the garbage disposal(which won’t go over well), I cut mine into quarters that can easily fit down the drain. This will also help them break down faster and easier.
  2. Run cold water while grinding peels and keep the disposal running for several seconds after all of them have passed through to ensure that they are fully broken down before leaving your drain and going through the rest of your plumbing system.
  3. Turn off the disposal and let hot water run for another 15 seconds.
  4. Always practice safety when using a garbage disposal – never put your hands down into it on a whim and unplug it when not in use. With the right precautions, you can safely and effectively dispose of citrus peels with a garbage disposal!

Pro Tip – as a self proclaimed produce lover, it’s a good idea to remove any fruit stickers. They can easily get caught up in the garbage disposal’s blades resulting in a broken appliance.

What not to put down the garbage disposal

If you’ve never used a garbage disposal before, I want to help you avoid a big problem with this advice. As a general rule non-food items should not go into the disposal. Avoid putting any and all hard materials near the drain. Having kids, I find that small spoons, screws, rocks, stones, rubber bands and other small objects can become problematic!! Overall any hard items can damage the garbage disposal blades and can cause it them to dull or stop moving all together.

  • Small bones – these can dull blades and make an awful grinding noise when the disposal is turned on!
  • Fruit pits – Avoid larger pits from stone fruit such as peach or plumb pits. Smaller pits from apples or lemons will can cause a problem too, especially if a lot of them are tossed in at once. Take care with cherry pits and unpopped popcorn kernels too!
  • Egg shells – They can dull the blade. They can also do you a lot more good when crumbled and put under plants growing outside!
  • Seafood shells – we love eating steamed clams but their shells should go straight into the trash! Small pieces are just as bad as small rocks for your disposal!
  • Fibrous veggies – And stringy vegetables like celery stalks aren’t a great idea for your disposal. Their fibers are so tough that they can cause your garbage disposal to stop running.
  • Potato peels – While vegetable peels are a natural fit for the disposal, large amounts of starchy foods like potato skins and the waste disposal, may congeal and create a thick paste that can create a problem for your garbage disposal unit.

Other helpful tips if something gets stuck down in the disposal

I mentioned earlier that we’ve had a few issues with our disposal, and thankfully we were able to solve them on our own without the help of expert plumbers.

eaten red cherries on a plate
  • First shut off power to the disposal before going near it with your hands. Ours has a switch underneath the sink, but I recommend unplugging it if you can.
  • Next get a flashlight. I’ve used my iPhone flashlight in a pinch but a larger light will be helpful if you have it.
  • Get your significant other, child or friend to hold the light while you push back the plastic flaps to get a better look inside.
  • Use a knife or fork to feel around and try to locate where the item is inside of the disposal before putting your hand it to get it.
  • Protect your hand with a disposable glove before going in remove the item!

If all else fails get the help of expert plumbing services and don’t use your disposal until it can be assessed.

About Me

I’m Melanie.

I’m a chef, registered dietitian, foodie, wife and mom.
If you’re looking for quick and healthy meal inspiration that serves YOU and your family well, then you’ve come to the right place!

Melanie Marcus Selfie

How to grate carrots without a grater – there’s always a way

If you want to make a carrot cake but find that you don’t have pre-shredded carrots, and you don’t have a traditional box grater either – there are a few things you can do to get the job done. Keep reading for the best way to grate carrots in a pinch. No one will ever know!

Tools you could use to make grated carrots

There are all different types of graters so, although you may not have a box grater or hand grater, there are a lot of things you can do to get your carrots down to the right size for your recipe. You may be surprised the simple kitchen equipment you need is already on hand! Thin slices of carrots for your carrot kale muffins or your other carrot favorite recipes are just minutes away!

  • vegetable peeler
  • cheese grater or micro plane grater
  • julienne peeler
  • shredding blade on mandolin
  • small food processor with shredding disc accessory
  • a sharp knife

How to make grated carrots

My first choice would be to use a mini food processor with a grating plate, because this is probably the easiest way. I try to use this kitchen appliance any chance I get, because it always gets the job done with minimal effort. All you need to do is add your carrots through the top shoot of the processor and let the plate do its job while you hit the pulse button. It will shred carrots for you!

If that’s not an option – I’d go for my vegetable peeler. Over a cutting board, run the peeler in a downward motion starting at the larger end of the carrot and ending at the pointed end of the carrot. Just like you would if you were going to peel it. It will make long thin strips. Then you can run your knife over them and cut them down to small thin pieces. It’s a great way to break your carrot down into small pieces with limited equipment!

The next method you could try is your microplane. This is a hand held grater that has small holes, similar to the large holes of the box grater. The main difference with with this tool is that your carrots will come out very fine, possibly mushy, so proceed with caution.

A julienne peeler will shred your large carrots into thin strips which means with a little bit of effort from your knife, you can chop them down to smaller pieces and get similar results to your box grater.

The best method will come down to which tools you have at home because there are truly a bunch of different ways to shred fresh carrots.

Use carrot shred immediately, but extra can be stored in an airtight container for up to three days. Try using them in muffins, breads, scones, meatloaf or quiche.

If whole carrots are more your thing – try these vegan carrot dogs! They’re excellent!

About Me

I’m Melanie.

I’m a chef, registered dietitian, foodie, wife and mom.
If you’re looking for quick and healthy meal inspiration that serves YOU and your family well, then you’ve come to the right place!

Melanie Marcus Selfie

Keep Your Nespresso Vertuo Machine Fresh: Step-by-Step Cleaning Guide 

If you’re like me, you’re reading this because you’ve never cleaned your Nespresso coffee machine!

Since starting the FASTer Way to Fat Loss, with intermittent fasting, my morning coffee time has been more important than ever. I wake up early when the rest of the house is asleep, make my coffee and catch up on reading, or writing in total quiet! I love resetting my day like this, but was truthfully stumped when I realized that I never thought to clean my machine! If you follow me on IG, you know I post my coffee in stories almost every day!

I realized my fatal mistake when having coffee with coworkers. A friend mentioned how much she love her Nespresso coffee maker and that cleaning it on a regular basis wasn’t so bad… when my mouth dropped! I’ll admit it, I have never run the descaling process on my Breville Nespresso Vertuo model. But I have to give myself grace – my machine didn’t have an unpleasant smell, my morning coffee tasted the same as always and I didn’t have a warning light!

To my credit, I have wiped the outside with a damp cloth and have always kept the water and discard bins clean – but regular cleaning was not in my rotation. Oops!

Jump to Recipe

Read on for a step-by-step guide on how to get a clean Breville Nespresso Vertuo machine.

We’ll talk through removing obvious dirt like old coffee grounds, how to turn on the descaling mode and what you should use to clean a dirty machine to keep your coffee tasting delicious! In addition to improving the taste of your coffee it will extend the life of your machine, keeping it in good condition.

How Often Should You Clean Your Machine? 

This is my machine here.

The general rule for all espresso machines is to clean them every few months, or when you notice that the indicator light color has changed from green to orange. If you use your Nespresso Vertuo every day, then cleaning it once every two months should suffice. Just make a note of your cleaning schedule if you have the Breville model because you won’t get an indicator light.

Jump to Recipe

Clean the Used Capsule and Water Reservoir

Clean the outside of these containers with a clean microfiber cloth. You can use lemon juice or white vinegar with water as a quick and effective solution. Use dish soap and water to remove any mineral deposits in the water reservoir, especially if you have hard water. The used coffee pod container may have a bit more build up from coffee residue, but can easily be removed with the cleaning process. Let both air dry before returning to the machine.

Cleaning the Drip Tray 

Next you’ll want to start by removing the drip tray from beneath your machine and emptying any residual water into the sink. Then, wash and rinse it with warm water and a mild detergent. Let it air dry before returning it to the machine. Make sure to empty and clean the drip tray after each use. 

Jump to Recipe
Cheers to excellent coffee.

Descaling Cycle 

The Nespresso website recommends that you descale your machine regularly. About every three months or every 300 pods, whichever comes first. It’s an important step to remove build-up of coffee oils that can build up over a long time.

(Most) Nespresso Vertuo have an automatic descaling system that will alert you when they need attention—the orange indicator light comes on when this happens. The descaling cycle can be activated in just a few steps: first, fill up the water tank with fresh tap water (though filtered or bottled water is recommended – not soapy water). Next, open the capsule container lid at the top of your machine and press the button for “descale” until you hear a beep; at this point, close the lid and press start. Once finished, discard any remaining water in the container and run two more cycles without adding any additional ingredients or capsules—this will ensure that all residue is removed from inside your machine.  

The Breville cleaning system is just a bit different. There’s no colored indicator light, and there’s no button inside the top of the machine. Instead, start by by filling the water reservoir with clean water. Then place a 20oz container under the spout. Close the capsule container lid at the top of the machine and press the button 3 times within 2 seconds to initiate the cleaning cycle. Keep your container in place for up to 5 minutes as water runs through the system. Once finished, discard any remaining water in the container and run two more cycles without adding additional ingredients or capsules.

Do You Need Special Cleaning Products? 

No! You don’t need special cleaners or chemicals when cleaning your Nespresso Vertuo; plain old soap and water will do just fine! However, if you do want to use special cleaning products made specifically for espresso machines, make sure they are non-abrasive so as not to damage any internal components of your device. Also note that some detergents contain chlorine which could leave behind an unpleasant taste in your coffee – so only use these products if necessary!  

With just a few simple steps every couple of months, you can keep your Nespresso in top shape and enjoy delicious cups of coffee for years to come! Cleaning does more than just improve flavor; regular maintenance helps extend the life of your appliance too! So take some time out today to give your machine some TLC – you’ll be glad you did!

Tips for cleaning your coffee maker

  • Create a phone reminder or jot your next cleaning on the calendar
  • Tip: note how many pods your case holds and make a judgement based on that, for example, you may have to run through it twice before cleaning.
  • Have a 20oz container, or large glass handy when it’s time to clean.
  • When it comes time to clean, just refill the reservoir and run the cycle after you’ve made your morning coffee. It’s automatic and hands off, so no reason to dread!
  • Rinse the drip tray and clean visible debris from the side containers weekly or as often as needed.

How I take my coffee

It took me a few weeks to get used to my Nespresso, but I truly enjoy my coffee so much that just one cup in the morning is enough. And I look forward to it every day!

The pod is key. I go back and forth with the melozio pods and the odacio pods, but I think odacio is my favorite. (They’re the turquoise ones). I keep it simple by adding 2 pumps of sugar free vanilla or hazlenut with 1/4 cup of foamed 1% milk. I don’t stray to far from this. If I try to make a 2nd cup, the satisfaction value just isn’t there. With one cup the calories stay under 50, I keep my fasted state and can stay on track with intermittent fasting!

If you like to take your coffee up a notch, try this Vegan Cold Creme recipe. Add a dolop

Cheers to excellent coffee.

How to clean your Nespresso Machine

Learn how to clean your Nespresso when it's missing an indicator light.
Prep Time2 minutes
Active Time5 minutes
Total Time7 minutes

Equipment

  • 1 Nespresso Machine
  • 1 20 oz container

Materials

  • 20 oz water

Instructions

  • Remove and clean both the water reservoir and the used pod container with warm soapy water. Let air dry before returning to the machine.
  • Fill the water reservoir with at least 20oz of bottled water.
  • Press the on button 3 times within 2 seconds to initiate the clean cycle. Be sure your 20oz container is under the spout.
  • It can take up to 2 minutes for the process to start. Leave container under the spout for the entire time. About 5 minutes.
  • Remove the drained water. Repeat if necessary.

About Me

I’m Melanie.

I’m a chef, registered dietitian, foodie, wife and mom.
If you’re looking for quick and healthy meal inspiration that serves YOU and your family well, then you’ve come to the right place!

Melanie Marcus Selfie

Unbelievably easy Yogurt marinade for chicken skewers

I came across this recipe a few years ago in one of my cookbooks and it’s been a staple ever since. I make it often during summer grilling season and it’s so easy to remember that I can make it while away on vacation! The marinade time is relatively low making it a good option for weeknight meals too. It’s one of my favorite chicken recipes because it requires very little prep work and they have so much flavor!

Jump to Recipe

What you need to make these chicken kabobs

Ingredients

  • Chicken pieces – I like to use boneless skinless chicken breasts cut in to 1-inch pieces. Boneless skinless chicken thighs also work well. If you don’t want to make kabobs, you can use your favorite cut of chicken and bake or roast until 165F.
  • Greek yogurt – The original recipe calls for full fat greek yogurt. I’ve made it with fat free Greek and plain yogurt and it also worked well.
  • Red curry paste – This is the secret ingredient. It’s where maximum flavor and color comes in. I prefer the Thai Kitchen brand. If you can’t find it, try a mix of tomato paste, garlic and fresh ginger, red chili powder and lemon zest.
  • Kosher salt and olive oil

Other equipment

  • Wooden skewers or metal skewers
  • Instant read thermometer
  • Outdoor grill, gas grill or indoor grill pan
  • Baking sheet to place raw chicken skewers
  • Plastic wrap
  • Plastic gloves

How to make yogurt curry chicken skewers

First, combine the plain greek yogurt, curry paste, salt and oil in a large bowl. Mix well and set marinade ingredients aside.

Next, cut your chicken into one inch pieces if necessary.

Place pieces of chicken into marinade. Once coated, place chicken onto skewers, cover with plastic wrap and place in the refrigerator for 20 minutes.

For best results, preheat your grill to ensure grill grates are hot.

Place skewers onto prepared grill and let cook for about 25 minutes, turning once half way through. Skewers should be golden brown and reach an internal temperature of 165F when done. Discard extra marinade.

Store leftovers in an airtight container for 3-5 days in the refrigerator.

Jump to Recipe

Why does yogurt make a good marinade?

Yogurt is a good source of healthy bacteria for your gut. That same live active bacteria also happens to be what makes it a good marinade, tenderizing your chicken within a short amount of time.

What to serve with these easy chicken skewers

Serve cooked skewers with…

  • Roasted red onions and broccoli
  • Warm pita bread
  • Traditional Greek salad with tomato, olives and feta
  • Small side salad
  • Roasted potatoes and a squeeze of fresh lemon juice
  • Sliced cucumber and tzatziki
  • Hummus and stuffed grape leaves

Nutritional information and macros

This grilled chicken is versatile for regular macro and low carb days. This recipe makes 6, 5 oz cooked portions with the following macros. If you need other macro friendly recipes check out my chicken fajitas, egg roll in a bowl or pulled chicken recipes! All super easy and macro friendly.

Calories: 221

Fat: 7g

Carbohydrate 1g

Protein 35g

Yogurt Curry Chicken Skewers

This recipe couldn't be faster to throw together, and it's a complete crowd pleaser.
Prep Time 10 minutes
Cook Time 25 minutes
Total Time 35 minutes
Course Main Course
Servings 6
Calories 221 kcal

Ingredients
  

  • 1/2 cup full fat greek yogurt
  • 2 tbsp red curry paste
  • 1 tsp kosher salt
  • 1 tbsp olive oil
  • 2 pounds chicken breast skinless, boneless

Instructions
 

  • Combine first four ingredients in a large bowl and set aside.
  • Cut chicken into 1 inch cubes if necessary. Then add to yogurt mixture.
  • Let chicken sit in marinade for 20 minutes in the fridge.
  • Grill over medium high heat until internal temperature reads 165F. About 25 minutes.

Nutrition

Calories: 221kcal
Tried this recipe?Let us know how it was!

About Me

I’m Melanie.

I’m a chef, registered dietitian, foodie, wife and mom.
If you’re looking for quick and healthy meal inspiration that serves YOU and your family well, then you’ve come to the right place!

Melanie Marcus Selfie

I’m making the case for jarred garlic – really!

I’ve been giving this a lot of thought lately. It’s funny because, I can vividly remember chatting with a girlfriend – pre marriage, and babies – when I explicitly said “if you have any respect for yourself and cooking – you should never use jarred garlic.” She called me fancy pants and that was the end of that! Anthony Bourdain has been quoted as saying something similar too.

Jarred pre-minced garlic will never replace fresh cloves (that is where you get the best flavor). But if peeling and slicing garlic is a step of cooking that is getting in the way of YOU cooking meals at home, I say use the jarred garlic. And don’t feel guilty about it! As you start to cook more, or circumstances change, you may have more time to give to the cooking process, and your choice of garlic may change too!

But now that I’m in another phase of life, I see (both garlic and cooking) differently. I just don’t have the same time to enjoy the art and process of cooking at every meal. Instead, home cooked family meals are a way to be sure my husband and I and the children are eating health(ier) food instead of fast food or takeout alternatives. They’re a way to be sure we’re eating enough fruits and vegetables, and a way to save money on expensive takeout.

Since culinary school I’ve practiced the technique of mise en place. I would choose an elaborate recipe based purely on flavor or presentation, purchase ingredients in the most fresh and unprocessed form and then prepare everything according to the ingredients list. So if a recipe called for sliced garlic. I would buy garlic bulbs at the local grocery store, break off the fresh garlic cloves, peel and slice until I had enough for the recipe. Then I’d move onto the next ingredient.

Today, it’s a different story. I am open to any and all grocery store shortcuts or new products, anything that will save me time and money and help get a home cooked meal on the table – VERY QUICKLY.

Types of garlic and garlic products

  • Raw whole bulb garlic can be found in the produce aisle. They’re covered in a white papery skin and last for quite some time at home when stored in a cool dry place. Not the refrigerator. These will have a stronger flavor than other “processed” garlic options.
  • Elephant garlic is a favorite of mine because 1 clove is equal to at least 2-3 normal cloves so it’s less labor to peel and easier to slice.
  • Black garlic is more earthy and not the same as traditional white garlic.

Aside from the traditional raw forms of garlic, you can also find other garlic products. Experiment with using different sources of garlic next time you make a pasta sauce or salad dressing. Then use wha you prefer.

  • Pre-peeled whole cloves of garlic can be found in produce sections. Caution with these because once you open the package, they will need to be used within a week or so. So unless you need a lot of garlic, buying these large bags may not be the money and time saving solution for you.
  • Garlic paste is usually in the refrigerated section of the grocery store, but has more additives.
  • Chopped garlic in small jars in the produce section of your grocery store, usually they’re sold in water or olive oil.
  • Frozen garlic cubes are great because one cube is equal to one clove of garlic which makes easy measuring.
  • Dried garlic in the spice aisle in the form of dehydrated garlic cloves or garlic powder. These are best for dry rubs.
  • Garlic salt is a mixture of garlic powder and salt.
harvesting garlic

What is in jarred garlic?

The main ingredients are garlic, water and citric acid which is used as a preservative to prevent oxidation and browning.

Converting teaspoons to cloves

Half a teaspoon of jarred garlic is equal to one clove of fresh garlic. Jarred is not as strong as the fresh stuff, so you can get away with using a little bit more.

If you ask me, there’s no such thing as too much garlic.

Benefits of jarred garlic

  • Convenient option for last minute meals – think stir fry, garlic bread, soup, salad dressing or marinade starter.
  • It has a longer shelf life than other garlic products such as garlic paste or pre-peeled cloves
  • No need for a garlic press
  • Time saver when you don’t have time to mince garlic
  • It can remove the mental hurdle of needing to peel and slice garlic which can be tedious
  • No smelly hands

Negatives of jarred garlic

  • You won’t get the same quality aroma filling your home – you need fresh for that!
  • Nutritionally, jarred garlic doesn’t have the same health benefits because it has been pasteurized or heated during the packaging process.
  • It loses it loses it’s antibacterial properties and has lower levels of allicin, a compound which may prevent certain types of cancers.1
  • The garlicky flavor is not as strong as fresh raw garlic.
  • It has a stigma, and your foodie friends will always hold against you.
  • It can develop an off putting odor and flavor after it’s been open for too long – so be sure to keep an eye on the expiration date.

What are signs of spoilage?

If your jarred garlic started to have an off odor or becomes discolored it’s time to toss it. It can last several weeks in the refrigerator, especially when it’s sealed and stored properly. When using garlic, be sure the spoon being used is clean to avoid cross contamination from other foods.

The bottom line

Jarred pre-minced garlic will never replace fresh cloves (that is where you get the best flavor). And some dishes are not a good fit for jarred garlic – like anything you’d eat raw. But if peeling and slicing garlic is a step of cooking that is getting in the way of YOU cooking meals at home, I say use the jarred garlic. And don’t feel guilty about it! As you start to cook more, or circumstances change, you may have more time to give to the cooking process, and your choice of garlic may change too!

Recipes you can use jarred garlic in

4
Egg Roll meal prep
Egg Roll In A Bowl
Easy weeknight recipe that comes together with basic pantry staples and 2-3 fresh ingredients from the store!
Check out this recipe
5
Three Cheese Baked Ziti
Crowd pleasing pasta that's full of flavor and less fat than your standard version!
Check out this recipe
6
Easy red lentil soup
Easy Split Red Lentil Soup
This super fast, protein packed recipe can be made any night of the week in under an hour!!
Check out this recipe

Resources

  1. https://pubs.acs.org/doi/10.1021/jf8000907

About Me

I’m Melanie.

I’m a chef, registered dietitian, foodie, wife and mom.
If you’re looking for quick and healthy meal inspiration that serves YOU and your family well, then you’ve come to the right place!

Melanie Marcus Selfie

Baked Salad should be a staple winter recipe for you – a dietitian explains

When I heard baked salads were trending on TikTok, I was intrigued and as a dietitian, pleasantly surprised. Baked salad is simply a variety of roasted vegetables that are eaten as a warm salad – which is perfect for winter eating! To me, baked salad recipes are the 2.0 of sheet pan meals. They’re an ideal way to increase your servings of vegetables and they’re very easy to make. I tested

This recipe is inspired by the version made by Justine Doiron, it’s the perfect balance of sweet and bitter, soft and crunchy. Her’s used chili oil, which I didn’t have on hand, so simplified a bit, either way, I really enjoyed it when I made it for the first time. It even reheated will as leftovers too! Just think of it as a roasted vegetable salad with fun crunchy bits on top. Let me know if you try this cozy dish and happy baked salad season!

I tested this concept as part of my work for Dole Food Company, but all opinions are my own!

Ingredients and substitutions

baked salad with salmon
  • cabbage – Not only is cabbage inexpensive, they’re a cruciferous vegetable, loaded with nutrients. Brussels sprouts or pre cut slaw mix would work well here too, if you don’t have cabbage.
  • kale– Kale is a hearty green that stands up to the heat of roasting. Collard greens are a good substitute if necessary.
  • red onion – This recipe called for red onion within the dressing, a yellow or white onion could also be used here. If you want to skip the warm dressing agrodolce all together, just use your favorite oil based salad dressing instead.
  • quinoa – I used a red quinoa, but white quinoa could also be used. If you don’t have quinoa, you can create breadcrumb mixtures that will provide the same texture as crispy quinoa. Sourdough croutons, crispy chickpeas or pumpkin seeds would also work well!
  • honey – maple syrup or agave could be used instead.
  • herbs such as sage and rosemary sprig.
  • red wine vinegar – A rose vinegar or a white vinegar would also work well here. I caution using apple cider or balsamic vinegar as their flavors are much stronger.
  • olive oil – since this oil is heated, don’t use extra virgin. Regular olive oil or other neutral oil such as vegetable or avocado oil would be fine.
  • kosher salt and black pepper

Variations and serving suggestions

Experiment making your own version of baked salad with these ideas.

  • Roast sweet potatoes, butternut squash cubes or other winter vegetables for a splash of color and vitamin A.
  • Top with roasted chicken breasts or poached salmon to create a meal that even meat eaters will love.
  • Pan sear goat cheese rounds to create a baked goat cheese salad as a fancy DIY first course at home.
  • Enjoy as a light lunch topped with chickpeas or roasted tofu.
  • Try roasting grapes, tomatoes or peaches for a sweet twist!
  • Which ever combination you choose, you won’t go wrong by adding a squeeze of fresh lemon juice before serving.

How to make baked salad

  • Start by thinly slicing the cabbage and kale. I used a mandolin to slice the cabbage into uniform strips and I took a shortcut with pre cut and pre washed kale.
  • Coat the cabbage and kale with olive oil, and place into a 400 F oven. Bake the kale for 8 minutes or until fork tender, leaving the cabbage in for a total of 20 minutes, until golden brown.
  • Cook quinoa according to package instructions and then spread onto large baking sheet, spray with olive oil spray and sprinkle with pinch of salt and pepper or Seasonello. Bake at 375 until crisp, about 20 minutes.
  • In a medium saucepan heat 1teaspoon olive oil with rosemary and then add honey mixture. Let simmer for 2 minutes add vinegar and then pour over sliced red onion in small bowl. Set aside.
  • When quinoa is toasty, layer the salad in one large bowl or divide into 3 or 4 smaller ones for meal preps!

Ingredients not to use

Roasting vegetables is one of my favorite things to do to increase flavor without a lot of work. In my opinion, nearly any vegetable can be roasted, but you may just want to watch out for the few below.

  • Delicate leafy greens such as spinach or spring mix. They will not stand up to the heat from the oven!
  • Avocado – While I’ve had success grilling avocado, I don’t suggest roasting it, in this way.
  • Cucumber – They will take longer to roast and will likely need seasoning to enhance the flavor.

If you want to use these items, I would suggest adding them raw just before serving.

Why you should try baked salads

  • They’re delicious.
  • They’re a hands off way to meal prep healthy lunches for the week.
  • This recipe is a good base that plays nicely with other ingredients to create variety.
  • Nine out of 10 Americans don’t eat enough fruits and vegetables – add more to your diet without sacrificing flavor.
  • This is an easy way to enjoy a warm cozy dish outside of salad season.
  • It makes amazing leftovers!
  • It’s a perfect fit if you’re following a low carb or Mediterranean style diet.

About Me

I’m Melanie.

I’m a chef, registered dietitian, foodie, wife and mom.
If you’re looking for quick and healthy meal inspiration that serves YOU and your family well, then you’ve come to the right place!

Melanie Marcus Selfie

Slow Cooker Three ingredient BBQ Pulled Chicken Hack

Every mom needs an easy slow cooker recipe that the whole family will love. Bonus points if it can transform from one meal to another without comment from the peanut gallery – this hack will do just that! This cooking method is a great way to result in tender chicken that can be used in a multitude of ways. Think of this as your protein meal prep for the week. In fact, you can cool and freeze half of what you make for a future easy dinner too! It’s easily a week’s worth of chicken for 2-3 people.

Ingredients you need for BBQ Pulled Chicken

chicken, bbq sauce, salt and water
  1. Boneless skinless chicken breasts and/or boneless skinless chicken thighs, plus kosher salt
  2. BBQ sauce – use your favorite barbecue sauce, we like to use Stubb’s.
  3. Water – you can also use a low sodium chicken broth for added flavor here!

Optional ingredients

If you have spices on hand you can enhance the sauce ingredients by adding a tsp of smoked paprika and a tsp of garlic powder or onion powder. If you like heat, you can add a few tablespoons of hot sauce during the cooking process. Another version of this recipe is slow cooker Mexican chicken which is made by swapping bbq sauce for mild or medium salsa.

Step by Step instructions

  • First line your slow cooker for easy clean up. Slow cooker liners are a must for me, they make the entire process including cleanup very hands off.
  • Next add your raw chicken breast and thighs to the bottom of the slow cooker. Sprinkle with salt.
  • Top with water and bbq sauce
  • Cover and cook on high for 3-4 hours or low for 6-8 hours
  • When chicken reaches an internal temperature of 165F, remove pieces from slow cooker and place in large bowl.
  • I like to shred using two forks, but you can also use a hand mixer to quickly pull apart the cooked chicken. Just be sure to use a low speed!
  • Then ladle 1-2 cups of the liquid from the slow cooker bbq chicken over the pulled chicken, allowing it to reabsorb.
  • The rest of the liquid can be discarded, but if you’re going to re-heat leftover pulled chicken later in the week, you may want to hold onto the extra sauce.
  • Lastly, if you’re feeding a crowd, return the pulled chicken to the slow cooker to keep warm for serving.

Store leftover pulled chicken in an airtight container in the refrigerator for 3-4 days or freeze for up to 3 months.

Step by step images

Ways to eat your pulled chicken

  1. On whole wheat hamburger buns with pickles and red onion
  2. With potato salad and string beans
  3. Make BBQ chicken sandwiches on a hearty bread
  4. With roasted sweet potato and a side salad
  5. With corn tortillas, sour cream and coleslaw
  6. Stuffed inside a baked potato with black beans and salsa

Macros Breakdown

240 calories

10g fat

5g carbohydrate

29g protein

0 fiber

This is truly the easiest bbq chicken recipe out there. There’s a little prep in just making sure you have chicken pieces and your favorite bbq sauce on hand, but other then that, it’s ideal for busy days!

Check out my review of Dole Sheet Pan Starter Kits for other easy dinner ideas. If you like this recipe, you should also check out my Fast Fajitas.

easy pulled chicken

BBQ Pulled Chicken

Easy protein meal prep that the whole family will love.
Prep Time 5 minutes
Cook Time 6 hours
Total Time 6 hours 5 minutes
Course Main Course

Ingredients
  

  • 2 pounds chicken breast boneless and skinless
  • 1 pound chicken thighs boneless and skinless
  • 1 cup bbq sauce
  • 1 tsp kosher salt
  • 1/3 cup water

Instructions
 

  • Place chicken pieces in the bottom of slow cooker.
  • Season with salt and cover with bbq sauce and water.
  • Cook on low for 8 hours.
  • Remove chicken from slow cooker and pull apart with two forks until fully shredded.
  • Pour 1-2 cups of sauce over shredded chicken and allow to absorb.
  • Return chicken to slow cooker to keep warm until serving.
Tried this recipe?Let us know how it was!

About Me

I’m Melanie.

I’m a chef, registered dietitian, foodie, wife and mom.
If you’re looking for quick and healthy meal inspiration that serves YOU and your family well, then you’ve come to the right place!

Melanie Marcus Selfie

Big batch cooking for beginners – save time and money

Let’s go a step beyond crockpot and freezer meals and talk about batch cooking as a time-saving strategy. With this approach to food, you dedicate 1-2 days a month (a couple of hours each day) to cook large quantities of your favorite recipes. I’m not talking about doubling – I’m talking about cooking big batch meals, like 3-4 times each recipe. It’s a great way to meal prep because you cook, freeze and store food for future weeknight meals while simplifying the cooking process. What can be easier than that? You cook once, have a variety of healthy meals available then you spend less time cleaning, meal planning and food shopping!

This article was inspired by a piece written for Dole Food Company!

Meal prep food in containers

And let’s face it, when life is busy and time is short, there’s nothing better than gaining precious time to spend with loved ones or just doing more of what you want to do! 

I love this concept for my family because it saves you time, money, cleanup, plus you’ll have a bunch of healthy recipes at your fingertips to get you through weeks ahead! If you’re only cooking for 1 or 2 you can divide into separate containers if you want to meal prep individual meals.

This method truly makes putting a good meal on the table a breeze.

Special equipment for easy batch meals

  • Slow Cooker
  • Instant pot
  • Sheet pans
  • Plastic bags
  • Individual food containers
  • Airtight containers
  • Extra freezer
  • Labels and sharpie

When it comes to special equipment, you can almost always modify a cooking technique for another piece of equipment if necessary. So don’t worry if you don’t have a slow cooker or instant pot! Just don’t forget the labels, you need to know what you have in stock and the date it was made!

Tips for grocery shopping large meals

Whether you’re cooking nutritious meals or good ol comfort food favorites, shopping online will help you save so much time, especially when you need to pick up a bunch of ingredients! It’ll also help prevent food waste because you’ll be preparing purchased product right away, so it won’t go bad in the produce drawer!

  • First, identify your recipes by choosing 1-4 recipes that you enjoy eating. If you’re a beginner at this, start with one recipe and build up week after week. For example, you can start with a basic baked ziti and simply double the recipe.
  • Next make your grocery list. I recommend doing this online and double check sizes of product needed. For example, if a recipe calls for a 28oz can of diced tomatoes, be sure not to choose a 14oz can instead! Just use the search bar and add items to your list one by one! Couldn’t be easier. I’m always surprised at how much I save when I do this!
  • Consider making a Costco run to save on buying products in bulk. My main concern with Costco on a normal week, is that we won’t use a package of broccoli, pesto or even fresh fish up before it goes bad, but large-batch cooking calls for a lot of food!
  • If it’s summertime, check out your local farmers market to see what’s in season.

Pantry staples for batch cooking meals

  • Variety of spices – I like to buy these as needed and in small batches because they do expire and lose potency. They are also expensive and a little goes a long way.
  • Sweet potatoes and regular potatoes – nutrient dense, gluten free and taste great. THey’re a kitchen workhorse.
  • Onions and garlic – these are so healthy for you and they’re also major flavor enhancers!
  • Broth – I suggest always getting low or no sodium broth. This way you can control the amount of salt and the overall flavor.
  • Breadcrumbs – Gluten free or plain breadcrumbs are a pantry staple. Season as needed.
  • Olive oil – Save the extra virgin for your salad dressings.
  • Canned beans, lentils – Go with low sodium or dried.
  • Canned diced tomatoes, tomato sauce – common ingredients in soups, chili and pasta dishes.

Items like brown rice, white rice, wild rice and pasta can usually be made quickly to go along with your batch meal at the last minute. You don’t need to prep and freeze these.

Cooked food in freezer

What types of recipes are best for batch cooking?

Make your batch cooking a success by coming up with a menu plan that lends itself to reheating. With a little planning, you’ll have your own list of go-to recipes and enjoy the beauty of batch cooking for yourself – week after week!

  • Pasta dishes such as lasagna or baked ziti are – AMAZING!
  • Soups such as lentil or minestrone
  • Muffins
  • Enchiladas
  • Burritos
  • Casseroles
  • Sauces, such as tomato sauce or curry, or salad dressing
kitchen counter with dirty dishes in sink
With batch cooking you worry about cleaning up less often!

How to avoid freezer burn

The easiest way is to allow cooked food to reach room temperature on the counter and then chill before freezing.  First cool food from 135 to 70 degrees within two hours, and then from 70 to below 41 within the next four hours. Seal in ziplock bag, wrap tightly with plastic wrap or enclose in freezer safe container, then label with the name of the recipe.

Five Tips for batch cooking success: 

  1. Select Winning Recipes. Choose recipes you know your family will love. My family loves Three Cheese Baked Ziti, Turkey Meatloaf and Red Lentil Soup.
  2. Shop in Bulk. Once you select recipes, take inventory of what spices, pasta and canned goods you have on hand and buy the rest. You may even find that you spend less money on groceries because you are laser-focused on specific dishes. 
  3. Have the right container! If you’re making lasagna or casseroles, choose freezer-safe glass ware, or save time on cleanup with recyclable aluminum trays. Keeping pans the same size helps maximize space in the freezer too! 
  4. Cool foods fully before labeling and freezing. First cool food from 135 to 70 degrees within two hours, and then from 70 to below 41 within the next four hours. Label each container with the name of the recipe and date it was made for easy recall!
  5. Make a schedule –  Keep your family traditions intact by writing in your Taco Tuesday’s or Pizza Friday’s and adjust your schedule accordingly! Just take 5 minutes to write out your monthly menu to help reduce decision stress and fatigue! And if it seems repetitive, try to remember what you ate yesterday for lunch – I bet no one will realize they’re on a rotation.

Here’s a sample schedule:

MondayTuesdayWednesdayThursdayFridaySaturdaySunday
Turkey Burgers with Sweet Potato friesTaco TuesdayLentil Soup with Garlic BreadLeftoversPizza FridayEat OutGrilled Chicken and Vegetables
Three Cheese Baked ZitiTaco TuesdayLeftoversLentil Soup with Garlic BreadPizza FridayTurkey Burgers with Sweet Potato friesEatout
Grilled Chicken and VegetablesTaco TuesdayLentil Soup with Garlic BreadLeftoversPizza FridayEat OutSheet Pan Salmon
Three Cheese Baked ZitiTaco TuesdayTurkey Burgers with Sweet Potato friesLentil Soup with Garlic BreadPizza FridayLeftoversGrilled Chicken and Vegetables
Make a schedule of your own, pop in your favorite recipes, and change it up as needed. Once you have a starting point your weekly dinner meals will go much smoother!

There’s nothing better than coming home after a long day to find a freezer full of fresh meals that just need to be heated! And the best part is that you know exactly what is in them because you made them yourself!

About Me

I’m Melanie.

I’m a chef, registered dietitian, foodie, wife and mom.
If you’re looking for quick and healthy meal inspiration that serves YOU and your family well, then you’ve come to the right place!

Melanie Marcus Selfie