Tag: vegetarian

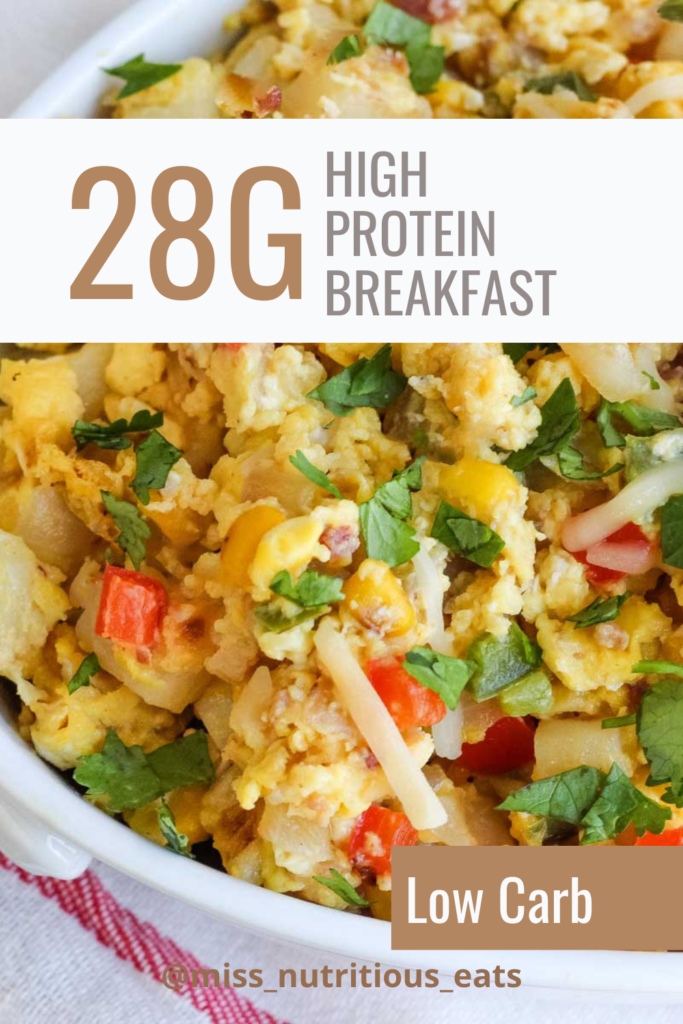
Turkey Sausage Scramble Recipe with 28g Protein

Need a tasty, protein-packed breakfast to kickstart your day? This turkey sausage breakfast scramble has you covered delivering 28g protein per serving! It’s loaded with turkey sausage, eggs, fresh bell peppers, and creamy avocado—basically, everything you need for a satisfying and healthy start. Whether you’re tracking macros, tryin to stay low carb or counting Weight Watchers points, this is an easy, balanced meal, this dish is super customizable and totally hits the spot.

Jump to Recipe

😍 Why You’ll Love This Turkey Sausage Breakfast Scramble  

  1. High in Protein – Packed with turkey sausage and eggs, it’s the perfect breakfast to fuel your body and keep you energized throughout the day.
  2. Easy to Customize – Add your favorite veggies, swap ingredients, or adjust portion sizes to fit your needs.
  3. Meal Prep Friendly – Make it ahead of time and enjoy a healthy, stress-free breakfast on busy mornings. Did you know you can freeze scrambled eggs?
  4. Weight Watchers Approved – With its balanced whole food ingredients, this recipe fits into nearly every healthy eating plan.
  5. Bursting with Flavor -The savory turkey sausage and creamy avocado make every bite something to enjoy.

Bonus: it’s great for meal prep, so busy mornings are no problem.

Jump to Recipe

🗒️ Ingredients + Substitutions  

large eggs: Eggs are the main protein base. You can substitute with liquid egg whites for a lower-fat option, or use a mix of eggs and egg whites to balance flavor and nutrition. Plant-based egg alternatives like JUST Egg can also work for a vegan version.

lean turkey sausage, crumbled: This adds protein and savory flavor. You can swap it with breakfast turkey sausage, chicken sausage, or plant-based sausage for a vegetarian option.

diced bell peppers: Bell peppers add color, crunch, and nutrients. Feel free to use any color or replace them with diced sweet potatoes, green onions, or even zucchini for variety.

coconut oil: Coconut oil provides a rich flavor, but for a lighter option, use olive oil or nonstick spray. Butter or ghee can add a creamy texture if preferred.

Optional toppings: Toppings like cheddar cheese, onion powder, or hot sauce boost flavor. For dairy-free options, try nutritional yeast or plant-based cheese. Other toppings like salsa or fresh herbs can brighten it up too!

💡 Gluten-Free? Read This!  

This turkey sausage breakfast scramble is naturally gluten-free but always check your turkey sausage label for ingredients like citric acid. Some food products may include additives!  

👩‍🍳 How to Make My Turkey Sausage Scramble  

Heat Coconut Oil in a Skillet  

Use a large skillet over medium heat. Add crumbled turkey sausage and cook until the internal temperature reaches 165°F. Remove and set aside.  

Sauté Bell Peppers  

Sauté diced bell peppers in the same skillet for 2-3 minutes until softened.  

Scramble Eggs  

Whisk whole eggs in a medium bowl, pour eggs into the skillet, and stir occasionally to create fluffy scrambled eggs.  

Combine and Season  

Add the turkey sausage crumble back into the skillet and mix everything together. Season with salt, black pepper, or onion powder.  

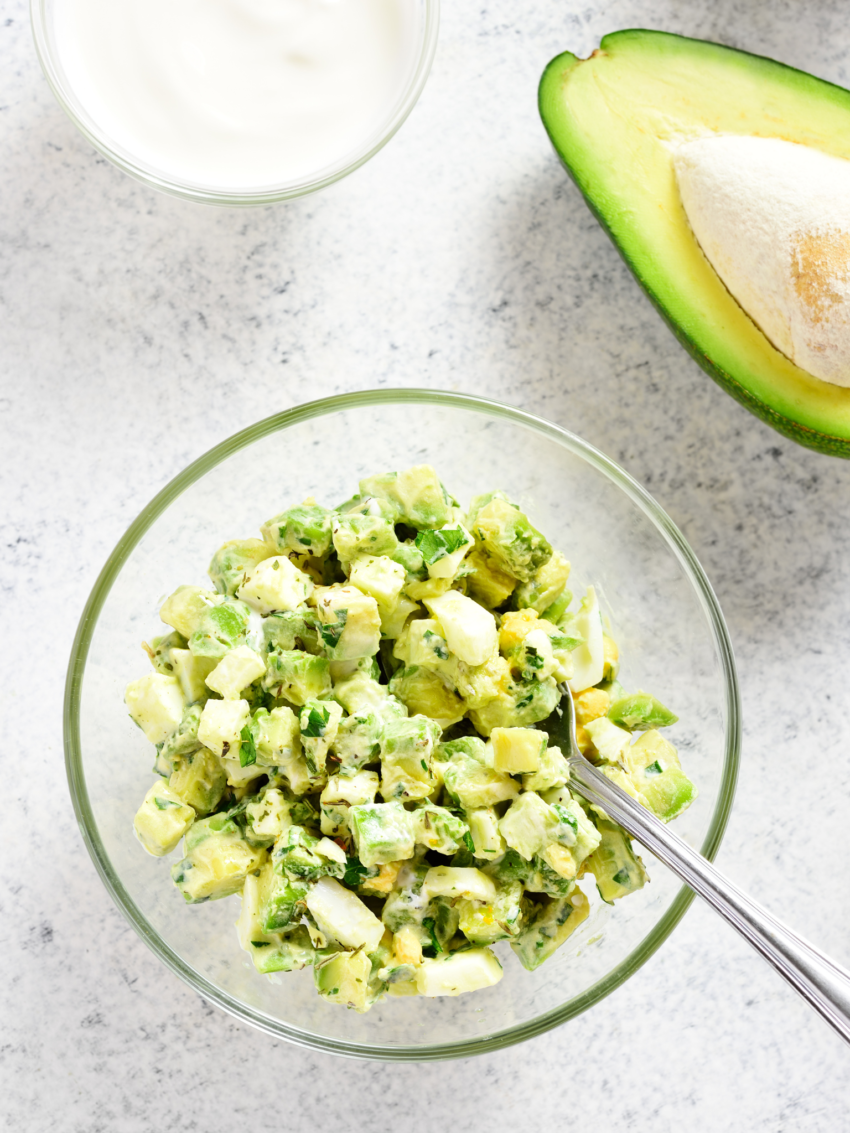
Top with Avocado and Cilantro  

Fold in diced avocado and sprinkle fresh cilantro for a finishing touch. Tons of flavor in every bite!  

📓 Best Served With  

  • Low Carb Option: Pair with a spring mix or roasted veggies like sweet potatoes.  
  • Balanced Macro Option: Add a slice of sourdough bread, hash browns, or fresh fruit like berries or melon.  
  • For Variety: Incorporate into sausage breakfast burritos or a breakfast casserole for meal prep!  

Join my next 6 week challenge!

Tired of endless diets and no results? Join the FASTer Way to Fat Loss and see real, sustainable changes in just 6 weeks!

Melanie Marcus FASTer Way to Fat Loss Coach

👝 How to Store Leftovers  

  • Store the turkey sausage breakfast scramble in an airtight container in the fridge for up to 3 days.  
  • Reheat on a skillet over medium heat or try using an air fryer for even heating.  

🧠 Common Questions  

Can I use liquid egg whites instead of whole eggs?  

Yes! Liquid egg whites are a perfect way to reduce the fat and calorie content while maintaining the grams of protein.   

Is this recipe Weight Watchers-friendly?  

Absolutely! Use the WW app to track specific ingredients like lean ground turkey, veggies, and eggs.  

I struggle breaking my fast with 30g protein, any other suggestions

Chocolate Baked Oatmeal

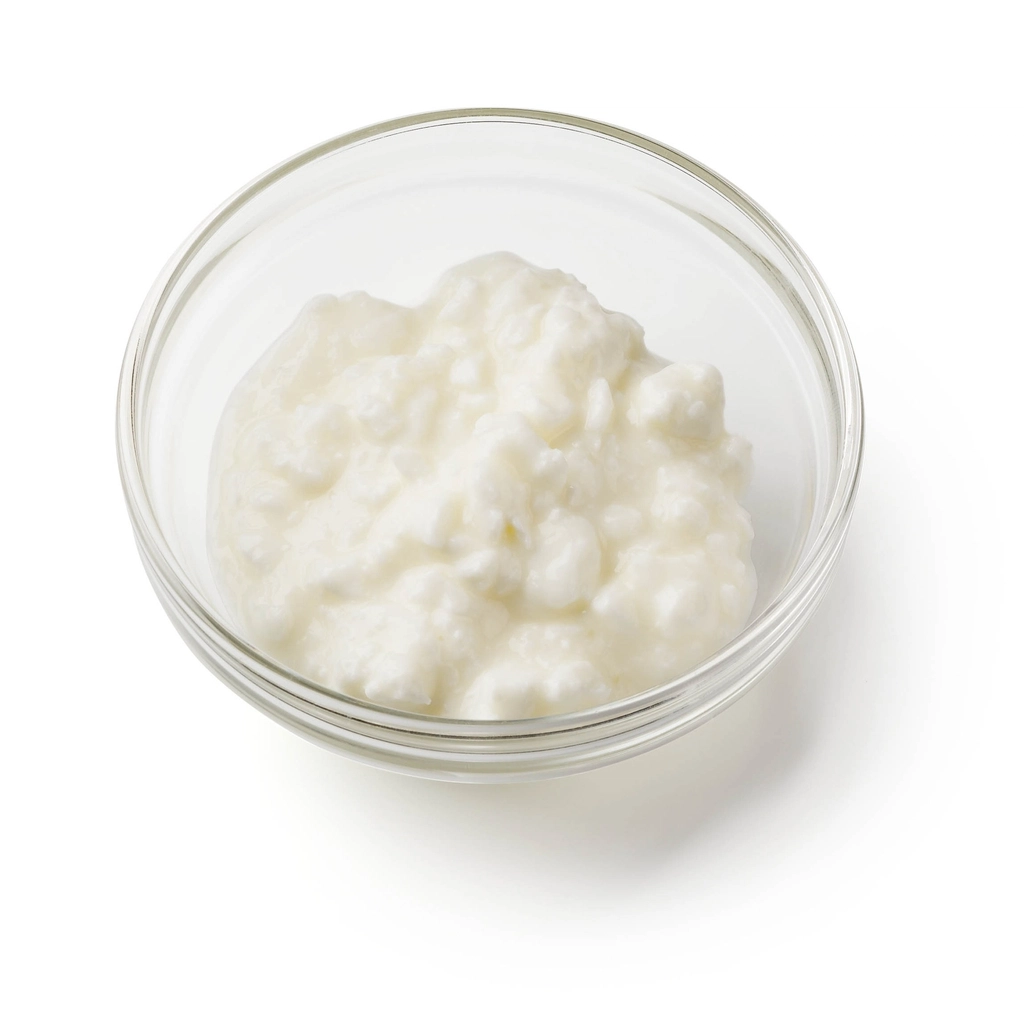
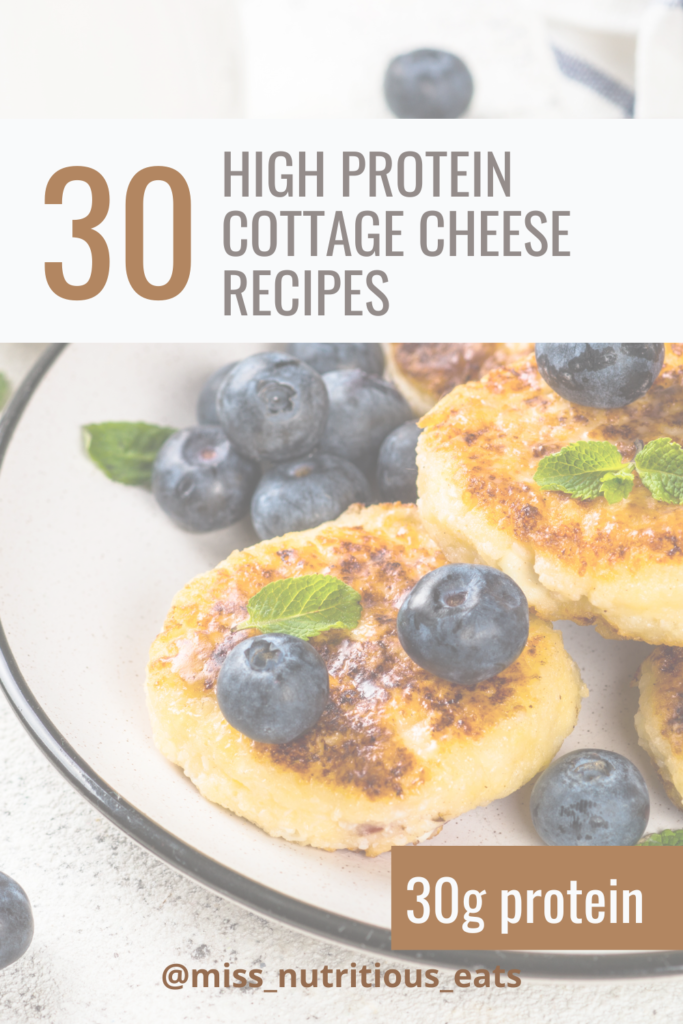
Check out these 30 ideas for meals made with cottage cheese.

💪🏼 Tracking Macros? Check This Out  

  • Protein: ~25 g protein per serving, thanks to lean turkey sausage and whole eggs.  
  • Fat: Adjust with olive oil, cooking spray, or liquid egg whites for lower g fat options.  
  • Carbs: Minimal carbs—pair with veggies like black beans or sweet potatoes for added fiber.  

Avocado and Turkey Sausage Scramble

A quick, protein-packed turkey sausage scramble with eggs, veggies, and avocado that's perfect for a healthy start or easy meal prep.
Prep Time 5 minutes
Cook Time 10 minutes
Total Time 15 minutes
Course Breakfast
Cuisine American
Servings 4
Calories 316 kcal

Ingredients
  

  • 8 eggs large
  • 4 oz lean turkey sausage crumbled
  • 1 avocado diced
  • 1/2 cup bell pepper diced
  • 1 tbsp coconut oil
  • 1 tbsp fresh cilantro chopped (optional)
  • salt and pepper to taste
  • 1 cup egg whites

Instructions
 

  • In a skillet, heat the coconut oil over medium heat.
  • Add the crumbled turkey sausage and cook until browned and fully cooked, about 5-7 minutes.
  • Remove the sausage from the skillet and set it aside.
  • In the same skillet, sauté the diced bell pepper for 2-3 minutes until slightly softened.
  • Whisk the eggs in a bowl, then pour them into the skillet, stirring occasionally to scramble.
  • Once the eggs are almost set, add the cooked turkey sausage back into the skillet and mix everything together.
  • Season with salt and pepper to taste.
  • Finally, remove from heat and gently fold in the diced avocado and chopped cilantro before serving.

Nutrition

Calories: 316kcalCarbohydrates: 7gProtein: 28gFat: 22gSaturated Fat: 7gPolyunsaturated Fat: 3gMonounsaturated Fat: 9gTrans Fat: 0.1gCholesterol: 349mgSodium: 398mgPotassium: 578mgFiber: 4gSugar: 2gVitamin A: 1160IUVitamin C: 30mgCalcium: 66mgIron: 2mg
Keyword eggs, low carb, protein
Tried this recipe?Let us know how it was!

About Me

I’m Melanie.

I’m a chef, registered dietitian, foodie, wife and mom.
If you’re looking for quick and healthy meal inspiration that serves YOU and your family well, then you’ve come to the right place!

Melanie Marcus Selfie

Chocolate Chia Pudding Recipe (Fat bomb + low carb)

One night after dinner, I checked my macro tracker and noticed I was off by 100g fat.  One hundred grams! It was a low carb day and I made a fatal mistake.  I ate intuitively according to my regular macros, and didn’t account for fat changes in my carb cycling!  That’s where this chia pudding was born.  I’m not into fat bombs, you know, the ones that combine peanut butter and coconut, covered in chocolate but I do like a pudding, so here is what I came up with.  

Whether you’re following a low-carb diet, the ketogenic diet, or cycling between carb-up and low-carb days, this creamy keto chocolate chia pudding is here to keep you on track. Packed with healthy fats, 12 grams of fiber, and a rich chocolate flavor, this recipe for chocolate chia pudding is an ideal way to crush your sweet craving. And if balancing your fats is a common issues, check out this post all about fat macros.

😍 Why You’ll Love This Chocolate Chia Pudding  

The main reason this low carb chia pudding stands out is versatility. It makes the perfect low carb breakfast, a perfect snack, or even a keto dessert for those days when your sweet tooth just won’t quit. Here’s why it’s so loved among keto enthusiasts and low-carb dieters alike:

  • Rich and Creamy Texture: Thanks to full-fat coconut milk and optional toppings, this pudding mimics a decadent dessert.  
  • Loaded with Healthy Fats: Ingredients like ​chia seeds are a great source of omega-3 fatty acids and fatty acids to keep you full and satisfied.  
  • Perfect for Weight Loss Goals: High fiber and fat content help stabilize blood sugar and curb hunger, aiding in your weight loss momentum.  
  • Customizable for different flavors and textures, this base recipe can be adapted into a berry chia pudding, chocolate chia seed pudding, or even coconut chia pudding.  
  • Simple Steps = Big Results: This is an easy recipe made with whole foods, ready in under five minutes with no added sugar—you can even make it while meal prepping.  

🗒️ Ingredients + Substitutions  

Here’s what you’ll need to make this classic keto chocolate chia pudding:

  • 3/4 cup canned coconut milk:  Full-fat coconut milk helps increase total fats and offers a creamier texture.  If you don’t need as many fats, try using 2 or 4 oz coconut milk and substitute almond milk for the rest.  
  • 2 Tbsp chia seeds (can use ground chia seeds for a finer feel): These are essential for creating that magic gelatinous structure we all love.  
  • 1/2 scoop FASTer Way chocolate protein powder (or replace with unsweetened cocoa powder and a keto sweetener, like monkfruit or stevia).  
  • 1/2 tsp vanilla extract for enhanced flavor.  

Optional Toppings:

  • Mixed nuts, dusting of cacao powder, a dollop of coconut cream, or a drizzle of peanut butter or almond butter for an extra indulgent touch.

Substitutions for Personalizations:

  • Replace coconut milk with unsweetened almond milk or heavy cream for a lighter pudding with fewer total fats.  
  • For a twist on texture, top with dark chocolate shavings to enhance the chocolate pudding vibes.  

Make sure to scroll to the bottom of this post for the printable recipe card!  

Jump to Recipe

If your doctor or dietitian has suggested a heart-healthy diet, you might want to be cautious with this recipe. It’s pretty high in saturated fat, mostly from coconut, which is something to limit in these diets. While the fat gives the dish its rich, creamy texture and stays solid at room temperature, it might not fit the guidelines for heart health.

If you have questions about this, you can email me at [email protected]

💡 Gluten-Free? Read This!  

If you’re wondering whether this recipe caters to gluten-free diets, the answer is a capital Y-E-S! All listed ingredients are naturally gluten-free, as are most low-carb sweetener .

For the best results, always cross-check any flavoring or supplement product (like protein powders) for hidden added sugar or gluten derivatives. Stick to brands with clean ingredient lists to align with your whole foods diet.  I like to use the FASTer Way Chocolate Hydrobeef protein powder which has 98 calories and 20g protein.

👩‍🍳 How to Make My Chocolate Chia Pudding  

This creamy pudding comes together in three simple steps.  

  1. First Step: Combine the chia seeds, cocoa powder or protein powder, vanilla extract, and canned coconut milk in a mug or mason jar. 
  2. Whisk Well, no need for a food processor unless you want a smoother texture. Ensure the seeds are evenly dispersed to prevent clumps.  
  3. Refrigerate for 5-10 minutes:  Other recipes may need to Refrigerate for 4+ hours (or overnight) in an airtight container but because we’re using a thick coconut milk, this one comes together quickly.

Enjoy your low carb chocolate chia pudding cold for the best consistency.  

📓 Best Served With  

Make this the hero of your snack or breakfast with these fun pairings:

  • Top with fresh fruit like fresh blueberries or frozen strawberries for a pop of brightness.  
  • Make a berry chia pudding by layering with mixed berries once it’s firmed up.
  • Personally, I love to top with cocowhip and a handful of nuts if I have the macros.

👝 How to Store Leftovers  

This chia pudding keto recipe is perfect for meal prep! Here’s how you can store any leftovers:

  • Place pudding in an airtight container or keep individual portions in a mason jar.  
  • It lasts 5-7 days in the fridge. If your pudding thickens too much, stir in some room temperature coconut milk or unsweetened almond milk, even water to restore its creamy texture.  

🧠 Common Questions  

What are the grams of net carbs per serving?  

With 12g fiber and 22g total carbs, this pudding contains approximately 10g net carbs. Perfect for a keto dessert or snack on a low carb diet.

Are there other flavor options?  

Absolutely! This base recipe is highly versatile. Change up the protein powder flavor or omit it all together.  Add flavors like keto maple syrup, espresso shots, or crushed favorite berries for a twist.

Join my next 6 week challenge!

Tired of endless diets and no results? Join the FASTer Way to Fat Loss and see real, sustainable changes in just 6 weeks!

Melanie Marcus FASTer Way to Fat Loss Coach

💪🏼 Tracking Macros? Check This Out  

Nutritional Information (per serving):  

  • 596 calories  
  • 22g total carbs  
  • 12g fiber  
  • 51g fat  
  • 21g protein  

For accuracy, use food databases to verify the nutritional values of specific brands and toppings you choose. The combination of more sweeteners or toppings may adjust macro totals.

This keto dessert is not just low-carb; it’s nourishing and loaded with nutritional benefits like omega-3s and tons of fiber, all contributing to steady blood sugar and long-lasting satiety.

Start Making Chia-based Magic  

Whether you’re on a ketogenic diet, exploring chia recipe options, or simply on a mission for flavor-packed, nutrient-dense dishes, this low carb chocolate chia pudding checks all the boxes. It’s proof that clean eating can be ultra satisfying. If you’re a chocolate lover like me- try this chocolate oats recipe. I bet you’ll love it too!

Loved this recipe or have ideas to modify it? Share your experience in our comments below or tag us on social for a chance to be featured. And don’t forget to grab your ingredient list now from the printable recipe card at the bottom of this post.  

Chocolate Chia Pudding (Low Carb)

I like this recipe for low carb days when I have a lot of fats to make up for at the end of the day!
Prep Time 8 minutes
Course Dessert
Servings 1
Calories 596 kcal

Ingredients
  

  • 3/4 cup coconut milk canned, full fat
  • 1/2 scoop FW Chocolate Protein Powder 20g/scoop
  • 2 Tbsp Chia seeds
  • 1/2 tsp vanilla
  • 1 oz fancy nuts optional

Instructions
 

  • Combine the first 4 ingredients in your large mug or bowl.
  • Use a hand blender to combine everything and let firm up in the fridge for 5-10 minutes.
  • Top with nuts before serving.

Nutrition

Calories: 596kcalCarbohydrates: 22gProtein: 21gFat: 51gSaturated Fat: 39gPolyunsaturated Fat: 6gMonounsaturated Fat: 2gTrans Fat: 0.03gCholesterol: 25mgSodium: 54mgPotassium: 619mgFiber: 12gSugar: 7gVitamin A: 53IUVitamin C: 5mgCalcium: 229mgIron: 6mg
Tried this recipe?Let us know how it was!

Pumpkin Pie Spice Baked Oatmeal Recipe (Gluten Free)

This recipe is for the pumpkin spice fans out there.  It checks the box for warm spices, quick breakfast and macro friendly. Now that I think about it, it’s kinda custardy like pumpkin pie. This Pumpkin Pie Oatmeal Bake is a hearty, baked oatmeal treat that’s absolutely one of my favorite breakfasts. Packed with nutrients and easy to prepare, this oatmeal bake is a great way to start your day right. 

You may also like my GF pumpkin muffins or the pumpkin spiced Dole whip too. LMK if you try them!

😍 Why You’ll Love Pumpkin Pie Oatmeal Bake

  • Healthy Breakfast Staple: Packed with protein and fiber, it’s a good source of protein with 10g per serving and keeps you full longer.
  • Meal Prep Friendly: Prepare it ahead of time and have individual portions ready for those hectic mornings.
  • Fall Flavors Galore: The pumpkin spice flavor will remind you of a cozy pumpkin spice latte.
  • Simple Ingredients: Uses basic ingredients you probably already have in your pantry.
  • Versatile and Delicious: Customize with your favorite things like chocolate chips, almond butter, or a dollop of Greek yogurt. I won’t lie, sometimes I just have it as my after dinner treat.  

🗒️ Ingredients

  • rolled oats – you can use quick oats as well.  Though, I think rolled provide a better texture.  
  • pumpkin puree- don’t use pumpkin pie filling.  While tasty, it is sweetened pumpkin with extra calories and added sugar which we’re trying to avoid!
  • large eggs – you can substitute up to 2 eggs for flax eggs and still get that custardy texture.  
  • almond milk – or milk of choice.  Using cow’s milk will add protein.
  • pure maple syrup – coconut sugar is a good alternative
  • vanilla extract
  • pumpkin pie spice – if you don’t have it, use equal parts cinnamon and nutmeg.
  • baking powder
  • salt
  • walnuts or pecans (optional)
  • raisins or dried cranberries (optional)
  • Optional toppings for serving, like a drizzle of maple syrup or peanut butter

💡 Gluten-Free? Read This!

To make this recipe gluten-free, simply substitute the rolled oats for certified gluten-free oats or quick oats. You’ll get the same flavor and best texture with these alternatives!

👩‍🍳 How to Make My Pumpkin Pie Oatmeal Bake

  1. Prepare the Baking Dish: Preheat your oven to 350°F (175°C) and grease a 9×9-inch baking dish with cooking spray.
  2. Mix Wet Ingredients: In a large bowl, whisk together the pumpkin purée, eggs, almond milk, pure maple syrup, and vanilla extract until smooth.
  3. Combine Dry Ingredients: In a separate bowl, mix the rolled oats, pumpkin pie spice, baking powder, and salt.
  4. Combine and Pour: Combine the wet ingredients and dry ingredients, stirring until well mixed. If using, fold in the nuts and dried fruit.
  5. Bake: Pour the mixture into the prepared baking dish and spread evenly. Bake for 30-35 minutes until the center is set and the edges are golden brown.
  6. Serve: Allow to cool slightly before cutting into squares. Serve warm with a drizzle of maple syrup or a dollop of Greek yogurt.

Join my next 6 week challenge!

Tired of endless diets and no results? Join the FASTer Way to Fat Loss and see real, sustainable changes in just 6 weeks!

Melanie Marcus FASTer Way to Fat Loss Coach

📓 Best Served With

This pumpkin oatmeal bake pairs wonderfully with:

  • A warm cup of coffee or English Breakfast tea
  • Fresh fruit like berries or apple slices
  • Your favorite nut butter or almond butter spread on top

👝 How to Store Leftovers

Store leftovers in an airtight container in the refrigerator for 3-4 days.  To enjoy the next morning, reheat in a toaster oven or microwave.

🧠 Common Questions

  • Can I use steel-cut oats instead of old-fashioned oats?  

  Absolutely! Steel-cut oats will add a nice chewy texture, but ensure to adjust the baking time slightly.

  • Can I substitute the sweetener?  

  Yes! Feel free to use honey, brown sugar, or coconut sugar instead of pure maple syrup. Monk fruit crystals would make this a sugar free option.

If you try this recipe, and I hope you do! Leave a comment below or tag me on social @miss_nutritious_eats!

Pumpkin Spice Oatmeal Bake

Course Breakfast
Servings 4
Calories 245 kcal

Ingredients
  

  • 1 cup rolled oats
  • 1 can pumpkin puree 15 oz
  • 4 large eggs
  • 1 cup almond milk
  • 1/4 cup maple syrup
  • 1 teaspoon vanilla extract
  • 1 teaspoon cinnamon
  • 1/2 teaspoon nutmeg
  • 1/2 teaspoon baking powder
  • 1/4 teaspoon salt
  • 1/2 cup chopped walnuts or pecans optional
  • 1/2 cup raisins or dried cranberries optional

Instructions
 

  • Preheat your oven to 350°F (175°C) and grease a 9×9-inch baking dish.
  • In a large bowl, whisk together the pumpkin puree, eggs, almond milk, maple syrup, and vanilla extract until smooth.
  • In a separate bowl, mix the rolled oats, cinnamon, nutmeg, baking powder, and salt. Combine the wet and dry ingredients, stirring until well mixed. If using, fold in the nuts and dried fruit.
  • Pour the mixture into the prepared baking dish and spread evenly. Bake for 30-35 minutes, or until the center is set and the edges are golden.
  • Let cool slightly before cutting into squares and serve warm!

Nutrition

Calories: 245kcalCarbohydrates: 37gProtein: 10gFat: 7gSaturated Fat: 2gPolyunsaturated Fat: 2gMonounsaturated Fat: 2gTrans Fat: 0.02gCholesterol: 164mgSodium: 351mgPotassium: 403mgFiber: 6gSugar: 16gVitamin A: 16775IUVitamin C: 4mgCalcium: 195mgIron: 3mg
Tried this recipe?Let us know how it was!

How to cook lentils perfectly (recipe + tips)

I find that lentils can either be a kitchen staple for clients, or they shy away from them because they don’t know how to prepare them.  The reality is, dry lentils are versatile, nutritious, and easy to prepare. They offer rich texture and earthy flavors which are a great addition to most ground meat recipes, but a staple for vegetarian recipes.  If you use black beans in your recipes, you can often substitute lentils instead.  

Whether you’re new to cooking lentils or looking to refine your technique, this guide will provide you with essential tips and recipes for various types of lentils.

Why are lentils so healthy?

Lentils are small round legumes that come in many different colors, shapes, and sizes. They are a great source of plant-based protein, making them an excellent meat alternative for vegetarians and vegans. With their high dietary fiber content, lentils aid in digestion and promote a feeling of fullness, supporting weight management. They are also packed with essential vitamins and minerals such as folate, iron, phosphorus, and potassium.

Nutritional Benefits of Lentils

  • High in Plant-Based Protein: Ideal for vegetarians and vegans.
  • Rich in Dietary Fiber: Promotes digestion and fullness.
  • Low in Fat: Provides steady energy without blood sugar spikes.
  • Packed with Vitamins and Minerals: Essential for overall health.
  • Antioxidants: Help reduce inflammation.  

Macros

A half-cup (about 100 grams) of cooked brown lentils typically contains the following macronutrients:

  • Calories: 115-120 kcal
  • Protein: 9 grams
  • Carbohydrates: 20 grams
    • Fiber: 8 grams
  • Fat: 0.4 grams

These values can vary slightly depending on cooking method and specific type of lentils.

Join my next 6 week challenge!

Tired of endless diets and no results? Join the FASTer Way to Fat Loss and see real, sustainable changes in just 6 weeks!

Melanie Marcus FASTer Way to Fat Loss Coach

Cooking Tips for Lentils

Rinse Lentils: Always rinse lentils under cold water to remove dirt, small rocks or debris. Look for small stones or rocks and remove them.

Soak Them: Letting them sit for even just 30 minutes (or overnight) will reduce cooking time by at least 15 minutes.  

Sauté for Flavor: Sauté onions, garlic, bay leaves and spices in olive oil before adding lentils and water for enhanced flavor. 

Water Ratio: Use plenty of water, a ratio of 3 cups of water for every 1 cup of lentils. Adjust as needed for different types of lentils.  In culinary school we removed excess water afterwards in a colander.  

Salt Timing: Add a pinch of salt towards the end of cooking to ensure the lentils are tender but not mushy.

Tender but Firm: For salads or cold dishes, cook lentils just until al dente to maintain a firm texture.

Quick Cooking: For a faster cooking process, consider soaking lentils for a few hours or overnight.  You’ll notice that they plump up and absorb a lot of water which will help reduce the cooking time.  

Free lentils tricolor image

Types of Lentils and How to Cook Them

Red Lentils (Masoor Dal)

Other Names: Orange Lentils

  • Cooking Time: 15-20 minutes
  • Texture: Soft and creamy
  • Flavor: Mild and slightly sweet
  • Best For: Soups, stews, and Indian cuisine
  • Instructions:
  1. Rinse 1 cup of red lentils under cold water.
  2. In a large pot, sauté onions, garlic, and your favorite spices in olive oil.
  3. Add the lentils, 3 cups of water, and bring to a boil.
  4. Reduce heat and simmer for 15-20 minutes until tender.
  5. Add salt towards the end of cooking.

Brown Lentils

Other Names: The most common type of lentils

  • Cooking Time: 20-30 minutes
  • Texture: Soft but holds shape
  • Flavor: Earthy and mild
  • Best For: Soups, stews, and veggie burgers
  • Instructions:
  1. Rinse 1 cup of brown lentils under cold water.
  2. Sauté onions, garlic, and spices in olive oil in a large pot.
  3. Add the lentils, 3 cups of water or vegetable broth, and bring to a boil.
  4. Reduce heat and simmer for 25-30 minutes until tender.
  5. Add salt towards the end of cooking.

Green Lentils

Other Names: French Lentils, Le Puy, Lentils de Puy and French green lentils

  • Cooking Time: 30-40 minutes
  • Texture: Firm and peppery flavor
  • Flavor: Earthy and robust
  • Best For: Salads, side dishes, and soups
  • Instructions:
  1. Rinse 1 cup of green lentils under cold water.
  2. Sauté onions, garlic, and spices in olive oil in a large pot.
  3. Add the lentils, 3 cups of water or vegetable stock, and a bay leaf.
  4. Bring to a boil, then reduce heat and simmer for 30-40 minutes until tender.
  5. Add salt towards the end of cooking.

Black Lentils

Other Names: Black Beluga Lentils

  • Cooking Time: 25-30 minutes
  • Texture: Firm and holds shape
  • Flavor: Rich and earthy
  • Best For: Salads, side dishes, and lentil salad
  • Instructions:
  1. Rinse 1 cup of black lentils under cold water.
  2. Sauté onions, garlic, and spices in olive oil in a large pot.
  3. Add the lentils, 3 cups of water or vegetable broth, and bring to a boil.
  4. Reduce heat and simmer for 25-30 minutes until tender.
  5. Add salt towards the end of cooking.

Using an Instant Pot or Pressure Cooker

For faster cooking, you can use an instant pot or pressure cooker. Follow the same steps but reduce the water to 2 cups for every 1 cup of lentils. Cook on high pressure for half the time specified for each type.

Storing Cooked Lentils

Store cooked lentils in an airtight container in the refrigerator for up to a week. They make excellent additions to salads, soups, and meal prep.

Favorite Lentil Recipes

  • Red Lentil Soup with fresh herbs and lemon juice
  • Brown Lentil Stew with hearty vegetables
  • French Green Lentil Salad with fresh herbs and olive oil
  • Black Lentil Salad with roasted vegetables and a tangy dressing
  • Greek Inspired Turkey Meatballs (with lentils!)

About Me

I’m Melanie.

I’m a chef, registered dietitian, foodie, wife and mom.
If you’re looking for quick and healthy meal inspiration that serves YOU and your family well, then you’ve come to the right place!

Melanie Marcus Selfie

Check out this healthy -ish protein rich Egg Salad Recipe

I polled you all in my stories and was interested to learn that 100% of you ate egg salad!  All different kinds of ways too – some simply mashed with avocado, others mash eggs with a bit of mayo, whether for breakfast or for lunch, you all love your egg salad.  And I do too.  

What’s not to love, it holds well, tastes great, and is protein rich – fitting into many eating patterns including low carb, diabetic, keto and of course, for those of us carb cycling in the FASTer Way.  I think there’s a misconception though: That egg salad is unhealthy because most creamy salads are loaded with fat. And lets be honest, a lot of time they are!  But with a few thoughtful swaps, and measurements (don’t eyeball the mayo!) you can create an easy egg salad recipe that has great flavor and will keep you on your health journey.

Jump to Recipe
Jump to Recipe

Why Choose Egg Salad?

Egg salad is an excellent source of protein, thanks to the egg whites and Greek yogurt. It’s also packed with essential vitamins and minerals like B vitamins, vitamin D, and selenium. By substituting mayonnaise with plain Greek yogurt, you reduce the fat content while still achieving that creamy texture we all love. Plus, using lots of fresh herbs and crunchy veggies adds fiber and antioxidants, and most importantly flavor.  

Ingredients and substitutions:

  • Hard-boiled eggs – This is really the star of the show, I think you could substitute with possibly chickpeas or extra firm tofu but would like to test that for you first. What makes this a great no-cook recipe is that you can either boil your own eggs, or purchase them pre-boiled at nearly every grocery store.
  • Plain Greek yogurt – I love full fat Greek yogurt, but use whatever you have. Sour cream, cottage cheese or simply more mayo works here too.  
  • Mayo – I kept this in to hold onto that traditional egg salad flavor.  A little mayo goes a long way for extra flavor and a little creaminess! You can use any of the yogurt substitutions if you want to omit.  
  • Dijon mustard – You can sub any mustard you have on hand, even yellow mustard 
  • Parsley, fresh dill, or chives – if you don’t have fresh use a teaspoon of dried herbs.  
  • Red onion – green onions or fresh chives would work well too.  If you don’t have red onion all together, you can use celery to get a similar crunch.  
  • Capers – these are optional but add a great brininess and pop of bright flavor.
  • Black pepper and kosher salt to taste – sea salt is fine too, I just prefer kosher!
Jump to Recipe
three brown eggs in bowl

Instructions:

  1. Boil Eggs:
  • Place eggs in a large bowl.
  • Fill the bowl with hot water until the eggs are covered.
  • Bring the water to a rolling boil, then reduce the heat and simmer for about 10 minutes to achieve perfect hard-boiled eggs.
  • For an easier method, you can use an Instant Pot or air fryer to make hard-boiled eggs.
  1. Cool the Eggs:
  • Transfer the boiled eggs to an ice bath (a bowl filled with cold water and ice) to cool them quickly.
  • Once cooled, peel the eggs and chop them into small pieces.
  1. Mix the Ingredients:
  • In a separate bowl, combine the chopped eggs, Greek yogurt, Dijon mustard, red onion, and fresh herbs.
  • If using, add capers.
  • Season with fresh cracked black pepper and sea salt to taste.
  1. Serve and Enjoy:
  • Serve your delicious egg salad in romaine lettuce cups for a low-carb option or on slices of whole-grain bread for a more traditional egg salad sandwich.
  • For a nice crunch, add some fresh celery or bell pepper pieces.
  • Store any leftovers in an airtight container in the refrigerator.

Join my next 6 week challenge!

Tired of endless diets and no results? Join the FASTer Way to Fat Loss and see real, sustainable changes in just 6 weeks!

Melanie Marcus FASTer Way to Fat Loss Coach

Health Benefits

High Protein Content

Our healthy egg salad recipe is rich in protein, aiding in muscle repair and growth. The combination of eggs and Greek yogurt provides a complete protein source, making it an excellent choice for those looking to increase their protein intake.

Essential Vitamins and Minerals

Eggs are loaded with B vitamins, vitamin D, and selenium, all of which are crucial for maintaining overall health and well-being. These nutrients support energy production, immune function, and bone health.

Heart-Healthy Option

By using Dijon mustard and capers, you add depth of flavor without the need for additional salt. 

Fresh Herbs and Veggies

Incorporating fresh parsley, dill, chives, and crunchy veggies like celery and bell pepper adds fiber and antioxidants. These components promote digestive health and provide a bright, fresh flavor.

how to hard boil eggs pin

Different Ways to Enjoy Egg Salad

Egg salad is incredibly versatile and can be enjoyed in various ways:

  • Lettuce Wraps: Serve in romaine lettuce cups for a low-carb meal.
  • Whole Grain Bread: Create a classic healthy egg salad sandwich using slices of whole-grain bread and a dash of hot sauce.
  • Avocado Toast: Top your favorite avocado toast with a scoop of egg salad for added protein and flavor.

Meal Prep Made Easy

Egg salad is a great way to use up leftover hard-boiled eggs from Easter time or any meal prep session. Store your egg salad in an airtight container in the refrigerator, and it will stay fresh for up to three days. This makes it a convenient option for healthy lunches throughout the week.

With its high protein content and essential vitamins it’s a dish that aligns perfectly with a health-conscious lifestyle. Plus, the variety of ways to serve it ensures that you’ll never get bored.

Love this healthy egg salad recipe? Share your star rating and leave a comment below! For more delicious recipes and healthy eating tips, sign up for my newsletter and follow on social media.

Egg Salad Recipe

Quick and classic egg salad. High in protein too!
Course Main Course, Salad
Cuisine American
Servings 3
Calories 234 kcal

Ingredients
  

  • 6 hard-boiled eggs chopped
  • 2 tbsp plain Greek yogurt I use full fat
  • 2 tbsp mayo
  • 1 tbsp Dijon mustard
  • 2 tbsp parsley dill, or chives
  • 1/4 cup red onion finely chopped
  • 2 tbsp capers optional
  • Fresh cracked black pepper and sea salt optional

Instructions
 

  • Combine all ingredients in bowl.
  • Let sit in fridge 20 minutes before serving.

Nutrition

Calories: 234kcalCarbohydrates: 3gProtein: 14gFat: 18gSaturated Fat: 4gPolyunsaturated Fat: 6gMonounsaturated Fat: 6gTrans Fat: 0.02gCholesterol: 377mgSodium: 244mgPotassium: 184mgFiber: 1gSugar: 2gVitamin A: 755IUVitamin C: 5mgCalcium: 72mgIron: 1mg
Keyword no cook, quick
Tried this recipe?Let us know how it was!

About Me

I’m Melanie.

I’m a chef, registered dietitian, foodie, wife and mom.
If you’re looking for quick and healthy meal inspiration that serves YOU and your family well, then you’ve come to the right place!

Melanie Marcus Selfie

30 High-Protein Meals Made with Cottage Cheese

This post is dedicated to my co-worker who is OBSESSED with cottage cheese. Literally any recipe- he’s shamelessly adding it to boost his protein intake.  But I can’t blame him. It’s a whole food.  It tastes great and it’s incredibly versatile and an excellent ingredient to support weight loss.  So Scott – this one is for you!  

Cottage cheese is an excellent source of protein, and according to the American Dairy Association it packs about 12 grams per 1/2 cup serving.1 Not only does it boast high protein content, but its creamy texture makes it a versatile ingredient for a variety of meals. Whether you’re a fan of the taste of cottage cheese or looking for ways to sneak more protein into your diet, these recipes are great additions to your meal plan. Here, I’ve compiled the best cottage cheese recipes that are gluten-free and perfect for breakfast, lunch, dinner, and snacks, each designed to deliver at least 30 grams of protein.

1/4 cup (2 oz) cottage
1/4 cup (2 oz) cottage by U.S. Department of Agriculture

Breakfast:

Cottage Cheese Breakfast Bowls: Start your day with these bowls combining cottage cheese, fresh berries, a scoop of protein powder, and a touch of honey. Blend in a food processor for a creamy texture similar to Greek yogurt.

High-Protein Pancakes: Mix cottage cheese with oats, eggs, and a scoop of your favorite protein powder. Cook on medium heat for pancakes that are a healthy breakfast option and a good source of calcium.

Savory Cottage Cheese Bowl: For those who prefer savory recipes, this bowl mixes cottage cheese with avocado, cherry tomatoes, and olive oil. It’s a great way to incorporate healthy fats and important nutrients into your morning routine.  

Cottage Cheese Toast: Upgrade your toast with a spread of cottage cheese, topped with sliced bell peppers and a sprinkle of cheddar cheese. Place under the broiler for a few minutes until the cheese melts for added deliciousness.

High-Protein Omelette: Whip up an omelette by adding 1/2 cup of cottage cheese into the egg mixture. Throw in fresh veggies and cooked chicken for extra protein and flavor.

Cottage Cheese Cake Overnight Oats: Combine 1/2 cup of cottage cheese with 1/2 cup rolled oats.  Mix in a touch of vanilla, and 1/2 a mashed banana and let sit overnight.  Top with fresh raspberries.  It’s one of the best ways to have cake for breakfast!  Add stevia as needed for sweetness.  

Lunch:

Cottage Cheese Alfredo Sauce: A healthier version of the classic alfredo made with cottage cheese, parmesan cheese, garlic and fresh herbs blended until smooth. Serve over your favorite gluten free pasta for a nutritious lunch.

Cottage Cheese and Quinoa Salad: A filling salad that combines the protein power of quinoa and cottage cheese with fresh greens and a lemon olive oil dressing.

Stuffed Bell Peppers: Mix cottage cheese, cooked lean ground turkey, and quinoa for a filling, then stuff into bell peppers. Bake in the oven until the peppers are tender.

Cottage Cheese Tacos: Replace traditional taco meat with a blend of cottage cheese, taco seasoning, and black beans, served in lettuce wraps for a low-carb option.

Savory Cottage Cheese Dip: Blend cottage cheese until smooth, then mix with diced tomatoes, green onions, and a touch of garlic for a dip that goes well with tortilla chips or fresh veggies.

Cottage Cheese Egg Salad: For a refreshing twist, mix chopped boiled eggs with cottage cheese, mustard, and herbs for a high-protein egg salad.

Dinner:

Cottage Cheese Lasagna: Substituting ricotta with cottage cheese is a great way to boost the protein content in this classic dish. Layer with cooked pasta, your favorite sauce, and plenty of vegetables. I’ve done it several times with my baked ziti recipe!

Cottage Cheese Pizza: Swap out mozzarella for cottage cheese on your pizza for an unusual but tasty twist. Add toppings like cooked chicken breast, spinach, and bell peppers for added nutrients.

Cottage Cheese Stuffed Chicken: Stuff chicken breasts with a mixture of cottage cheese, spinach, and sun-dried tomatoes, then bake until juicy and tender.

Creamy Cottage Cheese Vodka Sauce: Make a quick cottage cheese Vodka sauce to create a creamy, satisfying pasta dish paired with grilled chicken.  Zip cottage cheese with your favorite jarred marinara sauce and then heat and serve!  

You can easily replace the ricotta in this recipe with cottage cheese.

Cottage Cheese Burrito Bowl: Mix cottage cheese with rice, beans, and fajita vegetables for a hearty and nutritious meal.

Cottage Cheese Bolognese: Replace half the meat in your traditional Bolognese sauce with cottage cheese for a lighter, yet still protein-rich sauce.

Snacks:

Cottage Cheese Ice Cream: Combine cottage cheese with coconut milk and your choice of sweetener, then freeze for a healthy alternative to traditional ice cream. Check out my recipe here!

Cottage Cheese Energy Balls: Blend cottage cheese with oats, chia seeds, protein powder, and a bit of honey, then roll into balls and refrigerate—a perfect pre-workout snack.

Cottage Cheese and Fruit Parfait: Layer cottage cheese with fresh fruits, a drizzle of honey, and some granola for a quick and easy snack.

Cottage Cheese Dip for Fresh Veggies: Blend cottage cheese until smooth, then season with your favorite spice mix.  I like the Trader Joe’s Ranch seasoning for a kid friendly dip that pairs well with any type of fresh vegetables.

Cottage Cheese Caprese Bites: A simple snack of a slice of tomato, topped with a scoop of cottage cheese, basil leaf, and a drizzle of balsamic glaze. Don’t forget the flaky sea salt!

Cottage Cheese on Toast: Just scoop your cottage cheese onto your favorite gluten free bread or seed cracker. Top withe diced tomato, chive and everything but the bagel seasoning.

Additional Meal Ideas:

Protein-Packed Smoothies: Blend cottage cheese with fresh or frozen fruit, almond milk, and a scoop of protein powder for an easy way to increase your protein intake.

Cottage Cheese-Stuffed Avocado: Halve an avocado and fill with cottage cheese, topped with salsa and a squeeze of lime, for a balance of creamy and tangy flavors.

Cottage Cheese Frittata: Beat eggs with cottage cheese, pour into a baking dish, and add your choice of vegetables and cheese. Bake until set for a high-protein, easy meal prep option.

Cottage Cheese Meatballs: Combine cottage cheese with ground meat, breadcrumbs (gluten-free options available), and spices. Basically use in place of your liquid or eggs. Bake and serve with your favorite sauce.

Savory Cottage Cheese Crepes: Fill crepes with cottage cheese mixed with herbs and shredded chicken for a delightful lunch or dinner option.

Cottage Cheese and Berry Compote: A simple dessert or snack, layer cottage cheese with a homemade berry compote for a burst of flavor.

Incorporating cottage cheese into your meals is not only an easy way to boost your protein intake but also enhances the flavor and texture of dishes. From the creamy sauce of a lasagna to the sweet satisfaction of cheesecake, cottage cheese proves to be a great ingredient for anyone looking to maintain a healthy, high-protein diet. 

Benefits of eating cottage cheese

It’s a good source of high-quality protein.  With about 12 grams of protein per half-cup serving, cottage cheese is an excellent source of casein protein. 

It’s a source of bone-strengthening minerals: Cottage cheese is packed with calcium, phosphorus, and magnesium, which are vital for strong, healthy bones. 

Can be low in fat: Available in low-fat and nonfat varieties, cottage cheese is an excellent option for those looking to reduce their fat intake without sacrificing taste or nutritional value.

Gut Health Benefits: When produced with live and active cultures, cottage cheese can offer probiotics similar to yogurt, promoting a healthy gut microbiome. 

Macros

This is a list of ideas. You will need to play with the amounts you use to fit your macro goals. Feel free to DM or email me with questions!

References

1.  https://www.americandairy.com/health-wellness/benefits-of-dairy/cottage-cheese/

About Me

I’m Melanie.

I’m a chef, registered dietitian, foodie, wife and mom.
If you’re looking for quick and healthy meal inspiration that serves YOU and your family well, then you’ve come to the right place!

Melanie Marcus Selfie

Mom’s Best Ever Whole-Wheat zucchini bread recipe

I enjoyed this delicious zucchini bread recipe frequently during my childhood. It was a go-to option for quick breakfast, an after-school snack, and as an adult, a sweet(ish) after dinner treat. One of our family favorites was the blueberry zucchini bread, baked to perfection in a bundt pan. During prime zucchini season, the irresistible aroma of freshly baked loaves would fill the air, waiting to be packaged and frozen for later indulgence.  What a great memory – and now I share it with my children.

Jump to Recipe

Now that I have my own garden, growing zucchini plants successfully has been quite the challenge.  I’ve learned first hand that squash bugs can take out your crop within a week if you’re not prepared – and to grow them in North Carolina is a labor of love.  After three years of watching my plants die, this year I was ready and have been able to grow amazing zucchini through August! If you are a successful gardener, bookmark this page so you can make this wholesome zucchini bread recipe anytime.  You won’t regret it!

Ingredients and Substitutions for Walnut Zucchini Bread

  • Walnuts – preferably toasted!  Always store walnuts in the fridge to maintain freshness.  
  • Eggs – It’s best to use room temperature eggs.  Also, you can use up to two flax eggs in this recipe if you want.  
  • Sugar – the original recipe called for 2 cups of sugar. If you want to limit sugar, you can go down to 3/4 cup instead – which is what I do! Coconut sugar can be used instead of white sugar if you like.  I don’t recommend using honey or maple syrup because they’ll add extra moisture.  
  • Vegetable Oil – any oil will work.  I’ve used canola oil, olive oil, coconut oil and rapeseed oil and they all turned out well.  Keep in mind that certain oils will impart flavor and potentially more saturated fat than others.  
  • Apple Sauce – I use unsweetened apple sauce to help keep the bread moist.  You can also use plain greek yogurt or mashed banana. 
  • Unsifted White Whole Wheat Flour – You can use half whole wheat (whole grain flour) and half white flour to  bump up nutrients from whole grains.  All purpose flour or AP flour will also work well.
  • Baking Soda
  • Salt
  • Cinnamon
  • Baking Powder 
  • Zucchini shred using food processor or box grater.  This recipe calls for two cups of grated zucchini, I tend to use about 2 1/2 cups or one large zucchini. But remember to remove the seeds!!  Smaller zucchini are more desirable for their smaller, more digestable seeds.  If your zucchini is large, you will need to scoop them out.  
  • Vanilla extract
  • Optional mix ins :  blueberries, raisins, chocolate chips, lemon zest
Jump to Recipe

It’s so good that I’ll even make it in winter!

About white whole-wheat flour

White whole wheat flour is a healthier alternative to traditional all-purpose flour because it is made from whole grains rather than refined grains. Unlike other types of whole wheat flour, white whole wheat flour is made from a variety of wheat that has a lighter color and milder flavor, making it more appealing to those who are used to the taste of white flour. White whole wheat flour retains the bran and germ of the wheat, which are packed with fiber, vitamins, and minerals that are beneficial for our health. 

How to make the best zucchini bread

I love a short and simple quick bread recipes, and this one is my favorite.  

  • First things first, preheat oven to 350F and line two bread pans (aka loaf pan) with parchment paper and spray with nonstick spray.  You can also use one bunt pan.
  • In a large bowl, beat eggs (plus flax eggs) if you’re using, sugar, applesauce and oil. I like to do this by hand, but you can use your stand mixer with paddle attachment.  
  • Next, in a medium bowl combine all of the dry ingredients.  Whisk flour mixture well before gradually adding to wet ingredients.  
  • Now mix in zucchini.  
  • Last stir in walnuts and vanilla.
  • Pour batter into prepared pan or divide batter into two loaf pans and bake at 350F for about 1 hour or until toothpick comes out clean.  Cooking time may vary slightly depending on the moisture content of the zucchini.    
  • When it comes out of the oven, set the pans on a cooling rack and cover with a clean kitchen towel.

How to freeze this classic zucchini bread

  • For best results, let your breads rest on a wire rack until cool to touch. This helps ensure that excess moisture has evaporated and doesn’t get trapped inside.  
  • Wrap tightly with aluminum foil.
  • Then label freezer-safe bag with date they were made.  
  • One loaf will fit into one gallon size plastic bag.  
  • Freeze completely in the coldest part of the freezer.  
  • When you’re ready to enjoy your zucchini walnut bread simply take out of the freezer the night before so you can have it the next day.

When to eat zucchini bread

1.  Serve for breakfast instead of store bought muffins.  

2.  Bring a loaf of zucchini bread to the office to share with co-workers

3.  Enjoy a warm slice with a little butter. There’s nothing like it.  

4.  Cut into individual slices and wrap with plastic wrap.  Store in a freezer safe bag in the freezer for a healthy snack anytime.  

The best part about this whole wheat zucchini bread recipe is that it makes two loaves!  It’s a quick bread batter that is sure to rival your favorite banana bread or pumpkin bread. For me, there is just something incredibly satisfying about this homemade treat – perhaps it was the inclusion of toasted walnuts, adding a perfect crunch to every bite.

Let me know if you try it for yourself!!  

Mom’s Walnut Zucchini Bread

Prep Time 15 minutes
Cook Time 50 minutes
Total Time 1 hour 5 minutes
Course Breakfast
Cuisine American
Servings 16
Calories 288 kcal

Ingredients
  

  • 4 each eggs
  • 1 cup sugar
  • 1 cup vegetable oil
  • 1 tsp vanilla
  • 2/3 cup unsweetened applesauce
  • 3.5 cups white whole wheat flour unsifted
  • 1.5 tsp baking soda
  • 1.5 tsp salt
  • 1 tsp cinnamon
  • 3/4 tsp baking powder
  • 2 cups shredded zucchini
  • 1/2 cup walnuts toasted and chopped

Instructions
 

  • Mix eggs, sugar, oil, applesauce and vanilla in a large bowl.
  • In another bowl, combine all dry ingredients.
  • Gradually add dry ingredients to wet ingredients.
  • Fold in zucchini and walnuts
  • Pour into 2 prepared loaf pans, or 1 bundt pan.

Nutrition

Serving: 16gCalories: 288kcalCarbohydrates: 33gProtein: 4gFat: 17gSaturated Fat: 2gPolyunsaturated Fat: 10gMonounsaturated Fat: 3gTrans Fat: 0.1gCholesterol: 1mgSodium: 343mgPotassium: 95mgFiber: 3gSugar: 14gVitamin A: 36IUVitamin C: 3mgCalcium: 37mgIron: 1mg
Tried this recipe?Let us know how it was!

About Me

I’m Melanie.

I’m a chef, registered dietitian, foodie, wife and mom.
If you’re looking for quick and healthy meal inspiration that serves YOU and your family well, then you’ve come to the right place!

Melanie Marcus Selfie

Easy fried rice for one

Are you looking for an easy and tasty weeknight dinner that won’t take all night to make? Well, look no further than this super fast fried rice! You can may also like my egg roll in a bowl or easy ricotta pasta recipes – so check them out if you have time. But this delicious fried rice is my go to for busy weeknights since it has minimal ingredients and takes way less than 30 minutes from start to finish.

Plus, you can customize this basic recipe by using whatever vegetables or proteins you have in your fridge whether they are fresh or frozen. Keep reading to learn how my step-by-step guide will help you whip up a batch of irresistible fried rice in no time flat. It can also be made as a side dish for two or easily made to feed the entire family.

Jump to Recipe

Ingredients you need for this easy fried rice recipe

  • Toasted sesame oil – Other neutral oil such as vegetable oil, canola oil or olive oil will work well too here but sesame oil adds a lot of flavor.
  • Garlic – this is a classic flavor component, so don’t skimp. You can mince whole fresh garlic, use jarred minced garlic or frozen cubes are a great way to add flavor.
  • Fresh ginger – I like to use frozen cubes to keep this simple, but you can also grate fresh ginger.
  • Mixed vegetables – think fresh veggies like broccoli, bok choy, carrot, bell pepper, zucchini, green peas, green beans, onions, mini corn, bell peppers. A bag of frozen veggies will work here too.
  • Brown rice – I like to use brown rice, but it’s a matter of personal preference. Any rice will work. Leftover rice is a fabulous option if you have it. But white rice or cauliflower rice are also good substitutes. Just be sure any of the rice is pre-cooked and cooled. In fact, cold rice works best for fried rice recipes.
  • Gluten-free tamari – low sodium soy sauce, coconut aminos, even regular soy sauce will work but it does have gluten. These are all interchangeable so just use what you have.
  • Whole egg – We fry them sunny side up, but I also like to scramble the egg into the rice the way my mom used to do it for us, so it’s just personal preference.
  • They key is to use a hot wok or well heated frying pan to make sure everything cooks evenly!
  • optional toppings: Sriracha, green onions, bean sprouts, cilantro, sesame seeds, cubed tofu, or protein of choice such as leftover chicken.
Jump to Recipe

Steps to make classic fried rice

  1. Heat the oil in a large skillet or large wok over high heat.
  2. When the oil is hot, add the garlic, ginger, and chopped vegetables and cook over medium-high heat .
  3. Stir-fry the vegetables for about 5 minutes, until lightly browned and softened. Keep the ingredients moving so they cook evenly.
  4. Add the rice and cook, for another 3 minutes, then add the soy sauce and cook for 1 minute more. 
  5. Let the rice cook, undisturbed for 1-2 minutes if you like crispy bits in your fried rice.  
  6. Remove rice from panServe with sriracha.

What kind of rice is best to use for fried rice?

Personally I love to use leftover cooked rice from takeout. Day-old rice works really well because the individual grains maintain their texture as opposed to getting mushy. While jasmine rice is popular because of its aroma and flavor, but it tends to naturally have wetter consistency that helps it clump together.

  • If you have a rice cooker – Make the most of it by making a larger batch of fresh rice, let it return to room temperature and then freeze on a sheet pan in a single layer to use for later weeknight meals.
  • Microwaveable packets of long-grain rice are great for this type of quick cooking. They are also the best way to keep on hand in your pantry to make a complete meal in under 2 minutes!
  • Frozen brown or white long grain rice are other good options. I recommend that you microwave just before you add to the cooked vegetables. Though I find that rice doesn’t get as crispy with this method.

As you can see there are several types of rice you can use.

Here’s a secret for good fried rice: Cook your rice until it’s al dente, which means it has a little bite left to it. This prevents your fried rice from becoming mushy as you add sauces to your stir fry.

Tips for adding more flavor

When making dishes that include soy sauce, you may think more soy sauce is better. While you don’t want to skimp, it could become very one note if you use too much. Here’s what I recommend instead.

Make your fried rice with quantities listed in the ingredient list. Then taste it. While it may need more soy sauce for your liking, it’s important to remember that 15 milliliters or 1 Tablespoon of soy sauce has 920 milligrams of sodium. That’s 38% of the daily recommended value, and just about half of what the American Heart Association recommends for a heart healthy diet.

Instead of adding more soy sauce, you may want to sprinkle with a small amount of kosher salt to help bring out some high notes.

Alternatively, use lemon or lime juice! Citrus helps bring balance to salty or fatty foods and helps your tongue and mind appreciate the flavors. Just give a squeeze over the top and taste the difference for yourself!

If you happen to have leftovers, store your homemade fried rice in the refrigerator in an airtight container.

Calorie information

This recipe is really macro friendly because it has a significant source of fiber, plus you can modify the fat, protein or carbohydrate to meet your needs easily!

Calories 456

Fat 12 grams

Saturated 2grams

Sodium 571 grams

Protein 16 grams

Fiber 7 grams

About Me

I’m Melanie.

I’m a chef, registered dietitian, foodie, wife and mom.
If you’re looking for quick and healthy meal inspiration that serves YOU and your family well, then you’ve come to the right place!

Melanie Marcus Selfie

Quick Fried Rice for One

Prep Time 2 minutes
Cook Time 11 minutes
Total Time 13 minutes
Course Main Course, Side Dish
Calories 456 kcal

Ingredients
  

  • 1 tsp toasted sesame oil
  • 1 clove garlic minced
  • 2 tsp fresh ginger minced
  • 2 cups vegetables chopped
  • 1 cup cooked brown rice cooled
  • 2 tsp low sodium soy sauce
  • 1 egg fried
  • edamame, shrimp, tofu, green onion, sesame seeds, sriracha

Instructions
 

  • Heat the oil in a large nonstick skillet over high heat.
  • When the oil is hot, add the garlic, ginger, and chopped vegetables.
  • Stir-fry the vegetables for about 5 minutes, until lightly browned and softened.  Keep the ingredients moving so they cook evenly.
    Add the rice and cook, for another 3 minutes, then add the soy sauce and cook for 1 minute more. 
  • Let the rice cook, undisturbed for 1-2 minutes if you like crispy bits in your fried rice.  
  • Transfer your rice to serving bowl and top with fried egg and additional toppings if desired.

Nutrition

Calories: 456kcal
Tried this recipe?Let us know how it was!

Creamy Ricotta Pasta with Veggies and Pine nuts

Our family likes mac and cheese. But there’s a limit to how many nights in a row that I can make that blue box! I like this recipe because it requires minimal and simple ingredients, plus it changes up the usual tomato sauce that we have in regular rotation. You may only need to pick up 3 or 4 items – like lemon or ricotta, pasta or broccoli for a quick crowd pleasing creamy pasta. Also play around with the vegetables that you include to use up what you have on hand. It’s a great recipe to put in the rotation for meatless Mondays or any day of the week. It’s just one of those dishes that is good any time of year.

Let me know if you try it!

Ingredients and substitutions for this creamy ricotta sauce and pasta recipe

  • Broccoli florets – break down a whole head of broccoli into small florets or use pre cut and cleaned veggies.
  • Fresh lemon – we’re using both the zest and the juice in this recipe so go with fresh
  • Pasta – I like short pasta with a shape that will catch the sauce. We’ve had it with rotini and pasta shells and it was great! It will also work with whole grain, brown rice or quinoa pasta. Use whichever your family likes.
  • Ricotta cheese – I’m suggesting a part skim ricotta cheese to help limit saturated fat, which also helps reduce total calories. You could absolutely use a whole milk ricotta for a richer and creamer dish. I like ricotta cheese because it adds a bit of protein too.
  • Salt and pepper – use these to season your pasta and sauce as you cook. The final result will be bland if you don’t!
  • Handful of basil – I love using fresh if I have it, but you could also use frozen and mix it in with the ricotta for a herby version!
  • Optional – chili flakes, parmesan cheese and pine nuts. If you don’t have them, don’t worry. If you do have them, use these to top the finial dishes before serving. You could even used up crumbled bacon and frozen peas for a traditional combo.

How to make creamy ricotta pasta step by step

  1. Bring a large pot of salted water to a boil over high heat. Then zest and juice the lemon into a small bowl and set aside.
  2. Add the pasta to the boiling water and cook according to package directions for al dente. Two minutes before it’s al dente, add the broccoli and let cook for last two minutes.  
  3. Reserve 1 cup of the pasta water when you drain the pasta and broccoli.  
  4. Mix lemon zest, lemon juice, and 1 cup ricotta cheese. You can use a food processor or just mix really well with a wooden spoon. Season to taste with salt and pepper.  
  5. When the pasta reaches 2 minutes less than al dente, add the broccoli florets and cook for the remaining 2 minutes. 
  6. Return the hot pasta and broccoli to the pot. Add the ricotta mixture and 1/4 cup pasta water. Stir, adding more pasta water as needed, until the sauce coats and clings to the pasta. Taste and season with black pepper and Parmesan cheese, basil and red pepper flakes and pine nuts if desired.

The best part is you can also substitute any other vegetables you have on hand. Even leftover roasted cauliflower, and carrots could mix in well here.  

What to serve with creamy ricotta pasta

The nice thing is you really don’t need to serve anything else, but if you wanted to go the extra step here are a few ideas.

  • simple side salad
  • roasted chickpeas
  • roasted chicken or pork chops
  • sautéed greens
  • fresh diced tomatoes

How to store creamy ricotta pasta

If we have leftovers I like to store them in quart containers and then reheat in a pan with a little chicken broth or water to revive the sauce. Once the pasta comes down to room temperature, store it in an airtight container for up to three days.

Nutrition and macros

I make this recipe with brown rice pasta or traditional wheat pasta. But you could use the sauce over palm noodles or zucchini spirals if you needed to follow a low carb or lower calorie diet.

337calories

5g Fat 62g Carb 11g Pro 3g Fiber

creamy ricotta pasta

Creamy Ricotta Pasta

Super fast and nearly one pot meal for any day of the week
Prep Time 5 minutes
Cook Time 12 minutes
Total Time 17 minutes
Course Main Course
Cuisine American
Servings 6
Calories 337 kcal

Equipment

  • 1 large pot
  • 1 food processor or large bowl

Ingredients
  

  • 2 cups broccoli florets
  • 1 each lemon zest and juice
  • 1 pound pasta any kind you like
  • 1 handful fresh basil
  • red pepper flakes, parmesan and pine nuts optional

Instructions
 

  • Bring a large pot of water to a boil over high heat.  Then zest and juice the lemon into a small bowl and set aside.
  • Add the pasta to the boiling water.  Two minutes before it’s al dente, add the broccoli and let cook for last two minutes.  Reserve 1/2 cup pasta water when you drain the pasta and broccoli.  
  • Mix lemon zest, lemon juice, and 1 cup ricotta cheese.  You can use a food processor  or just mix really well with a wooden spoon.  Season to taste with salt and pepper.  
  • When the pasta reaches 2 minutes less than al dente, add the broccoli florets and cook for the remaining 2 minutes. 
  • Return the pasta and broccoli to the pot. Add the ricotta mixture and 1/4 cup pasta water. Stir, adding more pasta water as needed, until the sauce coats and clings to the pasta. Taste and season with black pepper and Parmesan cheese, basil and red pepper flakes and pine nuts if desired.

Nutrition

Calories: 337kcal
Tried this recipe?Let us know how it was!

About Me

I’m Melanie.

I’m a chef, registered dietitian, foodie, wife and mom.
If you’re looking for quick and healthy meal inspiration that serves YOU and your family well, then you’ve come to the right place!

Melanie Marcus Selfie

How to grate carrots without a grater – there’s always a way

If you want to make a carrot cake but find that you don’t have pre-shredded carrots, and you don’t have a traditional box grater either – there are a few things you can do to get the job done. Keep reading for the best way to grate carrots in a pinch. No one will ever know!

Tools you could use to make grated carrots

There are all different types of graters so, although you may not have a box grater or hand grater, there are a lot of things you can do to get your carrots down to the right size for your recipe. You may be surprised the simple kitchen equipment you need is already on hand! Thin slices of carrots for your carrot kale muffins or your other carrot favorite recipes are just minutes away!

  • vegetable peeler
  • cheese grater or micro plane grater
  • julienne peeler
  • shredding blade on mandolin
  • small food processor with shredding disc accessory
  • a sharp knife

How to make grated carrots

My first choice would be to use a mini food processor with a grating plate, because this is probably the easiest way. I try to use this kitchen appliance any chance I get, because it always gets the job done with minimal effort. All you need to do is add your carrots through the top shoot of the processor and let the plate do its job while you hit the pulse button. It will shred carrots for you!

If that’s not an option – I’d go for my vegetable peeler. Over a cutting board, run the peeler in a downward motion starting at the larger end of the carrot and ending at the pointed end of the carrot. Just like you would if you were going to peel it. It will make long thin strips. Then you can run your knife over them and cut them down to small thin pieces. It’s a great way to break your carrot down into small pieces with limited equipment!

The next method you could try is your microplane. This is a hand held grater that has small holes, similar to the large holes of the box grater. The main difference with with this tool is that your carrots will come out very fine, possibly mushy, so proceed with caution.

A julienne peeler will shred your large carrots into thin strips which means with a little bit of effort from your knife, you can chop them down to smaller pieces and get similar results to your box grater.

The best method will come down to which tools you have at home because there are truly a bunch of different ways to shred fresh carrots.

Use carrot shred immediately, but extra can be stored in an airtight container for up to three days. Try using them in muffins, breads, scones, meatloaf or quiche.

If whole carrots are more your thing – try these vegan carrot dogs! They’re excellent!

About Me

I’m Melanie.

I’m a chef, registered dietitian, foodie, wife and mom.
If you’re looking for quick and healthy meal inspiration that serves YOU and your family well, then you’ve come to the right place!

Melanie Marcus Selfie