Category: Recipe

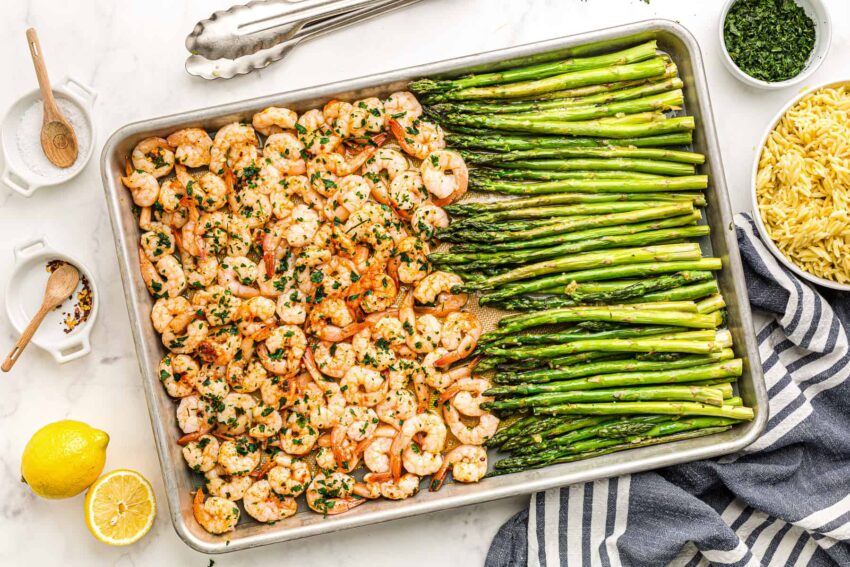
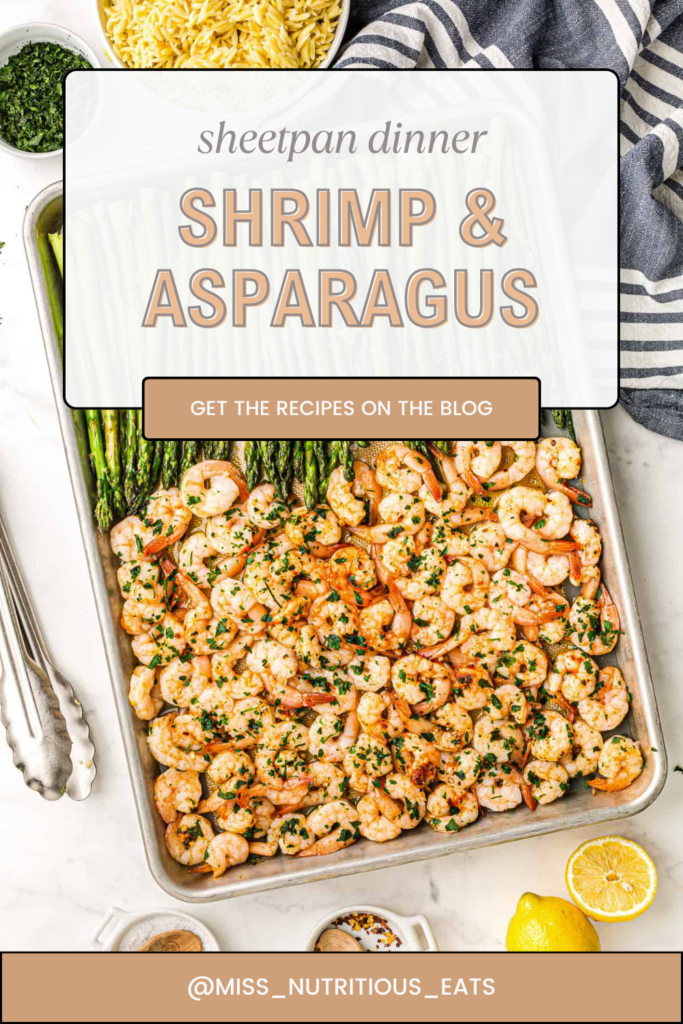
Sheet pan lemon and garlic shrimp with asparagus

Looking for an easy sheet pan dinner that’s both delicious and perfect for busy weeknights? How about one that’s high in protein and lower in calories too?  This Sheet Pan Lemon Garlic Shrimp and Asparagus recipe has you covered. It’s a great way to make a complete meal with minimal effort and maximum flavor. 

Jump to Recipe

๐Ÿ˜ Why you’ll love my sheet pan asparagus & shrimp

You will 100% love this sheetpan asparagus and shrimp recipe because it’s super quick to prepare, making it perfect for busy weeknights. It’s also high in protein, ensuring a satisfying meal without the fuss. Using a single sheetpan means minimal cleanup which noone will argue is a major bonus!

๐Ÿ“’ Ingredients

  • Large shrimp, peeled and deveined – I usually get frozen shrimp from Trader Joe’s or Costco and defrost what we need as needed.
  • fresh asparagus, trimmed
  • olive oil – regular olive oil is good for this. No need to do extra virgin olive oil.
  • garlic – I often use frozen cubes
  • lemon
  • paprika
  • Salt and black pepper
  • Fresh parsley

๐Ÿ‘ฉ๐Ÿปโ€๐Ÿณ How to make my sheet pan asparagus & shrimp

  1. Prepare the Shrimp and Asparagus: Preheat your oven to 400ยฐF (200ยฐC). On a prepared sheet pan lined with parchment paper or non-stick spray, place asparagus and shrimp in separate halves of the pan. Trim ends of asparagus spears to remove any tough ends.
  2. Season the Ingredients: In a large bowl, mix together olive oil, minced garlic, fresh lemon juice, lemon zest, paprika, kosher salt, and black pepper. Add the shrimp and asparagus to the bowl and toss until well-coated. For marinated shrimp, you can leave the mixture to sit and absorb flavors for a few minutes of prep time.
  3. Arrange on the Sheet Pan: Spread everything into a single layer on your large sheet pan for even cooking. For best results, make sure the asparagus and shrimp aren’t overcrowded. If needed, use a second half of another pan.
  4. Bake: Cook in the preheated oven for about 10-12 minutes. Keep an eye on the shrimp as they cook; you’re looking for them to be pink and cooked through while the asparagus remains tender but still crunchy.
  5. Garnish and Serve: Remove from the oven and garnish with fresh parsley, lemon slices, and a sprinkle of parmesan cheese. Serve alongside a side of brown rice or coconut rice for a complete meal.

๐Ÿง  Common Questions

Does Shrimp Sizes Matter? The size of your shrimp can affect cooking time, so adjust accordingly. Fresh shrimp works best, but frozen shrimp is a good alternativeโ€”just make sure to thaw and pat dry with paper towels before using.  I usually buy frozen shrimp from Costco or Trader Joe’s.  

Do I have to use fresh ingredients? Fresh asparagus and fresh lemon juice will enhance the flavors of this dish, making it a perfect asparagus dinner.

What other seasonings can I use? Add a kick to your dish with red pepper flakes, onion powder, or garlic powder. The best part of this easy way to cook is how customizable it is!

๐Ÿ‘ How to store leftovers

Storage and Meal Prep: This is an easy meal for meal prep. Save leftovers in airtight containers for lunch or as lighter meals throughout the week.

Keep this easy recipe in your back pocket for quick weeknight dinners.  Shrimp cook so quickly, you’ll be making this sheet pan recipe more than you think!

Sheetpan Shrimp and Asparagus

Prep Time 5 minutes
Cook Time 10 minutes
Total Time 15 minutes
Servings: 2
Course: Main Course
Cuisine: American
Calories: 314

Ingredients
  

  • 1 lb large shrimp peeled and deveined
  • 1 bunch fresh asparagus trimmed
  • 2 tablespoons olive oil
  • 4 cloves garlic minced
  • 1 lemon zested and juiced
  • 1 teaspoon paprika
  • Salt and black pepper to taste
  • Fresh parsley chopped (for garnish)

Method
 

  1. Preheat your oven to 400ยฐF (200ยฐC). On a prepared sheet pan lined with parchment paper or non-stick spray, place asparagus and shrimp in separate halves of the pan. Trim ends of asparagus spears to remove any tough ends.
  2. In a large bowl, mix together olive oil, minced garlic, fresh lemon juice, lemon zest, paprika, kosher salt, and black pepper. Add the shrimp and asparagus to the bowl and toss until well-coated. For marinated shrimp, you can leave the mixture to sit and absorb flavors for a few minutes of prep time.
  3. Spread everything into a single layer on your large sheet pan for even cooking. For best results, make sure the asparagus and shrimp aren’t overcrowded. If needed, use a second half of another pan.
  4. Cook in the preheated oven for about 10-12 minutes. Keep an eye on the shrimp as they cook; you’re looking for them to be pink and cooked through while the asparagus remains tender but still crunchy.
  5. Remove from the oven and garnish with fresh parsley, lemon slices, and a sprinkle of parmesan cheese. Serve alongside a side of brown rice or coconut rice for a complete meal.

Nutrition

Calories: 314kcalCarbohydrates: 10gProtein: 32gFat: 17gSaturated Fat: 2gPolyunsaturated Fat: 2gMonounsaturated Fat: 10gTrans Fat: 0.02gCholesterol: 286mgSodium: 1287mgPotassium: 394mgFiber: 2gSugar: 2gVitamin A: 974IUVitamin C: 31mgCalcium: 152mgIron: 1mg

Tried this recipe?

Let us know how it was!

About Me

I’m Melanie.

I’m a chef, registered dietitian, foodie, wife and mom.
If you’re looking for quick and healthy meal inspiration that serves YOU and your family well, then you’ve come to the right place!

Melanie Marcus Selfie

Gluten free muffin recipe with Libby’s pumpkin puree

All I need is one cool day to open a can of pumpkin and start cooking with comforting flavors like pumpkin spice. And this is THE BEST pumpkin muffin recipe. ย Thank you Kathleen Ashmore, recipe developer!!! ย My family loves these – plus they are gluten-free and no one knows any better! I think it’s because they’re not a super dense muffin like a lot of other gluten free options. They’re the perfect blend of fluffy texture and rich pumpkin flavor. With simple ingredients and a straightforward baking process, I’m sure this recipe will quickly become a family favorite.

Ingredients

To make these easy pumpkin muffins, you will need:

Jump to Recipe
  • almond flour 
  • gluten-free all-purpose baking flour – I tend to use the Bob’s Red Mill gluten free 1:1 flour.
  • ground ginger
  • ground cinnamon
  • ground nutmeg
  • kosher salt
  • baking powder
  • baking soda
  • large eggs
  • coconut sugar 
  • pumpkin puree (pure pumpkin like libbys pumpkin, not pumpkin pie filling)
  • neutral oil (like coconut oil or vegetable oil)
  • Demerara sugar for sprinkling the muffin tops at the end.  You could also use brown sugar for the same effect.  

Instructions

Step-by-Step Baking Instructions

  1. Preheat the Oven:

   Preheat your oven to 425 degrees F. Prepare a standard 12-cup muffin pan by spraying the cups with non-stick baking spray or by using muffin liners.

  1. Mix Dry Ingredients:

   In a large mixing bowl or the bowl of a stand mixer, briefly whisk together all dry ingredients, including the almond flour, gluten-free all-purpose flour, ground ginger, ground cinnamon, ground nutmeg, kosher salt, baking powder, and baking soda.

  1. Combine Sugar and Wet Ingredients:

   Add the pumpkin puree, neutral oil, and coconut sugar to the dry ingredients. Mix to combine until no streaks of flour are visible. This will create a smooth pumpkin mixture.

  1. Add Eggs:

   Add the large eggs to the mixture and whisk for 10 seconds more to combine.

  1. Fill the Muffin Cups:

   Using an ice cream scoop, transfer the muffin batter evenly into the prepared muffin tin.

  1. Top Each Muffin:

   Distribute Demerara sugar evenly over the top of each muffin for a delightful crunch.

  1. Baking Time:

   Bake the muffins at 425 degrees F for 5 minutes, then turn the heat down to 350 degrees F and bake for an additional 15-20 minutes, until a cake tester comes out just clean.

  1. Cooling:

   Cool the muffins in the pan for 10 minutes before transferring them to a wire rack to cool completely.

Tips and Variations

  • Mini Muffins:

  If you prefer mini muffins, simply adjust the baking time. Check for doneness after 10-12 minutes at 350 degrees F.

  • Add-Ins:

  For an extra treat, consider adding chocolate chips or chopped walnuts to the muffin batter before baking.

  • Toppings:

  A streusel topping or a cream cheese swirl can add an extra layer of flavor to these muffins. 

Storage

Store your muffins in an airtight container to keep them fresh. They can also be frozen for up to three months.

Seriously, these are the best pumpkin muffins.   Perfect for the fall season and are sure to become a family favorite. 

Nutrition

One muffin comes in at just under 189 calories, 27g Carb, 9g Fat, 4g Protein and 3g Fiber. For a muffin as delicious as this one, that is very macro balanced!

Pumpkin Muffins (GF)

Prep Time 5 minutes
Cook Time 25 minutes
Total Time 30 minutes
Servings: 12
Course: Breakfast, Snack
Cuisine: American
Calories: 189

Ingredients
  

  • ยฝ cup almond flour
  • 1 ยฝ cup GF all purpose baking flour
  • 1 teaspoon ground ginger
  • 1 ยฝ teaspoons ground cinnamon
  • ยผ teaspoon ground nutmeg
  • 1 teaspoon kosher salt
  • 2 teaspoons baking powder
  • 1 teaspoon baking soda
  • 3 large eggs room temperature
  • 1 cup coconut sugar
  • 15 oz. pumpkin puree
  • ยผ cup neutral oil
  • Demerara sugar for sprinkling if desired

Method
 

  1. Preheat the oven to 425 degrees F.
  2. Spray the cups of a standard 12 cup muffin tin with non-stick baking spray or use muffin liners.
  3. In the bowl of a stand mixer, or using a large bowl and whisk, briefly whisk together all dry ingredients.
  4. Add to the bowl the pumpkin, oil, and coconut sugar and mix to combine so there are no flour streaks visible.
  5. Add the eggs and whisk for 10 seconds more to combine.
  6. Transfer the batter evenly into the muffin cups. I like to use an ice cream scoop for this.
  7. Distribute the Demerara sugar evenly over the tops of the muffins.
  8. Bake for 5 minutes before turning the heat down to 350F and baking 15-20 minutes more until a cake tester comes out just clean.
  9. Cool for 10 minutes in the pan before transferring to a rack to cool completely.

Nutrition

Serving: 1gCalories: 189kcalCarbohydrates: 27gProtein: 4gFat: 9gSaturated Fat: 1gPolyunsaturated Fat: 3gMonounsaturated Fat: 2gTrans Fat: 0.03gCholesterol: 41mgSodium: 399mgPotassium: 92mgFiber: 3gSugar: 11gVitamin A: 5575IUVitamin C: 1mgCalcium: 77mgIron: 2mg

Tried this recipe?

Let us know how it was!

About Me

I’m Melanie.

I’m a chef, registered dietitian, foodie, wife and mom.
If you’re looking for quick and healthy meal inspiration that serves YOU and your family well, then you’ve come to the right place!

Melanie Marcus Selfie

How to cook lentils perfectly (recipe + tips)

I find that lentils can either be a kitchen staple for clients, or they shy away from them because they don’t know how to prepare them. ย The reality is, dry lentils are versatile, nutritious, and easy to prepare. They offer rich texture and earthy flavors which are a great addition to most ground meat recipes, but a staple for vegetarian recipes. ย If you use black beans in your recipes, you can often substitute lentils instead.ย ย 

Whether you’re new to cooking lentils or looking to refine your technique, this guide will provide you with essential tips and recipes for various types of lentils.

Why are lentils so healthy?

Lentils are small round legumes that come in many different colors, shapes, and sizes. They are a great source of plant-based protein, making them an excellent meat alternative for vegetarians and vegans. With their high dietary fiber content, lentils aid in digestion and promote a feeling of fullness, supporting weight management. They are also packed with essential vitamins and minerals such as folate, iron, phosphorus, and potassium.

Nutritional Benefits of Lentils

  • High in Plant-Based Protein: Ideal for vegetarians and vegans.
  • Rich in Dietary Fiber: Promotes digestion and fullness.
  • Low in Fat: Provides steady energy without blood sugar spikes.
  • Packed with Vitamins and Minerals: Essential for overall health.
  • Antioxidants: Help reduce inflammation.  

Macros

A half-cup (about 100 grams) of cooked brown lentils typically contains the following macronutrients:

  • Calories: 115-120 kcal
  • Protein: 9 grams
  • Carbohydrates: 20 grams
    • Fiber: 8 grams
  • Fat: 0.4 grams

These values can vary slightly depending on cooking method and specific type of lentils.

Join my new 21 DAY reset!

Tired of endless diets and no results? This reset is for you if you want to gain energy, cut the cravings, build strength, decrease bloat and feel amazing going into the holiday season!

Cooking Tips for Lentils

Rinse Lentils: Always rinse lentils under cold water to remove dirt, small rocks or debris. Look for small stones or rocks and remove them.

Soak Them: Letting them sit for even just 30 minutes (or overnight) will reduce cooking time by at least 15 minutes.  

Sautรฉ for Flavor: Sautรฉ onions, garlic, bay leaves and spices in olive oil before adding lentils and water for enhanced flavor. 

Water Ratio: Use plenty of water, a ratio of 3 cups of water for every 1 cup of lentils. Adjust as needed for different types of lentils. ย In culinary school we removed excess water afterwards in a colander. ย 

Salt Timing: Add a pinch of salt towards the end of cooking to ensure the lentils are tender but not mushy.

Tender but Firm: For salads or cold dishes, cook lentils just until al dente to maintain a firm texture.

Quick Cooking: For a faster cooking process, consider soaking lentils for a few hours or overnight.  You’ll notice that they plump up and absorb a lot of water which will help reduce the cooking time.  

Free lentils tricolor image

Types of Lentils and How to Cook Them

Red Lentils (Masoor Dal)

Other Names: Orange Lentils

  • Cooking Time: 15-20 minutes
  • Texture: Soft and creamy
  • Flavor: Mild and slightly sweet
  • Best For: Soups, stews, and Indian cuisine
  • Instructions:
  1. Rinse 1 cup of red lentils under cold water.
  2. In a large pot, sautรฉ onions, garlic, and your favorite spices in olive oil.
  3. Add the lentils, 3 cups of water, and bring to a boil.
  4. Reduce heat and simmer for 15-20 minutes until tender.
  5. Add salt towards the end of cooking.

Brown Lentils

Other Names: The most common type of lentils

  • Cooking Time: 20-30 minutes
  • Texture: Soft but holds shape
  • Flavor: Earthy and mild
  • Best For: Soups, stews, and veggie burgers
  • Instructions:
  1. Rinse 1 cup of brown lentils under cold water.
  2. Sautรฉ onions, garlic, and spices in olive oil in a large pot.
  3. Add the lentils, 3 cups of water or vegetable broth, and bring to a boil.
  4. Reduce heat and simmer for 25-30 minutes until tender.
  5. Add salt towards the end of cooking.

Green Lentils

Other Names: French Lentils, Le Puy, Lentils de Puy and French green lentils

  • Cooking Time: 30-40 minutes
  • Texture: Firm and peppery flavor
  • Flavor: Earthy and robust
  • Best For: Salads, side dishes, and soups
  • Instructions:
  1. Rinse 1 cup of green lentils under cold water.
  2. Sautรฉ onions, garlic, and spices in olive oil in a large pot.
  3. Add the lentils, 3 cups of water or vegetable stock, and a bay leaf.
  4. Bring to a boil, then reduce heat and simmer for 30-40 minutes until tender.
  5. Add salt towards the end of cooking.

Black Lentils

Other Names: Black Beluga Lentils

  • Cooking Time: 25-30 minutes
  • Texture: Firm and holds shape
  • Flavor: Rich and earthy
  • Best For: Salads, side dishes, and lentil salad
  • Instructions:
  1. Rinse 1 cup of black lentils under cold water.
  2. Sautรฉ onions, garlic, and spices in olive oil in a large pot.
  3. Add the lentils, 3 cups of water or vegetable broth, and bring to a boil.
  4. Reduce heat and simmer for 25-30 minutes until tender.
  5. Add salt towards the end of cooking.

Using an Instant Pot or Pressure Cooker

For faster cooking, you can use an instant pot or pressure cooker. Follow the same steps but reduce the water to 2 cups for every 1 cup of lentils. Cook on high pressure for half the time specified for each type.

Storing Cooked Lentils

Store cooked lentils in an airtight container in the refrigerator for up to a week. They make excellent additions to salads, soups, and meal prep.

Favorite Lentil Recipes

  • Red Lentil Soup with fresh herbs and lemon juice
  • Brown Lentil Stew with hearty vegetables
  • French Green Lentil Salad with fresh herbs and olive oil
  • Black Lentil Salad with roasted vegetables and a tangy dressing
  • Greek Inspired Turkey Meatballs (with lentils!)

About Me

I’m Melanie.

I’m a chef, registered dietitian, foodie, wife and mom.
If you’re looking for quick and healthy meal inspiration that serves YOU and your family well, then you’ve come to the right place!

Melanie Marcus Selfie

Greek inspired turkey meatballs (with lentils!)

If you’re looking to change up your turkey meatball game, or if you just love mediterranean flavors.  This recipe is it.  This recipe combines lean ground turkey with the hearty goodness of lentils and the tangy taste of feta.  They’re a great way to meal prep a hearty meal when served with pasts or a lighter lunch when served over salad or along side fresh cut vegetables and hummus.  

Jump to Recipe

Ingredients and substitutions

  • lean ground turkey – I use the leanest ground turkey I can find.  This allows me to balance the fat I add back in from the feta.
  • brown lentils (cooked and cooled) – Using a cup of lentils not only adds plant based fiber and protein, but it also adds moisture which turkey meatballs (especially when you use extra lean turkey) needs. I prefer to use dry lentils for this recipe.  I soak them for 20 minutes.  Then drain and boil for about 20 minutes until cooked through. You could use canned lentils, just be sure to rinse and drain them really well.  Cooked green lentils would be fine too.  Just be careful with red lentils because they cook quickly and could make your meatballs mushy.  They are simply delicious in this red lentil soup recipe though!
  • Feta cheese – use what you love.  My favorite is Trader Joe’s Sheep’s Milk Feta and it happens to come in 2, 5oz bars which makes measuring for this recipe very easy. You could also use crumbled cow’s milk feta.  
  • egg – one egg is all you need, you could use two eggs whites.  I don’t recommend a flax egg for this one! This is when you combine flax seed and warm water to form a thick mixture to form a binder.  
  • gluten-free bread crumbs – I’ve tested this recipe with both gluten free and regular bread crumbs. Either way, I recommend using plain.   
  • chopped arugula – I usually use a ton of fresh parsley, but I was out when this recipe came to life.  So I used fresh arugula and it was delicious.  You could use dill, parsley or a combo of all three!
  • salt – It’s pretty standard to use 1 tsp per pound of meat.  I like to use kosher salt or my favorite Seasonello, Italian seasoning salt.  
  • black pepper – 1/4 – 1/2 tsp of red chili flakes would be a nice addition!
  • optional  ingredients – lemon zest  or chopped green onions for extra flavor.

Cooking Instructions

Jump to Recipe

Step 1:

Preheat your oven to 375ยฐF (190ยฐC) and line a baking sheet with parchment paper.

Step 2:

In a large bowl, mix ground turkey with 1 cup of cooked brown lentils with feta, egg, gluten-free breadcrumbs, chopped arugula, salt, and black pepper. You could use a food processor to pulse the mixture until well combined but I just mix everything together with my hands.  

Step 3:

Form the lentil mixture into 1-inch meatballs with your hands or an ice cream scoop.  Place them on a prepared 9×13 baking pan.  

Step 4:

Bake the meatballs for about 40 minutes or until they are golden brown and cooked through to an internal temperature of 165ยฐF.  Store in an airtight container in the refrigerator for 5 days.  

Serving Suggestions

These Greek-inspired turkey meatballs are versatile and can be served in a variety of ways:

  • Over Greek Yogurt Sauce: Serve the meatballs over a bed of zesty Greek yogurt sauce, accompanied by fresh arugula salad tossed in a light lemon vinaigrette.
  • With Pita Bread: Pair the meatballs with warm pita bread, hummus, and a side of roasted vegetables for a heartier meal.
  • In Pasta Dishes: Add the meatballs to your favorite pasta dish or grain bowl for an extra protein boost.
  • Low Carb Option: Serve the meatballs over sautรฉed spaghetti squash for a low-carb alternative.
Jump to Recipe

Unique Elements

What sets this recipe apart are the unique elements that blend traditional Greek flavors with a modern twist:

  • Protein Boost:  Talk about high protein.  Five of these meatballs provide 39g protein and 9 grams of fiber!  
  • Healthy Lentils: The addition of lentils, whether brown, red, or green, not only adds a hearty texture but also boosts the nutritional value of the meatballs. The added fiber will also help maintain blood sugar if you enjoy these with pasta.
  • Chopped Arugula: Incorporating arugula into the meatballs introduces a peppery flavor that complements the richness of the ground turkey and feta.
  • Pulse in Food Processor: Using a food processor to mix the ingredients ensures a well-combined mixture, making it easier to form consistent meatballs.
  • Versatile Serving Options: From pita bread to Greek yogurt sauce, these meatballs can be adapted to suit various dishes and preferences.

This is such a delicious recipe, I hope you make it.  And if you do, please let me know! You may also like our original family favorite meatball recipe.

Mediterranean Turkey Lentil Meatballs

Prep Time 5 minutes
Cook Time 45 minutes
Total Time 50 minutes
Servings: 7
Cuisine: Mediterranean
Calories: 360

Ingredients
  

  • 2 pounds 98% lean ground turkey
  • 1 cup lentils cooked
  • 1/4 cup gluten free breadcrumbs
  • 1 each egg
  • 2 oz feta cheese
  • 1 cup arugula chopped
  • 1.5 tsp salt
  • 1/2 tsp pepper
  • 2 cloves garlic mashed
  • .5 tsp garlic powder

Method
 

  1. Combine all ingredients in a large bowl.
  2. Use a small cookie scoop to portion out meatballs. I usually slightly overfill a 1 oz scoop and get about 35 meatballs.

Nutrition

Serving: 5meatballsCalories: 360kcalCarbohydrates: 20gProtein: 35gFat: 16gSaturated Fat: 6gPolyunsaturated Fat: 4gMonounsaturated Fat: 5gTrans Fat: 0.1gCholesterol: 114mgSodium: 822mgPotassium: 569mgFiber: 9gSugar: 1gVitamin A: 260IUVitamin C: 2mgCalcium: 150mgIron: 4mg

Tried this recipe?

Let us know how it was!

Gluten & Dairy Free Cranberry Coconut Bars Recipe

Autumn is nearly upon us, and what better way to celebrate than with a treat that can double as an afternoon snack or just something to enjoy with a cup of tea? These would also be cute to serve at holiday parties wrapped in parchment paper. They’re just the thing you need when you’re craving something sweet but still want to stick to your gluten free diet. The first time I made these I was plesantly surprised with the flavor and texture.  They’re a softer version of a granola bar and remind me of my moms famous chocolate almond oaties.  (THE BEST cookie ever!) Also good are these 3 ingredient banana cookies that can double as breakfast. You’re welcome!

These are the perfect treat to add to your cookie platter to accomodate your GF guests this holiday season.  They can also be made in one bowl with a spatula.  No need to pull out your mixer and paddle attachment. Careful… these may easily become your favorite dessert for this time of year.  

Jump to Recipe

Ingredients and substitutions:

  • almond milk or milk of choice.  Coconut milk would be a great option.
  • brown sugar – You could use coconut sugar or any other dry sugar like white sugar.  If you use maple syrup, agave or honey the mixture may become too wet.  
  • ground flax seed – chia seeds work well here too. The flax helps to bind the recipe, similar to eggs. Check out this flax egg recipe for heart healthy or vegan cooking.
  • coconut oil – any neutral oil will work for this.  Avocado oil, safflower oil or vegetable oil all work well.   
  • vanilla extract
  • very ripe bananas – pumpkin puree would be good here, but make sure you like pumpkin flavor!
  • dried cranberries – cranberries without added sugar are TART, so be ware of what you buy and what you have on hand. In this case, I like that they balance the sweetness from the coconut.
  • rolled oats – you can use instant oats instead.  I do not recommend using steel cut oats, they will be too firm.  
  • unsweetened coconut flakes
  • cinnamon
  • gluten-free flour blend – I like the King Arthur gf flour blend.  It can be used as a 1:1 substitute for your AP flour.  If you don’t have an intolerance, you can use regular flour.
  • kosher salt or sea salt 

Optional mix ins:  walnuts, orange zest, white chocolate chips, dark chocolate chips, mini marshmallows or raisins.  

Why You’ll Love These Cranberry Bars

These bars are the perfect balance of sweet and tart, thanks to the dried cranberries and the subtle sweetness of coconut. I like to cut them into 16 squares so I can have two (which is a full serving) or just one as a quick snack to limit macros.

Jump to Recipe

Step-by-Step Instructions

Step 1: Prep Your Baking Pan and Oven

Preheat your oven to 350ยฐF (175ยฐC). Line an 8×8 inch baking pan with parchment paper, leaving an overhang for easy removal later.

Step 2: Prepare Flax Seed Mixture

In a small bowl, mix 2 tablespoons of ground flax seed with 6 tablespoons of water. Set aside for 5 minutes to thicken.

Step 3: Combine Wet Ingredients

In a large bowl, mash the very ripe bananas with a fork. Add the melted coconut oil, almond milk, brown sugar, and vanilla extract. Mix well until all the ingredients are combined.

Step 4: Mix Dry Ingredients

In a separate bowl, combine the gluten-free flour blend, baking powder, cinnamon, and kosher salt.

Step 5: Combine Wet and Dry Ingredients

Gradually add the dry ingredients to the wet ingredients, mixing until just combined.

Step 6: Fold in Oats, Coconut, and Cranberries

Fold in the unsweetened coconut, dried cranberries, and rolled oats. The batter should be thick and well mixed.

Step 7: Bake

Spread the batter evenly into the prepared baking pan. Bake for 30-40 minutes, or until the top is golden brown and a toothpick inserted into the center comes out clean.

Step 8: Cool and Slice

Allow the bars to cool in the pan for 10 minutes, then transfer them to a wire rack to cool completely. Once cooled, slice into bars and enjoy!

Optional:

For an extra touch, drizzle with melted white chocolate and then wrap in parchment with bakers twine.

Tips for the Perfect Cranberry Coconut Bars

Use High-Quality Ingredients

For the best results, use high-quality, certified gluten-free ingredients, especially if you have gluten intolerances!  King Arthur and Bob’s Red Mill both have a variety of options.  

Customize Your Bars

Feel free to add in some orange zest or fresh cranberries for extra flavor. 

Storage

Store your gluten-free cranberry coconut bars in an airtight container at room temperature for up to a week. Once cooled, I place them in a gallon zip lock bag and then freeze for up to 3 months for quick lunch additions or snacks.

Tips for Macros

This recipe makes 8 servings. I prefer to cut them into 16 squares, so I can enjoy half quickly.

With 29g carb, 13g fat and 3g each protein and fiber these are satisfying, nutrient dense and made of whole foods to fuel your activity!

Join my new 21 DAY reset!

Tired of endless diets and no results? This reset is for you if you want to gain energy, cut the cravings, build strength, decrease bloat and feel amazing going into the holiday season!

If you loved this recipe, be sure to check out my other gluten-free baking recipes (like my gluten free blondies) and sign up for our newsletter to get new recipes delivered straight to your inbox.

Happy baking!

Cranberry Bar – Gluten Free

Prep Time 10 minutes
Cook Time 40 minutes
Total Time 50 minutes
Servings: 8
Course: Dessert
Cuisine: American
Calories: 240

Ingredients
  

  • 1/4 cup coconut milk or milk of choice
  • 1/2 cup brown sugar
  • 1 tbsp ground flax seed
  • 1/4 cup coconut oil melted
  • 1 tsp vanilla extract
  • 2 each rips bananas
  • 1/3 cup cranberries dried
  • 1.5 cups rolled oats
  • 1/2 cup unsweetened coconut
  • 1/2 tsp cinnamon
  • 1/4 cup gluten free flour mix
  • 1/2 tsp baking powder
  • 1/8 tsp kosher salt

Method
 

  1. Preheat oven to 350F. Line 8 inch square pan with parchment and set aside.
  2. Peel and mash bananas in large bowl. Add sugar, flax, milk, oil and vanilla. Whisk together.
  3. In another bowl, mix your dry ingredients. Add the wet mixture to the dry mixture and stir well. Pour batter into pan and smooth out with a spoon or hands and press it down firmly.
  4. Bake at 350ยฐF for 40 minutes until the edges begin to golden and it is slightly firm to touch. Allow to cool in pan for 10 minutes before transferring to a wire rack and cooling completely. Slice into 8-16 bars.

Nutrition

Serving: 8gCalories: 240kcalCarbohydrates: 29gProtein: 3gFat: 13gSaturated Fat: 10gPolyunsaturated Fat: 1gMonounsaturated Fat: 1gSodium: 71mgPotassium: 134mgFiber: 3gSugar: 15gVitamin A: 3IUVitamin C: 1mgCalcium: 43mgIron: 1mg

Tried this recipe?

Let us know how it was!

About Me

I’m Melanie.

I’m a chef, registered dietitian, foodie, wife and mom.
If you’re looking for quick and healthy meal inspiration that serves YOU and your family well, then you’ve come to the right place!

Melanie Marcus Selfie

Healthier Recipe for chewy Gluten-Free Blondies

No butter, no eggs, xanthan gum

Full disclosure.  This recipe is still a treat, AND it has a good amount of sugar in it.  That said, these have a lot of redeeming qualities like protein, fiber and healthy fats because we’re using almond butter, almond flour and white beans  to keep it vegan if that’s a concern for you. I know, I said beans.  But stick with me, no one will know they are in there.  

So… if you’re craving a sweet treat but want to keep it healthy-ish these healthier blondies will satisfy your sweet tooth while keeping your macros on track. These blondies are vegan, vegetarian, and gluten-free, making them perfect for anyone with dietary restrictions or preferences. Plus, they’re made from simple ingredients that you probably already have in your pantry.

Jump to Recipe

Ingredients

Hereโ€™s what youโ€™ll need to make these delicious and healthier blondies:

  • 1 can white beans, drained and rinsed very well
  • 1 tsp baking powder
  • 1/4 tsp each of salt and baking soda
  • 3/4 cup granulated sugar (you can also use coconut sugar, or light brown sugar for a distinct taste)
  • 1/2 cup almond flour or almond meal
  • 1/4 cup mashed banana
  • 1/4 cup nut butter (like almond butter or peanut butter)
  • 1/4 cup chocolate chips (or butterscotch chips if you prefer)
  • 1 tsp vanilla extract
Jump to Recipe

Instructions

Follow these steps for the best results:

Preheat Your Oven

  1. Preheat your oven to 350 degrees Fahrenheit. Grease an 8ร—8 baking pan or line it with parchment paper to prevent sticking.

Blend Ingredients

  1. In a good food processor, blend all the ingredients (except the chocolate chips) until very smooth. If you don’t have a food processor, an electric mixer and a large mixing bowl will work too.  Just ensure to blend the beans very well.

Incorporate Chocolate Chips

  1. Mix the chocolate chips into the blondie batter using a wooden spoon. You can also add some chocolate chips on top for extra gooeyness.

Bake

  1. Scoop the batter into the prepared baking pan.  I used a square baking tin. Bake for 30 minutes. The blondies will look a little undercooked when you take them out, but they will firm up as they cool to a golden brown once they reach room temperature.

Cool Down

  1. Allow the blondies to cool in the baking pan.  Once cooled, you can cut them into squares. Store the blondies in an airtight container to keep them fresh.

Additional Tips

Gluten-Free Options

 For those avoiding gluten, ensure all your dry ingredients, like almond flour, are certified gluten-free. Bob’s Red Mill and other high-quality brands offer great options.  These are made with naturally gluten-free ingredients, but you’ll want to be sure they’re certified if you have celiac disease.

Sweetener Alternatives

If youโ€™re looking to reduce the sugar content, consider substituting granulated sugar with monk fruit sugar. It’s a natural sugar substitute that can be exchanged 1:1 for regular sugar in baking.  It’s a little pricey though, but worth it if you need to keep refined sugars down.  

I don’t recommend maple syrup or honey for this recipe because the blondies won’t firm up as needed with it.  The structure of the solid sugar is what helps create the soft but stable final texture.  

Oil Substitutes

   In this recipes we’re using mashed banana instead of melted butter, vegan butter, or even coconut oil.

Join my new 21 DAY reset!

Tired of endless diets and no results? This reset is for you if you want to gain energy, cut the cravings, build strength, decrease bloat and feel amazing going into the holiday season!

Why you’ll love these Healthier Blondies?

Nutritional Benefits

 Using ingredients like white beans and almond flour not only makes these treats gluten-free but also boosts their protein and fiber content.

Versatility

 Whether you’re a seasoned baker or it’s your first time, this easy recipe allows for plenty of customization. Add in butterscotch chips, semi-sweet chocolate chips, walnuts, or even white chocolate chips for different variations.

Storage

This gluten free blondie recipe stores very well.  Once they’re cut, place them in an airtight container and keep in the freezer for snacks as needed.  This helps with portion control and is a good idea to keep the high quality of these bars!

If you try these gluten free blondies- and I hope you do – tag me on social media and use the hashtag #MissNutritiousEats so I can see your creations!

Making these almond flour blondies is not just easy; it’s a really tasty way to enjoy a dessert bar without compromising your dietary needs. 

Gluten Free Blondies

Servings: 30
Course: Dessert, Snack
Calories: 52

Ingredients
  

  • 1 can white beans drained and rinsed very well
  • 1 tsp baking powder
  • 1/4 tsp baking soda
  • 3/4 cup granulated sugar you can also use coconut sugar, or light brown sugar for a distinct taste
  • 1/2 cup almond flour
  • 1/4 cup mashed banana
  • 1/4 cup nut butter like almond butter or peanut butter
  • 1/4 cup chocolate chips or butterscotch chips if you prefer
  • 1 tsp vanilla extract
  • 1/4 tsp salt

Method
 

  1. Preheat your oven to 350 degrees Fahrenheit. Grease an 8ร—8 baking pan or line it with parchment paper to prevent sticking.
  2. In a good food processor, blend all the ingredients (except the chocolate chips) until very smooth. If you don’t have a food processor, an electric mixer and a large mixing bowl will work too. Just ensure to blend the beans very well.
  3. Mix the chocolate chips into the blondie batter using a wooden spoon. You can also add some chocolate chips on top for extra gooeyness.
  4. Scoop the batter into the prepared baking pan. I used a square baking tin. Bake for 30 minutes. The blondies will look a little undercooked when you take them out, but they will firm up as they cool to a golden brown once they reach room temperature.
  5. Allow the blondies to cool in the baking pan. Once cooled, you can cut them into squares. Store the blondies in an airtight container to keep them fresh.

Nutrition

Calories: 52kcalCarbohydrates: 7gProtein: 1gFat: 3gSaturated Fat: 0.4gPolyunsaturated Fat: 0.3gMonounsaturated Fat: 1gSodium: 43mgPotassium: 27mgFiber: 0.5gSugar: 6gVitamin A: 1IUVitamin C: 0.2mgCalcium: 20mgIron: 0.2mg

Tried this recipe?

Let us know how it was!

About Me

I’m Melanie.

I’m a chef, registered dietitian, foodie, wife and mom.
If you’re looking for quick and healthy meal inspiration that serves YOU and your family well, then you’ve come to the right place!

Melanie Marcus Selfie

Ultimate no-bake brownie batter energy bites

Craving something sweet but want to stick to your health goals? Meet your new favorite snackโ€”Brownie Batter Energy Bites. Packed with wholesome ingredients like medjool dates, almond butter, and cocoa powder, these little bites are a delicious and nutritious way to satisfy your chocolate cravings without refined sugar. Perfect as an afternoon snack or a mid-day energy boost, theyโ€™re easy to make and even easier to love. I came across these brownie bites in the Dole.com recipe center and have been making them regularly to satisfy my after dinner chocolate craving.  

Don’t you just love when you find a treat that works with your health goals?

Why Brownie Batter Energy Bites?

These chocolate brownie energy balls are a fantastic alternative to traditional sweets. They offer the rich, fudgy decadent brownie flavor you adore without sacrificing your commitment to healthy eating. Plus, with ingredients like gluten-free oat flour and walnuts, youโ€™re not only treating your taste buds but also nurturing your mind with healthy fats. 

Health Benefits

  • Healthy Fats: Thanks to almond butter and walnuts, these bites help to keep your energy level steady throughout the day.
  • Natural Sweetness: Medjool dates and maple syrup provide a natural sweetness, avoiding sugar alcohols.
  • Fiber and Protein: The inclusion of oats and walnuts makes these bites a balanced source of macros which help maintain energy levels.
  • Vegan
  • Gluten Free
  • Low Sodium

Ingredients Youโ€™ll Need

  • 1 cup pitted dates
  • 1 Banana, peeled
  • ยฝ cup gluten free oat flour
  • โ…“ cup chopped walnuts
  • โ…“ cup unsweetened cocoa powder
  • 3 tablespoons almond butter
  • 2 tablespoons maple syrup
  • โ…› teaspoon coarse sea salt

Step-by-Step Preparation

  1. Blend the Base: Start by lining a rimmed baking pan with parchment paper. Pulse the pitted dates in a food processor until small pieces remain. Add the banana, oat flour, walnuts, cocoa powder, almond butter, and maple syrup. Pulse until smooth, occasionally scraping down the bowl. Transfer the mixture to a medium bowl and freeze for 20 minutes until firm.
  2. Shape the Bites: Using two small spoons, scoop the mixture into 16 (1ยพ-inch) mounds on the prepared pan. Roll into balls and sprinkle with sea salt. Refrigerate for 1 hour or until firm. 

Creative Variations

Feel free to experiment with this recipe! Swap out almond butter for cashew butter or try adding a tablespoon of chia seeds for an extra nutritional boost. For a touch of indulgence, consider mixing in dark chocolate chips or rolling the energy balls in coconut flakes for a bit of texture. If you want to add richness with a boost of energy, try adding 1 tsp espresso powder to your coco powder before the dough forms.  

I tend to make these with a mini cookie scoop at half size, so I can have more than one as a tasty treat.

Storage Tips

Store your brownie batter energy bites in an airtight container or stasher bags to keep them fresh. These energy bites freeze well too, making them perfect for batch prep and quick go snacks throughout the week.

Let me know if you try this healthy treat!  I hope you do.  

Brownie Batter Energy Bites

Prep Time 20 minutes
Cool Time 1 hour
Total Time 1 hour 20 minutes
Servings: 16
Course: Dessert
Cuisine: American
Calories: 92

Ingredients
  

  • 1 cup pitted dates
  • 1 Banana peeled
  • ยฝ cup gluten free oat flour
  • โ…“ cup chopped walnuts
  • โ…“ cup unsweetened cocoa powder
  • 3 tablespoons almond butter
  • 2 tablespoons maple syrup
  • โ…› teaspoon coarse sea salt

Method
 

  1. ย Lineย a rimmed baking pan with parchment paper. Pulse dates in a food processor until small pieces remain. Add banana, flour, walnuts, cocoa powder, almond butter and syrup; pulse until smooth, scraping down bowl occasionally. Transfer date mixture to a medium bowl; freeze 20 minutes or until firm. Makes about 2 cups.
  2. Usingย 2 small spoons, dropย date mixture into 16 (1ยพ-inch) mounds on prepared pan; roll mounds into balls. Sprinkle balls with salt; refrigerate 1 hour or until firm. Makes 16 energy bites.

Nutrition

Serving: 1BiteCalories: 92kcalCarbohydrates: 15gProtein: 2gFat: 4gSaturated Fat: 0.5gPolyunsaturated Fat: 2gMonounsaturated Fat: 1gSodium: 20mgPotassium: 170mgFiber: 2gSugar: 9gVitamin A: 19IUVitamin C: 1mgCalcium: 26mgIron: 1mg

Notes

I like to make these half size so I can have more than one bite size brownie as a snack.
ย 
Store in the freezer for a cool treat!

Tried this recipe?

Let us know how it was!

The Absolute Best Zucchini Lasagna Recipe (low carb)

I can’t remember a summer where we didn’t have zucchini lasagna on the menu. Whether it was a big family gathering at the lake, or a quiet dinner on the back porch, this veggie-packed twist on traditional lasagna is a summer comfort food not to be missed. ย Trust me :). It’a a staple summer zucchini recipe.

Jump to Recipe

It’s hard to resist layers of gooey cheese and rich meat sauce but summer months aren’t conducive for such a heavy dish. So if you’re looking to keep things on the lighter side, this simple zucchini lasagna recipe is a great option. It combines fresh garden zucchini with extra lean ground turkey for a low-carb take on traditional lasagna. The best part, is that I don’t have to spend hours in the kitchen.  Basically just brown some turkey to make a bolognese sauce of sorts and then layer up with slices of zucchini and layers of cheese.  It’s perfection.

Ingredients and substitutions:

  • Zucchini:  You just wouldn’t have this dish without it!  Though you could substitute yellow squash.  
  • Extra lean ground turkey:  Certainly use ground chicken, ground beef or any other ground meat that you have on hand.  
  • Raoโ€™s marinara sauce:  I insist on Rao’s if you want a delicious outcome with the least effort. Feel free to substitute with your favorite tomato sauce.
  • Mozzarella cheese:  I use part skim mozzarella cheese
  • Pesto:  You could omit, but I think this is the secret ingredient.  I love using Costco’s Basil Pesto.  It’s the best tasting pre-made pesto I’ve tried.  
  • Olive oil: In a pinch you could use another neutral oil.  
  • Salt and pepper to taste
  • Fresh basil leaves for garnish 
  • Optional:  red pepper flakes, italian seasoning, other fresh herbs of choice
Jump to Recipe

Instructions:

  1. Prepare the Zucchini:Start by washing your zucchinis. Using a mandoline slicer or a sharp knife, slice them into thin strips, about 1/4-1/2 inch thick. Take care to remove large seeded areas.  
  2. Preheat the Oven:Preheat your oven to 350ยฐF.
  3. Cook the Ground Turkey:Heat olive oil in a large skillet over medium heat. Add the ground turkey and cook until browned, breaking it apart with a spatula. Once cooked, stir in the tomato sauce. Let the sauce simmer for a few minutes. If you prefer a richer flavor, you can mix in a bit of tomato paste. 
  4. Assemble the Lasagna:Start by spreading a thin layer of tomato sauce at the bottom of the dish. Place a single layer of zucchini slices on top. Be sure the zucchini strips are close together but not overlapping too much. Sprinkle a layer of mozzarella cheese and half of the pesto.  Repeat the layers, ending with a layer of zucchini and a sprinkle of mozzarella cheese on top.
  5. Bake the Lasagna:Cover the baking dish with aluminum foil to prevent the top from browning too quickly. Bake for 30 minutes. After 30 minutes, remove the foil and bake for an additional 15-20 minutes, or until the top is golden brown and bubbly.
  6. Let it Rest:Allow the lasagna to rest for about 10 minutes before serving. This helps the layers set and makes it easier to cut into squares without a watery mess.
  7. Garnish and Serve:Garnish with fresh basil leaves and a sprinkle of additional Parmesan cheese if desired. Serve warm and enjoy!
Jump to Recipe

Tips for Perfect Zucchini Lasagna:

  • Preventing Watery Lasagna: To avoid excess moisture, ensure you have removed as much water as possible from the zucchini slices before assembling the lasagna. If you have any extra liquid on the bottom of the pan, you can drain it off before serving.
  • Storing Leftovers: Store any leftover zucchini lasagna in an airtight container in the refrigerator for up to 3 days. Itโ€™s even better the next day, as the flavors have more time to meld together. It also freezes really well so it’s a great way to meal prep for another night.
  • Adjusting for Dietary Needs: This recipe is a low-carb zucchini lasagna, but you can customize it with different kinds of cheese or add extra veggies to suit your taste preferences. For a different twist, try incorporating some cooked ground chicken or Italian sausage.
  • โ€‹Easy Clean Up:  I highly recommend cooking this off on a baking sheet to prevent drips and spills in the oven.

Join my new 21 DAY reset!

Tired of endless diets and no results? This reset is for you if you want to gain energy, cut the cravings, build strength, decrease bloat and feel amazing going into the holiday season!

FASTer Way Friends

Make this recipe on a Sunday for meal prep to take you through both low carb and regular macro days.  Serve with whole grain or chickpea pasta noodles to get your carbs in.  Or serve with Miracle noodles for lower carbs.  With only 9g carbs this qualifies as a keto lasagna for sure.  

This zucchini lasagna is not only a healthier alternative to traditional lasagna but also a versatile and satisfying dish that will earn rave reviews from your family. Enjoy this comforting meal without the extra carbs, and savor the fresh flavors of garden zucchini and lean ground turkey.

Zucchini Lasagna

This is a family favorite that can fit into any meal plan.
Prep Time 10 minutes
Cook Time 50 minutes
Total Time 1 hour
Servings: 6
Course: Main Course
Cuisine: American, Italian
Calories: 368

Ingredients
  

  • 1 jar Raos tomato sauce
  • 1 zucchini large
  • 12 oz mozzarella cheese shredded
  • 16 oz extra lean ground turkey
  • 2 tsp olive oil
  • Salt and pepper to taste
  • 1/4 cup basil pesto

Equipment

  • 9×14 baking pan

Method
 

  1. Cut zucchini into 1/4 inch planks
  2. Cook ground turkey with olive oil until cooked through. Season with salt and pepper to taste.
  3. Add tomato sauce and cook until heated through
  4. Layer tomato mixture, cheese, pesto and zucchini in pan, ending with cheese.
  5. Bake at 350F for 50 minutes, uncovering for last 5 minutes to get color on top.

Nutrition

Calories: 368kcalCarbohydrates: 9gProtein: 29gFat: 25gSaturated Fat: 10gPolyunsaturated Fat: 3gMonounsaturated Fat: 7gTrans Fat: 0.1gCholesterol: 102mgSodium: 1044mgPotassium: 626mgFiber: 2gSugar: 6gVitamin A: 1203IUVitamin C: 14mgCalcium: 340mgIron: 2mg

Notes

Zucchini lasagna is one of those recipes that I look forward to all year long.ย  I enjoy with miracle noodle on low carb days or some brown rice pasta on regular macro days.ย  The best part is that I can throw it together, it freezes well and my whole family loves it.ย ย 
ย 
ย 

Tried this recipe?

Let us know how it was!

About Me

I’m Melanie.

I’m a chef, registered dietitian, foodie, wife and mom.
If you’re looking for quick and healthy meal inspiration that serves YOU and your family well, then you’ve come to the right place!

Melanie Marcus Selfie

How to make gluten free salmon cakes (recipe)

When I shared this quick throw together recipe on my stories- ya’ll loved it!  It was born out of using up salmon that I cooked up from the weekend that needed new life.  But you can use canned and it will come out equally as good!  (This salmon salad is also delicious!) So if you’re looking for a delicious and easy weeknight dinner thatโ€™s both healthy and satisfying, these salmon cakes that happen to be gluten free are the perfect answer.

I like to make these because it’s one of the ways my husband actually enjoys eating salmon.  He loves crab cakes, and these are very similar.  

Jump to Recipe

Ingredients and substitutions

Before we get started, let’s gather all the ingredients:

  • salmon: Use what you have.  Wild-caught salmon like sockeye salmon or leftover Atlantic salmon work just as well as a couple of cans of salmon.
  • olive oil: Any neutral oil will do.  
  • onion: yellow or white onion works well. You can use pre chopped or even frozen.  
  • red bell pepper:  Any bell pepper works for this one.  I recommend yellow or orange.  Green bell peppers may be bitter.
  • garlic cloves:  Use fresh, frozen or jarred.  I like frozen for this one.
  • almond flour:  You could use regular breadcrumbs or gluten free breadcrumbs instead.
  • eggs: Egg whites could be used.  I do not recommend flax eggs for this purpose.
  • mayonnaise: Sour cream could be used in a pinch.
  • Dijon mustard:
  • parsley: fresh or dried will work, feel free to use green onions or chives if you have them.
  • dill: fresh or dried will work.  
  • Kosher salt and black pepper to taste
Jump to Recipe

Step-by-Step Guide to Making Gluten-Free Salmon Cakes

Follow these simple steps to make the best gluten-free salmon cakes:

1. Prepare the Salmon Mixture

In a large mixing bowl, combine the flaked salmon, diced onion, red bell pepper, minced garlic, almond flour, beaten eggs, mayonnaise, Dijon mustard, parsley, dill, salt, and pepper. Mix until well combined.

I find that using my alligator chopper really helps to make this meal come together very quickly.

Tip: If the mixture feels too wet to form into patties, add a little bit of almond flour to help bind it together.

2. Form the Patties

Form the salmon mixture into 8 patties, depending on your desired size. These easy salmon patties should hold together well but may need a gentle touch.

3. Cook the Salmon Cakes

Heat 3 tablespoons of olive oil in a large skillet (I like using my cast-iron skillet) over medium heat. Once the oil is hot, add the salmon patties in batches. Cook each patty for about 4-5 minutes on each side, or until they turn a beautiful golden brown and are cooked through.

Alternative cooking methods:

  • Air Fryer: Preheat your air fryer to 375ยฐF. Place the patties on a parchment-lined baking sheet and air fry for 3-4 minutes on each side.
  • Oven: Bake the salmon cakes on a parchment paper-lined baking sheet at 375ยฐF for 15-20 minutes, flipping halfway through.

4. Serve and Enjoy

Serve your gluten-free salmon cakes with a dollop of tartar sauce or a squeeze of fresh lemon juice. These healthy salmon patties pair really well with a summer corn salad, mixed greens salad, or coleslaw.

Join my new 21 DAY reset!

Tired of endless diets and no results? This reset is for you if you want to gain energy, cut the cravings, build strength, decrease bloat and feel amazing going into the holiday season!

Storage and Meal Prep Tips

  • Leftovers: Store any leftover salmon cakes in an airtight container in the refrigerator for up to 3 days. Reheat gently in a skillet or oven for the best flavor and texture.
  • Freezing: Freeze uncooked patties on a parchment-lined baking sheet. Once frozen, transfer them to a bpa-free freezer bag. They can be cooked directly from frozen; just add a few extra minutes to the cooking time.

Why You’ll Love This Recipe

  • Healthy and Nutritious: Packed with omega-3 fatty acids, these patties are a great addition to a gluten-free diet.
  • Versatile: This recipe can be made with wild salmon, canned salmon, or even farm-raised salmon. Just choose your favorite kind of salmon for the best results.
  • Easy: With minimal prep time and cooking time, these salmon cakes are perfect for an easy weeknight dinner or meal prep sessions.

FASTer Way Clients

Savet this recipe for a low carb or regular macro night. It’s higher in healthy fats and protein to help you meet your macro goals easily.

Whether you’re aiming to impress, or just trying to get a weeknight meal on the table, these salmon cakes are a surefire way to elevate your dinner table. 

Ready to get started? Follow my easy recipe card below and don’t forget to rate the recipe with a star rating!

Note: Some links in this blog may be affiliate links. I earn a small commission if you make a purchase through them, at no extra cost to you.

Salmon Cakes

If you like crab cakes, this one is for you!
Prep Time 10 minutes
Cook Time 10 minutes
Total Time 20 minutes
Servings: 4
Course: Main Course
Cuisine: American
Calories: 436

Ingredients
  

  • 16 oz cooked salmon
  • 3 tablespoons olive oil
  • 1 medium onion finely diced
  • 1 red bell pepper finely diced
  • 1 to 2 garlic cloves minced
  • ยฝ cup almond flour
  • 2 large eggs beaten
  • 2 tablespoons mayonnaise
  • 1 tablespoon Dijon mustard
  • โ…“ cup fresh parsley finely chopped
  • Kosher salt and black pepper to taste

Method
 

  1. In a large mixing bowl, combine the flaked salmon, diced onion, red bell pepper, minced garlic, almond flour, beaten eggs, mayonnaise, Dijon mustard, parsley, dill, salt, and pepper. Mix until well combined.
  2. Form the salmon mixture into 8 patties, depending on your desired size. These easy salmon patties should hold together well but may need a gentle touch.
  3. Heat 3 tablespoons of olive oil in a large skillet (I like using my cast-iron skillet) over medium heat. Once the oil is hot, add the salmon patties in batches. Cook each patty for about 4-5 minutes on each side, or until they turn a beautiful golden brown and are cooked through.

Nutrition

Serving: 2pattiesCalories: 436kcalCarbohydrates: 8gProtein: 29gFat: 32gSaturated Fat: 5gPolyunsaturated Fat: 8gMonounsaturated Fat: 12gTrans Fat: 0.02gCholesterol: 147mgSodium: 172mgPotassium: 727mgFiber: 3gSugar: 3gVitamin A: 1525IUVitamin C: 47mgCalcium: 75mgIron: 2mg

Tried this recipe?

Let us know how it was!

About Me

I’m Melanie.

I’m a chef, registered dietitian, foodie, wife and mom.
If you’re looking for quick and healthy meal inspiration that serves YOU and your family well, then you’ve come to the right place!

Melanie Marcus Selfie

Check out this healthy -ish protein rich Egg Salad Recipe

I polled you all in my stories and was interested to learn that 100% of you ate egg salad!  All different kinds of ways too – some simply mashed with avocado, others mash eggs with a bit of mayo, whether for breakfast or for lunch, you all love your egg salad.  And I do too.  

What’s not to love, it holds well, tastes great, and is protein rich – fitting into many eating patterns including low carb, diabetic, keto and of course, for those of us carb cycling in the FASTer Way.  I think there’s a misconception though: That egg salad is unhealthy because most creamy salads are loaded with fat. And lets be honest, a lot of time they are!  But with a few thoughtful swaps, and measurements (don’t eyeball the mayo!) you can create an easy egg salad recipe that has great flavor and will keep you on your health journey.

Jump to Recipe
Jump to Recipe

Why Choose Egg Salad?

Egg salad is an excellent source of protein, thanks to the egg whites and Greek yogurt. It’s also packed with essential vitamins and minerals like B vitamins, vitamin D, and selenium. By substituting mayonnaise with plain Greek yogurt, you reduce the fat content while still achieving that creamy texture we all love. Plus, using lots of fresh herbs and crunchy veggies adds fiber and antioxidants, and most importantly flavor.  

Ingredients and substitutions:

  • Hard-boiled eggs – This is really the star of the show, I think you could substitute with possibly chickpeas or extra firm tofu but would like to test that for you first. What makes this a great no-cook recipe is that you can either boil your own eggs, or purchase them pre-boiled at nearly every grocery store.
  • Plain Greek yogurt – I love full fat Greek yogurt, but use whatever you have. Sour cream, cottage cheese or simply more mayo works here too.  
  • Mayo – I kept this in to hold onto that traditional egg salad flavor.  A little mayo goes a long way for extra flavor and a little creaminess! You can use any of the yogurt substitutions if you want to omit.  
  • Dijon mustard – You can sub any mustard you have on hand, even yellow mustard 
  • Parsley, fresh dill, or chives – if you don’t have fresh use a teaspoon of dried herbs.  
  • Red onion – green onions or fresh chives would work well too.  If you don’t have red onion all together, you can use celery to get a similar crunch.  
  • Capers – these are optional but add a great brininess and pop of bright flavor.
  • Black pepper and kosher salt to taste – sea salt is fine too, I just prefer kosher!
Jump to Recipe
three brown eggs in bowl

Instructions:

  1. Boil Eggs:
  • Place eggs in a large bowl.
  • Fill the bowl with hot water until the eggs are covered.
  • Bring the water to a rolling boil, then reduce the heat and simmer for about 10 minutes to achieve perfect hard-boiled eggs.
  • For an easier method, you can use an Instant Pot or air fryer to make hard-boiled eggs.
  1. Cool the Eggs:
  • Transfer the boiled eggs to an ice bath (a bowl filled with cold water and ice) to cool them quickly.
  • Once cooled, peel the eggs and chop them into small pieces.
  1. Mix the Ingredients:
  • In a separate bowl, combine the chopped eggs, Greek yogurt, Dijon mustard, red onion, and fresh herbs.
  • If using, add capers.
  • Season with fresh cracked black pepper and sea salt to taste.
  1. Serve and Enjoy:
  • Serve your delicious egg salad in romaine lettuce cups for a low-carb option or on slices of whole-grain bread for a more traditional egg salad sandwich.
  • For a nice crunch, add some fresh celery or bell pepper pieces.
  • Store any leftovers in an airtight container in the refrigerator.

Join my new 21 DAY reset!

Tired of endless diets and no results? This reset is for you if you want to gain energy, cut the cravings, build strength, decrease bloat and feel amazing going into the holiday season!

Health Benefits

High Protein Content

Our healthy egg salad recipe is rich in protein, aiding in muscle repair and growth. The combination of eggs and Greek yogurt provides a complete protein source, making it an excellent choice for those looking to increase their protein intake.

Essential Vitamins and Minerals

Eggs are loaded with B vitamins, vitamin D, and selenium, all of which are crucial for maintaining overall health and well-being. These nutrients support energy production, immune function, and bone health.

Heart-Healthy Option

By using Dijon mustard and capers, you add depth of flavor without the need for additional salt. 

Fresh Herbs and Veggies

Incorporating fresh parsley, dill, chives, and crunchy veggies like celery and bell pepper adds fiber and antioxidants. These components promote digestive health and provide a bright, fresh flavor.

how to hard boil eggs pin

Different Ways to Enjoy Egg Salad

Egg salad is incredibly versatile and can be enjoyed in various ways:

  • Lettuce Wraps: Serve in romaine lettuce cups for a low-carb meal.
  • Whole Grain Bread: Create a classic healthy egg salad sandwich using slices of whole-grain bread and a dash of hot sauce.
  • Avocado Toast: Top your favorite avocado toast with a scoop of egg salad for added protein and flavor.

Meal Prep Made Easy

Egg salad is a great way to use up leftover hard-boiled eggs from Easter time or any meal prep session. Store your egg salad in an airtight container in the refrigerator, and it will stay fresh for up to three days. This makes it a convenient option for healthy lunches throughout the week.

With its high protein content and essential vitamins it’s a dish that aligns perfectly with a health-conscious lifestyle. Plus, the variety of ways to serve it ensures that you’ll never get bored.

Love this healthy egg salad recipe? Share your star rating and leave a comment below! For more delicious recipes and healthy eating tips, sign up for my newsletter and follow on social media.

Egg Salad Recipe

Quick and classic egg salad. High in protein too!
Servings: 3
Course: Main Course, Salad
Cuisine: American
Calories: 234

Ingredients
  

  • 6 hard-boiled eggs chopped
  • 2 tbsp plain Greek yogurt I use full fat
  • 2 tbsp mayo
  • 1 tbsp Dijon mustard
  • 2 tbsp parsley dill, or chives
  • 1/4 cup red onion finely chopped
  • 2 tbsp capers optional
  • Fresh cracked black pepper and sea salt optional

Method
 

  1. Combine all ingredients in bowl.
  2. Let sit in fridge 20 minutes before serving.

Nutrition

Calories: 234kcalCarbohydrates: 3gProtein: 14gFat: 18gSaturated Fat: 4gPolyunsaturated Fat: 6gMonounsaturated Fat: 6gTrans Fat: 0.02gCholesterol: 377mgSodium: 244mgPotassium: 184mgFiber: 1gSugar: 2gVitamin A: 755IUVitamin C: 5mgCalcium: 72mgIron: 1mg

Tried this recipe?

Let us know how it was!

About Me

I’m Melanie.

I’m a chef, registered dietitian, foodie, wife and mom.
If you’re looking for quick and healthy meal inspiration that serves YOU and your family well, then you’ve come to the right place!

Melanie Marcus Selfie