Category: Articles

The best healthy Greek yogurt in the supermarket

As a registered dietitian, I am often asked about the best options in the dairy aisle, and when it comes to Greek yogurt, I have a clear favorite: Fage.  Since the first time I tried Fage yogurt, it has been my number one choice. Whether it’s Fage Total, 2%, or fat free – Fage is a true Greek yogurt that you can easily find at any grocery store.

And as much as I love Fage, this is not an ad, and I have not been compensated in any way for this blog.

What makes Greek yogurt such a great choice? 

berry cream dessert

Greek yogurt is a protein-rich dairy product that contains essential nutrients like calcium, vitamin D, complete protein and fatty acids. It also has live active cultures, which can help improve gut health. And for those watching their blood sugar levels, Greek yogurt is often lower in carbs and higher in protein than traditional yogurt, making it a good option for those with lactose intolerance or trying to manage their diabetes.

Fage Total is my go-to brand when I’m in the yogurt aisle. For starters, it has a thick texture that is creamy and satisfying without being overly tart. And unlike some other brands, Fage Total does not contain any added sugar or artificial sweeteners.

What are live active cultures?

Live active cultures are good bacteria that are often found in fermented foods like yogurt, kefir, and sauerkraut. These tiny microorganisms help to break down sugars and carbohydrates in our food, which allows our bodies to absorb more nutrients and digest our food more easily. Plus, these good bacteria work to keep our gut healthy by crowding out the bad bacteria and strengthening our immune system.

You may know these live active cultures as probiotics. Probiotics can help improve digestion, boost your immune system, and even enhance your mood! Make sure to look for Greek yogurt that contains live and active cultures to reap the benefits.

What about the protein content? 

Well, Fage Total packs a whopping 18 grams of protein per serving, while the fat content varies depending on the type of yogurt you choose (full-fat, low-fat, or non-fat). While Fage does offer flavored yogurts, their unflavored varietites have little sugar, coming in at around 7 grams per serving. This is natural milk sugar called lactose.  It’s not added sugar.

strawberry shake

In fact, most Greek yogurt is an excellent source of protein, containing about 17 to 20 grams per serving (This is double your standard yogurt). This makes it a great option for those who are looking to build or maintain muscle mass, as well as for vegetarians who may struggle to get enough protein in their diets.

Cups yogurt parfaits fresh kiwi

The protein in plain Greek yogurt provides all of the amino acids you need to build lean body tissue, AKA muscle.  So if you’ve been strength training or want to tone up, choosing a lean and complete protein like a fat free or 1% fat greek yogurt is a great option.  I regularly include Greek yogurt as part of my meal planning.  Usually it pops in as a snack or treat at the end of the day because if it’s thicker texture.  I love having plain Greek yogurt with mixed fresh or frozen berries, drizzled with a bit of honey and toasted walnuts.  It’s phenomenal

Other nutrients in Greek yogurt

Next up, is calcium. Greek yogurt is rich in this mineral, which is crucial for strong bones and teeth. In fact, just one cup of Greek yogurt contains about 25% of your daily recommended intake of calcium!

Last but not least, Greek yogurt is also a good source of vitamins B12 and B6, which are important for maintaining healthy brain function and producing red blood cells.

​It has simple ingredients

But what I really love about Fage is the ingredient list. They use only simple, whole food ingredients like milk and live active cultures. And for those concerned about sourcing, Fage is made with milk from grass-fed cows and is free from milk protein concentrate. Plus, they offer a plain variety that allows for personal preference and added versatility in recipes.  With such a simple ingredients list, Greek yoghurt is considered a natural whole food and fits within the Faster Way meal plan.  

What does Greek yogurt taste like?

Bowl fruit and yogurt topped

Greek yogurt is thicker and creamier than regular yogurt, with a tangy taste that’s slightly sour and refreshing. It has a distinct flavor that’s hard to describe, but it’s often described as being slightly tart and tangy, with a creamy texture that’s satisfying and filling. It’s similar to sour cream in many ways.  The reason for its unique taste is due to the straining process, which removes much of the liquid whey from the yogurt, leaving behind a concentrated form of protein and flavor. 

How to use traditional Greek yogurt

But don’t just take my word for it! Next time you’re at your local supermarket, give Fage a try and see if it’s your new favorite Greek yogurt too. With options including non-fat, low-fat, and full-fat Greek yogurts, Fage has something for everyone and is a great choice for a healthy snack or addition to breakfast or dessert. Cheers to good gut health and delicious yogurt!

Are there alternatives to Greek yogurt?

If you’re at home and you need Greek yogurt, you can make it by straining a high quality plain yogurt such as Stonyfield Organic through cheese cloth or a mesh strainer for a few hours to remove excess liquid.  If you want another pre-made option, Icelandic yogurt or Icelandic skyr would be suitable, though possibly not as easy to find.  

Greek yogurt for weight loss.

  1. Greek yogurt is packed with protein which is essential for keeping you feeling full and satisfied. A 6-ounce serving of Greek yogurt typically contains around 15 to 20 grams of protein, whereas regular yogurt only contains around 9 grams. This means you’ll be less likely to snack on unhealthy foods throughout the day as your hunger pangs will be kept at bay.
  2. It’s lower in carbohydrates and sugar than other yogurt or dairy products. This is because the whey and lactose are strained from the yogurt during the production process, leaving it with a thicker, creamier texture and less sugar.
  3. Greek yogurt is also lower in calories than other dairy products such as cream cheese or sour cream. One ounce of cream cheese contains around 100 calories, whereas one ounce of Greek yogurt contains only around 20 calories.

When choosing a Fage for weight loss, I consider whether I’m focused on lower carbohydrates or regular macros. Total or 2% fat are appropriate for low carb days while fat free is the go-to for low macro or regular macro days. If you’re wondering more about macros, follow me on Instagram @miss_nutritious_eats and read more here!

These Yogurt Marinated Chicken Skewers come together quickly and are the perfect recipe to use up any plain Greek yogurt that you have in the house!

About Me

I’m Melanie.

I’m a chef, registered dietitian, foodie, wife and mom.
If you’re looking for quick and healthy meal inspiration that serves YOU and your family well, then you’ve come to the right place!

Melanie Marcus Selfie

The 3 types of kitchen towels you need in 2024

One of the most underrated tools for the home cook is the humble kitchen towel. Here are three kitchen towels that you absolutely need. No matter what type of cook you are, from newbie to professional, these towels will make your time in the kitchen so much easier and more enjoyable. 

kitchen cupboard and counter with various dishware

First and foremost, every kitchen needs a large drying towel. This towel should be designated specifically for drying clean dishes, and kept separate from any other towels to prevent cross contamination. I recommend a large size flour sack or cotton towel that has a high absorbency rate. Either a thinner towel or flat weave towels will offer a high absorbency rate and dry quickly.  Choose which feels best to you. This towel will be your best friend for quickly and easily drying dishes after they’ve been washed in the sink or the dishwasher. It’s ok to use this towel to dry hands.  Not only does a dedicated drying towel make clean up a breeze, it also helps prevent water spots on glassware and leaves dishes sparkling clean.  Look for a towel that has a hanging loop so that you can easily hang it up on a hook or cabinet handle for quick access.  I personally like the Williams Sonoma striped towel. 

Next, a smaller general kitchen towel is a must-have.  Terry cloth towels or cotton towels are ideal as they stand up to kitchen tasks and the washing machine well.  These will be your all around utility towel.  It’s perfect for cleaning up spills, wiping down countertops or appliances, holding onto hot pots and pans, and even using as an oven mitt in a pinch. I suggest opting for a cotton towel that’s versatile and can withstand a variety of uses and washing. 

Finally, no kitchen is complete without a small microfiber towel for wiping appliances. These towels are perfect for quickly wiping down your stovetop, fridge, or other appliances without leaving any streaks or residue. Microfiber towels are made of synthetic materials and are known for their ability to attract and trap dirt and grime. They are also incredibly durable and can be machine washed and used repeatedly. 

crop person in cleaning glove in bathroom

The three towels you need:

  1. Standard dish towels – Use to dry clean hands and dishes only.  Because they touch only clean hands and dishes they can be used a couple of times before washing.  Hang on hook near the sink to dry delicate dishes.  These are more decorative and may change with different seasons.  
  2. Utility or bar towels – These are your kitchen workhorse.  These are your basic lightweight cotton towel that you may fold over before grabbing a hot pan.  In addition to doubling as an oven mitt, it’s your best option to hold hot handles, wipe knives and cutting boards. You may use several of them during a cooking session.  They should be washed soon afterwards.  I often keep these tucked into my apron during a cooking sesh.  
  3. Microfiber cloth towels – Remember these are soft fabric, often bright colors and great for wiping appliances.  I have a stack folded under my sink to use for cleaning spills and wiping counters.  

**All kitchen towles should be machine washable.  

When it comes to picking out the best kitchen towels, there are a few things to keep in mind. Look for towels that are made from high quality, durable materials – like organic cotton or Turkish cotton – that can withstand daily use and frequent washing. Also, consider the size and surface area of the towels, as larger towels are great for drying and smaller ones are more versatile for different uses. And of course, don’t forget to choose towels in vibrant colors or with fun patterns to add a pop of personality to your kitchen decor.

A good set of dish towels includes a large drying towel for clean dishes, a smaller general kitchen towel for spills and other uses, and a small microfiber towel for wiping appliances. With these three versatile towels in your kitchen, you’ll be able to tackle any task with ease. Happy cooking!

About Me

I’m Melanie.

I’m a chef, registered dietitian, foodie, wife and mom.
If you’re looking for quick and healthy meal inspiration that serves YOU and your family well, then you’ve come to the right place!

Melanie Marcus Selfie

When to hire a registered dietitian and how much it costs

Are you overwhelmed by the wealth of information available on social media around nutrition, health and various fad diets? It may be time to consider hiring a registered dietitian nutritionist (RDN) who can guide you through the process of creating a healthy lifestyle – that works for you. The Academy of Nutrition and Dietetics confirms that RDNs have earned at least a bachelor’s degree in nutrition and dietetics, followed by completing an accredited internship and passing a national examination. And the truth is, many dietitian’s don’t stop there with their education.  They continue on to get their Masters in Nutrition or complimentary subjects such as communications, psychology and business among others.  

I chose to focus on culinary arts and nutrition because I believe the best way to eat healthy, is to make your food taste good. After all, flavor drives our eating decisions most of the time!

You can read more about me here.  

When is the right time to turn to an RDN

Trying to lose weight or managing health with healthy food choices is a universal struggle that we’ve all experienced at some point. You may have heard that weight loss simply comes down to burning more calories than we consume, but it’s not that simple. Our bodies are complicated machines with individual reactions to food.

photo of a burn fat text on round blue plate

It’s time to consider working with a dietitian if:

  • Postpartum has taken a toll and you want to fee like yourself again
  • Emotional eating has become significant hurdle to overcome. 
  • Genetics and hormones have made it challenging to lose weight.
  • “Quick fix” products and crash diets have not delivered on their claims.
  • You’ve gained and lost the same 20 pounds for years.  
  • You put in the time at the gym but you don’t see any changes.  
  • You’re not sure where to start with a nutrition program that will be effective.  
  • You are at a healthy weight, but you want to feel more toned and build muscle.
  • You want feel energetic as you go through the day!
  • You’ve tried diet plans, cleanses, meal prepping and pills but nothing seems to meet your personal needs.
  • You need a plan that will get you results for the long term!

The key to successful weight loss is patience, consistency, and giving yourself grace. With dedication and willingness to put in the work and make realistic lifestyle changes, anyone can achieve their health goals. TRUST ME.

preparing lemonade with lemon and sprig of rosemary

If you have food allergies, dietary needs, or a specific medical conditions such as heart disease or high cholesterol, it’s always a good idea to seek advice from an RDN. They can advise and develop a nutrition plan tailored to your needs, including creating personalized meal plans, guidance for grocery shopping, and providing nutritional counseling that focuses on habit building to support your health issues.

How do you find the right person for your needs?

If you are not sure where to start looking for an RDN, social media, the academy website, and referrals from your primary doctor can be great options to explore. When you hire an RDN, you can be sure that they have clinical experience and are a credentialed nutrition professional as a result of their training. Dietitian’s are the nutrition experts.  

You may be surprised to know that dietitians work in a variety of industries that include:  

  • Clinical work in the hospital with adults and children that have a variety of disease states
  • Long-term care facilities working with elderly and rehab patients
  • Supporting athletes in sports nutrition
  • Working with shoppers to choose healthy products at the grocery store
  • Writing for your favorite health and food publications
  • Recipe development for food companies
  • Private practice within a variety of spaces including weight management
  • Virtual dietitians can offer a variety of services including group programs
  • And many more…
scrabble pieces on a plate

In addition to their training and experience, RDN’s also stay up-to-date on the latest research and guidelines in nutrition. This means that they can provide accurate and evidence-based advice to help you reach your health goals. They can also work with you to develop personalized meal plans based on your specific dietary needs and preferences.

What to expect when working with me

I work with women who are motivated to build habits to achieve a healthy weight as well as a positive mindset around food.  

After enrolling in the initial six week orientation program, also referred to as a 6-week round, I will learn about your medical history, nutritional needs, and health goals with a new client intake form. Then we talk strategy to support your goals, which may include intermittent fasting, carb cycling, custom macros, workout and meal plans, recipes recommendations and hydration goals.  It’s tailored to your specific medical conditions or stage of life (including pregnancy and post partum)and may include advice on meal planning, food groups, and nutrient-rich diets to ensure a safe and healthy relationship with food. Basically we will create a nutrition plan based on your unique needs so that you can feel stronger, energized and ready to take on whatever comes at you!

When you hire an RDN (like me) you can feel confident knowing you are in the hands of a knowledgeable and experienced professional. You want to ensure you find an RDN who is a good fit for your personality and someone who can help motivate you to create and maintain a healthier lifestyle. Be sure to find someone who you can build a good relationship with, as follow-up visits are critical for long-term success.  

Instagram is a great way to get to know your future dietitian a little better, and learn about their philosophy.  Check out my instagram here!  

While scrolling, beware of fad diets and quick fix solutions. Working with a dietitian will help you steer clear of them and teach you the best way to lead a healthier lifestyle – for good!

How much does it cost to work with a dietitian?

The cost of working with a registered dietitian can vary depending on a number of factors such as location, expertise, and number of sessions.

person counting cash money

On average, the hourly rate for a registered dietitian in the United States is around $100-$200 and generally there is an initial longer consultation with a series of follow ups.  That said, many insurance plans cover the cost of consultations with a registered dietitian, so it’s important to check with your provider to see if these services are covered. In addition, some companies offer their employees access to registered dietitians as part of their wellness programs, so it’s worth checking with your employer to see if this is an option.

I work with clients virtually, the cost of the initial 6-week program is $249, and $99 a month thereafter if they choose to keep working with me.  There’s no doubt about it.  The cost is an investment in your health – and you are well worth it.  As my mom always says, if you have your health – you have everything you need.  

I hope to chat with you soon!

About Me

I’m Melanie.

I’m a chef, registered dietitian, foodie, wife and mom.
If you’re looking for quick and healthy meal inspiration that serves YOU and your family well, then you’ve come to the right place!

Melanie Marcus Selfie

Does the Faster Way to Fat Loss plan actually work?

Hey there, friends! I’m Melanie, a registered dietitian and Faster Way coach, and I am thrilled to share about the amazing Faster Way to Fat Loss program. If you’re looking for a fat loss program that incorporates the latest research in nutrition and fitness AND can fit into your every day life, you’re in the right place!

/yoa

The Faster Way to Fat Loss program is an online program that includes key components like intermittent fasting, carb cycling, low-carb days, whole food nutrition, and daily 30 minute workouts. Developed by Amanda Tress, a personal trainer, and nutrition coach, the program has helped tens of thousands of people achieve great results in terms of weight loss, energy levels, and overall wellness. ***The Faster Way isn’t a fitness program that promises you’ll lose 10 pounds in 2 weeks.  It’s a nutrition program that incorporates fitness to help you build healthful habits for your individual needs.  It helps you navigate those real life struggles of nutrition and wellness in an effective way.  And with my help (your personal coach), you’re sure to be successful no matter your goal.  All you need to do is trust the process.  

The first week

The first week of the program is dedicated to prep, which includes setting macro goals, learning about the different types of whole foods to consume, explore meal plans and recipes while adjusting to your fasting window.  

Once you’re familiar with the program, you’ll jump right into the hiit and weight training workouts during week two. While they are not required, my clients that do participate in workouts see results faster – plus they feel better in other aspects of life too. (Think better mood, regular periods, better sleep).  Rest days are also key to the program, allowing your body to recover and prepare sets the foundation for lean muscle growth. On top of that, the Faster Way App provides beginner workouts as well as advanced workouts you can do from the comfort of your own home, at your own level.  

Join my next round of the FASTer Way

Tired of endless diets and no results? Join the FASTer Way to Fat Loss and see real, sustainable changes in just 6 weeks!

Melanie Marcus FASTer Way to Fat Loss Coach

You will have all of the tools you need for success

  • Daily workouts
  • Intermittent fasting timer
  • Hydration tracker
  • Weekly meal plans and recipes (totally optional – but highly recommend!)
  • Challenge incentives with fun gifts
  • Supplements such as protein and collagen that help you hit your macros
  • Personal coach to answer questions and help you tweak the program for your needs

What I like the most as a dietitian

One of the biggest takeaways from the program is how it helps you with proper eating habits. The intermittent fasting eating window can be challenging at first, but you’ll quickly learn the right foods to eat during this time. And you’ll be amazed at how much food you should actually eat! The program also uses carb cycling, which means some days will be low carb days and others will be regular days. And remember, while research suggests that intermittent fasting eating schedule may work well for many people, it must be tweaked for certain people due to medications, pregnancy or other conditions.  Another reason why having a personal coach is so important.  

Read more about the 28 Reasons Why I Love the Faster Way.

Net carbs are emphasized throughout the program, ensuring you’re eating the right foods at the right time, especially on low carb days. This program isn’t like others where you’ll be depriving yourself of the foods you love the most. Rather, it is about making lifestyle changes consistently for six weeks that will benefit you in the long term.  And this 6-week program is the jumpstart to a lifetime of healthy habits! 

The Faster Way to Fat Loss program is more than just a workout plan. It’s a nutrition and exercise program that helps you change your lifestyle, both in and out of the gym. The monthly fee is an investment in your health.  And it will most likely be less expensive than a gym membership or personal trainer.

I’m now at the three year mark with the Faster Way.  I started just after my son was born and it changed my life! I would suggest it to anyone looking for a new year’s resolution to kick off healthier options in their lives. If you’re serious about your health and fitness goals, this is an excellent program to explore!

My honest review of the Faster Way to Fat Loss program: Hard work is key to carrying out any weight loss program, and in the beginning, it may seem overwhelming. But don’t be discouraged, there is an entire community doing the program with you every single day, whether it’s in your app, on FB, or your personal coach, you’re not alone. With the program’s online component, you’ll feel well-supported throughout your journey. Another great feature that I want to highlight is that members have access to the VIP program, where Amanda and her team offer extra coaching and accountability. And now, everything is centralized in the app.  It’s where you track your macros, enter your favorite foods, find your workouts, save your progress photos, track your hydration and fasting status.  It’s your one stop shop for educational and inspirational videos too.  

Through the FWTFL program, I was able to make a lot of changes that stick with me even today.  I’ve lost the baby weight, and have even started to enjoy strength training days.  I’ve never liked working out, but the at-home workouts are so quick and effective, I actually look forward to doing them.  It’s my “me” time.

If you’re considering making a lifestyle change and need additional support, I’d encourage you to check out the Faster Way program. With the right balance of intermittent fasting, carb cycling, low-carb days, whole food nutrition, gym workouts, and different workouts, it’s the perfect solution to achieving your fitness goals! Make the investment to create the best version of yourself!

My next round of the faster way STARTS HERE!!

Check out a sample FASTer Way meal plan.  

About Me

I’m Melanie.

I’m a chef, registered dietitian, foodie, wife and mom.
If you’re looking for quick and healthy meal inspiration that serves YOU and your family well, then you’ve come to the right place!

Melanie Marcus Selfie

Is it safe to cook frozen ground beef in slow cooker?

Imagine it’s a cold winter day in January and school has closed last minute due to an impending storm. It seems like the perfect day to take a few pounds of meat out of the freezer to make a slow cooker ground beef recipe.  Right? – WRONG!

Can you cook frozen ground beef in the crockpot?  

Today, I’m answering one of the most asked questions about cooking ground meat in the slow cooker – can you put frozen ground beef in the crock pot? Well, the short answer is NO. And let me tell you why you should not cook frozen meat in your slow cooker.

First off, it’s important to understand the concept of the temperature “danger zone.” This is the temperature range between 41-135 degrees Fahrenheit (5-57 degrees Celsius), where bacteria thrive and multiply rapidly. When food is between 70-125 degrees Fahrenheit (21-52 degrees Celsius) bacteria grows fastest. This means that when cooking ground beef, we need to make sure it gets to a safe temperature of above 140 degrees Fahrenheit (60 degrees Celsius) within two hours.

Now, back to the question at hand – can you put frozen ground beef in the crock pot? The answer is no because frozen meat takes too long to reach a safe temperature in a slow cooker. Slow cookers typically have a temperature range of 170-280 degrees Fahrenheit, which is high enough to kill most bacteria. However, the USDA still recommends thawing all foods completely before placing them in a slow cooker.

If you’re in a hurry and need to cook ground meat quickly, an instant pot or pressure cooker is a great way to do it. These appliances cook food at high pressure, which means they can quickly bring frozen meat to a safe temperature without spending too much time in the danger zone.

If you’re determined to use your slow cooker, here’s what you need to do to cook ground meat safely.

First, make sure your meat is fully thawed before putting it in the slow cooker. You can do this by transferring it from the freezer to the refrigerator for 24 hours. 

Once your ground meat is thawed, cook it on your slow cooker’s highest temperature setting for the first hour to ensure that it reaches a safe temperature quickly. Then, you can reduce the heat to the desired level to finish cooking. I found this to be the easiest way to reduce overall cooking time while taking advantage of the slow cooker’s convenience.  

Note that ground turkey follows the same rules as ground beef. Both ground meats should never be cooked frozen in a slow cooker.

So, if you want to cook ground beef or ground turkey in your slow cooker, make sure it’s fully thawed first. Don’t risk making yourself or your family sick by cooking frozen meat in the danger zone. It’s just not worth it!

Recipes to make in the crockpot using ground beef

One of the best things about using a slow cooker for meat is that you don’t have to worry about thawing the meat first. Just throw it in frozen and let the cooking process do its thing.

For cooked beef, you could do something like a shepherd’s pie. Brown the frozen beef in a frying pan first and then add it to the crockpot with some frozen veggies (peas, carrots and corn) and mashed potatoes (which you can make using a potato masher). Cook on low for 5-6 hours, or until the potatoes are tender.

If you’re looking for a quick and easy way to make tacos, try cooking them in the slow cooker with some taco seasoning and a cup of water. Cook on high for 2-3 hours, and then check the internal temperature with a meat thermometer to make sure it’s fully cooked before serving with tortillas, cheese, tomatoes, lettuce and salsa.

For sloppy joes, add thawed raw ground beef to the crockpot with some spaghetti sauce and a little bit of hot water. Cook on low for 5-6 hours and use a wooden spoon to break up any lumps of meat.

If you prefer poultry, try this slow cooker pulled chicken recipe.

​Time saving tip for storing ground beef

You can also use freezer bags to put your meat in if you’re planning to cook it another day. For example, if you like to shop at Costco for bulk purchases such as large quantities of lean meats, divide fresh meat as soon as you get home.  I find that most ground beef recipes call for 1 or two pounds of beef.  So your best bet is to pre portion one pound of meat into zip lock bags for later use. Once meat is in the bag, remove as much air as possible to prevent freezer burn.  Then label and date and store in the fridge for 3-6 months or when you are in need of a quick meal.  It’s a huge time saver!  

When you’re cooking large batches of ground beef in the slow cooker, it’s a good idea to separate it into cooked portions and store them in sandwich bags or an airtight container in the fridge or freezer. This way, you can easily pull out the amount you need for a quick meal without having to thaw an entire batch.

Is ground beef healthy?  

Well, the answer is not a straightforward yes or no, as it depends on various factors including your personal medical history and overall goals.  

Firstly, ground beef carries a lot of calories, which can be a drawback if you’re trying to lose weight. However, it also provides high protein content, which can help keep you fuller for longer and reduce your overall calorie intake.

In addition, the quality of the ground beef plays a huge role in determining whether it’s a good option for weight loss. Lean ground beef, or 95% lean, contains fewer calories and less saturated fat than higher-fat options.

Moreover, how you prepare the ground beef also matters. If you cook it with a lot of oil or butter, you’re adding significant calories that can hinder your weight loss efforts. However, by using a non-stick pan or cooking spray and seasoning with herbs and spices, you can keep the calorie count low.

Another thing to consider is how often you consume ground beef in your diet. Having it in moderation as part of a balanced diet is fine, but if you’re relying on it too much, it can lead to overconsumption of calories and hinder your weight loss goals.

If you do want to incorporate beef into your diet, you may want to track your calorie intake and macros to ensure that you’re not consuming too many calories, regardless of the food source. So, yes, you can eat ground beef and still lose weight, as long as you choose leaner, quality meat, prepare it in a healthy way.  After-all, all foods can fit as part of a balanced diet. If you want to learn more, visit me on Instagram and check out why I love the Faster Way to Fat Loss.

About Me

I’m Melanie.

I’m a chef, registered dietitian, foodie, wife and mom.
If you’re looking for quick and healthy meal inspiration that serves YOU and your family well, then you’ve come to the right place!

Melanie Marcus Selfie

Easily clean the garbage disposal with citrus peels

Have you seen the TikTok lemonade trend? If you’ve tried to make the viral whipped lemonade or just as well known cowboy caviar, you may have excess of lemon or lime peels in your kitchen. (if you haven’t made them check out those links to get the recipes!) Do you wonder if it’s safe to put them down the garbage disposal? The answer may surprise you – yes, you can! It’s actually a great way to reduce food waste and reuse something that would typically just go to the bin. In this post, we’ll talk through why running these peels through the disposal is actually beneficial and how disposing of them properly will keep your sink in tip-top shape. Read on to learn more about citrus peel disposal and make sure everything from the cutting board to the drain runs smoothly!

Why put fruit peels down the disposal?

Putting citrus peels, such as lemon, lime and orange down the garbage disposal helps break them down into smaller pieces for easier processing while making your drain smell good! The citrus oil offer a natural smell to the disposal and can help reduce odors from food scraps that may linger. In addition to cutting unpleasant odors, it’s thought that citrus peels can cut the residue left behind greasy foods, effectively eliminating them. You can use orange peels, lemon rinds, lime peels or grapefruit skins – they all have natural oils with unique scents! Bu-bye bad smell!

4 Steps to run citrus peels down the garbage disposal

  1. When disposing of citrus peels, it’s best to cut them up into smaller pieces. Instead of putting whole lemons down into the blades of the garbage disposal(which won’t go over well), I cut mine into quarters that can easily fit down the drain. This will also help them break down faster and easier.
  2. Run cold water while grinding peels and keep the disposal running for several seconds after all of them have passed through to ensure that they are fully broken down before leaving your drain and going through the rest of your plumbing system.
  3. Turn off the disposal and let hot water run for another 15 seconds.
  4. Always practice safety when using a garbage disposal – never put your hands down into it on a whim and unplug it when not in use. With the right precautions, you can safely and effectively dispose of citrus peels with a garbage disposal!

Pro Tip – as a self proclaimed produce lover, it’s a good idea to remove any fruit stickers. They can easily get caught up in the garbage disposal’s blades resulting in a broken appliance.

What not to put down the garbage disposal

If you’ve never used a garbage disposal before, I want to help you avoid a big problem with this advice. As a general rule non-food items should not go into the disposal. Avoid putting any and all hard materials near the drain. Having kids, I find that small spoons, screws, rocks, stones, rubber bands and other small objects can become problematic!! Overall any hard items can damage the garbage disposal blades and can cause it them to dull or stop moving all together.

  • Small bones – these can dull blades and make an awful grinding noise when the disposal is turned on!
  • Fruit pits – Avoid larger pits from stone fruit such as peach or plumb pits. Smaller pits from apples or lemons will can cause a problem too, especially if a lot of them are tossed in at once. Take care with cherry pits and unpopped popcorn kernels too!
  • Egg shells – They can dull the blade. They can also do you a lot more good when crumbled and put under plants growing outside!
  • Seafood shells – we love eating steamed clams but their shells should go straight into the trash! Small pieces are just as bad as small rocks for your disposal!
  • Fibrous veggies – And stringy vegetables like celery stalks aren’t a great idea for your disposal. Their fibers are so tough that they can cause your garbage disposal to stop running.
  • Potato peels – While vegetable peels are a natural fit for the disposal, large amounts of starchy foods like potato skins and the waste disposal, may congeal and create a thick paste that can create a problem for your garbage disposal unit.

Other helpful tips if something gets stuck down in the disposal

I mentioned earlier that we’ve had a few issues with our disposal, and thankfully we were able to solve them on our own without the help of expert plumbers.

eaten red cherries on a plate
  • First shut off power to the disposal before going near it with your hands. Ours has a switch underneath the sink, but I recommend unplugging it if you can.
  • Next get a flashlight. I’ve used my iPhone flashlight in a pinch but a larger light will be helpful if you have it.
  • Get your significant other, child or friend to hold the light while you push back the plastic flaps to get a better look inside.
  • Use a knife or fork to feel around and try to locate where the item is inside of the disposal before putting your hand it to get it.
  • Protect your hand with a disposable glove before going in remove the item!

If all else fails get the help of expert plumbing services and don’t use your disposal until it can be assessed.

About Me

I’m Melanie.

I’m a chef, registered dietitian, foodie, wife and mom.
If you’re looking for quick and healthy meal inspiration that serves YOU and your family well, then you’ve come to the right place!

Melanie Marcus Selfie

The secret to making viral Cottage Cheese “Protein” Ice Cream

Who doesn’t like ice cream? Traditional ice cream is my favorite dessert. Whether it’s a Carvel ice cream cake for birthdays, or soft serve ice cream on a summer day, I am here for it. Wouldn’t it be better if it helped you reach your health goals? As much as I love a traditional ice cream cone, if I’m honest, eating one daily is probably not going to get me to where I want to be. So when one of my girlfriends called me to ask my thoughts on TikTok’s viral cottage cheese “protein” ice cream, I had to try it! Watch here!

After making it a few times, I have one major takeaway. This recipe can go downhill fast with just one mistake – over freezing. It will make your ice cream so darn hard and icy, you’ll just want to toss it. But don’t worry, I have a few tips to avoid that frustration.

Jump to Recipe

What is cottage cheese ice cream?

It is whipped cottage cheese that is combined with flavor pairings like vanilla and strawberry to make a creamy and delicious treat! The beauty is that you can make it with just about anything, as long as you have cottage cheese. When it is whipped, it takes on the consistency and flavor of softened cream cheese, which makes it a fantastic base for just about any flavor combination you like. It’s such a versatile ingredient and a very simple recipe!

Is cottage cheese ice cream a good source of protein?

One serving of 2% fat cottage cheese is ½ cup or 4 ounces and contains 90 calories, 12 grams of protein, 3 grams of fat, and 350 milligrams of sodium. It’s an excellent source of protein providing the equivalent of three ounces of protein per cup.  

For reference, 1/2 cup of 4% milkfat cottage cheese has 120 calories, 12 grams protein, 5 grams fat, 3.5grams saturated fat and the same 350 milligrams of sodium.

One ounce of protein provides 7 grams of protein, which means a half cup of cottage cheese provides the equivalent of 2 ounces of high quality protein. And if we’re honest, you’ll probably eat about two servings of this dessert for a total of 24 grams of protein.

What type of cottage cheese is best to make ice cream?

You can use any type of cottage cheese, however when you go with a lower fat or fat free version, more ice crystals will form and you’ll have an icier dessert. I’m all about a creamier texture, so I recommend using a full fat cottage cheese to make it as close to the real thing as possible!

If you want to make this dessert with fat free or low fat cottage cheese, I recommend freezing it for less time. Freeze it for 60-90 minutes until its cold, but not frozen solid. It’ll still taste great.

Ingredients to make cottage cheese ice cream.

  1. Creamy base – I recommend using a container of whole milk cottage cheese for the creamiest dessert.
  2. Sweetener – You can use anything from maple syrup and raw honey to protein powder or monk fruit. Use the sweetener of your choice. I’ve made it with vanilla stevia and it had great flavor.
  3. Flavoring and mix ins – The original version I saw on social media used fresh strawberries and graham crackers, but you can use anything you’d like! Experiment with other chopped fruit, powdered peanut butter, chocolate chips, or flavorings such as cake batter or coconut.

In the version below, I added banana because it freezes well, adds a slight sweetness and lightens up the texture.

Jump to Recipe

Flavor combinations to try

  • vanilla extract, maple syrup and crushed walnuts
  • rum extract, fresh diced pineapple and coconut flakes
  • cocoa powder, almonds and mini chocolate chips
  • peanut butter and sliced banana
  • mint extract and dark chocolate shavings
  • cake batter extract and sprinkles
  • crushed graham crackers with diced strawberries
  • blueberries and lemon zest
  • raspberries and white chocolate chips
  • banana and vanilla stevia

You an also use it as a base of a protein bowl, instead of your favorite smoothie, making this a great alternative for breakfast, or an afternoon snack.

If you’re thinking about adding collagen or protein powder for an added protein boost, save it for another time. Cottage cheese is already such a good source of protein, that unless you have very high protein needs, it’s unnecessary. Learn more about macros and importance of protein here.

Equipment needed for cottage cheese ice cream.

In order to make this dessert you need something to whip your cottage cheese. You can achieve a creamy texture with anything from a high-powered blender, a food processor, even a hand-held immersion blender.

After that you just need a few basics like a container mix everything together in, and another to freeze in!

Also, it’s worth mentioning that you don’t need an ice cream maker to try this recipe. If you have one, you could use it to churn your cottage cheese mixture, but it will come out just as well if you put it in the freezer for 60-90 minutes.

How long do you freeze cottage cheese ice cream?

After blending your cottage cheese in a food processor, blender or immersion blender, add your flavorings of choice. You can then freeze a few different ways.

  • Place it back into the original cottage cheese container and freeze for 60-90 minutes until chilled all the way through. The center will likely be soft and creamy.
  • Put into a loaf pan for 60-90 minutes s it can freeze faster. Use an ice cream scoop to serve.
  • You can also spread onto a 1/4 sheet pan and cover with plastic wrap to give it even more surface area to freeze at a faster rate.

Whatever you do – do not let it freeze over night! It will form ice crystals and be very difficult to scoop. After testing several times, I noticed that the ice crystals formed regardless of the fat content. So, my best advice is to freeze for less time, or enjoy as a cold pudding.

Whatever you do – do not let it freeze over night! It will form ice crystals and be very difficult to scoop. After testing several times, I noticed the ice crystals form regardless of the fat content. So, my best advice is to freeze for less time, or enjoy as a cold pudding.

What is a serving of cottage cheese ice cream?

I saw a lot of people on social media making this dessert with 16 ounces (four servings), or two cups of cottage cheese – and it appeared that they were eating the entire batch in one sitting. I would recommend a 1/2 cup serving, just like regular ice cream to limit sodium and saturated fat.

As I mentioned earlier, one serving of 2% cottage cheese is ½ cup or 4 ounces and contains 90 calories, 12 grams of protein, 3 grams of fat, and 350 milligrams of sodium. If you ate the whole container, you’d have 360 calories, 48 grams of protein and 1400 mg of sodium. It’s recommended to keep sodium intake at or below 2000 mg daily to follow a heart healthy diet. So you can see how sodium added up quickly when the portion size increased.

Keep in mind that if you choose a higher fat content cottage cheese, you will have more total calories and fat.

Your toppings of choice will add to your calorie, fat and sodium intake too so stay mindful when making this healthy ice cream at home.

It’s all about what you’re in the mood for, what fits into your health goals and how you’re going to feel afterwards!

What if I eat too much protein?

When someone consumes more protein than their body needs, the excess is stored as fat. I recommend aiming for 20-30 grams or 3-4 ounces of protein per meal to stay satisfied and full. Which makes a 1/2 cup portion of cottage cheese ice cream a healthy alternative when toppings and add ons are kept in check!

Why should I try cottage cheese ice cream?

It’s an excellent food choice if you are trying to build muscle or maintain a healthy weight. In fact, a single serving of cottage cheese can provide nearly 2 ounces of protein, which is beneficial for promoting muscle growth and repair.

Now that cottage cheese has made it’s modern comeback, will you try it? Let me know!

If you are looking for other homemade ice cream recipes, you have to try nice cream. It’s another 2 ingredient wonder!

Nutrition Information

Calories: 164 per 1/2 cup serving

Fat: 5g

Saturated fat: 3g

Carbohydrates: 20g

Protein: 11g

Fiber: 1g

Cottage Cheese Ice Cream

Protein rich ice cream alternative
Prep Time 5 minutes
1 hour 30 minutes
Total Time 1 hour 35 minutes
Course Dessert
Servings 4
Calories 164 kcal

Equipment

  • 1 food processor immersion blender will work too

Ingredients
  

  • 16 oz full fat cottage cheese
  • 1 each banana
  • 2 tbsp maple syrup
  • 5 drops vanilla stevia

Instructions
 

  • Blend everything in a food processor until smooth.
  • Return to cottage cheese container and freeze for 60-90 minutes

Nutrition

Calories: 164kcal
Keyword protein
Tried this recipe?Let us know how it was!

How to grate carrots without a grater – there’s always a way

If you want to make a carrot cake but find that you don’t have pre-shredded carrots, and you don’t have a traditional box grater either – there are a few things you can do to get the job done. Keep reading for the best way to grate carrots in a pinch. No one will ever know!

Tools you could use to make grated carrots

There are all different types of graters so, although you may not have a box grater or hand grater, there are a lot of things you can do to get your carrots down to the right size for your recipe. You may be surprised the simple kitchen equipment you need is already on hand! Thin slices of carrots for your carrot kale muffins or your other carrot favorite recipes are just minutes away!

  • vegetable peeler
  • cheese grater or micro plane grater
  • julienne peeler
  • shredding blade on mandolin
  • small food processor with shredding disc accessory
  • a sharp knife

How to make grated carrots

My first choice would be to use a mini food processor with a grating plate, because this is probably the easiest way. I try to use this kitchen appliance any chance I get, because it always gets the job done with minimal effort. All you need to do is add your carrots through the top shoot of the processor and let the plate do its job while you hit the pulse button. It will shred carrots for you!

If that’s not an option – I’d go for my vegetable peeler. Over a cutting board, run the peeler in a downward motion starting at the larger end of the carrot and ending at the pointed end of the carrot. Just like you would if you were going to peel it. It will make long thin strips. Then you can run your knife over them and cut them down to small thin pieces. It’s a great way to break your carrot down into small pieces with limited equipment!

The next method you could try is your microplane. This is a hand held grater that has small holes, similar to the large holes of the box grater. The main difference with with this tool is that your carrots will come out very fine, possibly mushy, so proceed with caution.

A julienne peeler will shred your large carrots into thin strips which means with a little bit of effort from your knife, you can chop them down to smaller pieces and get similar results to your box grater.

The best method will come down to which tools you have at home because there are truly a bunch of different ways to shred fresh carrots.

Use carrot shred immediately, but extra can be stored in an airtight container for up to three days. Try using them in muffins, breads, scones, meatloaf or quiche.

If whole carrots are more your thing – try these vegan carrot dogs! They’re excellent!

About Me

I’m Melanie.

I’m a chef, registered dietitian, foodie, wife and mom.
If you’re looking for quick and healthy meal inspiration that serves YOU and your family well, then you’ve come to the right place!

Melanie Marcus Selfie

Keep Your Nespresso Vertuo Machine Fresh: Step-by-Step Cleaning Guide 

If you’re like me, you’re reading this because you’ve never cleaned your Nespresso coffee machine!

Since starting the FASTer Way to Fat Loss, with intermittent fasting, my morning coffee time has been more important than ever. I wake up early when the rest of the house is asleep, make my coffee and catch up on reading, or writing in total quiet! I love resetting my day like this, but was truthfully stumped when I realized that I never thought to clean my machine! If you follow me on IG, you know I post my coffee in stories almost every day!

I realized my fatal mistake when having coffee with coworkers. A friend mentioned how much she love her Nespresso coffee maker and that cleaning it on a regular basis wasn’t so bad… when my mouth dropped! I’ll admit it, I have never run the descaling process on my Breville Nespresso Vertuo model. But I have to give myself grace – my machine didn’t have an unpleasant smell, my morning coffee tasted the same as always and I didn’t have a warning light!

To my credit, I have wiped the outside with a damp cloth and have always kept the water and discard bins clean – but regular cleaning was not in my rotation. Oops!

Jump to Recipe

Read on for a step-by-step guide on how to get a clean Breville Nespresso Vertuo machine.

We’ll talk through removing obvious dirt like old coffee grounds, how to turn on the descaling mode and what you should use to clean a dirty machine to keep your coffee tasting delicious! In addition to improving the taste of your coffee it will extend the life of your machine, keeping it in good condition.

How Often Should You Clean Your Machine? 

This is my machine here.

The general rule for all espresso machines is to clean them every few months, or when you notice that the indicator light color has changed from green to orange. If you use your Nespresso Vertuo every day, then cleaning it once every two months should suffice. Just make a note of your cleaning schedule if you have the Breville model because you won’t get an indicator light.

Jump to Recipe

Clean the Used Capsule and Water Reservoir

Clean the outside of these containers with a clean microfiber cloth. You can use lemon juice or white vinegar with water as a quick and effective solution. Use dish soap and water to remove any mineral deposits in the water reservoir, especially if you have hard water. The used coffee pod container may have a bit more build up from coffee residue, but can easily be removed with the cleaning process. Let both air dry before returning to the machine.

Cleaning the Drip Tray 

Next you’ll want to start by removing the drip tray from beneath your machine and emptying any residual water into the sink. Then, wash and rinse it with warm water and a mild detergent. Let it air dry before returning it to the machine. Make sure to empty and clean the drip tray after each use. 

Jump to Recipe
Cheers to excellent coffee.

Descaling Cycle 

The Nespresso website recommends that you descale your machine regularly. About every three months or every 300 pods, whichever comes first. It’s an important step to remove build-up of coffee oils that can build up over a long time.

(Most) Nespresso Vertuo have an automatic descaling system that will alert you when they need attention—the orange indicator light comes on when this happens. The descaling cycle can be activated in just a few steps: first, fill up the water tank with fresh tap water (though filtered or bottled water is recommended – not soapy water). Next, open the capsule container lid at the top of your machine and press the button for “descale” until you hear a beep; at this point, close the lid and press start. Once finished, discard any remaining water in the container and run two more cycles without adding any additional ingredients or capsules—this will ensure that all residue is removed from inside your machine.  

The Breville cleaning system is just a bit different. There’s no colored indicator light, and there’s no button inside the top of the machine. Instead, start by by filling the water reservoir with clean water. Then place a 20oz container under the spout. Close the capsule container lid at the top of the machine and press the button 3 times within 2 seconds to initiate the cleaning cycle. Keep your container in place for up to 5 minutes as water runs through the system. Once finished, discard any remaining water in the container and run two more cycles without adding additional ingredients or capsules.

Do You Need Special Cleaning Products? 

No! You don’t need special cleaners or chemicals when cleaning your Nespresso Vertuo; plain old soap and water will do just fine! However, if you do want to use special cleaning products made specifically for espresso machines, make sure they are non-abrasive so as not to damage any internal components of your device. Also note that some detergents contain chlorine which could leave behind an unpleasant taste in your coffee – so only use these products if necessary!  

With just a few simple steps every couple of months, you can keep your Nespresso in top shape and enjoy delicious cups of coffee for years to come! Cleaning does more than just improve flavor; regular maintenance helps extend the life of your appliance too! So take some time out today to give your machine some TLC – you’ll be glad you did!
Tips for cleaning your coffee maker

  • Create a phone reminder or jot your next cleaning on the calendar
  • Tip: note how many pods your case holds and make a judgement based on that, for example, you may have to run through it twice before cleaning.
  • Have a 20oz container, or large glass handy when it’s time to clean.
  • When it comes time to clean, just refill the reservoir and run the cycle after you’ve made your morning coffee. It’s automatic and hands off, so no reason to dread!
  • Rinse the drip tray and clean visible debris from the side containers weekly or as often as needed.

How I take my coffee

It took me a few weeks to get used to my Nespresso, but I truly enjoy my coffee so much that just one cup in the morning is enough. And I look forward to it every day!

The pod is key. I go back and forth with the melozio pods and the odacio pods, but I think odacio is my favorite. (They’re the turquoise ones). I keep it simple by adding 2 pumps of sugar free vanilla or hazlenut with 1/4 cup of foamed 1% milk. I don’t stray to far from this. If I try to make a 2nd cup, the satisfaction value just isn’t there. With one cup the calories stay under 50, I keep my fasted state and can stay on track with intermittent fasting!

If you like to take your coffee up a notch, try this Vegan Cold Creme recipe. Add a dolop

Cheers to excellent coffee.

How to clean your Nespresso Machine

Learn how to clean your Nespresso when it's missing an indicator light.
Prep Time2 minutes
Active Time5 minutes
Total Time7 minutes
Yield: 0

Equipment

  • 1 Nespresso Machine
  • 1 20 oz container

Materials

  • 20 oz water

Instructions

  • Remove and clean both the water reservoir and the used pod container with warm soapy water. Let air dry before returning to the machine.
  • Fill the water reservoir with at least 20oz of bottled water.
  • Press the on button 3 times within 2 seconds to initiate the clean cycle. Be sure your 20oz container is under the spout.
  • It can take up to 2 minutes for the process to start. Leave container under the spout for the entire time. About 5 minutes.
  • Remove the drained water. Repeat if necessary.

About Me

I’m Melanie.

I’m a chef, registered dietitian, foodie, wife and mom.
If you’re looking for quick and healthy meal inspiration that serves YOU and your family well, then you’ve come to the right place!

Melanie Marcus Selfie

I’m making the case for jarred garlic – really!

I’ve been giving this a lot of thought lately. It’s funny because, I can vividly remember chatting with a girlfriend – pre marriage, and babies – when I explicitly said “if you have any respect for yourself and cooking – you should never use jarred garlic.” She called me fancy pants and that was the end of that! Anthony Bourdain has been quoted as saying something similar too.

Jarred pre-minced garlic will never replace fresh cloves (that is where you get the best flavor). But if peeling and slicing garlic is a step of cooking that is getting in the way of YOU cooking meals at home, I say use the jarred garlic. And don’t feel guilty about it! As you start to cook more, or circumstances change, you may have more time to give to the cooking process, and your choice of garlic may change too!

But now that I’m in another phase of life, I see (both garlic and cooking) differently. I just don’t have the same time to enjoy the art and process of cooking at every meal. Instead, home cooked family meals are a way to be sure my husband and I and the children are eating health(ier) food instead of fast food or takeout alternatives. They’re a way to be sure we’re eating enough fruits and vegetables, and a way to save money on expensive takeout.

Since culinary school I’ve practiced the technique of mise en place. I would choose an elaborate recipe based purely on flavor or presentation, purchase ingredients in the most fresh and unprocessed form and then prepare everything according to the ingredients list. So if a recipe called for sliced garlic. I would buy garlic bulbs at the local grocery store, break off the fresh garlic cloves, peel and slice until I had enough for the recipe. Then I’d move onto the next ingredient.

Today, it’s a different story. I am open to any and all grocery store shortcuts or new products, anything that will save me time and money and help get a home cooked meal on the table – VERY QUICKLY.

Types of garlic and garlic products

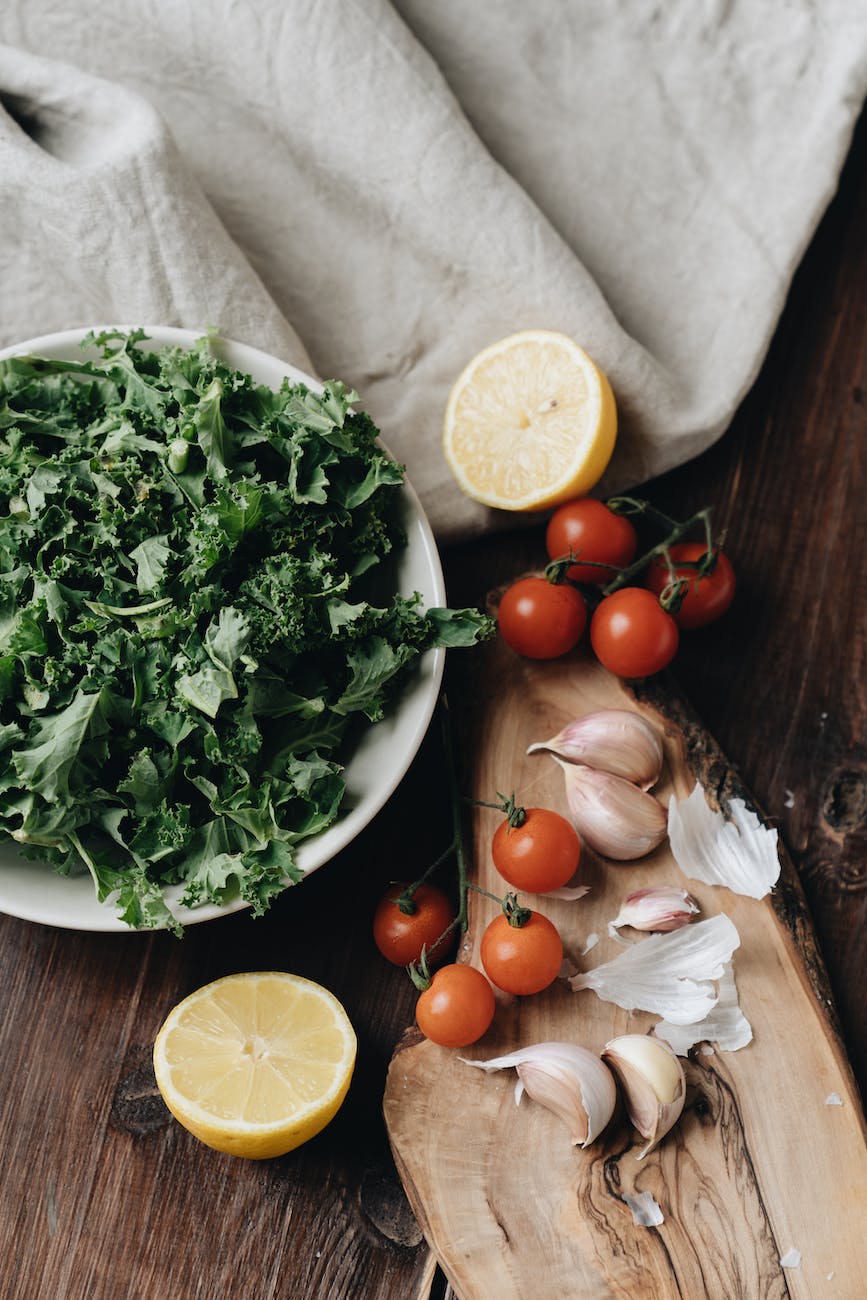
  • Raw whole bulb garlic can be found in the produce aisle. They’re covered in a white papery skin and last for quite some time at home when stored in a cool dry place. Not the refrigerator. These will have a stronger flavor than other “processed” garlic options.
  • Elephant garlic is a favorite of mine because 1 clove is equal to at least 2-3 normal cloves so it’s less labor to peel and easier to slice.
  • Black garlic is more earthy and not the same as traditional white garlic.

Aside from the traditional raw forms of garlic, you can also find other garlic products. Experiment with using different sources of garlic next time you make a pasta sauce or salad dressing. Then use wha you prefer.

  • Pre-peeled whole cloves of garlic can be found in produce sections. Caution with these because once you open the package, they will need to be used within a week or so. So unless you need a lot of garlic, buying these large bags may not be the money and time saving solution for you.
  • Garlic paste is usually in the refrigerated section of the grocery store, but has more additives.
  • Chopped garlic in small jars in the produce section of your grocery store, usually they’re sold in water or olive oil.
  • Frozen garlic cubes are great because one cube is equal to one clove of garlic which makes easy measuring.
  • Dried garlic in the spice aisle in the form of dehydrated garlic cloves or garlic powder. These are best for dry rubs.
  • Garlic salt is a mixture of garlic powder and salt.
harvesting garlic

What is in jarred garlic?

The main ingredients are garlic, water and citric acid which is used as a preservative to prevent oxidation and browning.

Converting teaspoons to cloves

Half a teaspoon of jarred garlic is equal to one clove of fresh garlic. Jarred is not as strong as the fresh stuff, so you can get away with using a little bit more.

If you ask me, there’s no such thing as too much garlic.

Benefits of jarred garlic

  • Convenient option for last minute meals – think stir fry, garlic bread, soup, salad dressing or marinade starter.
  • It has a longer shelf life than other garlic products such as garlic paste or pre-peeled cloves
  • No need for a garlic press
  • Time saver when you don’t have time to mince garlic
  • It can remove the mental hurdle of needing to peel and slice garlic which can be tedious
  • No smelly hands

Negatives of jarred garlic

  • You won’t get the same quality aroma filling your home – you need fresh for that!
  • Nutritionally, jarred garlic doesn’t have the same health benefits because it has been pasteurized or heated during the packaging process.
  • It loses it loses it’s antibacterial properties and has lower levels of allicin, a compound which may prevent certain types of cancers.1
  • The garlicky flavor is not as strong as fresh raw garlic.
  • It has a stigma, and your foodie friends will always hold against you.
  • It can develop an off putting odor and flavor after it’s been open for too long – so be sure to keep an eye on the expiration date.

What are signs of spoilage?

If your jarred garlic started to have an off odor or becomes discolored it’s time to toss it. It can last several weeks in the refrigerator, especially when it’s sealed and stored properly. When using garlic, be sure the spoon being used is clean to avoid cross contamination from other foods.

The bottom line

Jarred pre-minced garlic will never replace fresh cloves (that is where you get the best flavor). And some dishes are not a good fit for jarred garlic – like anything you’d eat raw. But if peeling and slicing garlic is a step of cooking that is getting in the way of YOU cooking meals at home, I say use the jarred garlic. And don’t feel guilty about it! As you start to cook more, or circumstances change, you may have more time to give to the cooking process, and your choice of garlic may change too!

Recipes you can use jarred garlic in

1
Egg Roll meal prep
Egg Roll In A Bowl
Easy weeknight recipe that comes together with basic pantry staples and 2-3 fresh ingredients from the store!
Check out this recipe
2
Three Cheese Baked Ziti
Crowd pleasing pasta that's full of flavor and less fat than your standard version!
Check out this recipe
3
Easy red lentil soup
Easy Split Red Lentil Soup
This super fast, protein packed recipe can be made any night of the week in under an hour!!
Check out this recipe

Resources

  1. https://pubs.acs.org/doi/10.1021/jf8000907

About Me

I’m Melanie.

I’m a chef, registered dietitian, foodie, wife and mom.
If you’re looking for quick and healthy meal inspiration that serves YOU and your family well, then you’ve come to the right place!

Melanie Marcus Selfie