How to reverse diabetes naturally (Diet Tips)

If you’re living with type 2 diabetes or have been told you’re “on the verge,” I want you to know something important: you are not stuck.
As a dietitian, health coach and mom who works with women every day, I’ve seen how overwhelming it can feel to manage blood sugar, medications, and the fear of what’s next. But here’s the truth I need you to hear—you can take control of your health. And you don’t have to do it with restrictive diets or a drawer full of prescriptions (you could possibly make that diabetes medication a thing of the past)!
For women who are motivated to feel better, lose weight, and reclaim their energy, there are natural, science-backed strategies that work. Lifestyle changes like simple nutrition swaps, building muscle through movement, and understanding your body’s response to insulin can actually improve your blood sugar—and in many cases, help put type 2 diabetes into remission.
I know it sounds bold, but I’ve watched it happen. And I’m here to help you take that first step.
Let me walk you through the strategies I use with my own clients to support real, lasting change—without the overwhelm. Let’s get you feeling confident in your body and hopeful for your future.
Table of contents
Understanding Diabetes and Its Risk Factors
Let’s talk about what’s really going on when it comes to type 2 diabetes—because understanding it is the first step toward taking back control of your health.
Diabetes happens when the body struggles to keep blood sugar in check, leading to consistently high glucose levels. While there are different types of diabetes, type 2 is by far the most common—and it’s often tied to lifestyle factors like nutrition, physical activity and body weight. In the United States, we suffer from diet related chronic diseases like diabetes, heart disease and some forms of cancer. Dietary changes, moving away from unhealthy diets, can fix this!
Here’s the thing: if you’re carrying extra weight, eating on the go, skipping workouts because life is busy, or dealing with things like high blood pressure or cholesterol, you may already be at higher risk—even if you haven’t been diagnosed yet. And if you had gestational diabetes during pregnancy or have a family history of diabetes, it’s even more important to pay attention.
But here’s the good news: type 2 diabetes doesn’t have to be your forever story. With early action and some strategic shifts in your daily habits—especially around food, movement, and sleep—you can lower your risk. And in many cases, it’s absolutely possible to put diabetes into remission.
You are not powerless. And you don’t have to wait for things to get worse to start feeling better.
Join my new 21 DAY reset!
Tired of endless diets and no results? This reset is for you if you want to gain energy, cut the cravings, build strength, decrease bloat and feel amazing going into the holiday season!

Natural Strategies to Reverse Diabetes
The most important thing to know about reversing diabetes is that it’s a process. It involves embracing a set of changes that improve your body’s ability to manage blood sugar and insulin sensitivity. You may also be interested to know more about when to hire a dietitian and how much it costs.
Here’s how you can do it naturally:
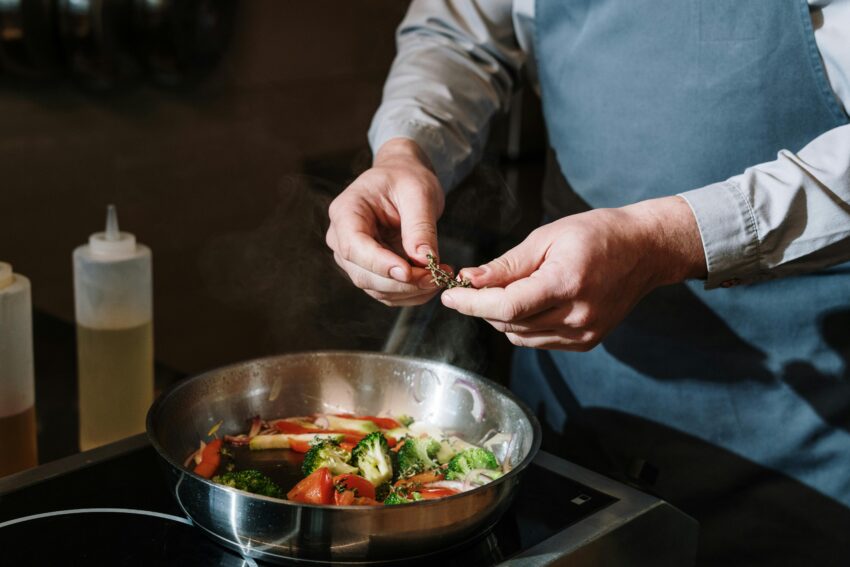
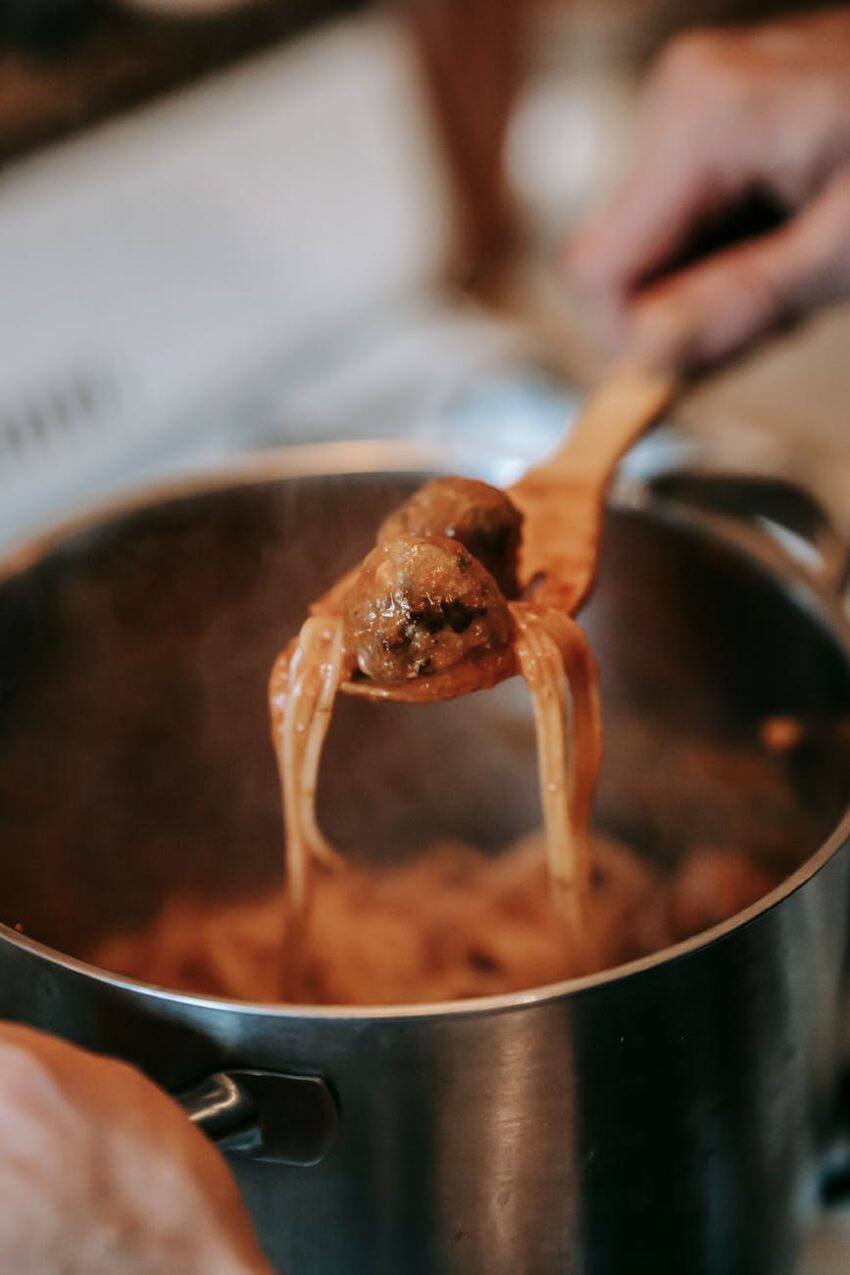
1. Start with Simple, Balanced Eating
When it comes to reversing type 2 diabetes, food is one of your most powerful tools—and no, it’s not just about cutting sugar.
If you’re like most of the women I work with, you’re juggling a lot. Maybe you’re grabbing meals between errands or relying on convenience foods because life is full. But the truth is, small, intentional food choices can make a huge impact on your blood sugar and overall health – and your risk of diabetes.
Instead of focusing on restriction like low-calorie diets, let’s shift to balance. That means choosing foods that keep your energy steady and your blood sugar stable (within a normal range)—without leaving you feeling deprived.
Here’s what that can look like:
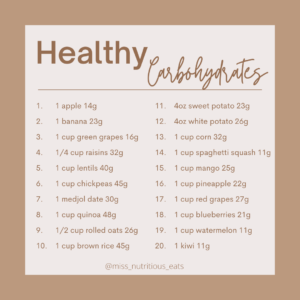
- Fiber-rich carbs like beans, lentils, whole grains, and starchy veggies (yes, potatoes can be part of the plan!) to slow the rise of blood sugar
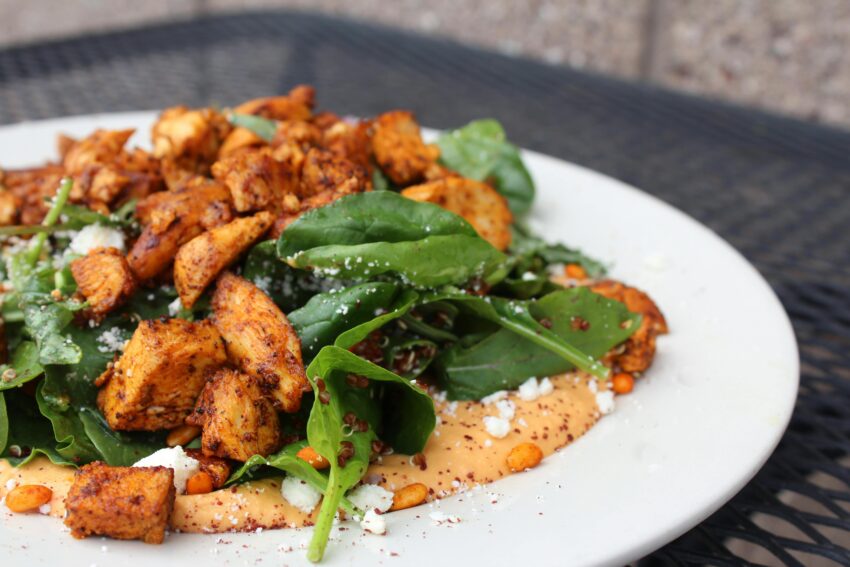
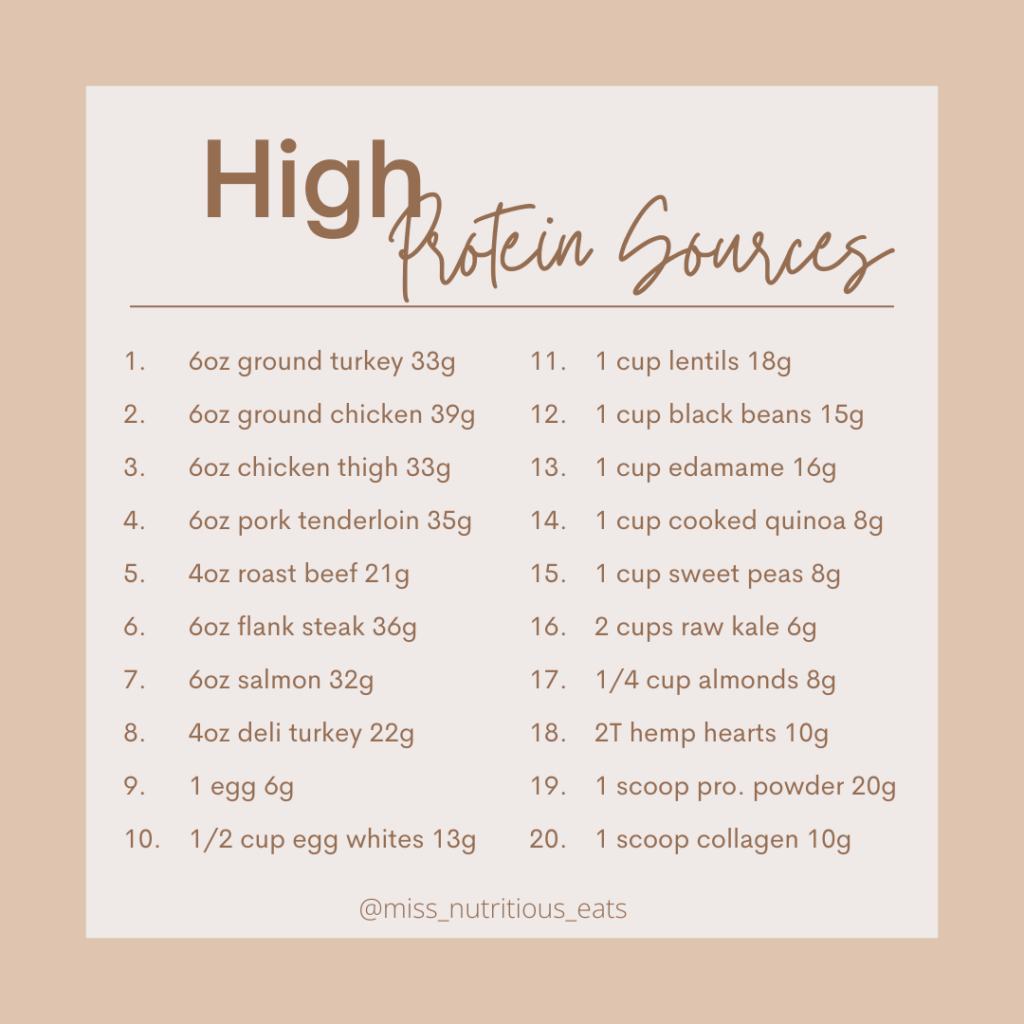
- Lean proteins such as chicken, turkey, eggs, fish, or plant-based options like tofu to help with fullness and blood sugar balance
- Healthy fats from avocado, nuts, seeds, or olive oil to keep you satisfied and support heart health
- Smarter swaps like choosing whole grain bread over white, or reducing how often you eat red meat—little shifts that really add up over time
Reading food labels can help, but it doesn’t have to be complicated. I always tell my clients: aim for meals that leave you feeling full, energized, and in control—not sluggish or craving more 20 minutes later.
I’ve had clients tell me, “White rice is life,” and I completely get it—food is such a personal, cultural, and emotional part of our lives. Instead of telling them to cut it out, we work on finding ways to enjoy it as part of a balanced diet. For example, one client loved having white rice with every meal, but they were struggling with energy crashes in the afternoon. Together, we adjusted their portions and paired the rice with more protein and fiber-rich veggies. The results were incredible—they felt more energized, less sluggish, and still got to enjoy the food they love. It’s such a good reminder that small changes, not restrictions, can have a huge impact on our health while keeping the foods we love on the menu.
And the best part? These changes don’t just support your blood sugar—they’ve also been linked to lower cholesterol, a healthier heart weight loss. Win-win-win!

2. Move Your Body in a Way That Feels Good
Exercise doesn’t have to mean running marathons or spending hours at the gym—especially if you’re juggling work, family, and everything in between. The truth? Movement is medicine when it comes to managing and even reversing type 2 diabetes.
The goal is to get your body moving regularly in ways that feel sustainable (and maybe even fun!). Walking, swimming, riding your bike with the kids, or picking up a set of dumbbells can all help improve your insulin sensitivity, boost energy, and support weight loss.
Here’s a good place to start:
- Aim for at least 150 minutes of moderate activity each week
- Mix in both aerobic movement (like walking or dancing) and resistance training (like bodyweight or strength workouts)
- New to exercise? Daily walks are a powerful way to kickstart your metabolism and steady your blood sugar—even 10–15 minutes after meals makes a difference
Remember: progress is progress, even if it doesn’t look “perfect.” You don’t need a gym membership to get results—you just need consistency and a plan that fits your life.
3. Focus on a Healthy Weight (Without Obsession)
Let’s talk real talk—weight can be a sensitive subject. But when it comes to managing diabetes, even small shifts in weight can lead to big improvements in your blood sugar and overall health.
Studies show that losing just 5–10% of your body weight can lead to lower A1C levels, more energy, and a stronger shot at remission. That doesn’t mean starving yourself or hopping on the latest fad diet. It means building habits you can stick with long-term.
If you’re feeling stuck, it’s okay to ask for help. Whether that’s working with a coach (hi! 🙋♀️), talking to your doctor, or exploring medical strategies, there is no shame in doing what’s best for you.
4. Prioritize Sleep Like It’s Self-Care (Because It Is)
If you’re doing “all the right things” but still struggling with your blood sugar, ask yourself: Am I sleeping enough?
Lack of sleep messes with hormones that control hunger, stress, and blood sugar—leaving you cranky, craving carbs, and more prone to health issues. It’s a cycle that’s easy to fall into, especially for busy women.
Shoot for 7–8 hours of quality sleep each night. That might mean setting boundaries with screens before bed, getting to sleep earlier, or creating a wind-down routine that actually calms your nervous system. And if you’ve ever wondered about going to bed hungry – read this.
Better sleep = better health. It’s that simple.
5. Keep Track of Your Progress (Even the Small Wins)
Regular health check-ins aren’t just for people who already have a diabetes diagnosis—they’re key for preventing problems, too.
Monitoring your blood sugar, checking in on your A1C, and working with a trusted provider gives you the information (and confidence!) to make smart decisions along the way.
As you implement lifestyle changes, these markers can help you:
- Track improvements in blood sugar and insulin resistance
- Talk to your doctor about reducing or even eliminating medications
- Stay motivated by seeing real results from your hard work
Progress isn’t always visible from the outside—but your numbers will tell the story.
6. Build a Lifestyle That Supports You—Not Stresses You Out
The truth is, you don’t have to do this alone. Lifestyle changes stick better (and feel way more doable) when you’re surrounded by people who get it.
Whether it’s a supportive group, a coaching program, or even a few close friends making similar changes, don’t underestimate the power of community. You deserve encouragement, not criticism.
Some simple ways to make healthy living part of your everyday life:
- Swap sugary drinks for flavored water or sparkling water
- Upgrade your white bread to something heartier like a whole grain artisan loaf
- Make movement fun—dance in the kitchen, play outside with your kids, or try a new class
- Choose smarter snacks like nuts, Greek yogurt, or hummus with veggies
- Keep an eye on the glycemic index of your go-to foods to reduce unexpected blood sugar spikes
This is about creating a life that supports your energy, joy, and long-term health—not one that feels restrictive or stressful.
Is Diabetes Remission Really Possible?
Yes—and I want you to believe that, too. I’ve seen women just like you take back control of their blood sugar, lose weight, and even reduce (or eliminate!) their reliance on medications. When you consistently fuel your body with the right foods, move in ways that support your metabolism, and create sustainable habits, real change happens.
And while every woman’s health journey is different, you don’t have to figure it all out alone. It’s important to work with your healthcare provider—but having a coach and a proven strategy like the FASTer Way can help you stay consistent and confident every step of the way.
Let’s Be Real: This Isn’t Just About Diabetes
It’s about you—feeling like yourself again, having energy to keep up with your kids, getting dressed without frustration, and not constantly worrying about your blood sugar or the next doctor’s appointment.
The truth is, reversing type 2 diabetes (or drastically improving your health) isn’t about being perfect—it’s about showing up with intention. Maybe you start by changing how you plan your meals, getting in a few short strength workouts a week, or finally understanding how your body responds to food. The FASTer Way gives you the structure and support to do exactly that—without the overwhelm.
If you’re ready to stop guessing, start feeling better, and take charge of your health in a way that actually fits your life, I’d love to help guide you. You deserve to feel strong, vibrant, and in control. Let’s get you there—together.
The American Diabetes Association is an excellent resource if you need more information.