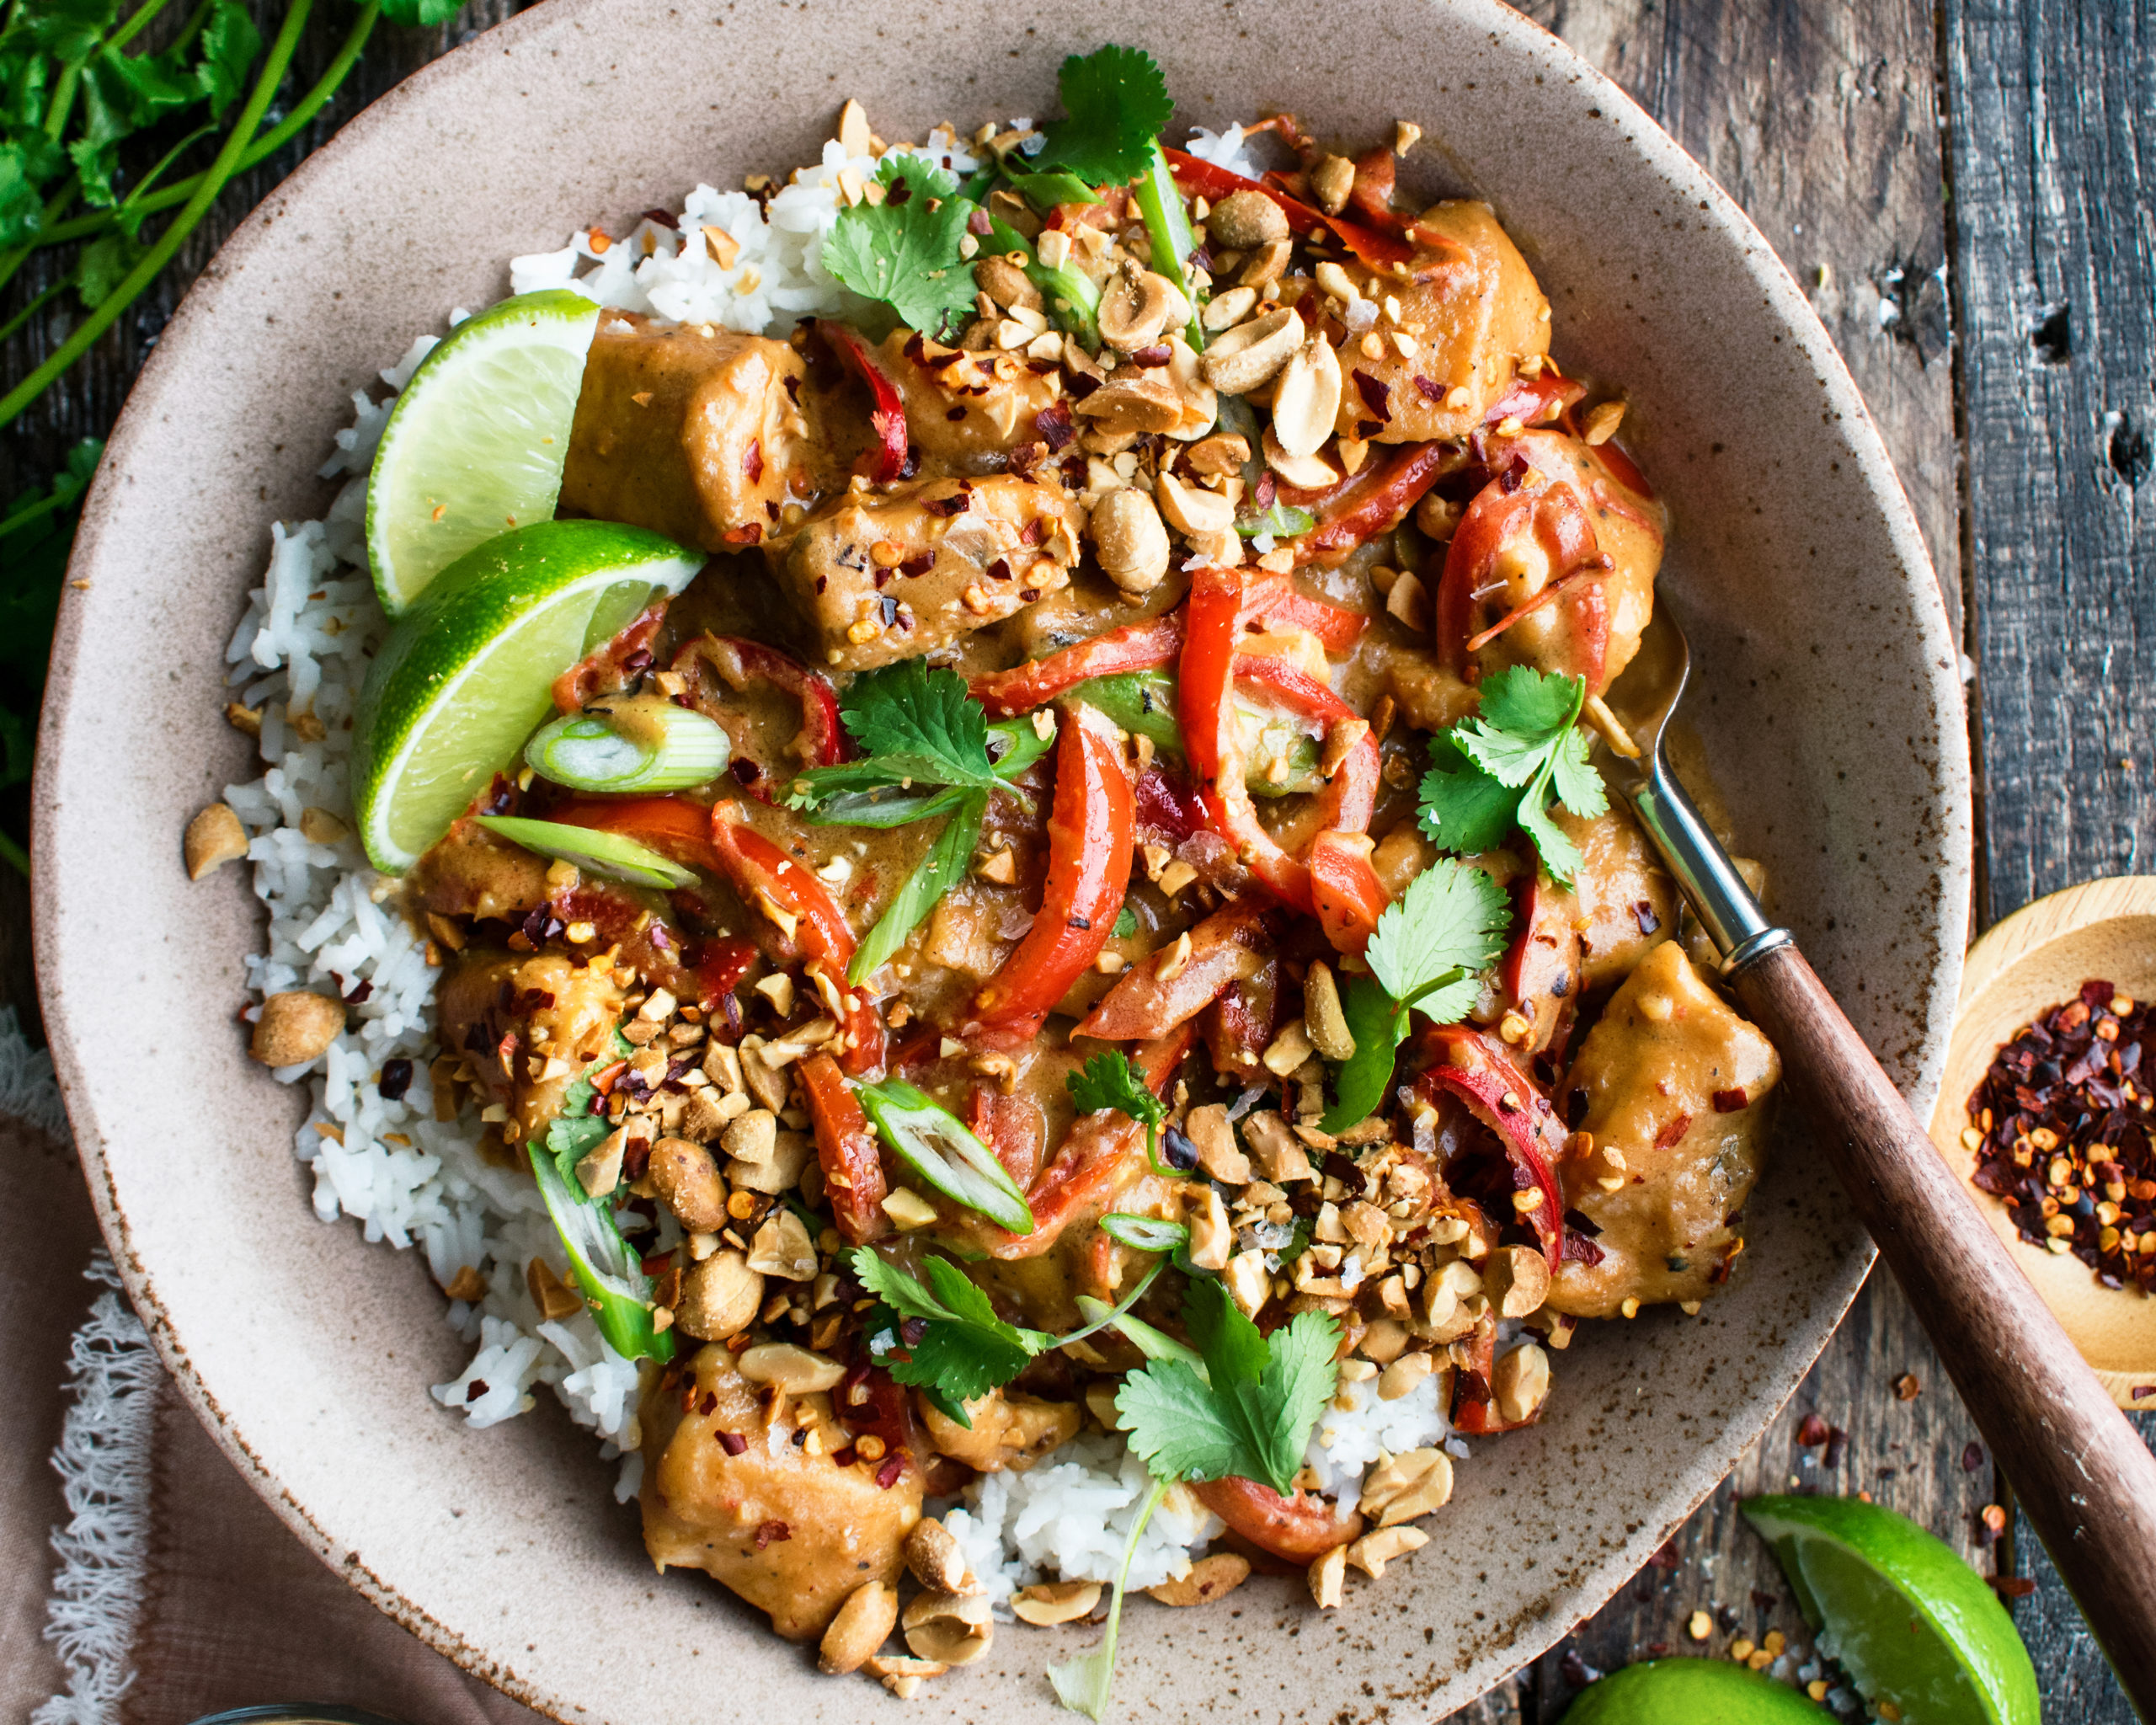
Let’s be real—between school drop-offs, sports practices, and trying to eat something other than your kids’ leftovers, dinner can feel like just one more thing on your never-ending to-do list. That’s exactly why I love this recipe. Packed with rich flavors, simple ingredients, and plenty of nutritional benefits, this Thai-inspired chicken and rice bowl checks all the boxes. It’s quick, family-friendly, and perfect whether you’re a FASTer Way client looking for a low-carb win or a busy mom just trying to get something healthy on the table without a ton of fuss.
I come back to this one again and again because it’s so easy to make your own. Need more protein to hit your macros? Pile on some extra chicken breasts or thighs—or try tofu for a plant-based twist. Want to keep it low-carb? Swap the jasmine rice for cauliflower rice or even rice noodles for a change-up. However you spin it, this dish will keep you nourished, satisfied, and feeling like you’ve got at least one meal totally handled.
Here’s why this bowl will be on repeat in your kitchen (trust me, it’s a keeper):
Fits your goals—whatever the day: Whether you’re having a regular macro day or keeping things low-carb, this recipe flexes with you. Swap in jasmine rice, cauliflower rice, or even rice noodles depending on what your body needs.
Meal prep made easy: This one comes together fast, holds up beautifully in the fridge, and tastes just as good the next day. Perfect for busy weeks when you need something reliable and nourishing on hand.
Big, bold flavor: With coconut aminos, fresh ginger, and sautéed red bell peppers, this bowl brings serious flavor—like takeout vibes without the mystery ingredients.
Protein-packed: With 25 grams of protein per serving, it’s ideal for staying full, supporting muscle tone, and fueling your busy day.
Family-approved: My favorite part? Even picky eaters love it. The Thai-inspired flavors are mild enough for kids but satisfying enough for adults. Win-win.
This dish is naturally gluten-free when you use coconut aminos instead of soy sauce and check your almond butter for any sneaky additives. It’s a great option for anyone looking for a cleaner, allergy-friendly meal.
👩🍳 How to Make My Thai-Inspired Chicken and Rice Bowl
Easy to make and ready in no time, here’s how to whip up this dish:
Heat avocado oil in a large skillet over medium heat.
Add the ground chicken, season it with sea salt, and cook until it’s beautifully golden brown and fully cooked (check the internal temperature for 165°F).
Toss in the garlic, ginger, red bell peppers, and shredded carrots. Sauté the veggies until they soften and absorb those delicious flavors.
Whisk together the sauce in a large bowl using coconut aminos, lime squeezes, almond butter, and optional sriracha for heat.
Pour the sauce into the skillet and stir everything together, letting it simmer for 2–3 minutes for that layer of rich, marinated goodness.
Serve over your choice of rice or noodles, garnishing with green onions, cilantro, and sesame seeds.
📓 Best Served With
Pair this flavorful thai chicken recipe with:
A side of napa cabbage drizzled with thai peanut sauce.
Light, zesty salads topped with fresh basil or thai basil.
A refreshing glass of lime juice infused sparkling water.
👝 How to Store Leftovers
This dish is perfect for meal prep! Follow these tips to keep it tasting amazing:
Store in an airtight container in the fridge for up to 4 days.
For maximum freshness, keep the rice and chicken mixture separate.
To reheat, pop it in the microwave or a skillet over medium-low heat until warmed through.
Pro Tip: Create a double batch this first time so you can enjoy it throughout the entire week!
🧠 Common Questions
Q1. Can I make this with chicken thighs?
Yes! Swap in diced chicken thighs or even sliced chicken breasts for that juicy chicken texture!
Q2. Can I use a different protein?
Absolutely. Try ground beef for a heartier dish or tofu for a vegetarian twist.
Q3. Is there an Instant Pot option?
Yes! Cook the chicken and veggies on high pressure for 5 minutes, followed by a quick release. Mix the sauce and stir everything together for those rich, thai flavors.
Join my next 6 week challenge!
Tired of endless diets and no results? Join the FASTer Way to Fat Loss and see real, sustainable changes in just 6 weeks!
1lbextra lean ground chickenor extra lean ground turkey
1tbspavocado oil
3clovesgarlicminced
1tbspfresh gingergrated
½red bell pepperthinly sliced
1cupshredded carrots
2cupscooked jasmine riceor cauliflower rice for low-carb
¼cupcoconut aminosor gluten-free tamari
1tbsplime juice
1tbspalmond butter
1tspsrirachaoptional
¼tspsea salt
½cupchopped green onions
¼cupchopped cilantrooptional
1tbspsesame seedsoptional
Method
Heat avocado oil in a large skillet over medium heat. Add ground chicken, season with sea salt, and cook until browned, breaking it up with a spoon—about 6–7 minutes.
Add garlic, ginger, red bell pepper, and shredded carrots. Sauté for another 3–4 minutes until veggies soften.
In a small bowl, whisk together coconut aminos, lime juice, almond butter, and sriracha.
Pour sauce into the skillet and stir to coat everything well. Let simmer for 2–3 minutes.
Serve over cooked rice.
Top with green onions, cilantro, and sesame seeds if desired.
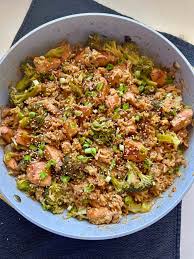
Looking for an easy, healthy meal that’s absolutely packed with flavor and perfect for the whole family? Just like the classic arroz con pollo, this Garlic Ginger Chicken and Rice ticks all the boxes. With tender chicken thighs, fluffy jasmine rice, fresh broccoli, and a hint of sesame, this is a one-pot meal that belongs in your weekly rotation.
It’s comforting “meal prep meets weeknight dinner” food, packed with protein and wholesome ingredients. And it’s super customizable to meet dietary restrictions and an excellent solution for leftover chicken or rice.
Here’s what you’ll need to make this family-favorite recipe (plus a few substitutions for flexibility):
Chicken Thighs (Boneless, Skinless): Juicy and flavorful, but you can easily swap with lean chicken breast or organic chicken for lighter macros. For my kids, I like to cut the chicken into bite-sized pieces.
Jasmine Rice: Perfect for fluffy rice, but long grain, white rice, instant rice, or even brown rice also works well!
Low-Sodium Chicken Broth: Vegetable broth or water works if needed.
Coconut Aminos or Soy Sauce: Choose low-sodium soy sauce if you’re out of coconut aminos.
Fresh Garlic & Ginger: Garlic powder or onion powder can be used in a pinch, but fresh ingredients create a bolder taste.
Broccoli & Carrots: Fresh broccoli florets and julienned carrot are ideal, but feel free to toss in cauliflower rice, black beans, or even green beans for variety.
Sesame Oil & Red Pepper Flakes (optional): Add the perfect finishing touch with a drizzle of sesame oil, and spice it up with a pinch of red pepper flakes!
Green Onions & Sesame Seeds (optional)
Break Through
This guide walks you through how unknowingly, hormones may be in the way of your fat loss goals.
Good news! This recipe is gluten-free as written. Just be sure the soy sauce or coconut aminos you select is certified gluten-free. Double-check the chicken broth or vegetable broth label for any hidden gluten as well.
👩🍳 How to Make My Garlic Ginger Chicken and Rice
Ingredients prepped? Here’s how to turn it into a delicious recipe your whole family will devour in no time!
Sear the Chicken Heat olive oil in a large skillet over medium heat. Season the chicken thighs with salt and black pepper, then sear for 3-4 minutes per side until golden brown. Set aside.
Build Flavor Add minced fresh garlic, grated ginger, and red pepper flakes to the same skillet. Sauté for about a minute, just until fragrant.
Simmer the Rice Meal Stir in the rice, 2 cups of chicken broth, honey, and coconut aminos. Mix well. Return the chicken to the skillet, covering it with the sauce.
Cook the Rice and Veggies Cover and simmer on low heat for 20 minutes. Add the broccoli florets and carrot on top of the rice during the last 5 minutes of cooking.
Finish with Sesame Oil and Garnishes Drizzle with sesame oil, sprinkle green onions, and add sesame seeds if desired. Serve hot and enjoy!
📓 Best Served With
Looking to elevate this dish even more? Pair it with these simple side dishes for a complete meal:
Green Beans or Bell Peppers sautéed with garlic powder and olive oil.
A fresh side salad with avocado oil dressing.
Steamed cauliflower rice for extra veggies.
Bonus tip: top your bowl with a soft-boiled egg for extra protein!
👝 How to Store Leftovers
Got leftovers? (Lucky you!) Here’s how to store them for maximum deliciousness:
Fridge: Store in an airtight container for up to 3-4 days.
Freezer: Freeze in portioned airtight containers for up to 3 months.
Reheat: Warm gently on medium heat to preserve that fluffy rice texture.
🧠 Common Questions
Q: Can I use leftover rice or chicken for this recipe?
A: Absolutely! This dish works great with leftover rice or rotisserie chicken. Simply adjust cooking times since pre-cooked ingredients don’t need as long.
Q: What kind of rice works best here?
A: Jasmine rice is my favorite for this recipe, but regular rice, long grain, or even instant rice works in a pinch. Cauliflower rice is a fantastic gluten-free alternative too!
Q: Can I make this in an Instant Pot?
A: Totally! Sear the chicken on sauté mode, then add the ingredients and cook on high pressure for 10 minutes.
💪🏼 Tracking Macros? Check This Out
If you’re keeping an eye on your protein, carbs, and fats, this recipe is macro-friendly without sacrificing taste. Each serving is packed with 43g protein, 53g carbs, and 11g fat.
You can also adjust the macros if needed:
Use lean chicken breast for less fat.
Sub cauliflower rice for a lower-carb option.
Add black beans to pack in more fiber and plant-based protein.
Tired of the dinner struggle and trying to eat healthy while still feeding your family something they’ll actually want to eat?
Let me help you simplify it.
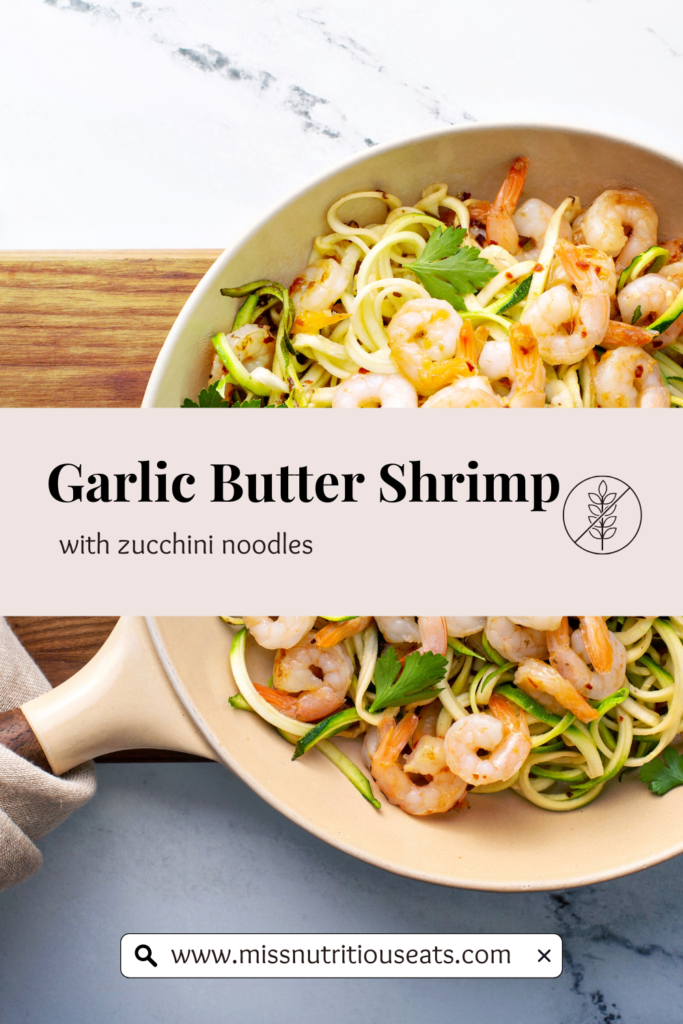
This Garlicky Butter Shrimp with Zucchini Noodles is one of my go-to low-carb meals—it’s fast, flavorful, and totally family-friendly. Whether you’re carb cycling, meal prepping, or just need something easy on a busy weeknight, this dish hits all the marks: juicy shrimp, a garlicky butter sauce, and a little kick from red pepper flakes (you can leave that out if the kids aren’t into it 😉).
No fancy ingredients. No complicated steps. Just a dinner you can feel good about.
I’ve got tips, easy swaps, and everything you need to make this recipe work for you—even with picky eaters in the house. Let’s make low-carb feel doable (and delicious)!
Break Through
This guide walks you through how unknowingly, hormones may be in the way of your fat loss goals.
😍 Why You’ll Love Garlicky Butter Shrimp & Zucchini Noodles
It’s Low Carb: With just 5g of carbs per serving, this recipe fits seamlessly into a low-carb diet, carb cycling rotation or keto meal plan.
Easy Recipe: Using simple ingredients like fresh garlic, jumbo shrimp, and zucchini noodles, you can whip this up in less than 30 minutes.
Versatile Side Pairings: Pair it with mashed cauliflower, fresh spinach, or cauliflower rice for a complete meal.
Perfect for Carb Cycling: The low net carb count makes it an excellent option for lower-carb days, while still providing a satisfying and nutritious meal.
Great Flavor: The butter, lemon juice, and fresh parsley deliver the best flavor with minimal prep.
🗒️ Ingredients + Substitutions
Main Ingredients:
1 lb shrimp (fresh shrimp preferred, peeled, and deveined) – Smaller shrimp or pre-cooked shrimp work in a pinch.
2 medium zucchini, spiralized into zucchini noodles – Swap with spaghetti squash or fresh spinach for personal preference.
2 tbsp unsalted butter or opt for olive oil or ghee for a dairy-free alternative.
3 cloves fresh garlic, minced – Garlic powder can work if you’re out of fresh garlic.
½ tsp red pepper flakes for a spicy garlic shrimp kick, optional.
Fresh parsley, chopped, for garnish.
Optional Additions:
2 tbsp grated Parmesan cheese (or a dairy-free alternative).
Lemon juice to brighten the flavors.
Pro Swap Ideas:
Add plump cherry tomatoes or baby spinach for an extra layer of freshness.
Love a creamy sauce? Add a splash of heavy cream, chicken broth, or vegetable stock for a richer flavor.
💡 Gluten-Free? Read This!
This garlic shrimp recipe is naturally gluten-free thanks to its use of zucchini noodles. While most butter and cheese is naturally GF, just give yourself a double-check that all additional ingredients, such as unsalted butter and Parmesan cheese, are certified gluten-free for maximum peace of mind – or just stick to brands that you know!
👩🍳 How to Make My Garlicky Butter Shrimp & Zucchini Noodles
Follow these easy steps for the best part of your day!
Heat the Pan
Melt unsalted butter in a large skillet over medium heat. Add the minced fresh garlic and sauté until fragrant (about 1 minute).
Cook the Shrimp
Add the large shrimp to the skillet, seasoning with sea salt, black pepper, and optional red pepper flakes. Cook for 2-3 minutes per side until the shrimp becomes pink and opaque. Remove from the skillet and set aside.
Make the Zucchini Noodles
Using the same pan, sauté the spiralized zucchini noodles for 1-2 minutes over medium-high heat, just until tender.
Combine and Finish
Return the shrimp to the skillet, drizzle with freshly squeezed lemon juice, and toss to coat. Garnish with fresh parsley and grated Parmesan, if desired, for the ultimate finishing touch.
📓 Best Served With
Mashed Cauliflower for a comforting low-carb side.
Cauliflower Rice for a true keto garlic butter shrimp.
Fresh Spinach for a light, nutrient-packed pairing.
A glass of dry white wine like Pinot Grigio for a perfect date night meal. 🍷
👝 How to Store Leftovers
Enjoy this shrimp dish later by storing it properly!
Cool First: Allow the entire recipe to cool completely before storing.
Use an Airtight Container: Store shrimp and zucchini noodles together or separately in the fridge for up to three days.
Reheat Gently: Warm leftovers over medium heat in a hot skillet with a bit of olive oil or butter for a fresh taste. Avoid overcooking the shrimp to preserve their juicy texture.
Join my next 6 week challenge!
Tired of endless diets and no results? Join the FASTer Way to Fat Loss and see real, sustainable changes in just 6 weeks!
Absolutely! Just adjust the cook times to avoid overcooking. Pre-cooked shrimp can be added during the final toss with the zucchini noodles.
2. Is it okay to substitute zucchini noodles?
Yes! Swap with spaghetti squash, fresh spinach, or even mashed cauliflower if zucchini noodles aren’t your favorite way to enjoy low-carb meals.
3. How can I make this a special occasion dish?
Add some sun-dried tomatoes and a creamy Tuscan shrimp-inspired cream sauce for an indulgent twist.
4. Can I freeze leftovers?
We wouldn’t recommend freezing due to the texture of the zucchini noodles. That said, the shrimp can be frozen separately and added to freshly cooked noodles next time.
💪🏼 Tracking Macros? Check this out
This keto garlic butter shrimp is not just delicious, it’s macro-friendly!
Calories per Serving: 180kcal
Protein: 25g
Carbohydrates: 5g
Fat: 7g
This low-carb shrimp recipe is the perfect addition to your low-carb meals or carb cycling plan. Plus, it’s packed with potassium and vitamin C for added nutritional benefits.
Whether it’s a busy weeknight or a special occasion, this Garlicky Butter Shrimp is an unbeatable low-carb dinner idea. With just a few basic ingredients, you can make a shrimp dish that satisfies the entire family.
Don’t forget to pin or save this recipe card for easy access next time! And check out our affiliate links for must-have cooking gear like cast iron skillets or spiralizers to make this process even easier. Happy cooking! 🎉
I’m a chef, registered dietitian, foodie, wife and mom. If you’re looking for quick and healthy meal inspiration that serves YOU and your family well, then you’ve come to the right place!
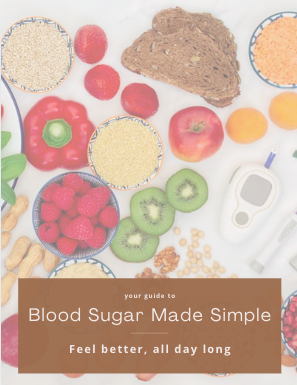
If you’re living with type 2 diabetes or have been told you’re “on the verge,” I want you to know something important: you are not stuck.
As a dietitian, health coach and mom who works with women every day, I’ve seen how overwhelming it can feel to manage blood sugar, medications, and the fear of what’s next. But here’s the truth I need you to hear—you can take control of your health. And you don’t have to do it with restrictive diets or a drawer full of prescriptions (you could possibly make that diabetes medication a thing of the past)!
For women who are motivated to feel better, lose weight, and reclaim their energy, there are natural, science-backed strategies that work. Lifestyle changes like simple nutrition swaps, building muscle through movement, and understanding your body’s response to insulin can actually improve your blood sugar—and in many cases, help put type 2 diabetes into remission.
I know it sounds bold, but I’ve watched it happen. And I’m here to help you take that first step.
Let me walk you through the strategies I use with my own clients to support real, lasting change—without the overwhelm. Let’s get you feeling confident in your body and hopeful for your future.
Let’s talk about what’s really going on when it comes to type 2 diabetes—because understanding it is the first step toward taking back control of your health.
Diabetes happens when the body struggles to keep blood sugar in check, leading to consistently high glucose levels. While there are different types of diabetes, type 2 is by far the most common—and it’s often tied to lifestyle factors like nutrition, physical activity and body weight. In the United States, we suffer from diet related chronic diseases like diabetes, heart disease and some forms of cancer. Dietary changes, moving away from unhealthy diets, can fix this!
Here’s the thing: if you’re carrying extra weight, eating on the go, skipping workouts because life is busy, or dealing with things like high blood pressure or cholesterol, you may already be at higher risk—even if you haven’t been diagnosed yet. And if you had gestational diabetes during pregnancy or have a family history of diabetes, it’s even more important to pay attention.
But here’s the good news: type 2 diabetes doesn’t have to be your forever story. With early action and some strategic shifts in your daily habits—especially around food, movement, and sleep—you can lower your risk. And in many cases, it’s absolutely possible to put diabetes into remission.
You are not powerless. And you don’t have to wait for things to get worse to start feeling better.
Join my next 6 week challenge!
Tired of endless diets and no results? Join the FASTer Way to Fat Loss and see real, sustainable changes in just 6 weeks!
The most important thing to know about reversing diabetes is that it’s a process. It involves embracing a set of changes that improve your body’s ability to manage blood sugar and insulin sensitivity. You may also be interested to know more about when to hire a dietitian and how much it costs.
Here’s how you can do it naturally:
1. Start with Simple, Balanced Eating
When it comes to reversing type 2 diabetes, food is one of your most powerful tools—and no, it’s not just about cutting sugar.
If you’re like most of the women I work with, you’re juggling a lot. Maybe you’re grabbing meals between errands or relying on convenience foods because life is full. But the truth is, small, intentional food choices can make a huge impact on your blood sugar and overall health – and your risk of diabetes.
Instead of focusing on restriction like low-calorie diets, let’s shift to balance. That means choosing foods that keep your energy steady and your blood sugar stable (within a normal range)—without leaving you feeling deprived.
Here’s what that can look like:
Fiber-rich carbs like beans, lentils, whole grains, and starchy veggies (yes, potatoes can be part of the plan!) to slow the rise of blood sugar
Lean proteins such as chicken, turkey, eggs, fish, or plant-based options like tofu to help with fullness and blood sugar balance
Healthy fats from avocado, nuts, seeds, or olive oil to keep you satisfied and support heart health
Smarter swaps like choosing whole grain bread over white, or reducing how often you eat red meat—little shifts that really add up over time
Reading food labels can help, but it doesn’t have to be complicated. I always tell my clients: aim for meals that leave you feeling full, energized, and in control—not sluggish or craving more 20 minutes later.
I’ve had clients tell me, “White rice is life,” and I completely get it—food is such a personal, cultural, and emotional part of our lives. Instead of telling them to cut it out, we work on finding ways to enjoy it as part of a balanced diet. For example, one client loved having white rice with every meal, but they were struggling with energy crashes in the afternoon. Together, we adjusted their portions and paired the rice with more protein and fiber-rich veggies. The results were incredible—they felt more energized, less sluggish, and still got to enjoy the food they love. It’s such a good reminder that small changes, not restrictions, can have a huge impact on our health while keeping the foods we love on the menu.
And the best part? These changes don’t just support your blood sugar—they’ve also been linked to lower cholesterol, a healthier heart weight loss. Win-win-win!
2. Move Your Body in a Way That Feels Good
Exercise doesn’t have to mean running marathons or spending hours at the gym—especially if you’re juggling work, family, and everything in between. The truth? Movement is medicine when it comes to managing and even reversing type 2 diabetes.
The goal is to get your body moving regularly in ways that feel sustainable (and maybe even fun!). Walking, swimming, riding your bike with the kids, or picking up a set of dumbbells can all help improve your insulin sensitivity, boost energy, and support weight loss.
Here’s a good place to start:
Aim for at least 150 minutes of moderate activity each week
Mix in both aerobic movement (like walking or dancing) and resistance training (like bodyweight or strength workouts)
New to exercise? Daily walks are a powerful way to kickstart your metabolism and steady your blood sugar—even 10–15 minutes after meals makes a difference
Remember: progress is progress, even if it doesn’t look “perfect.” You don’t need a gym membership to get results—you just need consistency and a plan that fits your life.
Let’s talk real talk—weight can be a sensitive subject. But when it comes to managing diabetes, even small shifts in weight can lead to big improvements in your blood sugar and overall health.
Studies show that losing just 5–10% of your body weight can lead to lower A1C levels, more energy, and a stronger shot at remission. That doesn’t mean starving yourself or hopping on the latest fad diet. It means building habits you can stick with long-term.
If you’re feeling stuck, it’s okay to ask for help. Whether that’s working with a coach (hi! 🙋♀️), talking to your doctor, or exploring medical strategies, there is no shame in doing what’s best for you.
4. Prioritize Sleep Like It’s Self-Care (Because It Is)
If you’re doing “all the right things” but still struggling with your blood sugar, ask yourself: Am I sleeping enough?
Lack of sleep messes with hormones that control hunger, stress, and blood sugar—leaving you cranky, craving carbs, and more prone to health issues. It’s a cycle that’s easy to fall into, especially for busy women.
Shoot for 7–8 hours of quality sleep each night. That might mean setting boundaries with screens before bed, getting to sleep earlier, or creating a wind-down routine that actually calms your nervous system. And if you’ve ever wondered about going to bed hungry – read this.
Better sleep = better health. It’s that simple.
5. Keep Track of Your Progress (Even the Small Wins)
Regular health check-ins aren’t just for people who already have a diabetes diagnosis—they’re key for preventing problems, too.
Monitoring your blood sugar, checking in on your A1C, and working with a trusted provider gives you the information (and confidence!) to make smart decisions along the way.
As you implement lifestyle changes, these markers can help you:
Track improvements in blood sugar and insulin resistance
Talk to your doctor about reducing or even eliminating medications
Stay motivated by seeing real results from your hard work
Progress isn’t always visible from the outside—but your numbers will tell the story.
6. Build a Lifestyle That Supports You—Not Stresses You Out
The truth is, you don’t have to do this alone. Lifestyle changes stick better (and feel way more doable) when you’re surrounded by people who get it.
Whether it’s a supportive group, a coaching program, or even a few close friends making similar changes, don’t underestimate the power of community. You deserve encouragement, not criticism.
Some simple ways to make healthy living part of your everyday life:
Swap sugary drinks for flavored water or sparkling water
Upgrade your white bread to something heartier like a whole grain artisan loaf
Make movement fun—dance in the kitchen, play outside with your kids, or try a new class
Choose smarter snacks like nuts, Greek yogurt, or hummus with veggies
Keep an eye on the glycemic index of your go-to foods to reduce unexpected blood sugar spikes
This is about creating a life that supports your energy, joy, and long-term health—not one that feels restrictive or stressful.
Yes—and I want you to believe that, too. I’ve seen women just like you take back control of their blood sugar, lose weight, and even reduce (or eliminate!) their reliance on medications. When you consistently fuel your body with the right foods, move in ways that support your metabolism, and create sustainable habits, real change happens.
And while every woman’s health journey is different, you don’t have to figure it all out alone. It’s important to work with your healthcare provider—but having a coach and a proven strategy like the FASTer Way can help you stay consistent and confident every step of the way.
Let’s Be Real: This Isn’t Just About Diabetes
It’s about you—feeling like yourself again, having energy to keep up with your kids, getting dressed without frustration, and not constantly worrying about your blood sugar or the next doctor’s appointment.
The truth is, reversing type 2 diabetes (or drastically improving your health) isn’t about being perfect—it’s about showing up with intention. Maybe you start by changing how you plan your meals, getting in a few short strength workouts a week, or finally understanding how your body responds to food. The FASTer Way gives you the structure and support to do exactly that—without the overwhelm.
If you’re ready to stop guessing, start feeling better, and take charge of your health in a way that actually fits your life, I’d love to help guide you. You deserve to feel strong, vibrant, and in control. Let’s get you there—together.
The American Diabetes Association is an excellent resource if you need more information.
About Me
I’m Melanie.
I’m a chef, registered dietitian, foodie, wife and mom. If you’re looking for quick and healthy meal inspiration that serves YOU and your family well, then you’ve come to the right place!
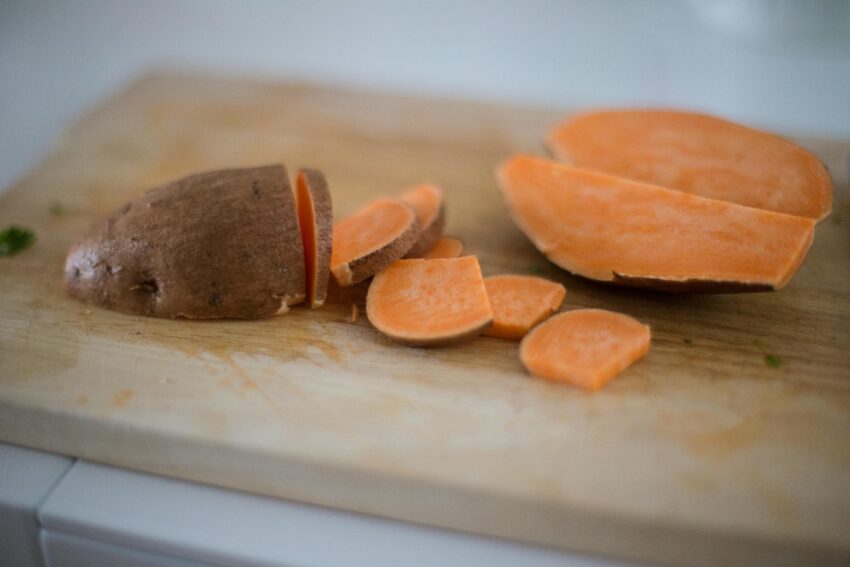
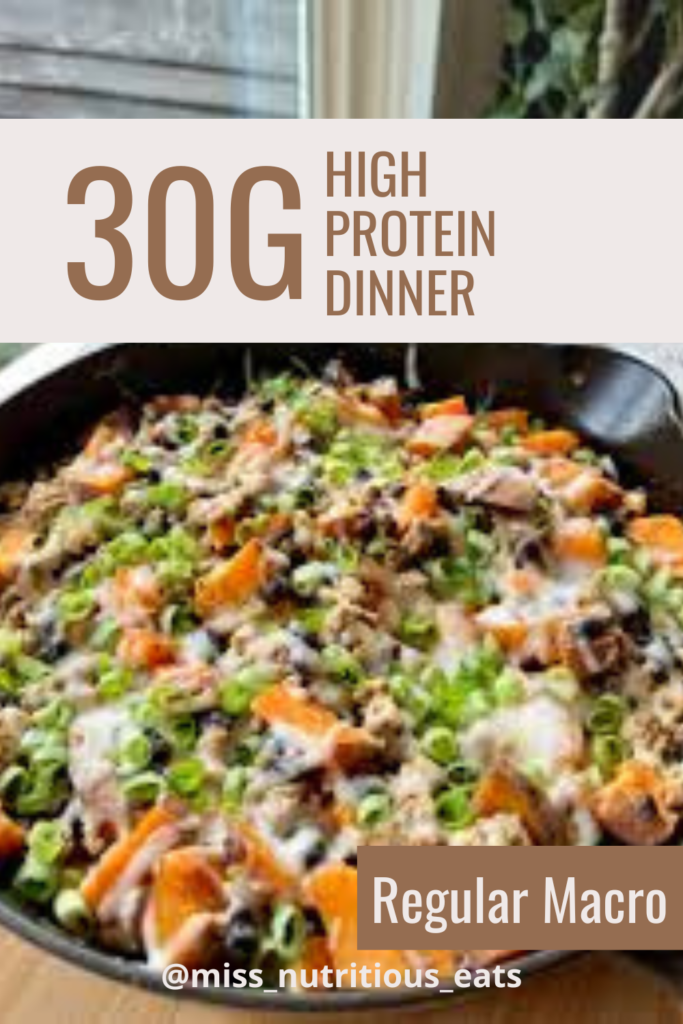
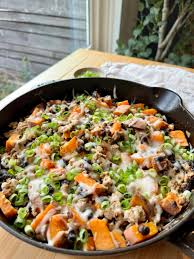
As a dietitian and a busy mom, I know how important it is to find meals that are not only delicious but also packed with nutrients and easy to whip up on hectic weeknights. That’s why I absolutely love this Southwest Turkey & Sweet Potato Skillet! Sweet potatoes are one of my go-to ingredients—they’re a fantastic source of fiber, vitamins like A and C, and provide long-lasting energy thanks to their natural complex carbohydrates. Pairing them with lean ground turkey keeps this dish loaded with high-quality protein while keeping the saturated fat on the lower side. And here’s a trick—seasoning the turkey with bold spices like chili powder, cumin, and garlic truly elevates its flavor without needing extra salt or fat. And if you’re currently enrolled in my FASTer Way programming, this recipe is perfect for a regular macro day!
If family friendly recipes are on your list, be sure to check out these meatballs, and garlic parmesan recipes. You’ll be glad you did!
Here’s what you’ll need to make this skillet sweet potato meal:
lean ground turkey (or try ground meat like chicken or extra lean beef even bison)
sweet potato, diced into small pieces (swap for whole sweet potatoes, sautéed sweet potato cubes, or even butternut squash)
bell peppers (any color; we love red bell pepper for sweetness)
onion (use red onion, yellow onion, or even shallots)
garlic, minced (substitute with garlic powder if needed)
baby spinach (or try kale, green beans, or cauliflower rice)
Seasonings: chili powder, ground cumin, smoked paprika, black pepper, kosher salt
2 tbsp olive oil (for sautéing; use coconut oil or avocado oil as alternatives)
1 tbsp fresh lime juice (adds brightness; lemon juice works too)
Optional toppings:
Feta cheese or a dairy-free alternative
Fresh cilantro, chopped
Green onions
Cheddar cheese
Ingredient Tips:
For added protein, toss in a fried egg or a handful of black beans.
Prefer mild spices? Substitute regular paprika for the smoked version and adjust seasonings to your taste!
💡 Gluten-Free? Read This!
Great news! This healthy sweet potato skillet recipe is naturally gluten-free, thanks to simple seasonings and whole ingredients. Just double-check your seasoning labels for hidden gluten, especially with chili powder or spice mixes.
👩🍳 How to Make My Southwest Turkey & Sweet Potato Skillet
This is a simple recipe that comes together fast! Here’s the step-by-step cooking process:
Cook the Sweet Potato: Heat 1 tbsp olive oil in a large skillet over medium heat. Add the diced sweet potato and cook for 5-7 minutes, stirring occasionally, until they’re slightly softened. Set them aside.
Cook the Turkey & Aromatics: Add the remaining oil, lean ground turkey, diced onion, and garlic to the skillet. Cook on medium-high heat, using a wooden spoon to break apart the meat until browned and fully cooked.
Add Veggies & Seasonings: Mix in the diced bell peppers, chili powder, ground cumin, smoked paprika, black pepper, and kosher salt. Stir well for that ideal amount of southwest flavor.
Stir the sweet potatoes back into the skillet. Cook for another 5 minutes until they’re fork tender.
Stir in the baby spinach and lime juice, letting the spinach wilt for 1-2 minutes.
Top Your Skillet: Remove from heat and sprinkle with feta, fresh cilantro, or your favorite toppings like melted cheese or sour cream.
🍽️ Pro Tip: Serve over brown rice, white rice, or scoop it up with tortilla chips for a crowd-pleasing dining experience.
📓 Best Served With
This versatile southwest flavors meal pairs perfectly with:
Breakfast Hash: Add a fried egg or avocado.
Rice Skillet Bowls: Serve over cauliflower rice, quinoa, or brown rice for a complete meal.
Vegetarian Meal Options: Swap the meat for roasted chickpeas or extra veggies.
👝 How to Store Leftovers
For meal prep or leftovers, store your southwest turkey skillet in an airtight container for up to 4 days in the fridge. Reheat on the stovetop or microwave for a quick and easy meal.
Want to freeze it? Place portions in freezer-safe containers for up to 2 months. This perfect one-pan meal reheats beautifully, maintaining its fresh delicious flavors.
🧠 Common Questions
Can I use ground beef instead of turkey?
Absolutely! Lean ground beef works well in this skillet recipe and offers a slightly richer flavor.
How do I make this dish spicier?
Add in cayenne pepper, red pepper flakes, or a drizzle of your favorite hot sauce for some heat.
Can I make this a vegetarian dish?
Yes! Swap the turkey for black beans, lentils or crumbled tofu. Adding green chiles, or roasted chickpeas will add to savory flavors too!
On The GO
I love cooking, but it seems like with 2 school aged children, we are always on the go. Here are some of my go-tos.
Each serving of this skillet is perfectly balanced to fuel your body. Here’s the breakdown of the key nutrients per serving:
Calories: 282 kcal
Carbohydrates: 16 g
Protein: 30 g
Fat: 11 g
Fiber: 3 g
With this recipe, you’re loading your family with a nourishing, and incredibly satisfying meal. It’s wholesome comfort food with a nutrition edge—perfect for fueling busy days or capping off your evening on a healthy note.
¼cupcrumbled feta or dairy-free alternativeoptional
2tbspchopped fresh cilantro
Method
Heat 1 tbsp olive oil in a large skillet over medium heat.
Add the diced sweet potato and cook for 5-7 minutes, stirring occasionally, until slightly softened.
Remove from the skillet and set aside. Add the remaining olive oil, ground turkey, onion, and garlic, cooking until turkey is browned and fully cooked. Stir in bell peppers, chili powder, cumin, smoked paprika, salt, and pepper. Add the sweet potatoes back into the skillet and cook for another 5 minutes until tender.
Stir in spinach and lime juice, cooking until wilted. Serve topped with feta and fresh cilantro.
Want more ideas like this? Subscribe to my weekly emails to make mealtime stress-free!
Whether it’s your first time creating one-pan meals or you want a great way to enjoy a simple dish that works for busy weeknights, this Southwest Turkey & Sweet Potato Skillet is a great option. Bookmark this true story of a skillet recipe that will become your go-to for comforting, healthy dinners.
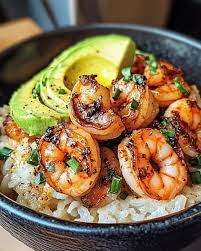
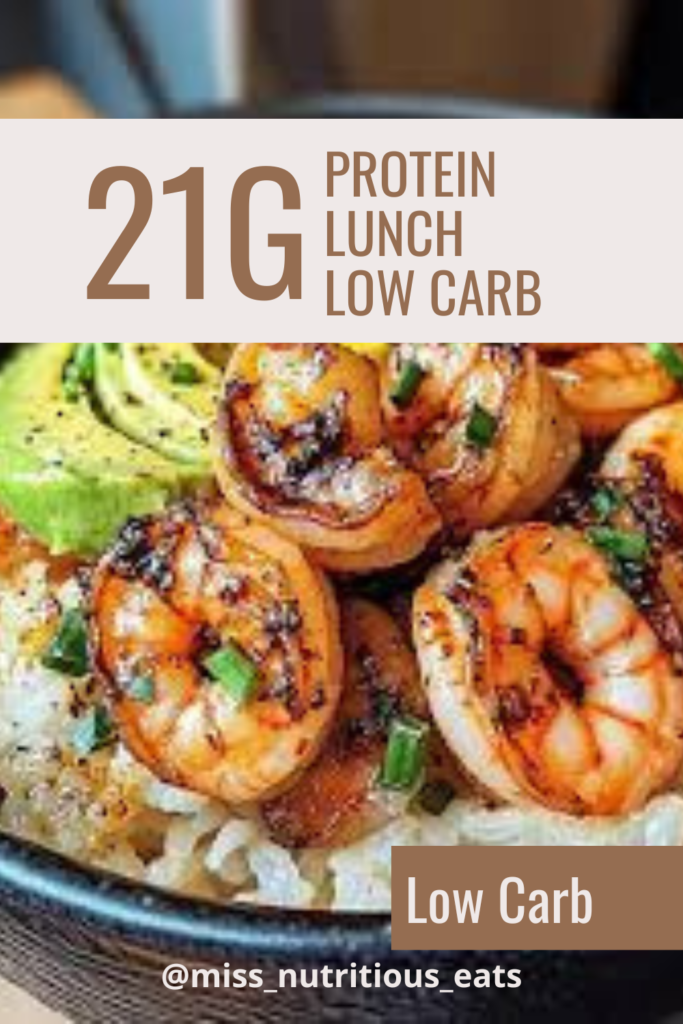
Are you ready to try a dish that screams fresh flavors and packs a punch? Meet the Spicy Garlic Shrimp & Avocado Bowl. This shrimp bowl recipe checks all the boxes including vibrant colors, fresh ingredients, and the perfect way to enjoy a low-carb, healthy salad. Whether it’s your first time trying shrimp rice bowls or you’re a meal prep pro, this dish will elevate your repertoire.
Here’s a breakdown of the key ingredients and some substitution ideas:
For the Shrimp
6 oz shrimp, peeled and deveined: Opt for jumbo shrimp if you prefer more bite, or substitute with pre-cooked shrimp to save time.
Olive oil: Use high-quality extra virgin olive oil for the best flavor. Avocado oil is a great alternative.
Spices: Chili powder, garlic powder, paprika, salt, and black pepper create a bold, flavorful base. Adjust spice level depending on your preferences.
For the Salad Base
Cauliflower rice: Perfect for a low-carb option, but jasmine rice, sushi rice, or quinoa are great additions if you prefer a heartier bowl.
Fresh vegetables: Cherry tomatoes, red bell pepper, cucumber, and fresh veggies like red cabbage or green onions bring a refreshing crunch.
For Toppings and Extras
½ avocado: Ripe avocados add that creamy avocado texture and plenty of healthy fats.
Fresh cilantro and lime juice: These play a significant role in bringing out the flavors, but fresh lemon juice works too. Sprinkle sesame seeds for a different flavor profile.
You’ll be happy to know this shrimp bowl recipe is naturally gluten-free! If you’re experimenting with cooking methods, avoid adding soy sauce unless it’s labeled gluten-free. You can also try coconut aminos for a great way to add umami flavor with no gluten concerns.
👩🍳 How to Make My Spicy Garlic Shrimp & Avocado Bowl
Get your full kitchen ready because this recipe comes together in a few simple steps:
Prep the shrimp: Toss peeled and deveined jumbo shrimp in a medium bowl with olive oil, chili powder, garlic powder, paprika, salt, and black pepper to coat evenly. Adjust spice level as needed.
Cook the shrimp: Heat a large skillet over medium-high heat. Arrange shrimp in a single layer and sauté for 3-4 minutes per side until pink and cooked through. Transfer them to a small bowl and keep warm.
Prepare the salad base: Arrange your bowl with cauliflower rice (or your choice of quinoa, jasmine rice, or brown rice). Add diced cherry tomatoes, cucumber, red bell pepper, and avocado.
Combine and garnish: Place your cooked shrimp on the salad base. Drizzle with fresh lime juice and garnish with chopped cilantro. Serve immediately and enjoy your avocado shrimp salad!
📓 Best Served With
Black beans: Add a side of seasoned black beans for a burrito bowl-inspired twist.
Spicy mayo: Mix mayo with a dash of chili powder and fresh lime juice for the perfect drizzle.
Sushi bowls: Incorporate sushi rice and finish with soy sauce or sesame seeds for a refined take.
👝 How to Store Leftovers
Cooked shrimp bowls can be stored in an airtight container in the fridge for up to 3 days. Keep the avocado and fresh vegetables separate to maintain their freshness. For meal prep, assemble everything except the avocado and cucumber in advance and add those just before serving.
🧠 Common Questions
Can I use pre-cooked shrimp?
Absolutely! Pre-cooked shrimp is a great way to save time. Just heat them briefly in a skillet with the spices to bring out the flavors.
What’s a good substitute for cilantro?
If you’re not a fan of cilantro, use chopped fresh parsley or green onions for a different, yet equally refreshing touch.
How do I adjust for picky eaters?
Swap out spicy shrimp for milder cajun shrimp or adjust spice levels to suit everyone’s preference. You can also include side dishes like red onions or simpler veggies like plain cucumbers.
On The GO
I love cooking, but it seems like with 2 school aged children, we are always on the go. Here are some of my go-tos.
Here’s the full nutrition information for a single serving of this shrimp bowl recipe (based on a 255-calorie diet):
Calories: 255kcal
Carbohydrates: 13g
Protein: 21g
Fat: 15g
Saturated Fat: 2g
Cholesterol: 137mg
Sodium: 434mg
Potassium: 889mg
Fiber: 6g
This nutritious meal is a balance of healthy fats, lean protein, and dietary fiber. You can also pump up the protein by adding more shrimp to meet your macro needs.
Next Time, Try This!
Switch things up to explore your culinary creativity! Throw in some red peppers, black beans, or green onions for that next-level flavor. Or, craft sushi-style shrimp rice bowls and experiment with soy sauce for an entirely different vibe.
Now it’s your turn to make this Spicy Garlic Shrimp & Avocado Bowl! Head to your favorite grocery store, snag the freshest ingredients, and create a delicious meal that celebrates the art of balance, flavor, and nutrition.
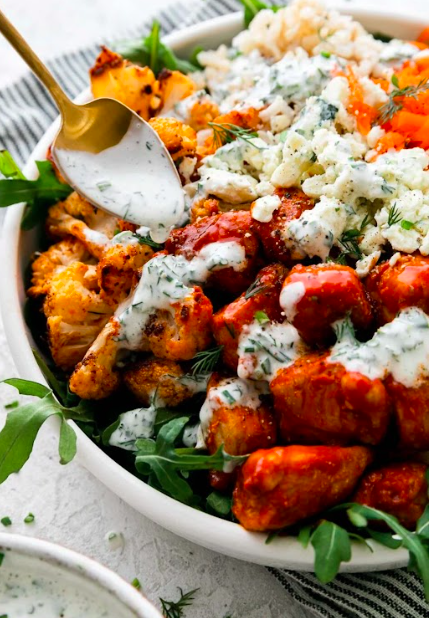
There’s just something about buffalo and ranch that always creates a crowd pleasing recipe. This Buffalo Ranch Chicken Bowl is one of those solutions that checks all the boxes: it’s quick, wholesome, and packed with flavor. Whether you’re navigating a hectic week or looking to spice up your meal prep routine, this recipe is your reminder that eating well doesn’t have to be complicated.
Protein options: Shredded rotisserie chicken, chicken thighs, skinless chicken breasts, or cubed chicken
Base: White rice, brown rice, cauliflower rice (low-carb alternative), or long grain rice prepared using a rice cooker
Veggies: Cherry tomatoes (or grape tomatoes), red onions, bell peppers, roasted cauliflower, bag of cabbage slaw mix, sweet potatoes, or a great addition of fresh veggies like cucumbers
Healthy fats: Avocado or olive oil
Cheese options: Blue cheese crumbles, feta cheese, or a dairy-free alternative
Sauces and dressings: Primal Kitchen buffalo sauce, Frank’s Buffalo Wing Sauce, blue cheese dressing, or homemade ranch using Greek yogurt and ranch seasoning
Additional seasonings: Garlic powder, paprika, sea salt, black pepper
Optional sides: Black beans, lime juice, apple cider vinegar
On The GO
I love cooking, but it seems like with 2 school aged children, we are always on the go. Here are some of my go-tos.
Double-check seasoning packets like ranch seasoning and buffalo sauce for gluten content.
Use gluten-free dressing options (e.g., a homemade ranch made with dairy-free yogurt).
👩🍳 How to Make My Buffalo Ranch Chicken Bowl
Cook the protein:
Use shredded chicken, cubed chicken, or a sheet pan chicken option for crispy buffalo chicken.
For easy preparation, try tender buffalo chicken made in an Instant Pot or slow cooker with chicken broth and spicy buffalo sauce.
Prepare the base:
Use your preferred bed of rice (brown, white, or cauliflower rice) or opt for roasted cauliflower for a low-carb twist.
Cook the rice in a rice cooker or Instant Pot for ease.
Assemble the bowl:
Add freshly cooked grains or cauliflower florets to a large skillet over medium-high heat to crisp, if desired.
Layer with lots of veggies like bagged cabbage slaw mix, cherry tomatoes, and bell peppers.
Season and dress:
Coat the chicken in buffalo sauce, garlic powder, and seasonings until golden brown.
Top with blue cheese crumbles (or feta), ranch dressing, and extra buffalo sauce for a spicy kick.
Serve and enjoy:
Garnish with fresh chives or green onions for a burst of flavor!
📓 Best Served With
Low-carb buffalo chicken bowls paired with a side of black beans or crispy roasted sweet potatoes.
Try this bowl-style meal with a refreshing apple cider vinegar slaw for a tangy kick.
A dollop of sour cream or your favorite hot sauce can elevate the spice factor.
👝 How to Store Leftovers
Store leftover buffalo chicken or veggies in an airtight container in the fridge for up to 4 days.
For meal prep, use separate containers to preserve freshness. Add dressing just before serving.
Freeze leftover spicy buffalo chicken in a meal prep container for up to 3 months.
🧠 Common Questions
Q1. Can I make this with crispy buffalo chicken?
Absolutely! Use cubed chicken tossed with olive oil, buffalo sauce, and ranch seasoning, then bake at high heat on a sheet pan until golden brown.
Q2. Are there different types of buffalo sauce I can use?
Yes, you can try Frank’s Buffalo Wing Sauce or Primal Kitchen Buffalo Sauce for a lower-calorie option.
Q3. Can I use rotisserie chicken?
Definitely! Shredded rotisserie chicken is a great addition and saves on prep time.
💪🏼 Tracking Macros? Check This Out
The Buffalo Ranch Chicken Bowl is a perfect blend of flavor and nutrition. It’s only 265 calories per serving and packed with 30g of protein to keep you full and support muscle recovery. With just 9g of carbs and 4g of fiber, it’s great for low-carb diets and supports healthy digestion. It also has 12g of healthy fats, including 5g monounsaturated fats and 3g polyunsaturated fats, while keeping saturated fat low at 3g.
This bowl is also loaded with nutrients like Vitamin A (7321IU) for vision and immunity, Vitamin C (14mg) for skin and immune health, plus potassium (654mg) and iron (2mg) for energy and cellular health.
Whether you’re tracking macros or just looking for a healthy, satisfying meal, this recipe has it all—simple, nutritious, and packed with flavor!
Packed with high protein, healthy fats, and fresh veggies, this recipe supports your nutrition goals visually and functionally.
Check the nutrition facts and nutritional information on seasoning packets and sauces to fit this into your macros seamlessly.
Swap out rice with cauliflower rice to cut carbs while keeping the hearty feel of buffalo bowls.
If you try out this Buffalo Ranch Chicken Bowl Recipe – and I hope you do – share your thoughts with a star rating in the comments!
2tbspcrumbled blue cheeseor dairy-free alternative
1tbspranch dressingor dairy-free option
1tbspbuffalo sauce
½tspgarlic powder
½tsppaprika
¼tspsea salt
¼tspblack pepper
Method
In a medium bowl, toss the grilled or shredded chicken with buffalo sauce, garlic powder, paprika, salt, and pepper until well coated.
In a large salad bowl, add shredded romaine as the base. Top with cherry tomatoes, shredded carrots, sliced cucumber, diced avocado, and crumbled blue cheese.
Add the buffalo-seasoned chicken on top. Drizzle with ranch dressing and gently toss before serving. Enjoy!
As a dietitian and FASTer Way coach, I’ve had the privilege of guiding so many clients through their fat loss journeys, but John and Adrienne’s story is one that truly stands out. Seeing a former professional athlete and his wife not only embrace the FWTFL lifestyle but completely transform their energy levels, strength, and overall health has been incredible. Their journey is proof that with the right foods, strategic workouts, and a supportive community, anyone can achieve amazing results—no matter their prior experience or stage in life. I’m so excited to share their story with you!
As a former professional athlete, John spent most of his life training and staying in elite condition while playing hockey. After retiring from the NHL in 2002, he transitioned into coaching and broadcasting. With this career shift, the routine of working out became a distant memory, and over the years, weight gain slowly crept in.
Feeling out of shape and low on energy, John consulted a functional medicine doctor, who introduced him to the FASTer Way program. Through our friendship with Melanie Marcus, we had heard of FASTer Way before but never knew the details. After reviewing his blood test results, John was cleared to start the program—and that’s when our journey began.
On The GO
I love cooking, but it seems like with 2 school aged children, we are always on the go. Here are some of my go-tos.
On February 1st, 2024, we committed to FASTer Way and invested in our health. We bought weights, a bench, kettlebells, mats, and even dusted off our Peloton—transforming our garage into our personal gym. One of the best parts of FASTer Way is that you don’t need an expensive gym membership or extra travel time. No waiting for machines, no awkward gym encounters—just a convenient, time-efficient way to train.
Over the years, we had tried multiple fitness programs, gyms, and trainers, but nothing ever stuck. With FASTer Way, John saw immediate results through a simple, structured approach. The app helped him track his food intake, stay accountable, and keep workouts to just 30 minutes, plus 20 minutes of cardio.
Each night, we review the next day’s workout and macro goals, ensuring we are fully prepared. One year later, John is down 45 pounds, back to his playing weight and waist size, and has regained his strength and stamina. He even had to buy an entirely new wardrobe—a welcome expense for a great reason! The transformation has been incredible.
Staying on Track with a Demanding Schedule
John’s schedule is non-stop—with early mornings, long game days, and late nights due to 7:30 PM hockey games. However, he starts his day strong with a FASTer Way workout, a Peloton ride, and a protein-packed coffee with creatine before heading to the rink.
The app has helped him become more mindful of his food choices, especially while traveling. He now prioritizes whole-food, grass-fed protein and even invested in a new water bottle to stay on top of hydration.
The results have been so noticeable that friends, family, and colleagues constantly ask, “What are you doing?” The answer? “The FASTer Way!” Even John’s former coaching colleagues are curious about his success and how healthy he looks.
Adrienne’s Transformation: Strength, Energy & Pain Relief
About a month into John’s journey, he told me, “If I’m doing this, you’re doing it with me!” So, I joined the FASTer Way community—and I’m so glad I did!
At first, I was skeptical, but it didn’t take long for me to see real results. This program leveled up my fitness, and now I look forward to Monday HIIT and Tuesday Tabata! I have always been active, but this is the easiest program to stay consistent with, progress properly, and maintain. I feel stronger now than I did in my 30s, and I’m turning 60 this year.
As a former professional golfer, the strength and endurance I’ve gained have directly impacted my game—I hit the ball farther, and I don’t fatigue as quickly under tournament conditions. A major bonus? No more back pain, something I’ve dealt with for most of my life.
The best part of this entire journey has been committing to this lifestyle together.
Reconnecting with Our Coach, Melanie Marcus
An extra-special bonus of this experience has been reconnecting with our dear friend, Melanie Marcus.
Melanie has been an incredible coach, uniquely understanding the challenges John faced transitioning from an NHL lifestyle to everyday life. She guided him through the FASTer Way app, provided nutrition tips for traveling, and helped him stay accountable—without making it feel overwhelming.
With a former professional athlete, coaching requires a delicate balance—pushing for progress while respecting past training experiences. Melanie did exactly that.
Why We Recommend FASTer Way
We wholeheartedly recommend FASTer Way to anyone looking to lose weight, gain strength, and build sustainable habits. This isn’t just another diet—it’s a lifestyle change that truly works.
If you’re considering it, give it a try—you won’t be disappointed! 🚀
The FASTer Way to Fat Loss (FWTFL) is a sustainable lifestyle program that combines intermittent fasting, carb cycling, whole food nutrition, and strength training to help you achieve amazing results. Founded by Amanda Tress, this 6-week program is designed to be a long-term solution for fat loss, energy levels, and overall health.
Key Components of the FWTFL Program
Intermittent Fasting & Eating Schedule – Learn when and how to eat to fuel your body efficiently. Carb Cycling – Incorporates low-carb days, regular macro days, and low macro days to optimize fat loss. Whole Foods & Nutrition Program – Focuses on real foods, healthy fats, and the right foods for long-term success. Strength Training & HIIT Workouts – Includes upper and lower body, gym workouts, including mobility workouts for rest days. Each are about 30 minute workouts to help build muscle. FWTFL App & Coaching – Get access to the Faster Way app, and certified coach for guidance every step of the way. When you sign up using this link, you ensure that I am your coach + dietitian for the whole program. Supportive Community – Engage with a small group on Social Glow throughout the VIP program to stay motivated.
Why FASTer Way Works
For first-time clients, the prep week sets the foundation for success. Throughout the first round, you’ll learn how to balance food groups, fitness goals, and meal guides while following a structured workout plan. Many clients, including those with prior experience in other programs, see great results in the first week—with progress photos showing a different person in just a few weeks.
The main reason this program is a game changer is that it’s not just a short-term weight loss program—it’s a lifestyle change. Clients who previously struggled with yo-yo dieting finally find a sustainable way to build muscle, burn fat, and improve energy levels in the long run.
Is It the Right Time for You?
If you’re looking for a fitness program that offers immediate access, clear weekly meal plans, and a personal trainer feel, this is the best decision you can make. This honest review proves that hard work and the right reasons lead to better shape and lasting success.
Join today and take control of your healthy lifestyle with FASTer Way! 💪🔥
About Me
I’m Melanie.
I’m a chef, registered dietitian, foodie, wife and mom. If you’re looking for quick and healthy meal inspiration that serves YOU and your family well, then you’ve come to the right place!
If you’re taking Ozempic as part of a weight loss journey or blood sugar control, you’ve probably noticed one big change—your appetite isn’t what it used to be. As a GLP-1 receptor agonist, Ozempic helps regulate blood sugar and promotes weight loss by slowing digestion and reducing hunger. For many, this makes it easier to eat fewer calories, but it can also mean struggling to get enough protein, which (I can’t stress this enough!!) is crucial for maintaining muscle, energy, and overall health.
As a registered dietitian and professionally trained chef, I know firsthand how important protein is—especially when you’re losing weight. I also know that eating well shouldn’t feel like a chore. Stay with me through this article, I’ll walk you through exactly how to hit your protein goals while on Ozempic, with simple, satisfying, and delicious solutions that fit your lifestyle. Let’s make this easy (and tasty)!
Ozempic has been making headlines, and here’s why—it’s a medication with semaglutide, an active ingredient that helps manage type 2 diabetes and supports weight management. Weight loss drugs like semaglutide works by mimicking GLP-1, a hormone your body naturally produces to regulate blood sugar, control appetite, and boost metabolism.
Here’s how it works: it helps your body release insulin when blood sugar is high and slows digestion, keeping you feeling full longer. This reduces hunger and calorie intake without feeling deprived. It also lowers cravings by reducing glucagon, a hunger hormone, making it easier to stick to healthier habits.
For weight loss, the appetite suppression is a game-changer. Combined with a good diet and exercise, Ozempic can help you lose significant weight while improving how your body burns fat and handles insulin resistance.
On The GO
I love cooking, but it seems like with 2 school aged children, we are always on the go. Here are some of my go-tos.
When you’re on a weight-loss journey one thing you don’t want to overlook is protein. I cannot stress enough how protein intake is crucial for preserving lean muscle mass, repairing connective tissues, and maintaining strength as you shed pounds. Protein isn’t just about building muscle—it supports so many essential body functions, from keeping your immune system is in tip top shape to ensuring your hair, skin, and nails stay healthy. You want to have nice hair and skin and strong bones right? With the appetite-suppressing effects of Ozempic and the potential for reduced calorie intake, there’s a chance that rapid weight loss could lead to losing muscle along with fat if you’re not getting enough protein. That’s why it’s extra important to make sure your meals are packed with high-quality protein sources like lean meats, eggs, dairy, tofu, or legumes. By including enough protein in your diet, you can keep your body strong throughout your weight-loss journey while reaping the full benefits of your medical weight loss plan.
Setting Personalized Protein Goals
Setting personalized protein goals can help you take charge of your health and fitness, but where do you start? A good baseline to consider is the recommended daily allowance (RDA) for protein, which suggests consuming around 0.8 to 1.2 grams of protein per kilogram of body weight for most individuals. This range is a general guideline, but your ideal protein intake will depend on factors like your activity level, health goals, and overall nutrition needs. For example, someone trying to build muscle or recover from an illness may need more protein than someone with a sedentary lifestyle. To determine what’s right for you, it’s a smart idea to consult a registered dietitian or an obesity medicine physician. These experts can evaluate your dietary needs, fitness routine, and medical history to set personalized protein targets that align with your goals and lifestyle. By fine-tuning your protein intake, you can fuel your body effectively, whether your focus is on weight loss, muscle gain, or simply maintaining a healthy balance.
When new clients join my 6 week fat loss program, I review their new client assessment and set custom macros based on past medical history and individual goals.
Protein-rich foods for Ozempic Users
When it comes to finding the best protein sources, focusing on high-quality, nutrient-dense foods is essential. Lean meats like chicken breast, turkey, and fish are excellent options, providing a hefty dose of protein with minimal fat. For those who enjoy dairy, foods like cottage cheese, Greek yogurt, and other low-fat dairy products are both protein-packed and versatile, making them easy to incorporate into your diet.
Whole grains such as quinoa and farro not only deliver protein but also supply fiber, which supports digestion and helps you stay full longer.
Healthy fats like avocados, nuts, and seeds can complement these protein sources, offering additional nutrients and sustaining energy levels.
Plant-based proteins such as beans, lentils, tofu, and edamame are fantastic choices as well, especially for vegetarians or those looking to reduce their meat intake, while animal-based proteins are often complete proteins, providing all essential amino acids vital for muscle repair and overall health.
For individuals with busy schedules, protein powders, ready-to-drink protein shakes, and newer innovations like protein-rich drinks are convenient options to ensure you meet your daily protein goals without sacrificing nutrition. By balancing these dietary elements, Ozempic users can maintain a high-quality protein intake that aligns with their weight loss and health objectives.
Practical Meal Planning Tips for Protein Goals
Meal planning might sound intimidating, but it doesn’t have to be. The key is to focus on whole foods that are naturally rich in protein, healthy fats, and other vital nutrients. Now that you’re not as hungry, every bite counts to get your body the nutrients it needs.
Meal planning might sound intimidating, but it doesn’t have to be. The key is to focus on whole foods that are naturally rich in protein, healthy fats, and other vital nutrients. Now that you’re not as hungry, every bite counts to get your body the nutrients it needs.
This is going to sound corny, but think of protein, carbs, and fats as friends you’re inviting to a party. Protein is like the dependable friend who always helps you set the foundation for a great time—strong and reliable. Carbs are the lively guest who keeps everyone energized and moving, while healthy fats are the chill, supportive friend who makes sure everything stays balanced and smooth. Hosting the perfect party (or meal, in this case) is all about getting the right mix of these three.
When planning your meals, start by prioritizing protein. It takes center stage, bringing structure and strength to the plate. Foods like chicken breast, fish, or tofu make great options. Then, think about carbs—whole grains like quinoa or brown rice or starchy veggies like sweet potato are excellent choices. Finally, don’t forget your fats—think slices of creamy avocado or a drizzle of olive oil to bring it all together.
1️⃣ Eat Protein First at Every Meal
When you sit down to eat, start with protein before anything else. Whether it’s eggs, chicken, Greek yogurt, or fish, front-loading protein helps ensure you get what you need before you fill up.
2️⃣ Focus on Smaller, Protein-Dense Meals
Since big meals might not be appealing, try small, frequent meals packed with protein: ✅ Greek yogurt with collagen powder ✅ Scrambled eggs with cheese ✅ Tuna salad on cucumber slices ✅ Protein shake with almond milk ✅ Cottage cheese with berries
3️⃣ Sip Your Protein
If solid food feels too heavy, protein drinks and smoothies are a lifesaver. Try: 🥤 A high-quality protein shake ☕ Collagen or protein powder in coffee 🍓 A smoothie with protein, Greek yogurt, and berries
4️⃣ Keep Easy Protein Snacks on Hand
Protein-rich snacks make it easier to hit your goals without overloading your plate: ✔ Hard-boiled eggs ✔ String cheese or cottage cheese ✔ Turkey roll-ups with avocado ✔ A handful of almonds + a protein bar
5️⃣ Track & Adjust as Needed
Since your appetite fluctuates, tracking your protein intake can help you see where you might need a boost. Aim for at least 20–30g of protein per meal and adjust based on how you feel.
Tackling Challenges to Meeting Protein Goals
Meeting your protein goals can come with its own set of challenges, but a little preparation helps a lot. One common mistake is underestimating how much protein your body actually needs, so take time to familiarize yourself with portion sizes. For example, aim for around 20-30 grams of protein in each meal to reach your daily target.
Another hurdle might pop up if you’re using GLP-1 medications, which often reduce appetite or feelings of hunger. This can make it hard to eat larger meals, so try smaller, protein-dense meals instead—think a slice of turkey on a whole-grain cracker or a small serving of cottage cheese with fresh fruit.
Fairlife chocolate milk, or a protein shake are good options to have on hand. Small hacks like these can make hitting your goals much easier without feeling like a chore.
Practical Meal Planning Tips for Protein Goals
Meals
When it comes to building a balanced diet with plenty of protein, the key is to keep it simple and practical. Start by thinking of each meal like a well-rounded plate—your protein is the star of the show. Whether it’s lean chicken, fish, tofu, or even eggs, you want to aim for a high-quality protein source that fills you up and helps your body recover and grow strong.
Complement your protein with wholesome carbs like quinoa, brown rice, or sweet potatoes to maintain steady energy.
Round out your meal with healthy fats such as a handful of nuts, avocado slices, or a drizzle of olive oil to stay satisfied and support overall health.
Snacks
When it comes to snacks, think grab-and-go, whole foods so you don’t skimp on nutrition.
Boiled eggs are a powerhouse snack—packed with protein and super convenient.
Plain Greek yogurt topped with fresh berries or cinnamon makes for a creamy and satisfying option without added sugar.
Apples, pack of almonds and a beef stick.
For meal planning, the easiest way is to mix and match.
Start with a protein like grilled chicken, chickpeas, shrimp or tempeh.
Add a veggie side like roasted broccoli or a mixed greens salad.
Include a small serving of whole grains like farro, barley, or brown rice to keep variety in your meals.
If you’re reading this and thinking – there is no way I’m going to do this cooking, the good news is you don’t have to. Whole Foods and other meal delivery services make it easy to meet your unique macro needs.
Prepping these ahead of time and storing them in meal containers can make assembling meals during the week quick and easy. This approach helps you stay on track with your protein goals while maintaining a balanced, sustainable diet for weight loss or overall health. It’s all about creating combinations that work for you!
Tackling Challenges to Meeting Protein Goals
These are some of the most common hurdles I’ve seen my clients encounter over the past year.
Underestimating Protein Needs
Many people don’t realize how much protein they actually need.
Solution: Use a macro calculator or aim for at least 20-30g of protein per meal.
Portion Size Confusion
A “serving” of protein isn’t always a full portion. (Example: A 4 oz chicken breast has ~35g protein.)
Solution: Weigh and track protein sources initially to get a feel for proper portions.
Reduced Appetite on GLP-1 Medications
Feeling full quickly can make it hard to consume enough protein.
Pre-plan meals to distribute protein evenly throughout the day.
Protein Goals in a Balanced Diet
While protein is a star player, it’s not the whole game. A healthy, sustainable diet includes: ✅ Healthy fats (think avocado, nuts, olive oil) for hormone balance and brain health. ✅ Whole grains for fiber and steady energy (yes, carbs are important!). ✅ Portion-controlled calories—because even too much of a good thing can stall progress.
It’s not about cutting everything out—it’s about learning how to build meals that fuel your body and fit your lifestyle.
Long-Term Success = Lifestyle Changes
Here’s the truth: No matter how great your meal plan is, if it doesn’t fit your real life, it won’t stick. That’s why focusing on habits—like prioritizing protein at meals, prepping ahead, and making small swaps—helps create results that last.
At the end of the day, your diet should support your goals and your life. No extremes,—just balance.
Regular Monitoring and Adjustments
Hitting your protein goals isn’t just a “set it and forget it” thing. As your body changes—whether you’re losing weight, gaining muscle, or adjusting to a new routine—your protein needs can shift too. That’s why regular check-ins with your dietitian and healthcare provider are a good idea and can make a big difference.
Tracking protein
✔ Ensures you’re getting enough – Especially important if you’re losing weight or building muscle. ✔ Prevents under or over-eating – Too little protein can slow progress, while too much without balance can throw off your nutrition. ✔ Helps troubleshoot plateaus – If you’re stuck, tweaking your protein intake (alongside other macros) can help get things moving again.
Adjusting as You Go
Your needs might change based on: Weight loss progress – As you lose weight, your protein needs may need to be fine-tuned. Muscle-building goals – If you’re strength training more, you may need to increase protein intake. Appetite changes – Medications (like GLP-1s) or lifestyle shifts can have side effects that impact how much you comfortably eat.
Stay Connected & Stay Flexible
The best way to get this right? Stay in touch with a registered dietitian, weight-loss coach, or healthcare provider who can help assess and adjust your intake. Nutrition isn’t one-size-fits-all, and making small, strategic changes over time is what leads to lasting results.
The key takeaway? Listen to your body, track your intake, and don’t be afraid to make adjustments along the way. 💪🏼
You’ve Got This! 💪🏼
Hitting your protein goals while on Ozempic is totally doable—it just takes a little planning and the right approach. With small, smart tweaks, you can fuel your body, protect your muscle, and feel stronger while losing weight.
The key? Make protein a priority. Whether that’s adding a scoop of protein to your morning coffee, choosing high-protein snacks, or focusing on quality meals, every little effort adds up. And the best part? You don’t have to do it alone! A nutrition coach, registered dietitian, or healthcare provider can help guide you and make sure you’re getting exactly what your body needs.
So keep going—your health goals are 100% within reach! With a little planning (and some tasty protein-packed meals along the way), you’ll be feeling your best in no time. 💯
What’s your favorite way to sneak in extra protein? Let’s share ideas below! ⬇️😊
Join my next 6 week challenge!
Tired of endless diets and no results? Join the FASTer Way to Fat Loss and see real, sustainable changes in just 6 weeks!
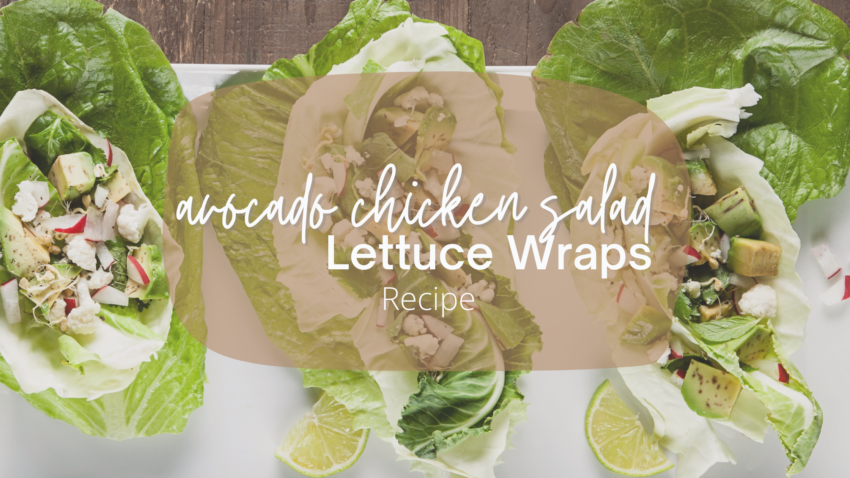
Looking for a healthy lunch that’s easy to make and packed with healthy fats? I love these avocado chicken salad lettuce wraps—they’re one of my go-to meals when I’m trying to keep things light but satisfying. They’re perfect for a quick dinner, lunch, or even something I whip up the night before (if I can resist eating it all and save some for the next day!). With minimal cooking and loads of flavor, this California avocado-inspired dish has definitely become one of my favorite lettuce wrap recipes. Give it a try!
Kickstart your health journey with these 3 FREE guides—perfect for intermittent fasting, weight loss on the go, and jumpstarting fat loss. Grab yours and make healthy eating easier than ever! 💪
On The GO
I love cooking, but it seems like with 2 school aged children, we are always on the go. Here are some of my go-tos.
😍 Why You’ll Love Avocado Chicken Salad Lettuce Wraps
Minimal Cooking: Spend as little time as possible in the kitchen with this recipe. Whether you’re using a pre-cooked chicken breast or rotisserie chicken from the grocery store, or even Costco canned chicken you’ll have these wraps ready in no time.
Handful of Ingredients: You only need a few staples like Greek yogurt, black pepper, and lemon juice, paired with fresh produce like ripe avocados, celery, and romaine lettuce.
Healthy and Low-Calorie: Packed with healthy fats from the avocado, these wraps are perfect for anyone tracking a calorie diet or aiming to keep things light.
Refreshing on a Hot Summer Day: Skip heavy meals! These wraps are light, fresh, and exactly what you need to cool down.
Customizable: Whether you prefer lime juice over lemon juice, or like to throw in extras like green onions or red onion, there’s plenty of room to make them your own.
🗒️ Ingredients + Substitutions
To make these simple lettuce wraps, here’s what you’ll need from the grocery store:
chicken breast, cooked and shredded. If you’re short on time, use a rotisserie chicken for convenience! Canned Kirkland chicken breast is also a good option.
avocado, mashed. Use a fresh avocado or hass avocados for the creamiest flavor. I also use Kirkland avocado mash cups when I have them.
Greek yogurt. Swap with lite sour cream if needed.
mustard. Dijon mustard works well for a punchier flavor
lemon juice. Lime juice works too
celery stalk, chopped
Salt and black pepper, to taste
Romaine lettuce leaves (or use butter lettuce, bibb lettuce, or lettuce cups for variety)
Optional add-ins for extra crunch and flavor:
Green onions
Red onion, finely diced
Large avocados for garnish
💡 Gluten-Free? Read This!
This delicious recipe is naturally gluten-free, thanks to the use of lettuce leaves rather than bread or wraps. Butter lettuce or bibb lettuce makes a crunchy and pliable replacement for traditional tortillas, while Romaine lettuce provides a crisp texture that’s perfect for these chicken wraps.
👩🍳 How to Make My Avocado Chicken Salad Lettuce Wraps
Follow these simple steps to assemble this healthy lunch in no time:
Cook and Shred the Chicken
If you’re starting from scratch, cook the chicken in a large skillet over medium heat until done. Alternatively, shred leftover chicken from last night, or grab a rotisserie chicken for a quick option.
Mix the Chicken Salad Mixture
Using a large bowl (or mixing bowl), combine shredded chicken, mashed ripe avocado, Greek yogurt, mustard, and lemon juice. Add the chopped celery, then season with salt and black pepper to taste. Mix until well combined.
Prepare the Lettuce Cups
Wash and dry your Romaine lettuce (or butter lettuce) leaves, ensuring they’re clean and crisp.
Serve and Enjoy
Spoon the chicken salad mixture into your lettuce cups or wraps, and serve immediately. Garnish with diced red onion, green onions, or even a sprinkle of Vitamin C-packed lemon zest if desired.
This good way to utilize leftover chicken also makes a great source of high protein, perfect for those on the go!
📓 Best Served With
These avocado wraps pair beautifully with light and refreshing sides. Try these combos:
A simple salad drizzled with a vinaigrette.
A side of fresh fruits to add natural sweetness.
Sparkling water with a splash of lime juice.
👝 How to Store Leftovers
Got extras? Store any leftover chicken salad mixture in an airtight container and refrigerate. It keeps well for 3-4 days, making it a great lunch idea for the week ahead. Pro tip: Keep the mixture separate from the lettuce leaves for maximum freshness when assembling your wraps later!
Join my next 6 week challenge!
Tired of endless diets and no results? Join the FASTer Way to Fat Loss and see real, sustainable changes in just 6 weeks!
Q1. Can I use a food processor for the chicken salad mixture?
Absolutely! If you prefer a finer texture, blend the ingredients in a food processor before stirring in chopped celery.
Q2. Can I make these wraps ahead of time?
Yes, but for best results, assemble the wraps just before serving. Store the salad mix separately from the bibb lettuce, and your wraps will stay fresh.
Q3. Are there vegetarian substitutes?
For a vegetarian twist, swap the chicken breast with chickpeas or tofu crumbles.
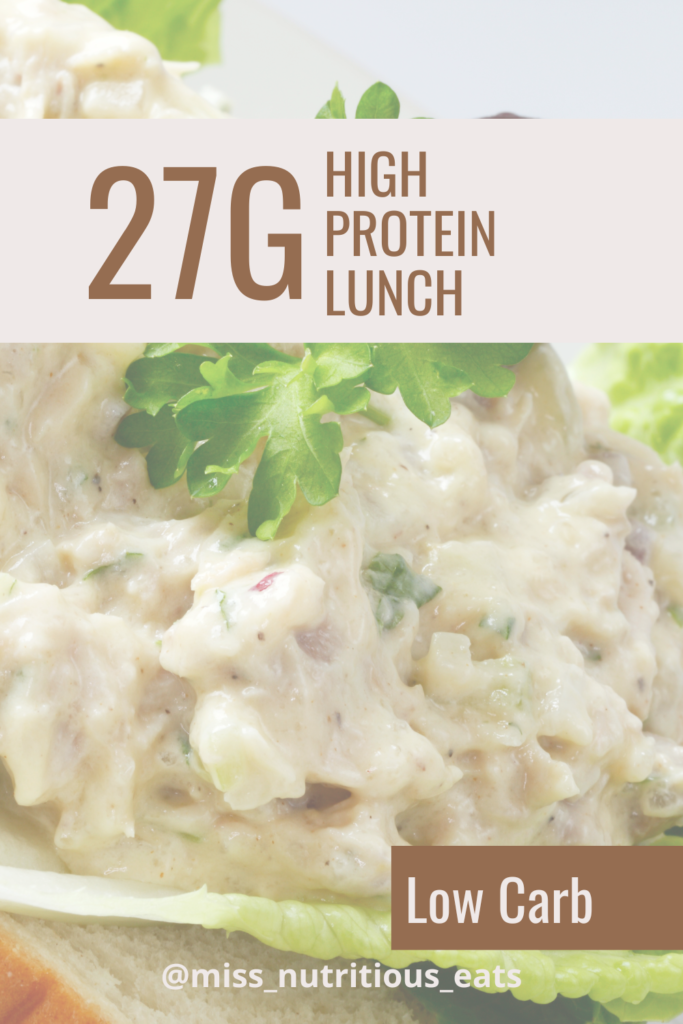
💪🏼 Tracking Macros? Check This Out
With this avocado chicken salad lettuce wrap, you’re tapping into the trifecta of balanced nutrition—healthy fats, high protein, and low carbs. At just 230kcal per serving, it’s packed with 27g of protein, 11g of fat, and only 7g of carbohydrates. While we love carbs in the FASTer Way, when we’re carb cycling, high fat and protein is the way to go.
If you try this recipe, and I hope you do! – Let me know in the comments below!