Month: September 2024

Why the Microplane is the Best Tool for Your Kitchen

When it comes to culinary tools, there’s one tool that stands out in my kitchen—the Microplane. Whether you’re a home cook or a professional chef, the Microplane grater is a must. Known for its ultra-sharp blades and ease of use, this versatile tool can make tedious tasks quick and painless – think ginger, garlic, and citrus zest.

The Importance of Having the Right Tool ⚙️
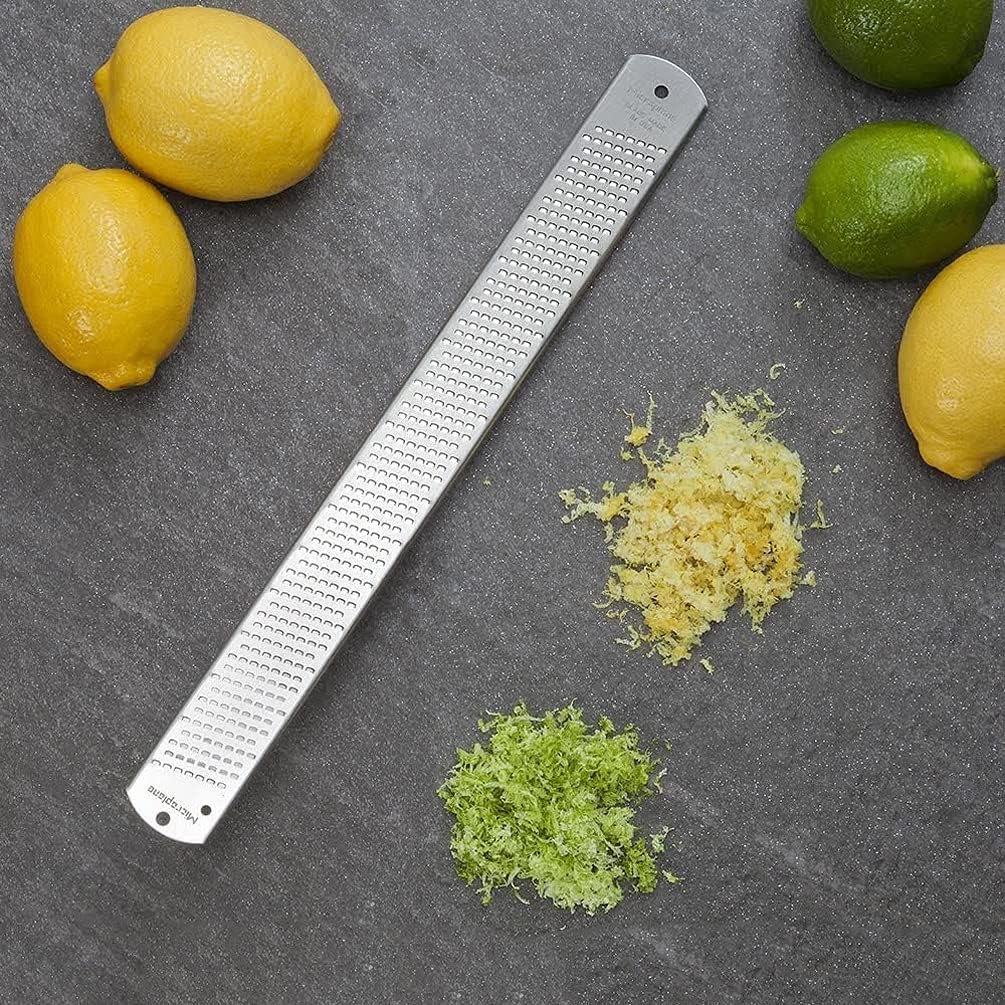
When cooking, having the right tool for the job makes everything smoother. It can make preparation faster, easier, and more enjoyable. That’s why, if you’re building your kitchen kit, a Microplane should be at the top of your list. 

The Versatility of the Microplane 🍋 🧀 🍝

One of the outstanding features of the Microplane is its versatility. From grating fresh ginger to zesting citrus fruits, this tool handles it all with precision and ease.

Fresh Ginger

Grating fresh ginger can be a daunting task with a traditional grater due to its fibrous roots.  IYKYK.  The Microplane’s sharp teeth efficiently grate ginger fibers, providing a perfect combination of pulp and juicy shavings that blend seamlessly into your dishes. Unlike ceramic ginger graters that require more maintenance, the Microplane’s stainless steel design ensures durability and easy cleaning.

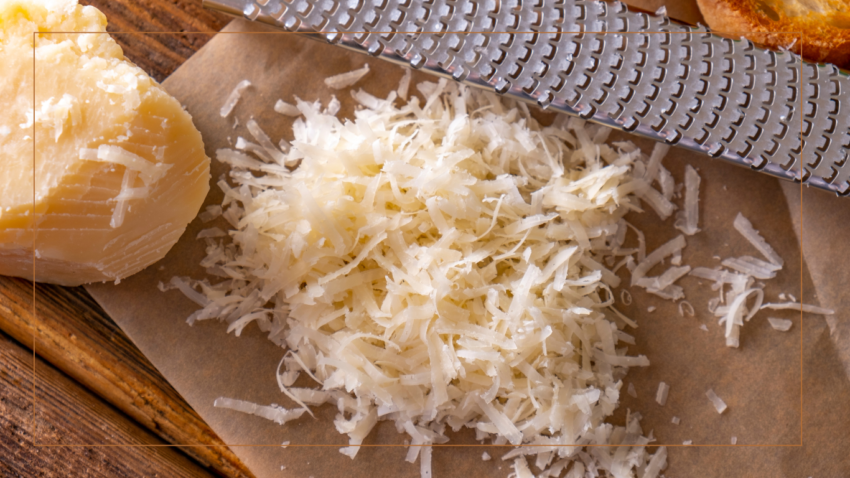
Hard Cheese

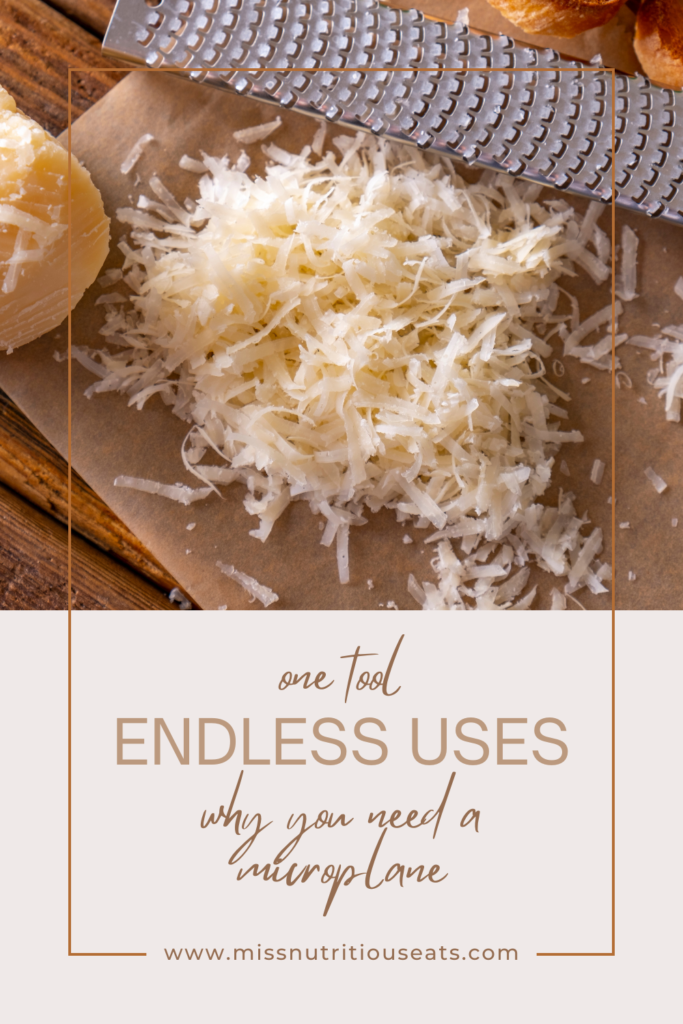
Whether Parmesan or Pecorino Romano, it creates a fluffy pile of cheese that’s easy to measure and incorporate into your favorite pasta, salads, and more. Its fine grater surface ensures consistent results, adding a professional touch to your meals.

Garlic

Forget about cumbersome garlic presses—the Microplane grates garlic without juicing the garlic. It produces a fine paste that’s perfect for sauces and dressings, making meal prep quicker and more efficient.

Citrus Zest

Transform your desserts and cocktails with vibrant citrus flavors. The Microplane expertly removes the fragrant outer layer of lemons and oranges without the bitter pith. Its rasp-style graters and paddle graters with removable blades offer tailored options for different grating needs.

Other Uses

You can even use it to finely grate garlic or shallots, transforming them into a paste that blends into dressings, marinades, or sauces without the need for extensive chopping. It’s also a handy tool for grating spices like nutmeg or cinnamon. Some chefs even use a Microplane to create delicate chocolate shavings for garnishing desserts or coffee beverages.

I’ve even used it to grate carrots in a pinch!

Ease of Use and Maintenance 🧽

Praised by America’s Test Kitchen for its ease of cleaning and long-lasting durability, the Microplane is a low-maintenance tool. Its snap-on cover ensures safe storage and prolongs the blade’s sharpness.

Step-by-Step Instructions for Using a Microplane

  1. Start with a clean tool:  Rinse the Microplane under hot water to dislodge any debris, and dry it completely.
  2. Choose the item you wish to grate: Citrus fruits, hard cheeses, fresh ginger, garlic, or whole spices like nutmeg.
  3. Hold the Microplane handle securely with one hand, ensuring the blade is angled away from your body.  Position a bowl or cutting board beneath the grater to collect the shavings.
  4. Grating Technique:  Place the ingredient at the top of the Microplane.  Move it back and forth across the blade, applying light, even pressure.  Rotate the ingredient if needed to ensure even grating, especially for round ingredients like citrus.
  5. Collection:  Allow the fine shavings or zest to fall directly onto a bowl or a plate for easy gathering.  Tap the Microplane lightly against the edge of the bowl to release any stubborn bits.
  6. Post-Grating Safety:  Upon finishing, ensure the Microplane is secure on a stable surface before releasing your grip.  Refrain from using fingers to remove remaining pieces from the sharp blades.
  7. Cleaning the Microplane:  Immediately rinse the Microplane under warm water to remove residue.  Use a soft-bristled brush to gently scrub along the blade if necessary.  Alternatively, place the Microplane on the top rack of the dishwasher for a thorough clean.  Dry the Microplane completely before storing it, as moisture can diminish the sharpness of the blades and lead to oxidation.
FAQ  📓 ✏️ 🔍

When it comes to choosing a high-quality Microplane, a few brands stand out. The original Microplane brand itself is probably the industry leader, thanks to it’s precision-engineered blades and ergonomic designs. Other brands include OXO, known for its user-friendly designs and comfortable grips, and KitchenAid, which combines durability with versatility.

How Much Does a Microplane Cost? 💵

The cost of a Microplane can vary depending on several factors, including the brand, model, and specific features. On average, a standard Microplane grater can range from $8 and up. I’m usually of the mind that you get what you pay for.  But I have an $8 microplane from culinary school that is still doing a great job for me.  So it’s really a low investment tool that every cook should have.  

Is a Microplane Difficult to Clean? Can It Go in the Dishwasher?

Cleaning a Microplane grater can be relatively straightforward, though its fine, sharp blades require some care. Most Microplane graters are designed to be easy to clean by simply rinsing them under warm water immediately after use to prevent food particles from drying and sticking. Many models are dishwasher safe; however, it is often recommended to place them on the top rack to avoid potential damage and preserve the sharpness of the blades. For the best results, hand-washing your Microplane with a gentle brush can help maintain its quality and performance over time. Always refer to the manufacturer’s care instructions for specific guidance on cleaning and maintenance.

Does It Take Up a Lot of Room?

Microplane graters are generally designed to be slim and compact, making them easy to handle and store in any kitchen setting. This is why I’m such a fan! Their streamlined shape ensures they do not occupy much space in a kitchen drawer or cabinet. Some models even come with a protective cover or a hole for hanging, allowing them to be stored on a utensil rack or wall-mounted for added convenience. I usually keep mine in a a drawer or standing upright with other tools in a jar for easy access during cooking.  

Are There Other Kitchen Tools That Can Be Used to Grate Ginger?

Yes, there are several kitchen tools that can effectively grate ginger if a Microplane is not available. 
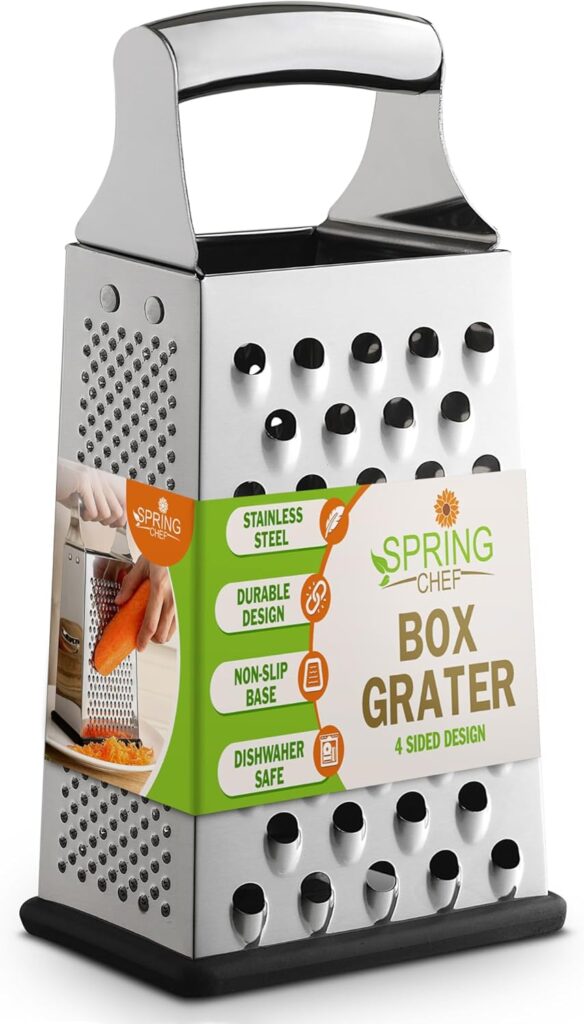
One such tool is a traditional box grater, which often includes a fine grating side suitable for breaking down ginger’s fibrous texture. 

Alternatively, a ceramic ginger grater is specifically designed for this purpose, featuring small, sharp teeth that efficiently shred ginger into a smooth paste while capturing the juice. These are usually round with an outer collection trough to hold juice.  

A small paring knife can also be used carefully to mince ginger into fine pieces if no grating tool is accessible. 
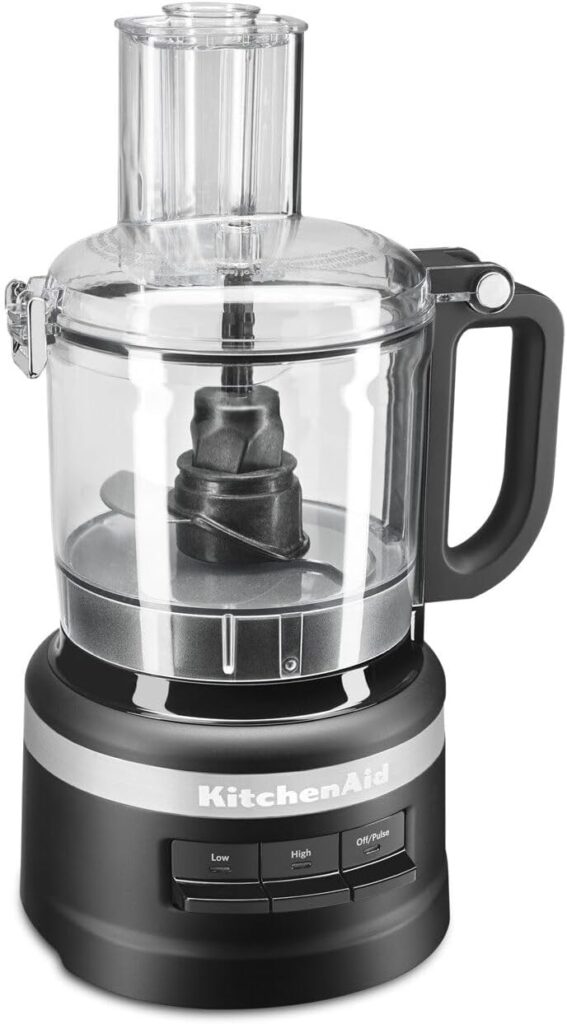
For those with a food processor, using a shredding attachment can quickly and easily process ginger in larger batches. I’ve had my Kitchen Aide for some time and use it weekly for items like zucchini or making energy bites.

Each of these options can be convenient depending on the specific preparation needs and volume of ginger required.

About Me

I’m Melanie.

I’m a chef, registered dietitian, foodie, wife and mom.
If you’re looking for quick and healthy meal inspiration that serves YOU and your family well, then you’ve come to the right place!

Melanie Marcus Selfie

How to cook lentils perfectly (recipe + tips)

I find that lentils can either be a kitchen staple for clients, or they shy away from them because they don’t know how to prepare them.  The reality is, dry lentils are versatile, nutritious, and easy to prepare. They offer rich texture and earthy flavors which are a great addition to most ground meat recipes, but a staple for vegetarian recipes.  If you use black beans in your recipes, you can often substitute lentils instead.  

Whether you’re new to cooking lentils or looking to refine your technique, this guide will provide you with essential tips and recipes for various types of lentils.

Why are lentils so healthy?

Lentils are small round legumes that come in many different colors, shapes, and sizes. They are a great source of plant-based protein, making them an excellent meat alternative for vegetarians and vegans. With their high dietary fiber content, lentils aid in digestion and promote a feeling of fullness, supporting weight management. They are also packed with essential vitamins and minerals such as folate, iron, phosphorus, and potassium.

Nutritional Benefits of Lentils

  • High in Plant-Based Protein: Ideal for vegetarians and vegans.
  • Rich in Dietary Fiber: Promotes digestion and fullness.
  • Low in Fat: Provides steady energy without blood sugar spikes.
  • Packed with Vitamins and Minerals: Essential for overall health.
  • Antioxidants: Help reduce inflammation.  

Macros

A half-cup (about 100 grams) of cooked brown lentils typically contains the following macronutrients:

  • Calories: 115-120 kcal
  • Protein: 9 grams
  • Carbohydrates: 20 grams
    • Fiber: 8 grams
  • Fat: 0.4 grams

These values can vary slightly depending on cooking method and specific type of lentils.

Join my next round of the FASTer Way

Tired of endless diets and no results? Join the FASTer Way to Fat Loss and see real, sustainable changes in just 6 weeks!

Melanie Marcus FASTer Way to Fat Loss Coach

Cooking Tips for Lentils

Rinse Lentils: Always rinse lentils under cold water to remove dirt, small rocks or debris. Look for small stones or rocks and remove them.

Soak Them: Letting them sit for even just 30 minutes (or overnight) will reduce cooking time by at least 15 minutes.  

Sauté for Flavor: Sauté onions, garlic, bay leaves and spices in olive oil before adding lentils and water for enhanced flavor. 

Water Ratio: Use plenty of water, a ratio of 3 cups of water for every 1 cup of lentils. Adjust as needed for different types of lentils.  In culinary school we removed excess water afterwards in a colander.  

Salt Timing: Add a pinch of salt towards the end of cooking to ensure the lentils are tender but not mushy.

Tender but Firm: For salads or cold dishes, cook lentils just until al dente to maintain a firm texture.

Quick Cooking: For a faster cooking process, consider soaking lentils for a few hours or overnight.  You’ll notice that they plump up and absorb a lot of water which will help reduce the cooking time.  

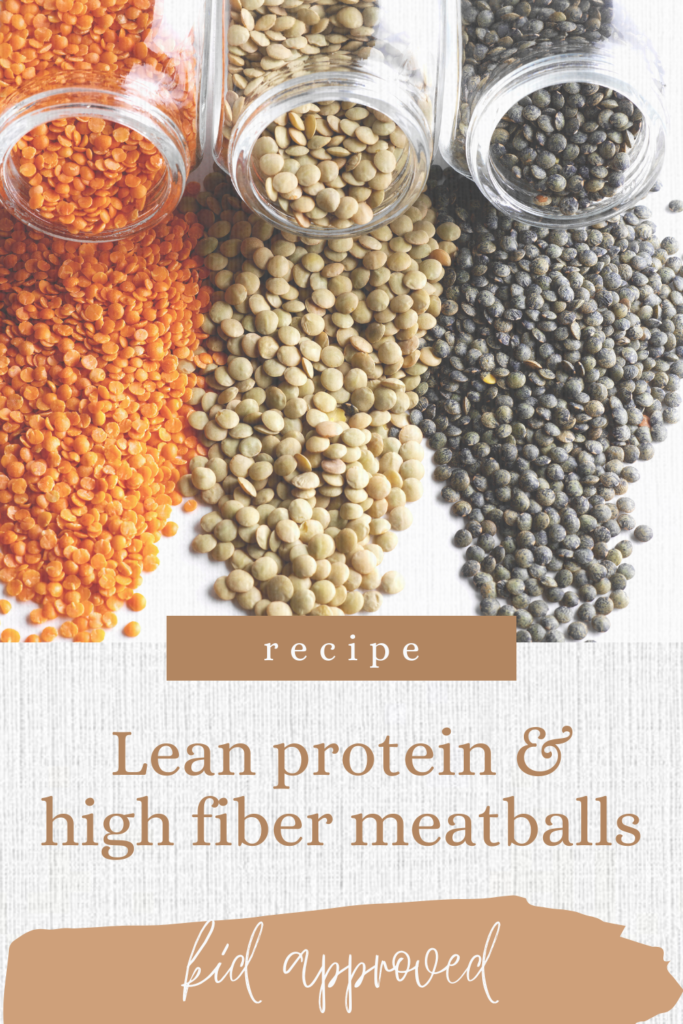
Free lentils tricolor image

Types of Lentils and How to Cook Them

Red Lentils (Masoor Dal)

Other Names: Orange Lentils

  • Cooking Time: 15-20 minutes
  • Texture: Soft and creamy
  • Flavor: Mild and slightly sweet
  • Best For: Soups, stews, and Indian cuisine
  • Instructions:
  1. Rinse 1 cup of red lentils under cold water.
  2. In a large pot, sauté onions, garlic, and your favorite spices in olive oil.
  3. Add the lentils, 3 cups of water, and bring to a boil.
  4. Reduce heat and simmer for 15-20 minutes until tender.
  5. Add salt towards the end of cooking.

Brown Lentils

Other Names: The most common type of lentils

  • Cooking Time: 20-30 minutes
  • Texture: Soft but holds shape
  • Flavor: Earthy and mild
  • Best For: Soups, stews, and veggie burgers
  • Instructions:
  1. Rinse 1 cup of brown lentils under cold water.
  2. Sauté onions, garlic, and spices in olive oil in a large pot.
  3. Add the lentils, 3 cups of water or vegetable broth, and bring to a boil.
  4. Reduce heat and simmer for 25-30 minutes until tender.
  5. Add salt towards the end of cooking.

Green Lentils

Other Names: French Lentils, Le Puy, Lentils de Puy and French green lentils

  • Cooking Time: 30-40 minutes
  • Texture: Firm and peppery flavor
  • Flavor: Earthy and robust
  • Best For: Salads, side dishes, and soups
  • Instructions:
  1. Rinse 1 cup of green lentils under cold water.
  2. Sauté onions, garlic, and spices in olive oil in a large pot.
  3. Add the lentils, 3 cups of water or vegetable stock, and a bay leaf.
  4. Bring to a boil, then reduce heat and simmer for 30-40 minutes until tender.
  5. Add salt towards the end of cooking.

Black Lentils

Other Names: Black Beluga Lentils

  • Cooking Time: 25-30 minutes
  • Texture: Firm and holds shape
  • Flavor: Rich and earthy
  • Best For: Salads, side dishes, and lentil salad
  • Instructions:
  1. Rinse 1 cup of black lentils under cold water.
  2. Sauté onions, garlic, and spices in olive oil in a large pot.
  3. Add the lentils, 3 cups of water or vegetable broth, and bring to a boil.
  4. Reduce heat and simmer for 25-30 minutes until tender.
  5. Add salt towards the end of cooking.

Using an Instant Pot or Pressure Cooker

For faster cooking, you can use an instant pot or pressure cooker. Follow the same steps but reduce the water to 2 cups for every 1 cup of lentils. Cook on high pressure for half the time specified for each type.

Storing Cooked Lentils

Store cooked lentils in an airtight container in the refrigerator for up to a week. They make excellent additions to salads, soups, and meal prep.

Favorite Lentil Recipes

  • Red Lentil Soup with fresh herbs and lemon juice
  • Brown Lentil Stew with hearty vegetables
  • French Green Lentil Salad with fresh herbs and olive oil
  • Black Lentil Salad with roasted vegetables and a tangy dressing
  • Greek Inspired Turkey Meatballs (with lentils!)

About Me

I’m Melanie.

I’m a chef, registered dietitian, foodie, wife and mom.
If you’re looking for quick and healthy meal inspiration that serves YOU and your family well, then you’ve come to the right place!

Melanie Marcus Selfie

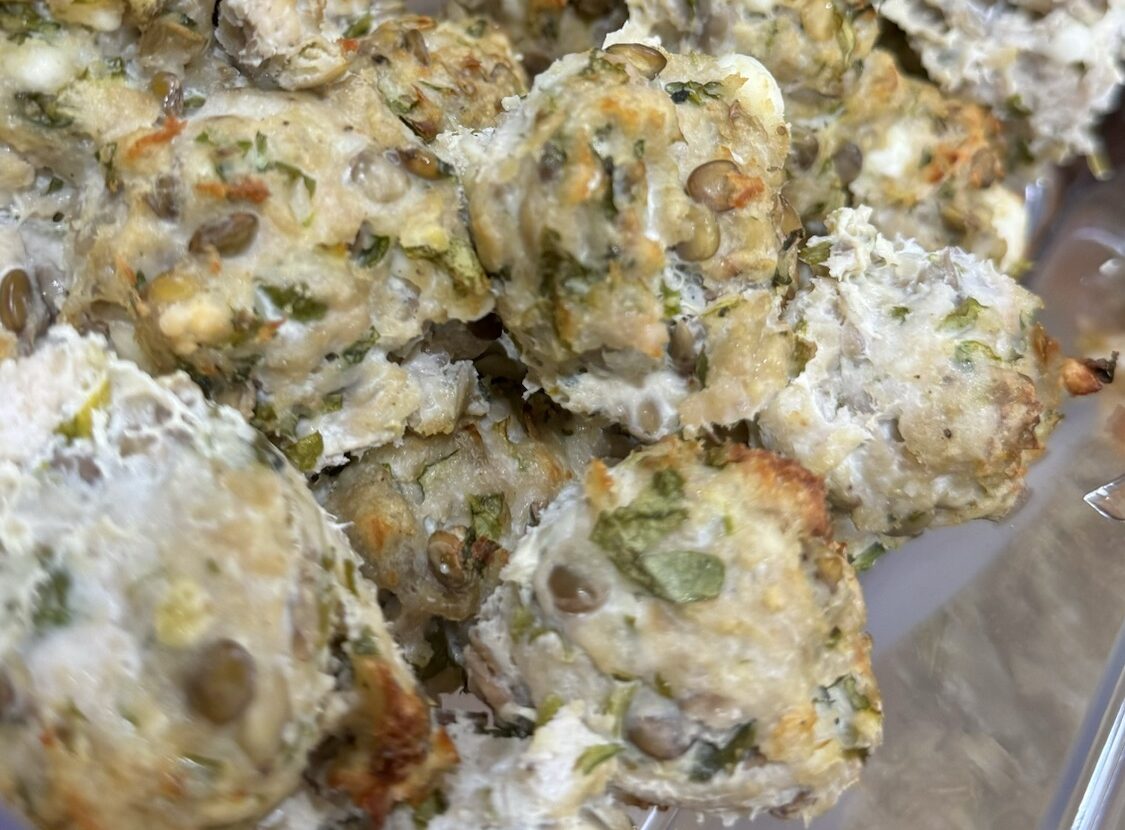
Greek inspired turkey meatballs (with lentils!)

If you’re looking to change up your turkey meatball game, or if you just love mediterranean flavors.  This recipe is it.  This recipe combines lean ground turkey with the hearty goodness of lentils and the tangy taste of feta.  They’re a great way to meal prep a hearty meal when served with pasts or a lighter lunch when served over salad or along side fresh cut vegetables and hummus.  

Jump to Recipe

Ingredients and substitutions

  • lean ground turkey – I use the leanest ground turkey I can find.  This allows me to balance the fat I add back in from the feta.
  • brown lentils (cooked and cooled) – Using a cup of lentils not only adds plant based fiber and protein, but it also adds moisture which turkey meatballs (especially when you use extra lean turkey) needs. I prefer to use dry lentils for this recipe.  I soak them for 20 minutes.  Then drain and boil for about 20 minutes until cooked through. You could use canned lentils, just be sure to rinse and drain them really well.  Cooked green lentils would be fine too.  Just be careful with red lentils because they cook quickly and could make your meatballs mushy.  They are simply delicious in this red lentil soup recipe though!
  • Feta cheese – use what you love.  My favorite is Trader Joe’s Sheep’s Milk Feta and it happens to come in 2, 5oz bars which makes measuring for this recipe very easy. You could also use crumbled cow’s milk feta.  
  • egg – one egg is all you need, you could use two eggs whites.  I don’t recommend a flax egg for this one! This is when you combine flax seed and warm water to form a thick mixture to form a binder.  
  • gluten-free bread crumbs – I’ve tested this recipe with both gluten free and regular bread crumbs. Either way, I recommend using plain.   
  • chopped arugula – I usually use a ton of fresh parsley, but I was out when this recipe came to life.  So I used fresh arugula and it was delicious.  You could use dill, parsley or a combo of all three!
  • salt – It’s pretty standard to use 1 tsp per pound of meat.  I like to use kosher salt or my favorite Seasonello, Italian seasoning salt.  
  • black pepper – 1/4 – 1/2 tsp of red chili flakes would be a nice addition!
  • optional  ingredients – lemon zest  or chopped green onions for extra flavor.

Cooking Instructions

Jump to Recipe

Step 1:

Preheat your oven to 375°F (190°C) and line a baking sheet with parchment paper.

Step 2:

In a large bowl, mix ground turkey with 1 cup of cooked brown lentils with feta, egg, gluten-free breadcrumbs, chopped arugula, salt, and black pepper. You could use a food processor to pulse the mixture until well combined but I just mix everything together with my hands.  

Step 3:

Form the lentil mixture into 1-inch meatballs with your hands or an ice cream scoop.  Place them on a prepared 9×13 baking pan.  

Step 4:

Bake the meatballs for about 40 minutes or until they are golden brown and cooked through to an internal temperature of 165°F.  Store in an airtight container in the refrigerator for 5 days.  

Serving Suggestions

These Greek-inspired turkey meatballs are versatile and can be served in a variety of ways:

  • Over Greek Yogurt Sauce: Serve the meatballs over a bed of zesty Greek yogurt sauce, accompanied by fresh arugula salad tossed in a light lemon vinaigrette.
  • With Pita Bread: Pair the meatballs with warm pita bread, hummus, and a side of roasted vegetables for a heartier meal.
  • In Pasta Dishes: Add the meatballs to your favorite pasta dish or grain bowl for an extra protein boost.
  • Low Carb Option: Serve the meatballs over sautéed spaghetti squash for a low-carb alternative.
Jump to Recipe

Unique Elements

What sets this recipe apart are the unique elements that blend traditional Greek flavors with a modern twist:

  • Protein Boost:  Talk about high protein.  Five of these meatballs provide 39g protein and 9 grams of fiber!  
  • Healthy Lentils: The addition of lentils, whether brown, red, or green, not only adds a hearty texture but also boosts the nutritional value of the meatballs. The added fiber will also help maintain blood sugar if you enjoy these with pasta.
  • Chopped Arugula: Incorporating arugula into the meatballs introduces a peppery flavor that complements the richness of the ground turkey and feta.
  • Pulse in Food Processor: Using a food processor to mix the ingredients ensures a well-combined mixture, making it easier to form consistent meatballs.
  • Versatile Serving Options: From pita bread to Greek yogurt sauce, these meatballs can be adapted to suit various dishes and preferences.

This is such a delicious recipe, I hope you make it.  And if you do, please let me know! You may also like our original family favorite meatball recipe.

Mediterranean Turkey Lentil Meatballs

Prep Time 5 minutes
Cook Time 45 minutes
Total Time 50 minutes
Cuisine Mediterranean
Servings 7
Calories 360 kcal

Ingredients
  

  • 2 pounds 98% lean ground turkey
  • 1 cup lentils cooked
  • 1/4 cup gluten free breadcrumbs
  • 1 each egg
  • 2 oz feta cheese
  • 1 cup arugula chopped
  • 1.5 tsp salt
  • 1/2 tsp pepper
  • 2 cloves garlic mashed
  • .5 tsp garlic powder

Instructions
 

  • Combine all ingredients in a large bowl.
  • Use a small cookie scoop to portion out meatballs. I usually slightly overfill a 1 oz scoop and get about 35 meatballs.

Nutrition

Serving: 5meatballsCalories: 360kcalCarbohydrates: 20gProtein: 35gFat: 16gSaturated Fat: 6gPolyunsaturated Fat: 4gMonounsaturated Fat: 5gTrans Fat: 0.1gCholesterol: 114mgSodium: 822mgPotassium: 569mgFiber: 9gSugar: 1gVitamin A: 260IUVitamin C: 2mgCalcium: 150mgIron: 4mg
Keyword lentil
Tried this recipe?Let us know how it was!

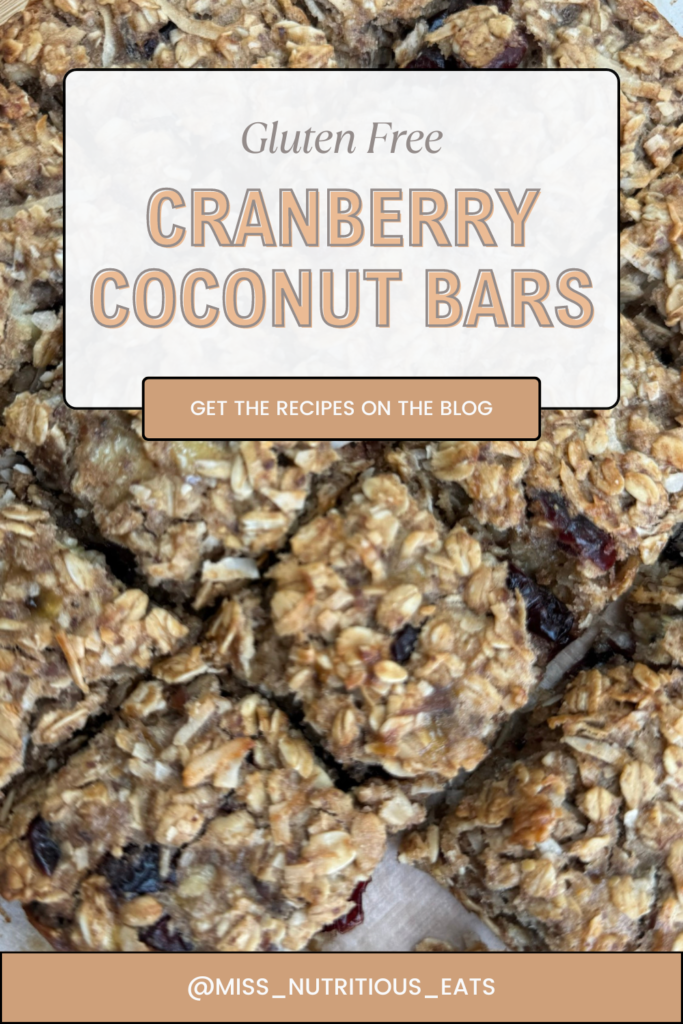
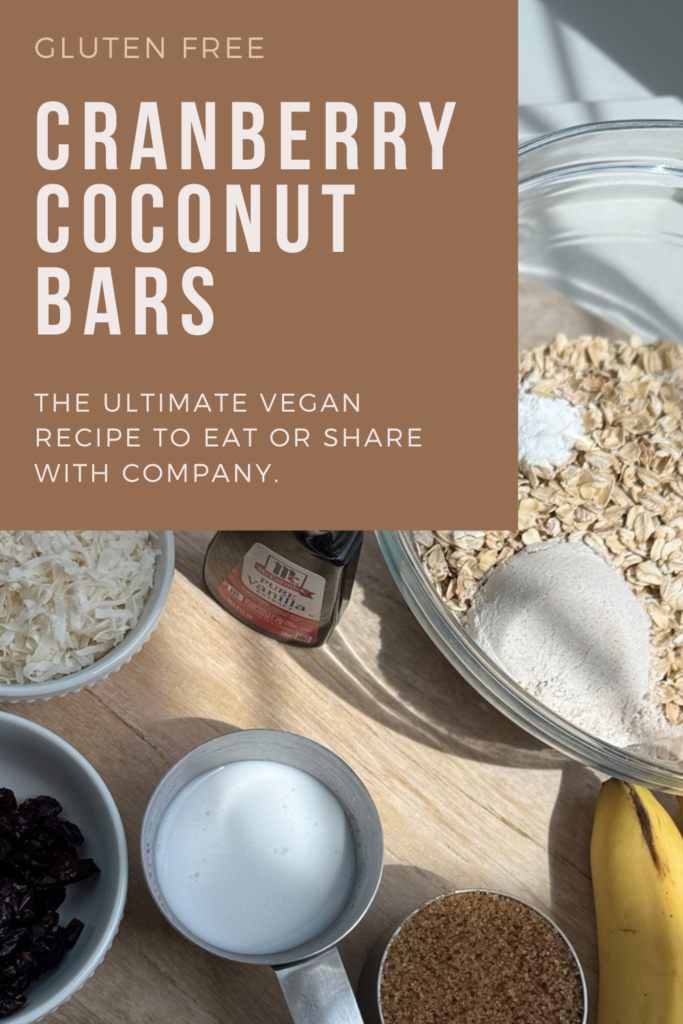
Gluten & Dairy Free Cranberry Coconut Bars Recipe

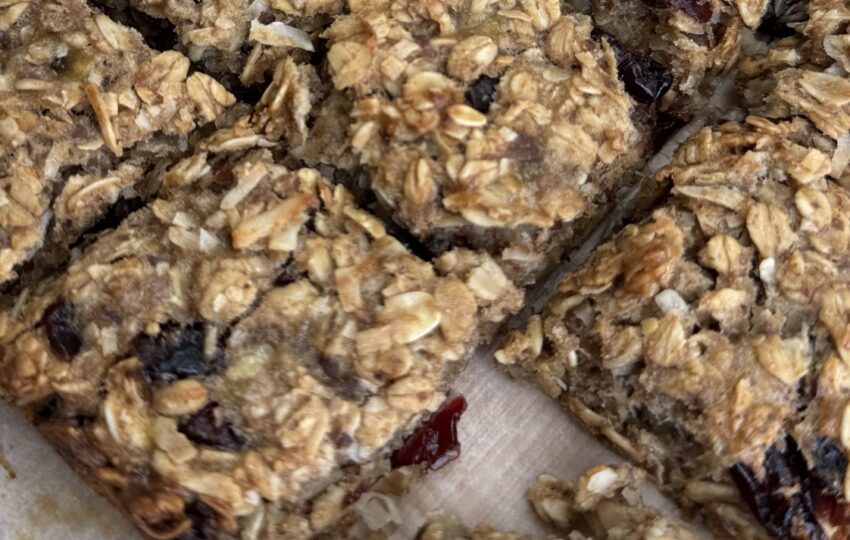
Autumn is nearly upon us, and what better way to celebrate than with a treat that can double as an afternoon snack or just something to enjoy with a cup of tea? These would also be cute to serve at holiday parties wrapped in parchment paper. They’re just the thing you need when you’re craving something sweet but still want to stick to your gluten free diet. The first time I made these I was plesantly surprised with the flavor and texture.  They’re a softer version of a granola bar and remind me of my moms famous chocolate almond oaties.  (THE BEST cookie ever!) Also good are these 3 ingredient banana cookies that can double as breakfast. You’re welcome!

These are the perfect treat to add to your cookie platter to accomodate your GF guests this holiday season.  They can also be made in one bowl with a spatula.  No need to pull out your mixer and paddle attachment. Careful… these may easily become your favorite dessert for this time of year.  

Jump to Recipe

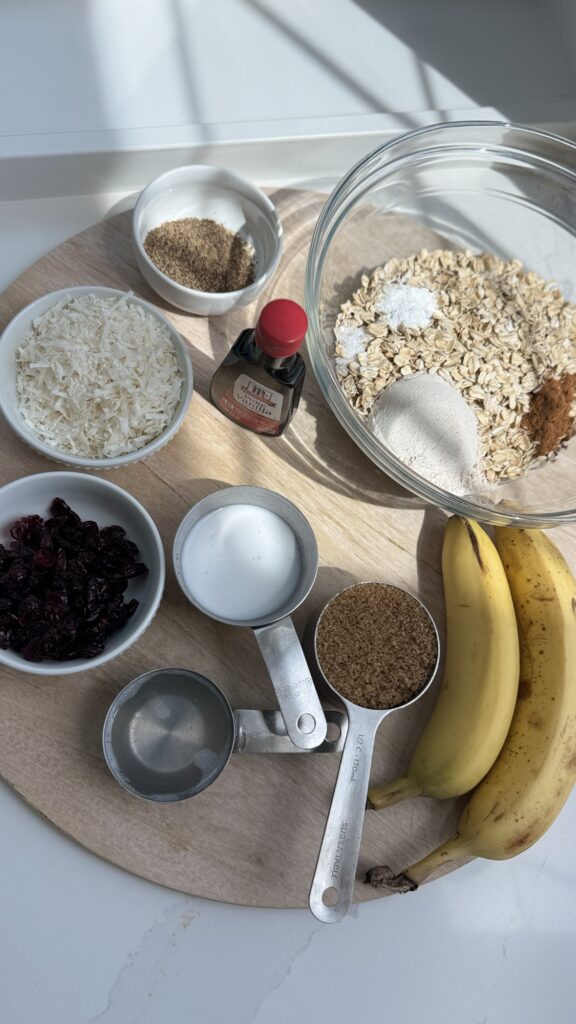
Ingredients and substitutions:

  • almond milk or milk of choice.  Coconut milk would be a great option.
  • brown sugar – You could use coconut sugar or any other dry sugar like white sugar.  If you use maple syrup, agave or honey the mixture may become too wet.  
  • ground flax seed – chia seeds work well here too. The flax helps to bind the recipe, similar to eggs. Check out this flax egg recipe for heart healthy or vegan cooking.
  • coconut oil – any neutral oil will work for this.  Avocado oil, safflower oil or vegetable oil all work well.   
  • vanilla extract
  • very ripe bananas – pumpkin puree would be good here, but make sure you like pumpkin flavor!
  • dried cranberries – cranberries without added sugar are TART, so be ware of what you buy and what you have on hand. In this case, I like that they balance the sweetness from the coconut.
  • rolled oats – you can use instant oats instead.  I do not recommend using steel cut oats, they will be too firm.  
  • unsweetened coconut flakes
  • cinnamon
  • gluten-free flour blend – I like the King Arthur gf flour blend.  It can be used as a 1:1 substitute for your AP flour.  If you don’t have an intolerance, you can use regular flour.
  • kosher salt or sea salt 

Optional mix ins:  walnuts, orange zest, white chocolate chips, dark chocolate chips, mini marshmallows or raisins.  

Why You’ll Love These Cranberry Bars

These bars are the perfect balance of sweet and tart, thanks to the dried cranberries and the subtle sweetness of coconut. I like to cut them into 16 squares so I can have two (which is a full serving) or just one as a quick snack to limit macros.

Jump to Recipe

Step-by-Step Instructions

Step 1: Prep Your Baking Pan and Oven

Preheat your oven to 350°F (175°C). Line an 8×8 inch baking pan with parchment paper, leaving an overhang for easy removal later.

Step 2: Prepare Flax Seed Mixture

In a small bowl, mix 2 tablespoons of ground flax seed with 6 tablespoons of water. Set aside for 5 minutes to thicken.

Step 3: Combine Wet Ingredients

In a large bowl, mash the very ripe bananas with a fork. Add the melted coconut oil, almond milk, brown sugar, and vanilla extract. Mix well until all the ingredients are combined.

Step 4: Mix Dry Ingredients

In a separate bowl, combine the gluten-free flour blend, baking powder, cinnamon, and kosher salt.

Step 5: Combine Wet and Dry Ingredients

Gradually add the dry ingredients to the wet ingredients, mixing until just combined.

Step 6: Fold in Oats, Coconut, and Cranberries

Fold in the unsweetened coconut, dried cranberries, and rolled oats. The batter should be thick and well mixed.

Step 7: Bake

Spread the batter evenly into the prepared baking pan. Bake for 30-40 minutes, or until the top is golden brown and a toothpick inserted into the center comes out clean.

Step 8: Cool and Slice

Allow the bars to cool in the pan for 10 minutes, then transfer them to a wire rack to cool completely. Once cooled, slice into bars and enjoy!

Optional:

For an extra touch, drizzle with melted white chocolate and then wrap in parchment with bakers twine.

Tips for the Perfect Cranberry Coconut Bars

Use High-Quality Ingredients

For the best results, use high-quality, certified gluten-free ingredients, especially if you have gluten intolerances!  King Arthur and Bob’s Red Mill both have a variety of options.  

Customize Your Bars

Feel free to add in some orange zest or fresh cranberries for extra flavor. 

Storage

Store your gluten-free cranberry coconut bars in an airtight container at room temperature for up to a week. Once cooled, I place them in a gallon zip lock bag and then freeze for up to 3 months for quick lunch additions or snacks.

Tips for Macros

This recipe makes 8 servings. I prefer to cut them into 16 squares, so I can enjoy half quickly.

With 29g carb, 13g fat and 3g each protein and fiber these are satisfying, nutrient dense and made of whole foods to fuel your activity!

Join my next round of the FASTer Way

Tired of endless diets and no results? Join the FASTer Way to Fat Loss and see real, sustainable changes in just 6 weeks!

Melanie Marcus FASTer Way to Fat Loss Coach

If you loved this recipe, be sure to check out my other gluten-free baking recipes (like my gluten free blondies) and sign up for our newsletter to get new recipes delivered straight to your inbox.

Happy baking!

Cranberry Bar – Gluten Free

Prep Time 10 minutes
Cook Time 40 minutes
Total Time 50 minutes
Course Dessert
Cuisine American
Servings 8
Calories 240 kcal

Ingredients
  

  • 1/4 cup coconut milk or milk of choice
  • 1/2 cup brown sugar
  • 1 tbsp ground flax seed
  • 1/4 cup coconut oil melted
  • 1 tsp vanilla extract
  • 2 each rips bananas
  • 1/3 cup cranberries dried
  • 1.5 cups rolled oats
  • 1/2 cup unsweetened coconut
  • 1/2 tsp cinnamon
  • 1/4 cup gluten free flour mix
  • 1/2 tsp baking powder
  • 1/8 tsp kosher salt

Instructions
 

  • Preheat oven to 350F. Line 8 inch square pan with parchment and set aside.
  • Peel and mash bananas in large bowl. Add sugar, flax, milk, oil and vanilla. Whisk together.
  • In another bowl, mix your dry ingredients. Add the wet mixture to the dry mixture and stir well. Pour batter into pan and smooth out with a spoon or hands and press it down firmly.
  • Bake at 350°F for 40 minutes until the edges begin to golden and it is slightly firm to touch. Allow to cool in pan for 10 minutes before transferring to a wire rack and cooling completely. Slice into 8-16 bars.

Nutrition

Serving: 8gCalories: 240kcalCarbohydrates: 29gProtein: 3gFat: 13gSaturated Fat: 10gPolyunsaturated Fat: 1gMonounsaturated Fat: 1gSodium: 71mgPotassium: 134mgFiber: 3gSugar: 15gVitamin A: 3IUVitamin C: 1mgCalcium: 43mgIron: 1mg
Tried this recipe?Let us know how it was!

About Me

I’m Melanie.

I’m a chef, registered dietitian, foodie, wife and mom.
If you’re looking for quick and healthy meal inspiration that serves YOU and your family well, then you’ve come to the right place!

Melanie Marcus Selfie

16:8 Intermittent Fasting:  results from real clients

Intermittent fasting has become a diet buzz word in recent years – and for good reason. This eating schedule not only promotes weight loss but also offers health benefits, including improved metabolic health, better control over food cravings, and enhanced mental clarity. But as with most diet and nutrition approaches, there is more than one way to do it.  Keep scrolling down to learn about the different types of intermittent fasting, the specific methods used by my clients, and the AMAZING results they’ve achieved. 

What is Intermittent Fasting?

I like to think of Intermittent fasting (IF) as an eating schedule.  It is an approach to eating that alternates between periods of eating and fasting. Unlike traditional diets that focus on what to eat, IF emphasizes when you eat. This eating window can vary based on the chosen intermittent fasting plan. The 16/8 method is one of the most popular types of intermittent fasting, where you fast for 16 hours and limit your food intake to an 8-hour window every day.  

Benefits of Intermittent Fasting

  • Weight Loss: One of the primary goals of IF is weight loss through calorie restriction. By limiting the time window for eating, you naturally consume fewer calories, which leads to fat loss and improved body composition.
  • Improved Insulin Sensitivity and Blood Sugar Levels: Fasting periods can help lower blood sugar levels and improve insulin sensitivity, reducing the risk of type 2 diabetes.
  • Enhanced Metabolic Health: Switching between fed and fasted states can activate a metabolic switch in your body, promoting better metabolic health and efficient fat burning.
  • Reduced Inflammation: IF has been shown to lower chronic inflammation, thereby reducing the risk of cardiovascular disease and other health conditions.
  • Mental Clarity and Focus: Many people report better mental clarity and focus during fasting periods, which may be linked to stabilized blood glucose levels and reduced calorie intake.

Join my next round of the FASTer Way

Tired of endless diets and no results? Join the FASTer Way to Fat Loss and see real, sustainable changes in just 6 weeks!

Melanie Marcus FASTer Way to Fat Loss Coach

Success Stories from Real Clients

1. The Busy Businessman

My 53-year-old male client, a husband and father of two, lives on the road for most of the year. Despite his hectic schedule, he found his groove with the 16/8 intermittent fasting method. By dedicating 30 minutes daily to workouts and focusing on lean proteins and healthy fats, he has lost 30 pounds. The best part? His energy levels and stamina have skyrocketed, making those business trips less exhausting. He enjoys black coffee and electrolyte water during his fasting period, helping him maintain focus and mental clarity throughout the day.

2. The Stay-at-Home Mom

Another client of mine, a 38-year-old stay-at-home mom experienced incredible changes by incorporating intermittent fasting schedule into her routine. Over three months, she lost 10 pounds and 18 inches, significantly improving her body composition. More importantly, her strength and energy levels have soared. She now lifts heavier weights and feels more in control of her food cravings and eating habits, plus we’ve also increased  her macros (and calories) to fuel her new exercise routine.  Her secret? She sticks to whole grains, healthy fats, and lean proteins during her 8-hour eating window, ensuring she gets the nutrients she needs for sustained energy.

How to Get Started with Intermittent Fasting

1. Choose Your Intermittent Fasting Plan

There are different types of intermittent fasting to suit various lifestyles and goals. Learn which type is right for you.  

2. Plan Your Eating Window

Decide on an 8-hour eating window that works best for you. For instance, if you prefer to have dinner with your family, you might choose an eating schedule from 12 PM to 8 PM. This will allow you to enjoy meals with loved ones without feeling restricted.

3. Focus on Nutrient-Dense Foods

During your eating periods, prioritize lean proteins, healthy fats, and whole grains. Avoid junk food and sugary snacks, as they can spike your blood sugar levels and lead to weight gain.

4. Stay Hydrated

Drink plenty of water, black coffee, green tea, and unsweetened tea during your fasting periods. These beverages can help curb hunger and keep you hydrated.

5. Listen to Your Body

Intermittent fasting is not a one-size-fits-all solution. Pay attention to how your body responds and adjust your eating window and food intake as needed. If you experience any adverse side effects such as headaches, , consult a nutrition expert or healthcare provider.

6. Combine with Physical Activity

Incorporate physical activity, such as strength training or cardio workouts, into your routine. Exercise can enhance the benefits of intermittent fasting, promoting fat loss and improving overall health.  Our FASTer Way workouts are 30 minutes and done.  One of my favorite parts of the program.  

Join my next round of the FASTer Way

Tired of endless diets and no results? Join the FASTer Way to Fat Loss and see real, sustainable changes in just 6 weeks!

Melanie Marcus FASTer Way to Fat Loss Coach

What if I can’t fast?

Here’s the thing. Intermittent fasting can be modified to meet your needs. For example, if you are pregnant or have a condition where a longer fast isn’t appropriate, we scale back as needed. I find that most clients find success with at least a 12:12 fast. But if you have questions, just ask!

Overall, intermittent fasting can be a game-changer for those looking to lose weight, improve their metabolic health, and achieve a better body composition. The success stories of my clients highlight the practical benefits and positive effects this diet plan can have on different aspects of life, from energy levels to mental clarity.

Ready to see similar results? Start your intermittent fasting routine today and feel the difference. For personalized guidance and a tailored intermittent fasting protocol, reach out to me. Let’s make your health and wellness goals a reality!

Join the Community:

Follow me social media for more tips, success stories, and updates on intermittent fasting.

About Me

I’m Melanie.

I’m a chef, registered dietitian, foodie, wife and mom.
If you’re looking for quick and healthy meal inspiration that serves YOU and your family well, then you’ve come to the right place!

Melanie Marcus Selfie