Category: Articles

How to Naturally Dye Easter Eggs with up-cycled ingredients

Easter is a special time of year known for family gatherings, egg hunts, the excitement of Easter baskets filled with goodies and of course renewed faith. But have you considered ditching the artificial colors this year for natural Easter egg dyes? It’s an excellent way to get gorgeous, sometimes subdued, sometimes vibrant colors without the chemical dyes. It’s a fantastic opportunity to involve children in a seasonal tradition of creating beautiful Easter egg colors using natural ingredients that would have otherwise been trash. Here’s my easy guide on how to do it.

a variety of colorful foods in boiling water to create dye

Growing up my aunt always colored Easter eggs using different things, but I will always remember a large stock pot filled with onion skins on her kitchen stovetop.   She even used panty hose to experiment with placing herbs or flowers to make unique designs on the eggs.  I always thought it was resourceful and beautiful.  

Materials Needed:

  • A selection of cooked white eggs and brown eggs
  • Natural dye materials: yellow onion skins, red onion skins, purple cabbage, beets, turmeric, paprkia, red zinger tea, raspberries, blueberries, spinach, black coffee
  • White vinegar or lemon juice
  • Water
  • Pots and sauce pan
  • Fine mesh strainer
  • Disposable cups or mason jars
  • Slotted spoon

Natural Dyeing Mediums to Consider

You will be amazed with how many different foods can produce a variety of colors.

Produce items

  • Red onion skin – light pink color
  • Yellow onion skin – orange color
  • Spinach – light green color
  • Raspberries – pink color
  • Purple Cabbage – blue/purple color 
  • Red Cabbage – purple color
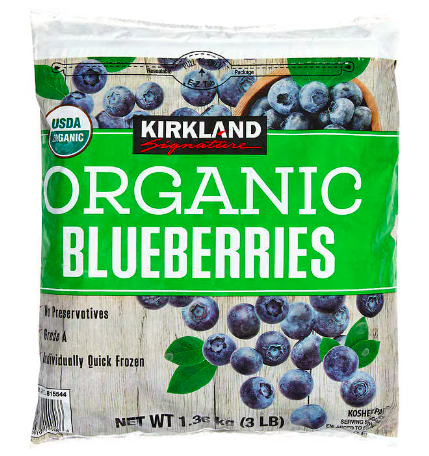
  • Blueberries – blue color

Spices

  • Paprika – red color
  • Turmeric – yellow color

Beverages

  • Red Zinger Tea – red color
  • Coffee – blackish brown color
  • Tart Cherry Juice – red color

Remember the Ratio

One cup of medium per one cup water.  I usually do 4 cups of water so I have plenty to color several eggs at one time.  

Step 1: Prepare Your Hard-Boiled Eggs

Before you start, make sure you have plenty of hardboiled eggs in either white or brown. If you need more info on that, check out my article on the perfect hard boiled egg. Keep in mind that brown eggs will give you more muted tones when dyed while white eggs can render bright yellow, green eggs, or even blue eggs based on the natural colors you choose. 

Step 2: Create the Natural Dyes 

Natural food dyes in jars

For a true homemade dye, select the natural ingredients you want to use. Last year I experimented with a variety of produce to get different colors including  a orange dye from yellow onion skins, purple from red cabbage dye, and green dye from spinach.  

To start, place your items in large mason jars and add enough boiling hot water to cover them. For every cup of water, add the same amount of your chosen plant material and let cool completely.  This will ensure a high concentration of natural colors in the dye pot.

For spices like turmeric, mix one tablespoon of spice with a cup of water. If you’re using coffee or tea bags, brew them as you would if you were going to drink them, but in a high concentration AKA extra strong.

Step 3: Strain and Add Vinegar

Once your dye bath reaches room temperature, use a fine mesh strainer to eliminate any large pieces and pour the fluid back into mason jar. For each cup of natural dye, mix in one tablespoons of vinegar. This step is crucial as the acidity from vinegar helps the egg shells to absorb the natural colors from your homemade dye, ensuring beautiful colors.

Step 4: Dye Your Eggs

Before immersing the eggs, wrap them in various things like silk ties, old pantyhose, or rubber bands for interesting patterns. Or use  a white wax crayon to create unique designs.  Then gently lay your hard-boiled eggs into the natural egg dyes using a slotted spoon.

If you’re using hollow eggs, the process is much the same, but you may need to fill them with a little bit of water to ensure they sink. Leave the eggs in the dye bath in the fridge for a few hours or overnight for more profound depth of color. (I prefer overnight).  The good news is you can check on them occasionally to see if they’ve reached your desired color. These natural options provide various colors, from  bright yellow to blueberry’s deep blue dye.

Step 5: Drying the Eggs

Remove the eggs from the dye and set them on paper towels or a rack to dry. Resist the temptation to wipe them down, as you could rub off the natural colors. Instead, let the natural easter egg dye work its magic as the eggs dry to a wonderful sheen.

I’d love to know how your eggs turned out! Tag me on social media to share your creations!

IG: Miss_nutritious_eats

About Me

I’m Melanie.

I’m a chef, registered dietitian, foodie, wife and mom.
If you’re looking for quick and healthy meal inspiration that serves YOU and your family well, then you’ve come to the right place!

Melanie Marcus Selfie

Foolproof method to make perfect hard boiled eggs 

We make a batch of hard boiled eggs on a weekly basis in our house.  It’s just one of those things that I thought everyone knew how to do!  Making the perfect hard-boiled egg isn’t as simple as tossing eggs into hot water.  (So many blogs suggest leaving eggs in hot water hard boil eggs.  However, that method has a lot of room for error.)  

My method places eggs in a pot of water and boils them for a specific amount of time until desired doneness.  This is hands down the best way to do it. Though my mom does love making them in an instant pot… I just can’t commit to another appliance right now!  

Brown Chicken Eggs

Whether you prefer your yolks gooey and soft or fully set, following a few important tips ensures your eggs turn out exactly the way you like them, every single time.  The biggest problem is that timing will vary depending on the size of egg.  But one of the best things is, if you always buy large eggs, you will get perfect hard-boiled eggs every time.  

Ingredients

  • Large eggs (as many as you need)

Note that these directions are intended for large eggs. You may need to adjust boiling times accordingly if using smaller or larger eggs.

Equipment

  • Saucepan or pot
  • Bowl for ice-water bath
  • Slotted spoon or skimmer
  • Timer

Instructions

Step 1: Preparing the Eggs for Boiling

Before boiling, ensure your eggs are at least 10 days old for easier peeling.  I found that older eggs work best.  And don’t worry, this usually isn’t a problem unless you are getting fresh eggs from chickens each week!  Add cold eggs to pot in a single layer (you don’t want eggs sitting on top of eggs because they may break).  Any cracked egg (raw) should be discarded and not cooked or consumed.  

Step 2: Boil the Water

Fill a pot with enough water to cover the eggs by about an inch. Bring the water to a full rolling boil over high heat.

Step 3: Lower the Heat 

Once boiling, reduce the heat to medium.  This should look just above a simmer. This prevents the eggs from moving too much and cracking.

Step 4: Adjust Heat and Start Timer

Immediately set your timer for your desired level of doneness.  

Check out this list for cook time:  

  • 6 minutes: Soft-boiled eggs. Runny yolk, soft white.
  • 6 1/2 minutes: Soft, jammy yolk.
  • 8 minutes: Perfect eggs in my opinion!  Medium yolk, slightly soft. 
  • 10 minutes: Mostly hard with a hint of softness.
  • 12 minutes: Fully hard-boil eggs with a lighter yolk.
  • 14 minutes: Hard-cooked eggs.  Very firm hard-boiled egg.

It’s not advised for anyone to eat raw eggs.  Some whole shell eggs may contain bacteria that can lead to food born illness.1 

Step 6: Ice Water Bath for rapid cooling

While the eggs are boiling, prepare an ice-water bath. This is basically a large bowl filled with ice and cool water from the tap.  Exactly when your timer goes off, remove the eggs with your slotted spoon and transfer them into the ice bath. This will halt the cooking process and make your eggs easier to peel.

Step 7: Peeling

Once the eggs are cooled (about 5 minutes in the ice bath), gently crack them all over and peel under running water for most manageable peeling.

Tips

  • Do not overcrowd the pot; boil in batches if necessary.
  • Fresh eggs are more difficult to peel. Use eggs that have been in the refrigerator for at least a week. As an egg ages, moisture escapes from the shell leaving an air pocket inside.  The more air there is, the easier it will be to peel them.  
  • For extra help with peeling, after cooling the eggs in an ice-water bath, peel the eggs under cold running water or in the water bath itself.

Nutrition & Macros

One large egg contains about 6 grams of protein which is important for building and repairing tissues in the body. It also provides 5 grams of healthy fats that are necessary for brain health and can help with weight management by keeping you fuller longer.

Macros: 6gP, 5gF, 1gC, 0g Fiber

Join my next round of the FASTer Way

Tired of endless diets and no results? Join the FASTer Way to Fat Loss and see real, sustainable changes in just 6 weeks!

Melanie Marcus FASTer Way to Fat Loss Coach

Eggs are also rich in choline, a nutrient that plays a vital role in brain development and function. Furthermore, they contain antioxidants lutein and zeaxanthin which promote eye health.

What to do with hard boiled eggs

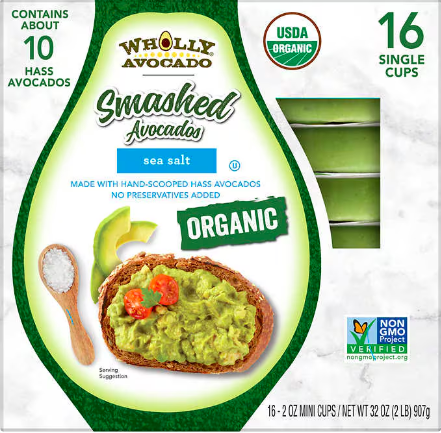
  • Turn into egg salad.  On busy days I like to mix 2 hard boiled eggs with 1 individual serving of avocado mash for a quick low carb option.  
  • On toast!  Slice your hard boiled eggs and place on buttered toast with a bit of Seasonello!
  • Eat them plain as a protein-packed snack.  Pair with berries and whole grain crackers to make it more substantial.  
  • Use them to make a Cobb salad for a low carb day meal.  
  • My kids usually grab their own hard boiled eggs in the morning as part of a quick hands off breakfast for me!
  • Decorate them for Easter 🙂

How long will hard boiled eggs last

Hard boiled eggs can last up to one week if stored properly. The key is to keep them in the fridge and not leave them out at room temperature for too long. 

I usually place eggs in a bowl once cooled and store them on the center shelf in my fridge.  This way anytime we open the fridge we can see them, and eat them before the week is over.  

Sources

  1. https://ask.usda.gov/s/article/Is-it-safe-to-eat-lightly-cooked-egg-dishes-or-use-recipes-that-call-for-raw-eggs

About Me

I’m Melanie.

I’m a chef, registered dietitian, foodie, wife and mom.
If you’re looking for quick and healthy meal inspiration that serves YOU and your family well, then you’ve come to the right place!

Melanie Marcus Selfie

Helpful essentials when starting the FASTer Way to Fat Loss

Welcome to what could be the start of a life-changing experience for you—the FASTer Way to Fat Loss program. Embarking on this path is not just about shedding pounds; it’s about gaining a whole new understanding of health and wellness. However, to maximize your chances for success and truly thrive on this program, having the right tools can make all the difference. In this post, I’m sharing the essentials that my clients find the most value in having as they start their new healthy lifestyle!

The Essentials for a Smooth Journey

Before you launch into the world of intermittent fasting, carb cycling, and effective workouts, it’s important to gather a few key items. And before you commit to a specific coach – be sure you like their style of teaching. I think this is an important one that easily gets overlooked!

Join my next round of the FASTer Way

Tired of endless diets and no results? Join the FASTer Way to Fat Loss and see real, sustainable changes in just 6 weeks!

Melanie Marcus FASTer Way to Fat Loss Coach

Fitness Must-Haves

  • Sports Bra: Starting any workout regimen without good support is like trying to run a race with your shoes untied—it just doesn’t make sense! A quality sports bra will keep you comfortable and focused on the task at hand.
  • Sneakers: The backbone of any physical activity, a sturdy pair of sneakers is vital. They’re not just for show; they protect and support your feet through every squat, lunge, jump, or step.
  • Strength Bands/Weights: While body weight is an excellent resistance tool, incorporating some basic weights or strength bands can add variety and challenge your muscles in new ways.
  • Water Bottle: Hydration is key, especially when you’re pushing your body to new depths. Keep a water bottle on hand to ensure your water intake is up to par with your hard work.

Kitchen Allies

  • Dry Measuring Cups & Spoons, Kitchen Scale: These tools are pivotal in mastering portion control, which is an integral part of the program’s nutrition approach.
  • Sheet Pans & Food Storage Containers: Meal prep is a game-changer when it comes to sticking to the weekly meal plans. Having the right containers will keep your nutritious meals fresh and ready to go.
  • Protein Powder: I find that most clients at some point start using a protein supplement to help build lean muscle. The trick with a protein powder is to find one that delivers protein and not carbohydrate and fat. This makes meeting macro goals much easier!

Tech Support

  • iPhone/Smartphone: Immediate access to the FASTer Way app keeps you tapped into daily workouts, meal plans, and the supportive community for that daily accountability boost.
  • TV that will mirror your phone: Totally not required, but I find that I like to cast my screen to make workouts more enjoyable.

If I had to pick just one thing

I would highly, suggest that you invest in a kitchen scale.  It will be a game changer when it comes to dialing in on your macros. 

Beyond the Physical Items

Having physical items on hand is wonderful, but the most important part of your success is cultivating an open mind. The strategies you will implement—like low macro days and regular macro days—are designed to elevate your metabolic rate and improve overall health, not just for immediate results but as part of a holistic approach to wellness.

Adopting the FASTer Way lifestyle means recognizing that this isn’t just a weight loss program—it’s a complete recalibration of how you view and consume food, how you move your body, and how you prioritize your overall health.

Success Stories to Inspire You

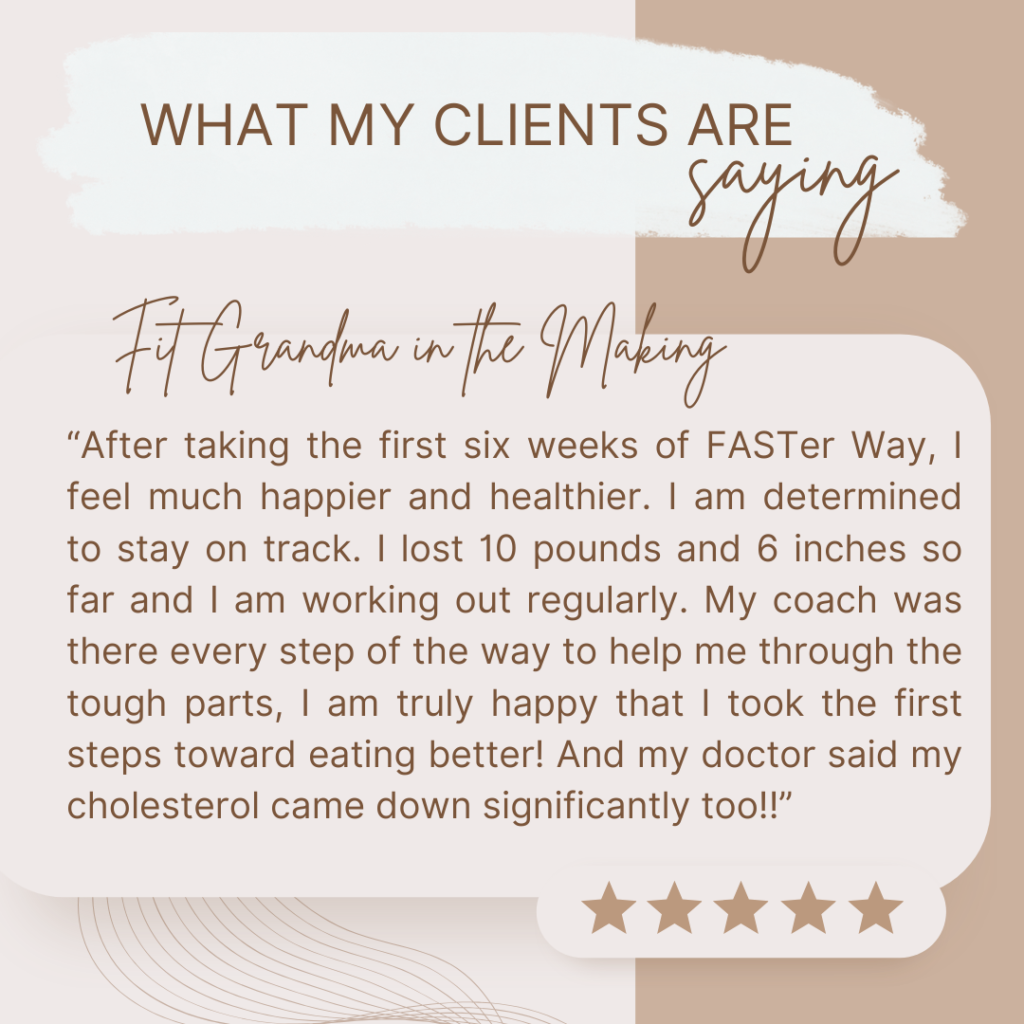
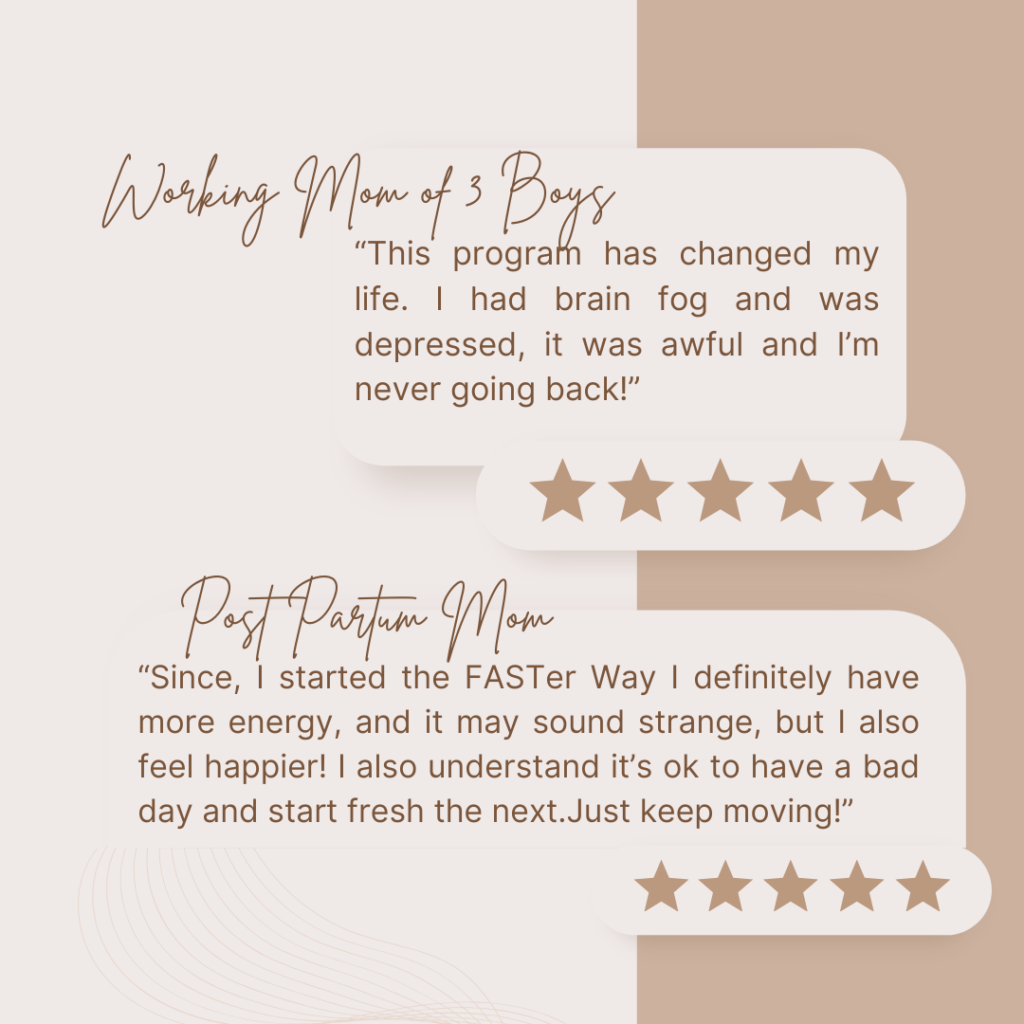
The FASTer Way has been a game-changer for many who’ve walked this path before you. Take it from our community members who’ve found success:

A Final Word of Encouragement

Remember, your commitment to this 6-week program and ultimately joining the VIP membership is about integrating these new practices into your life one day at a time. From the start prep week with your certified coach, you’re setting yourself up for long-term success.

One of the best things about this online fitness program is that it truly provides a consistent community, always ready to provide comprehensive support through social media platforms, VIP programs, and of course, the irreplaceable Facebook group banter. 

You will have a wealth of resources at your fingertips—from meal plan information to ongoing access to sample meal plans and daily meal plan recipes.

Join thousands of FASTer Way veterans who’ve seen great results, and remember, becoming a more confident, healthy, and energized you is worth every step, every rep, and every healthy meal. 

Are you ready to start your weight loss journey with the right tools and best support? Join me and become a faster way member today! 🌟

About Me

I’m Melanie.

I’m a chef, registered dietitian, foodie, wife and mom.
If you’re looking for quick and healthy meal inspiration that serves YOU and your family well, then you’ve come to the right place!

Melanie Marcus Selfie

Best macro friendly Waldorf chicken salad recipe

Whether you’re looking for easy lunches, a quick low carb meal, or you’re into meal prep, this Macro Friendly Waldorf Chicken Salad will quickly become your favorite way to satisfy hunger.

This delicious chicken salad harnesses the efficiency of canned chicken, without sacrificing the creamy texture we all love in traditional chicken salad recipes. The great recipe I’m sharing with you today is lean and offers that perfect balance of sweet and crunchy too.  

Jump to Recipe

But what makes it macro friendly?

When a food item is considered macro-friendly, it generally means it is composed in a way that helps you meet your macronutrient needs in a balanced and healthful manner. Macronutrients, commonly referred to as macros, are the nutrients required by the body in large amounts, which include carbohydrates, proteins, and fats.

Being “macro-friendly” could indicate that the food:

  • Has a balanced amount of carbs, proteins, and fats.
  • Is versatile and can be easily incorporated into different dietary regimens without overly skewing the balance of macronutrients.
  • Is calorie-dense and provides nutritional benefit without excessive sugars or unhealthy fats.
  • Can be portioned effectively to meet individual macro tracking goals, often relevant for those tracking their intake for body composition goals, such as fitness enthusiasts and athletes.

This recipe in particular is macro friendly because it is easy to modify the recipe ingredients to meet your macro goals whether you are following a low carb or regular macro day.

A macro-friendly food helps you nail your specific dietary targets based on your personal goals, whether that be weight loss, muscle gain, or maintenance of general health.

Macros

This recipe makes one large serving. It’s a lot of food. I like to have most for lunch and finish the rest as an afternoon snack. I serve with seed crackers, romaine leaves, celery, carrots or on Ezekiel bread!

Calories: 474 kcal

Carbohydrates: 22g

Protein: 36g

Fat: 29g

Fiber: 3g

Jump to Recipe

Join my next round of the FASTer Way

Tired of endless diets and no results? Join the FASTer Way to Fat Loss and see real, sustainable changes in just 6 weeks!

Melanie Marcus FASTer Way to Fat Loss Coach

Ingredients:

  • Canned chicken breast
  • Crunchy celery
  • Walnuts (toasted for the best flavor)
  • Mayonnaise (light mayonnaise for a low-calorie option)
  • Dijon mustard
  • Fresh dill (or other fresh herbs for an aromatic twist)
  • Green or red grapes
  • Green apple
  • Lemon juice, optional (for some zesty flair)
  • Onion powder and garlic powder, optional (to spice things up)

Step-by-Step Instructions:

  1. Quickly drain the canned chicken breast. I find the Costco brand offers great quality, perfect as the main ingredient for this recipe.
  2. In a large mixing bowl, combine the chicken with 1.5 Tbsp of light mayonnaise, 1 tsp dijon mustard, 1/2 ounce of crushed toasted walnuts, 1/2 cup halved red grapes, and 1/2 cup of chopped crunchy celery, 1/4 cup chopped apple for that classic flavor profile.

Preparing Your Salad

When you’re finished mixing up this easy chicken salad recipe, store it in an airtight container in your fridge. It’s a super easy way to dig into a macro friendly meal throughout the week, especially if you’re looking to reach your macro goals on a low carb day. Serve this salad as lettuce wraps, which is not only a great option for a gluten-free dish but also keeps it low carb and fresh. 

And if you’re counting macros, here’s a healthy salad recipe tip for you: before digging in, measure the total gram weight of your serving to stay on track. If you’ve served yourself a 100g portion, simply enter 100 as the serving size when logging your meal.

Jump to Recipe

The Best Things About This Chicken Salad

  • Versatility: You can enjoy it on a bed of lettuce, stuffed in avocado halves, or as a filling for bell peppers.
  • Convenience: It’s the perfect make-ahead lunch to enjoy throughout the week.
  • Customization: Feel free to add hard-boiled eggs, cherry tomatoes, bell peppers, green onions, and fresh parsley to add more flavors and textures.
  • Ease: If you want to use freshly poached chicken breast:  With the paddle attachment on your stand mixer, shredding chicken becomes effortless, giving you the creamy texture without much fuss.
  • Nail Fat Macros:  If you follow the FASTer Way to Fat Loss you may notice, there are some days that fat macros may be difficult to reach.  This recipe will help you get there!
  • Family Friendly: While it will help you reach your goals- your family will probably like it too! Check out this post for how to prepare macro friendly foods they all will love.

Above all, the best way to discover this great recipe is to try it yourself! Enjoy the process of mixing and matching, maybe even adding a bit of tangy buffalo sauce if you’re looking for that kick. 

Bonus: Looking for an easy chicken salad recipe that feels gourmet? Add a hint of poppy seeds and apple cider vinegar to the mix and experience a new take on a beloved classic!

Nutrition, flavor, and satisfaction – it’s all here in this Macro Friendly Waldorf Chicken Salad. Enjoy and happy healthy eating!

Waldorf Chicken Salad

Macro friendly and perfect for a low carb day.
Course Main Course, Salad
Servings 1 person
Calories 474 kcal

Ingredients
  

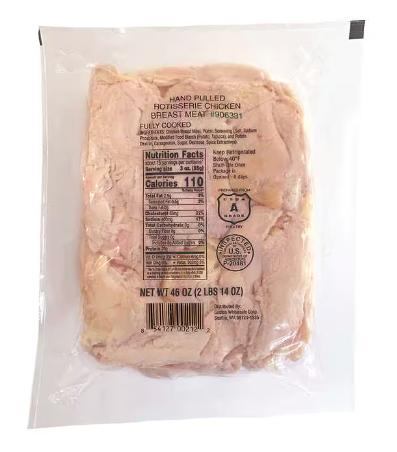
  • 8 ounces Kirkland Chicken Breast
  • 1.5 tbsp mayonaise
  • 1 tsp dijon mustard
  • 1/2 cup grapes halved
  • 1/2 cup celery chopped
  • 1/2 ounce walnuts toasted
  • 1/4 cup green apple

Instructions
 

  • In a large bowl combine all ingredients and mix.

Nutrition

Serving: 1gCalories: 474kcalCarbohydrates: 22gProtein: 36gFat: 29gSaturated Fat: 3gPolyunsaturated Fat: 16gMonounsaturated Fat: 5gTrans Fat: 0.04gCholesterol: 109mgSodium: 1071mgPotassium: 383mgFiber: 3gSugar: 16gVitamin A: 313IUVitamin C: 6mgCalcium: 48mgIron: 1mg
Keyword chicken, macro friendly, protein
Tried this recipe?Let us know how it was!

About Me

I’m Melanie.

I’m a chef, registered dietitian, foodie, wife and mom.
If you’re looking for quick and healthy meal inspiration that serves YOU and your family well, then you’ve come to the right place!

Melanie Marcus Selfie

Why I eat leftover salmon straight from the fridge

Atlantic salmon is a weekly staple for us when it comes to healthy eating.  (I’ll save why this is my preference for another post!) It’s a delicious fish that can be prepared in a variety of ways whether you’re buying fresh or frozen salmon from the grocery store.  

Leftover salmon from the day before is delicious protein source. Have you ever tried eating cold salmon? Personally, I think it’s the best way to eat it for convenience, taste and avoiding that fishy smell! Read on, and I’ll explain 🙂

The fastest way to prepare salmon

Jump to Recipe

Before Kids

I used to roast fresh salmon or defrosted salmon in my toaster oven or in a 400 F oven.  I would remove any excess moisture with a paper towel, coat with a bit of olive oil spray, season with Seasonello and top with lemon slices and roast for 15-20 minutes depending on the thickness of the fish.  Still a great way to prepare salmon, (and I still do when cooking for a large crowd), but on a normal weeknight, every minute counts.

After Kids

While the above method seems pretty quick and painless, I now have even less time and this is BY FAR, my favorite way to prepare salmon – bonus my husband even likes it too!  

  1. Take a 6-8oz frozen salmon fillet out of packaging and place directly in 400F bucket air fryer.  
  2. Spray with olive oil spray, season with salt and pepper or Seasonello and top with lemon slices.  
  3. Cook for 14 minutes (from frozen) and serve!!  
  4. Salmon should look opaque and golden and reach an internal temperature of 145 F with a food thermometer when done.

When it’s cooked at a high temperature like this, the outside gets a little color to make it appealing and the inside is flakey and moist.  

I can usually fit 3 salmon fillets in my air fryer and I usually try to make at least one extra piece of salmon for lunch the next day.  

How to store cooked salmon properly

Storing leftover salmon properly is crucial to ensure food safety and to maximize its shelf life. After cooking salmon, let it cool to room temperature before storing it in an airtight container or wrapping it tightly in plastic wrap or aluminum foil. This will keep it fresh for up to 3-4 days.

Why I eat cold leftover salmon straight from fridge

Now, back to the topic of why I eat cold leftover salmon straight from the fridge. There are a few reasons why this is a great choice.

Convenience: 

Eating cold leftover salmon is a great way to save time and effort. You don’t have to worry about reheating it or going through the whole cooking process again. I like to eat it as is, make salmon salad out of it, add it to a salad or even make a sandwich. 

Taste: 

As strange as it may sound, leftover cold-cooked salmon can taste even better than the first time you had it. The flavors have had time to meld together, and your taste buds may pick up on different nuances that you didn’t notice before. Because salmon is a fattier fish, it maintains a moist flaky texture too which makes it very satisfying to eat.  My kids prefer salmon cold too.  

No Fishy Smell:

There’s something to be said about office kitchen etiquette about salmon.  When you’re eating it, everyone knows it because of they fishy odors!  When you have it cold with your meal, it still tastes great, and won’t smell up the whole kitchen the way reheated fish does.  

Roasted salmon pinterest pin

Nutritional benefits: 

Salmon is rich in omega-3 fatty acids, which are important for brain function and overall health. Eating cold leftover salmon is an easy hands off way to get more of these beneficial nutrients in your diet.

Rich in Omega-3 fatty acids: Seafood, especially oily fish like salmon, tuna, and sardines, are excellent sources of Omega-3 fatty acids that are essential for heart and brain health.

High in protein: Seafood is a great source of lean protein, making it an ideal option for those looking to increase their protein intake without consuming excess calories or unhealthy fats.

Low in saturated fat: Compared to other animal proteins, seafood contains lower amounts of saturated fat. This makes it a healthier option for those looking to maintain cardiovascular health.

Contains essential vitamins and minerals: Seafood is rich in vital nutrients like vitamin D, selenium, iodine, and zinc, which play crucial roles in maintaining overall health.

Helps prevent chronic diseases: Regularly consuming seafood has been linked to a reduced risk of chronic diseases like heart disease, Alzheimer’s disease, and depression due to its high nutrient content.

Supports healthy growth and development: Seafood is especially important for children and pregnant women as it provides essential nutrients for proper growth and development.

Lowers inflammation: The anti-inflammatory properties of Omega-3 fatty acids found in seafood can help reduce inflammation in the body, which is linked to many chronic diseases.

Aids in weight management: Due to its high protein content and low calorie density, seafood can be beneficial for weight management by promoting satiety and reducing overall calorie intake.

To enjoy cold leftover salmon straight from the fridge, simply take it out of the container and enjoy, or let it sit at room temperature for a few minutes and top with lemon juice. 

Other salmon recipes

I know my roasting method is basic, but it works and it’s delicious.  I’m not a fan of coating with cream cheese or feta cheese because it is already a good source of healthy fats.  And for basic weeknight meals, balance is important.  We talk a lot about that if you enroll in the FASTer Way and are focused on health too!  

1
Quick High Protein Salmon Salad
Use canned or leftover salmon to make this recipe.
Check out this recipe
2
Tuna poke in a blue bowl
Tuna Poke Salad
If you're loving salmon, use sushi grade salmon in this recipe instead of tuna!
Check out this recipe
3
salmon on top on lemon slices.
Baked Salad
Top this with salmon – it's soooo good!
Check out this recipe

You can easily turn leftover salmon into salmon cakes by combining with a bit of bread crumbs, chopped bell peppers, red onions and mayo or egg.  Form into salmon patties and cook over medium heat with a little olive oil on stovetop until brown and cooked through.  

One recipe I do really love is this simple salmon salad, which you can make with canned or cold cooked salmon.  It would also be phenomenal over baked salad too!

Roasted salmon on plate.

Air-fryer Roasted Salmon

Use salmon straight from the freezer.
Prep Time 1 minute
Cook Time 14 minutes
Total Time 15 minutes
Course Main Course
Cuisine American
Servings 1
Calories 242 kcal

Equipment

  • 1 basket style air fryer I have found if I use my other toaster oven style air fryer, I need to add a few minutes to cook time. And it tends to make a mess.

Ingredients
  

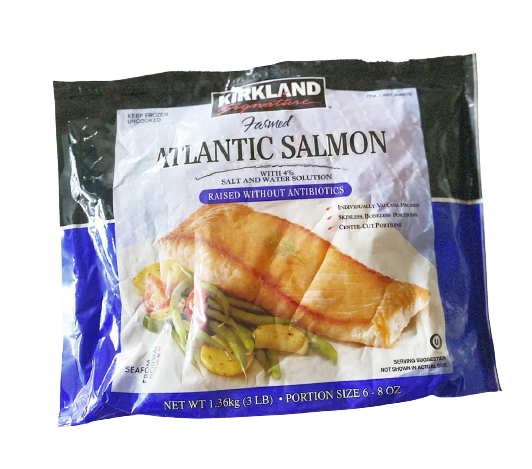
  • 6 oz Atlantic Salmon fillet, frozen I like Costco fillets
  • Seasonello or salt and pepper

Instructions
 

  • Preheat air-fryer to 400F.
  • Place frozen salmon on parchment liner in air fryer basket and let cook for 14 minutes.
  • Should reach an internal temperature of 145F with a meat thermometer when done.

Nutrition

Calories: 242kcalProtein: 34gFat: 11gSaturated Fat: 2gPolyunsaturated Fat: 4gMonounsaturated Fat: 4gCholesterol: 94mgSodium: 75mgPotassium: 833mgVitamin A: 68IUCalcium: 20mgIron: 1mg
Keyword air fryer, easy, fast, protein, simple
Tried this recipe?Let us know how it was!

About Me

I’m Melanie.

I’m a chef, registered dietitian, foodie, wife and mom.
If you’re looking for quick and healthy meal inspiration that serves YOU and your family well, then you’ve come to the right place!

Melanie Marcus Selfie

Two ingredient soup hack (creamy + nourishing)

As a mom and dietitian, I’m always on the hunt to make something wholesome and easy to feed myself and my kids – and this one hits the mark for both. You can warm up your soul with this quick and easy two-ingredient soup hack that is perfect for those busy weekdays or whenever you need a quick dinner fix. It also happens to be an excellent way to get your kids to eat vegetables! Plus you can add to it to create a macro balanced meal or snack.  It is literally the easiest soup recipes I have ever tested.

This recipe is built on the convenience of frozen mirepoix and chicken broth from the grocery store, making it a great go-to meal when you’re short on time.

Jump to Recipe

Ingredients and Alternatives:

For this basic recipe, you will only need two main ingredients, frozen mirepoix and broth, but you can add additional ingredients to customize the soup to your own preference. 

Frozen mirepoix

  • This is a combination of pre-diced celery, onion and carrot.  I usually have a bag in the freezer.  
  • This soup is equally as good with fresh mirepoix, my local Trader Joe’s and Harris Teeter always have it available in the produce aisle.  When I buy fresh, I generally try to cook it the same day.  
  • You could always use 3/4 cup each of diced carrots and celery with 1 cup of diced onion.  
Chopped onions, carrots, leeks and turnips for soup.

Chicken stock

Bowl of broth herbs and spices to make chicken soup
  • Vegetable stock is a perfect alternative if you’re vegan, vegetarian or trying to follow a more plant based lifestyle.
  • Beef stock will add a deeper umami flavor to this soup.
  • Turkey stock is a great alternative to chicken stock.
  • Bone broth may also be used.  This option will offer a more protein rich soup.  

​Make it your own

  • Feel free to add fresh herbs, such as thyme or rosemary, to elevate the soup’s flavor, or hot sauce to add an extra kick.
  • Try adding a can of tomatoes to make a tomato-based soup.
  • Grate or add a cube of fresh ginger to the mirepoix for a nutrient and flavor boost.
  • Serve with poached shrimp for an elegant starter or light lunch.
Jump to Recipe

Steps to Make It:

  1. Start by heating up a large pot on medium heat and adding a tablespoon of olive oil.
  2. Add the frozen mirepoix mixture and cook for 5-7 minutes until it’s soft and fragrant.
  3. Pour in the chicken or vegetable broth, enough to cover the mirepoix, and let it come to a boil.
  4. Turn down the heat and let the soup simmer for at least 15 minutes.
  5. Use an immersion blender to puree the soup until you reach the desired consistency.
  6. If you want a thinner soup, add more warm chicken or veggie stock and blend.  
  7. Serve hot with toppings of your choice.
Home blender

The beauty of this recipe is that it is perfect for anyone looking for a warm and hearty soup without having to spend hours in the kitchen. This is perfect for those who are seeking a healthy option but don’t want to sacrifice flavor.

Interesting Ways to Serve It:

Bowl of creamy soup decoreated with crema and herbs

If you’re looking to mix things up, try serving this soup as a base for a poached egg. 

You can also roast sweet potato cubes and add them to the soup for a seasonal twist. 

For extra creaminess, add a dollop of Greek yogurt, (heavy cream or sour cream work too!) 

 Serve with crusty bread, green onions, and black pepper.

Top with croutons or toasted pumpkin seeds for an extra crunch.

This two-ingredient soup is an easy favorite during any time of year and is perfect for children and adults alike.

How to store It:

You can pop any leftover soup in the freezer in an airtight container for a quick and easy lunch. I recommend pouring into pint containers for easy meal prepping and portioning.

Nutrition & Macros:

This soup is packed with nutrients from the vegetables and broth. Mirepoix, made from a mix of carrots, celery, and onions, is an excellent source of vitamins and fiber. It is also great for hydration.

It has about 100 calories per serving and is made with real whole food ingredients.

  • Carbohydrates 5g
  • Protein 6g
  • Fat 3g

These values may change if you use a different broth such as bone broth or vegetable broth.

If you’re following the FASTer Way, save this recipe for low macro day. It’s will definitely help you feel full and hit your macro targets.

If you’re in a soup mood, you should try this split lentil soup recipe. It’s high protein and fiber gets better with time.

Don’t hesitate to make it your own by adding your own twist to the recipe. Happy cooking!

delicious pumpkin soup in ceramic bowl

2 Ingredient Soup

This recipes is so easy and comes together quickly for a cozy soup.
Cook Time 45 minutes
Total Time 45 minutes
Course Soup
Cuisine American
Servings 4
Calories 109 kcal

Equipment

  • 1 blender

Ingredients
  

  • Frozen Mirepoix
  • 32 ounces chicken stock

Instructions
 

  • Heat 1 tbsp olive oil in stock pot.
  • Add frozen bag of mirepoix and cook over medium heat until translucent and soft. About 10 minutes.
  • Add broth or stock to vegetables and let simmer for 20 minutes.
  • Transfer hot soup to blender and blend until smooth.
  • Serve and enjoy

Nutrition

Serving: 4gCalories: 109kcalCarbohydrates: 15gProtein: 6gFat: 3gSaturated Fat: 1gPolyunsaturated Fat: 0.5gMonounsaturated Fat: 1gCholesterol: 7mgSodium: 374mgPotassium: 238mgFiber: 2gSugar: 7gVitamin A: 35IUVitamin C: 4mgCalcium: 9mgIron: 0.5mg
Keyword easy, kid friendly
Tried this recipe?Let us know how it was!

About Me

I’m Melanie.

I’m a chef, registered dietitian, foodie, wife and mom.
If you’re looking for quick and healthy meal inspiration that serves YOU and your family well, then you’ve come to the right place!

Melanie Marcus Selfie

9 ways to start cooking healthier at home today

Cooking at home is an incredible way to ensure that you are eating healthy meals that are both tasty and nutritious. It always amazes me to think about that what you eat has the power to prevent or reduce your risk of chronic disease such as diabetes, heart disease and obesity. Not only that, it is also an enjoyable way to spend time with family and friends, enhance your culinary skills, and save money! However, sometimes it can be challenging to whip up a meal that is both healthy and delicious, especially if you are new to cooking. But don’t worry! I have got you covered.

It always amazes me to think about that what you eat has the power to prevent or reduce your risk of chronic disease such as diabetes, heart disease and obesity.

Tip #1: Prioritize whole foods

When I say whole foods, I mean foods that are in their mostly natural form.  Think fresh fruit and vegetables, lean meat, healthy fats like avocado and walnuts as well as whole grains.  In the Faster Way, we say anything that comes from the ground or has a mother is fair game.  These foods provide more nutritional value than convenience foods and processed foods because they have micronutrients and fiber that keeps you feeling full and content. For example, incorporating whole grains like brown rice and quinoa into your meals is a great way to add fiber to your diet while fresh fruits and vegetables are chock full of mood enhancing and gut healthy nutrients that bring color and flavor to meals.  Whole food nutrition is also an important element of weight management.  

Tip #2: Plan ahead

Planning ahead is a crucial step in healthy cooking. It saves time, money, and reduces food waste. Develop a weekly menu, taking into consideration the nutrients you need, and shop accordingly. Meal prepping is also a great way to ensure that you have healthy meals ready to go when you are tight on time. Having a handy kitchen notebook or weekly meal planner is a simple way to organize your dinners for the week. It’s your one stop for your favorite new recipes, recipe notes and ingredients that should make up your pantry staples!  

Tip #3: Use the right cooking methods

The cooking methods you choose can significantly impact the health of your meals. Instead of frying, try baking, grilling, or steaming. These methods tend to require less oil and maintain the flavor of your ingredients. Another tip is to use non-stick pans or parchment paper to eliminate the need for excessive oils. Keep in mind that fats have twice the calories as carbohydrate and protein. 

Roasted potatoes

Tip #4: Play with spices and herbs

Parsley on counter

Who says healthy food has to be boring? Playing with spices and herbs is an excellent way to liven up your meals, especially when you’re reducing the amount of fat in food.  Adding spices also provides health benefits. Spices like turmeric, ginger, and cumin are known for their anti-inflammatory properties, and herbs such as parsley and basil have high antioxidant levels.  Once you master a cooking technique, such as roasting for example, you can play with the combination of fresh herbs to create variety in flavor.


Tip #5: Experiment with healthy substitutes

There’s no shortage of healthy substitutes for common ingredients. 

  • For instance, instead of using white flour, try almond or coconut flour, which both contain high vitamins and minerals. 
  • Rather than using sugar, opt for natural sweeteners like honey, maple syrup, or dates.  
  • You can also use unsweetened applesauce or mashed banana in place of butter to keep baked goods healthier too. 
  • Another option is to swap out solid fat such as butter or lard for avocado oil or olive oil because these oils support healthy cholesterol and overall heart health.  
  • Instead of sour cream use a Greek yogurt for that creamy consistency with the added benefit of protein.
  • If you choose to consume dairy, opting for low-fat options is a great way to add calcium and water-soluble vitamins to your diet. So instead of choosing whole milk, try a 2% milk and gradually go to a 1% option as everyone gets used to the change.  (They may not even notice the difference!)
  • Instead of going for the salt shaker or soy sauce which should be avoided if you have high blood pressure, try a squeeze of lemon juice.  Acidity from lemon has a way of brightening up a meal, beyond what salt can add.  Try it!
  • If you are cooking with ground beef, try chopping mushrooms to replace part or all of the beef.  This will decrease total calories and saturated fat, but also add fiber, flavor and important micronutrients.  

Tip #6: Pay attention to portions

healthy travel snacks

This is a big one because portion size and balance of macronutrients can make or break our health goals. Portion sizes can make a big difference in a meal.  White rice for example has 170 calories per 1 cup, cooked.  If you accidentally double that by taking a second helping, the calories will add up quickly.  Plate fruits and vegetables first and incorporate lean proteins like fish and chicken to ensure a balanced meal. Plate your carbohydrates last.  

Tip #7:  Change up your appliances

One of my favorite appliances is my air fryer.  When it comes to cooking fish, chicken cutlets or fries, it’s one of my favorite ways to get a home-cooked meal on the table quickly. Using a slow cooker is a great way to cook lean meats like chicken and pork while retaining their flavor and nutritional value too.  

Vegetable Hack: Cook frozen veggies in your air frier for a quick side that comes together in about 10 minutes!

Tip#8: Nutrition by addition

Often times, an average meal or snack is just one or two ingredients away from being well balanced and satisfying. 

  • Chia seeds can be sprinkled on top of meals for healthy fats and fiber.  
  • Slice bananas or mash berries on top of toast with peanut butter for micronutrients and a pop of flavor.
  • Leftover restaurant meals, like risotto or pasta can be reheated and combined with a bag of frozen vegetables to increase the volume and add nutrition.
  • You can add a scoop of protein powder to rolled oats to provide satiating protein.  
  • Instead of snacking on a piece of fruit, add a scoop of cottage cheese for protein and fat.  
  • When you’re having a slice of pizza, one of the best ways to bump up the nutrition is to have a small side salad or raw vegetables along with it.  
  • If you have to stop for fast food, you can opt for a salad but be sure to add a protein.  At Chick-Fil-A you can ask for double grilled chicken or nuggets to add for filling protein.  

Tip #9 :  Measure your oil

One tablespoon of olive oil or vegetable oil has 120 calories. So when you do the Rachel Ray swirl in the pan (straight from the bottle) it’s easy to add more than intended.  One simple way to avoid eating too much fat is to measure your oil.  Fat is an important part of a healthy diet, so I’m not saying to avoid it all together, it’s just a food group to be aware of, especially if you have heart disease.  

Check out this home made salad dressing – it’s so creamy and tangy. Seriously the best!

My favorite recipes on repeat

4
Quick Fried Rice for One
Check out this recipe
5
Yogurt Curry Chicken Skewers
This recipe couldn't be faster to throw together, and it's a complete crowd pleaser.
Check out this recipe
6
Egg Roll meal prep
Egg Roll In A Bowl
Easy weeknight recipe that comes together with basic pantry staples and 2-3 fresh ingredients from the store!
Check out this recipe

Remember that even small changes in your eating habits can lead to big health benefits. There are even great options for healthier meals at the grocery store (just check out the prepared foods and frozen sections!) and simple swaps you can make to your favorite dishes to make them healthier. 

Follow me on instagram to cook along with me!

About Me

I’m Melanie.

I’m a chef, registered dietitian, foodie, wife and mom.
If you’re looking for quick and healthy meal inspiration that serves YOU and your family well, then you’ve come to the right place!

Melanie Marcus Selfie

How to prep kale for any recipe – step by step

Kale is a delicious, leafy green that’s rich in vitamin C and essential nutrients. It’s no surprise that many people consider it one of their favorite ingredients! However, if you’ve ever cooked with curly kale, tuscan kale, dinosaur kale, or lacinato kale, you might have noticed that these greens have tough stems running down the center of the leaves. These stems can be bitter and chewy, detracting from the best flavor of the kale leaf. That’s where deveining kale comes in. In this step-by-step guide, you’ll learn the best way to devein kale for any recipe.

curly kale on white background

Step-by-Step Guide: How to Devein Kale for Any Recipe

Step 1: Gather Your Tools and Ingredients

To prepare your kale, you’ll need a few simple tools and ingredients:

  • A bunch of kale (curly kale, tuscan kale, dinosaur kale, or lacinato kale all work well)
  • A cutting board
  • A sharp knife
  • A large bowl
  • Cold water
  • Ice
  • Paper towels or a salad spinner

Optional:

  • Plastic bags
  • Sheet pans

Step 2: Remove the Kale Leaves from the Stem

close up shot of chopped kale on a white surface

To begin, hold the kale leaf by the stem, with the tip of the leave pointing down. With a paring knife, slide the blade of the knife down both sides of the stem. The tough stems should come out in one piece, leaving you with kale leaves ready to be washed and cooked.

Step 3: Wash the Kale Leaves

Once you’ve separated the kale leaf from the stem, put the leaves in a large bowl of cold water. Move the leaves around in the water to help remove any dirt or debris. Then, lift the kale leaves out of the water and discard the water. It’s important to remember not to soak the leaves for too long, as kale can absorb too much water and become soggy, diminishing its best flavor.

Step 4: Blanch the Kale (optional)

If you’d like to soften your kale leaves, you can quickly blanch them in boiling water for about 30 seconds. Then, immediately transfer the blanched kale to a bowl of ice water to stop the cooking process. After a minute or two, drain the kale and gently squeeze any excess water out of the leaves.

Step 5: Dry the Kale Leaves

Whether you blanch the kale or not, it’s important to dry the leaves well before cooking. You can do this by using paper towels to blot the kale dry or by using a salad spinner to remove excess water. If you choose to use a salad spinner, be sure to spin the leaves in smaller pieces to ensure that they dry thoroughly.

Step 6: Chopping the Kale Leaves

Now that you’ve deveined and cleaned your kale, it’s time to chop it into smaller pieces. Using a sharp knife, cut the leaves into thin strips or smaller pieces, depending on the recipe. Skip this step if you need the leaves to remain whole.

Step 7: Store Your Deveined Kale

To keep your kale fresh and crisp, wrap it in paper towels, place it in a plastic bag, and store it in the refrigerator. This will help absorb any excess moisture and keep your kale fresh for up to a week. In a pinch, you can purchase kale at your local farmer’s market or grocery store that has already been washed chopped and deveined.

Easy recipes to make with Kale

Kale Chips:  Toss the chopped kale leaves with a bit of olive oil or sesame oil and add a pinch of salt. Spread them in a single layer on a sheet pan and bake in the oven at 350°F for about 10-15 minutes, or until they’re crispy.

Optional: For an added kick, you can add a squeeze of lemon juice or sprinkle of red pepper flakes to your kale leaves.

Kale Salad:  Drizzle your fresh kale(small pieces) with red wine vinegar and a bit of salt.  Massage the kale with your hands until kale is slightly wilted.  Then drizzle with olive oil and fresh ground pepper to taste.  You can top this with goat cheese, white beans and pepitas for a refreshing side.  It’s my favorite way to eat kale!

One of the best things about kale is its versatility in the kitchen. It can be eaten raw, blended into smoothies, roasted, sautéed, or even made into chips.

This baked salad recipe with kale is a must try!

photo of salad ingredients

“As a mom and registered dietitian, I am always on the lookout for nutrient-dense and delicious food options that my family will actually enjoy. That’s why I love sautéing kale with just a few simple ingredients – olive oil, garlic, and Seasonello seasoning. Not only does it taste incredibly flavorful, but it’s also full of essential vitamins and minerals. Plus, the healthy fats from the olive oil help your body absorb those nutrients even better. When you cook up a big batch of this tasty kale dish, it’ll be hard to keep it on the table for very long. Give it a try and see for yourself!”

Melanie Marcus MA RD

Kale Nutrition

Kale is a superstar among greens, packed with vitamins and minerals such as vitamin C, vitamin K, vitamin A, calcium, magnesium and folate. It is also rich in antioxidants and fiber, making it an excellent addition to almost any diet.1

In addition to its impressive nutrient profile, kale has been linked to a range of potential health benefits. Studies have shown that consuming kale may help improve heart health, reduce inflammation, and even lower the risk of some cancers. It is also a low-calorie food with about 40 calories per 100g, which can be helpful for weight management.

The nice thing about kale, as with most green leafy vegetables, it fits well with may eating patterns including the mediterranean diet, the keto diet, low carb , vegetarian, vegan and gluten free.

If you’re following the Faster Way to Fat Loss, kale is a vegetable that can fit on your regular macro, low macro, and low carb day plans.

Sources

  1. Alfawaz, H. A., Wani, K., Alrakayan, H., Alnaami, A. M., & Al-Daghri, N. M. (2022). Awareness, Knowledge and Attitude towards ‘Superfood’ Kale and Its Health Benefits among Arab Adults. Nutrients14(2), 245. https://doi.org/10.3390/nu14020245

About Me

I’m Melanie.

I’m a chef, registered dietitian, foodie, wife and mom.
If you’re looking for quick and healthy meal inspiration that serves YOU and your family well, then you’ve come to the right place!

Melanie Marcus Selfie

How to cook rolled oats in the microwave (easy + mess free)

I know overnight oats are having a moment, but for me, a warm cut of oatmeal is a staple food for me – especially in the winter. Whether it’s as a break fast food or snack, at home or at the office, it’s the perfect vehicle for fruit, healthy fats, even protein. The truth is oatmeal is a nutritious food enjoyed by many, but cooking oatmeal on the stove can be time-consuming and messy. That’s why learning how to make oatmeal in the microwave is a great way to save time and hassle, especially on busy mornings. In this blog, I’m sharing an easy microwave oatmeal recipe that results in a delicious bowl of oatmeal with no mess involved.

What type of oats should you use? 

Before we dive into the cooking process, let’s talk about the type of oats you should use. There are a few different kinds of oats, including quick oats, old-fashioned oats, and steel-cut oats. What’s the difference?  

Quick Oats – AKA quick-cooking oats were made for perfect microwave oatmeal. Quick oats are essentially rolled or old fashioned oats that have been chopped up to have a higher surface area.  They offer the same fiber and nutrients as other oats, your body simply doesn’t have to work as hard to break down.  Generally this type of oats is usually found in those little packets.  

Old-Fashioned Oats – For me, these make the perfect oatmeal.  Not too mushy, and still cook quickly in the microwave. Old-fashioned or rolled oats are steel cut oats that have been flattened by large drums to increase the surface area. The cooking time is much faster than steel-cut oats. 

Steel-cut Oats – are nubs of oats or oat groats that have been toasted and cut to the size of a pinhead.  They have a hard exterior that takes some time to soften when cooked.  

I recommend sticking to quick oats or old-fashioned oats for the best results when cooking oatmeal in the microwave.  

​How to cook oatmeal in the microwave

Step 1 – combine oatmeal and liquid

To start, you’ll need a microwave-safe bowl and a cup of oats. For a single serving of oatmeal, use 1/2 cup of oats and 1 cup of liquid. The liquid can be water, milk (dairy or non-dairy), oat milk or even a combination of these, depending on your personal preference. You can go up to 2 cups of liquid if you prefer a larger volume of oatmeal.  

Step 2 – season and microwave

Add a pinch of salt and microwave on high power for 6 minutes, stirring every minute to ensure even cooking. The actual cooking time will vary depending on the type of oats you’re using and your microwave’s power, so it may take some trial and error to find your perfect cooking time.

I find that cooking for 2 minutes and then stirring works best. Stopping every minute during the last 2 minutes of cooking.

Step 3 – add protein if desired

To make your oatmeal extra creamy, try adding a scoop of protein powder or a tablespoon of peanut butter to your cooking liquid before microwaving. This will give your oatmeal a protein boost and a delicious flavor.

Step 4 – add flavor

Once your oatmeal is cooked, it’s time to add your favorite toppings. Consider adding some fresh fruit, peanut butter powder, dash of vanilla extract, even some extra milk to your bowl of oats. The best part of oatmeal is that it can be customized to your personal taste preferences, so get creative with your toppings.

​How to prevent oatmeal from spilling over in the microwave

Ensure your oatmeal doesn’t spill over the bowl while cooking by using a large bowl.  Much larger than you think you need.  

Next, it’s critical to stop and stir your old fashioned oats frequently while they are cooking.  This means you should stop the microwave every one to two minutes of cook time, especially during the last minute when it is the hottest!  

​My favorite way to eat oatmeal

I’ve said it before, oatmeal is such a great vehicle to balance macros. (All this means is that you are eating a combination of protein, carbohydrate and fat at each meal). 

Oatmeal + collagen + almond milk + frozen blueberries

Oatmeal + banana + peanut butter 

Oatmeal + 2 egg whites 

Oatmeal + sautéed spinach + fried egg

Oatmeal + diced apple + cinnamon + milk of choice

​Oatmeal tips if your trying to lose weight

Common toppings like chocolate chips, maple syrup, brown sugar even peanut butter should be added to oatmeal in a limited capacity. Honey, maple syrup, agave and brown sugar are all simple sugars and a simple form of energy.  Instead add flavor to your oats with spices like vanilla or cinnamon, fresh berries or protein powder.  

I’m not saying you shouldn’t sweeten your oats at all.  I just want to caution you that these ingredients should be used with caution.  

Full disclosure, microwaving oatmeal may not be the traditional way of cooking oatmeal, but it’s a good idea for people who want to save time and hassle. Plus, by using a microwave you can enjoy a delicious bowl of oatmeal in just a few minutes, without the mess – ANYTIME!

​I’d love to know if you try to make oatmeal in the microwave!  Let me know!

About Me

I’m Melanie.

I’m a chef, registered dietitian, foodie, wife and mom.
If you’re looking for quick and healthy meal inspiration that serves YOU and your family well, then you’ve come to the right place!

Melanie Marcus Selfie

Sleepy Girl Mocktail recipe + tart cherry substitutions

I had 4 people ask me about the Sleepy Girl Mocktail within 5 days so I thought I should offer my two cents as a registered dietitian. This recipe has been making its rounds on social media, thanks to wellness influencer Gracie Norton and her popular TikTok video. It even had Good Morning America talking about it’s sleep-inducing properties! But what makes this viral drink potentially the perfect beverage to have before you go to bed? Lets break down how the beverage can improve sleep quality and add some zhuzh to your bedtime routine.  

Interested in a lower calorie version? Jump to the bottom for my version that is about half the calories of the original.

Jump to Recipe

What you need to make the Sleepy Girl Mocktail

The main ingredients are : 

  • pure tart cherry juice
  • magnesium powder
  • prebiotic soda – Olipop soda is a popular brand

Add a few ice cubes if you want it on the rocks.  

Jump to Recipe

Why does the combo work?

Tart cherries are a source of melatonin, a hormone that helps regulate the sleep-wake cycle and promote deeper, more restful sleep. 

Magnesium plays a crucial role in the nervous system and has calming properties, making it a key ingredient for a good night’s sleep.  It helps regulate certain hormones including the stress hormone cortisol which has a positive impact for better sleep.  

While it’s not a magic potion, it does contain ingredients that have been shown to support a peaceful night’s sleep.  I think it’s clever because it’s one way to replace your evening alcoholic beverage without depriving yourself.

Melanie Marcus MA RD

Prebiotic soda provides a bubbly texture with a touch of prebiotics. It also promotes gut health and can offer relief from digestive discomforts.  

I think it’s clever because it’s one way to replace your evening alcoholic beverage without depriving yourself.  It feels a little more elevated than water and without the effects of alcohol.

Ingredients substitutions

Tart cherry juice: 

Well known for it’s melatonin content, tart cherry juice isn’t the only fruit that supports melatonin levels. Pineapple, banana, and grapes have also been observed to increase blood melatonin levels.  You can cut your tart cherry juice or replace it all together with pineapple or grape juice.  

Magnesium:  

If you’re worried about taking ta magnesium supplement, add a teaspoon or two of chia seeds.  Just 1 ounce has 95mg magnesium.  If you generally don’t tolerate magnesium well, you can try magnesium glycinate.  It is generally better tolerated and doesn’t result in upset stomach like other forms of magnesium.

Prebiotic soda: 

You can replace prebiotic soda with regular soda water. Don’t skimp on this because it needs a little fizz. If tonic water crosses your mind, remember, it will add calories, just like regular soda will. Could taste good though!

Does the type of magnesium matter?

Magnesium is available in several forms, each with different effects on the body. One of the most common forms, magnesium citrate, is  often used to treat constipation, and could lead digestive issues like diarrhea.  This happens when unabsorbed magnesium salts stimulate bowel movements by drawing water into the intestines and colon. If you want to avoid this, magnesium glycinate might be a better option since it’s more easily absorbed and as a result less likely to cause these troubles.

The average scoop of magnesium powder has about 200mg per scoop.  

That said, don’t forget that magnesium is widely available in natural food sources like nuts, beans, rice, seeds, and leafy greens. For example, chia seeds are a fantastic magnesium source, providing 111mg an impressive 26% of your daily value in just one ounce. Meanwhile, almonds and spinach are also rich in magnesium, offering nearly 20% of your daily recommended intake each. Incorporating these foods into your diet can help you reap the benefits of magnesium and avoid unwanted digestive complications that may come with certain magnesium supplements.

This drink may not be for you if:

Blood sugar is a concern

I want to start by saying that 100% juice does count as a serving of fruit.  Just 6 ounces once daily counts as a serving (not more!). That said, juice is a simple form of natural sugar and can result in increases in blood sugar if consumed without fat, fiber and protein.   

You are calorie conscious

If you are tracking macros or following a lower calorie diet, for example, consuming liquid calories and fruit juices in general may leave you with fewer calories to eat throughout the day.  One cup of tart cherry juice has 159 calories, 37g carbohydrate with 33g sugar, 1g protein, 1 g fat.  While it is packed with nutrients, liquid calories don’t register the same way in your stomach.  Plus that’s more calories than your average glass of wine or low calorie beer.  

Signs of too much magnesium

​Healthy people don’t have to worry about getting too much magnesium because excess is filtered and excreted by the kidneys.  Consult with your physician before adding this mocktail to your routine.  

That said, the the USDA established 350mg/day as a tolerable upper limit for magnesium for adults 19 years or older.  Taking more may result in abdominal cramping and diarrhea.  

Do I recommend the Sleepy Girl Mocktail?

While it’s not a magic potion, it does contain ingredients that have been shown to support a peaceful night’s sleep.  I think it’s clever because it’s one way to replace your evening alcoholic beverage without depriving yourself.  It feels a little more elevated than water and without the effects of alcohol.  If you’re already taking a magnesium supplement, this may be a combo to try.  Otherwise be sure to speak with you healthcare provider before adding a supplement to your routine.  

What other questions do you have about the sleepy girl mocktail trend? 

On a mocktail kick?

Check out this winter sangria recipe for a refreshing option. Or if you’re just into trending beverages, you won’t want to miss this blue cloud smoothie recipe. Check them out to be in the know!

Lightened up Sleepy Girl Mocktail

Course Drinks
Servings 1
Calories 80 kcal

Ingredients
  

  • 2 ounces Tart Cherry Juice
  • 2 ounces Pineapple Juice
  • 2 ounces club soda
  • 1 tsp chia seed
  • 1 scoop magnesium powder optional

Instructions
 

  • Combine all ingredients in glass and mix well.
  • Serve over ice if desired.

Nutrition

Serving: 6ouncesCalories: 80kcalCarbohydrates: 17gProtein: 1gFat: 1gSaturated Fat: 0.1gPolyunsaturated Fat: 1gMonounsaturated Fat: 0.1gTrans Fat: 0.01gSodium: 18mgPotassium: 188mgFiber: 1gSugar: 11gVitamin A: 5IUVitamin C: 6mgCalcium: 40mgIron: 1mg
Tried this recipe?Let us know how it was!

About Me

I’m Melanie.

I’m a chef, registered dietitian, foodie, wife and mom.
If you’re looking for quick and healthy meal inspiration that serves YOU and your family well, then you’ve come to the right place!
Melanie Marcus Selfie