Month: July 2024

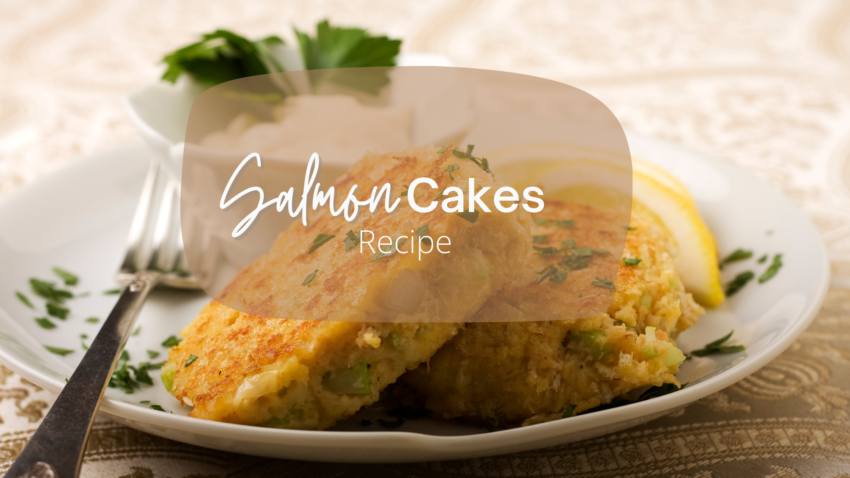
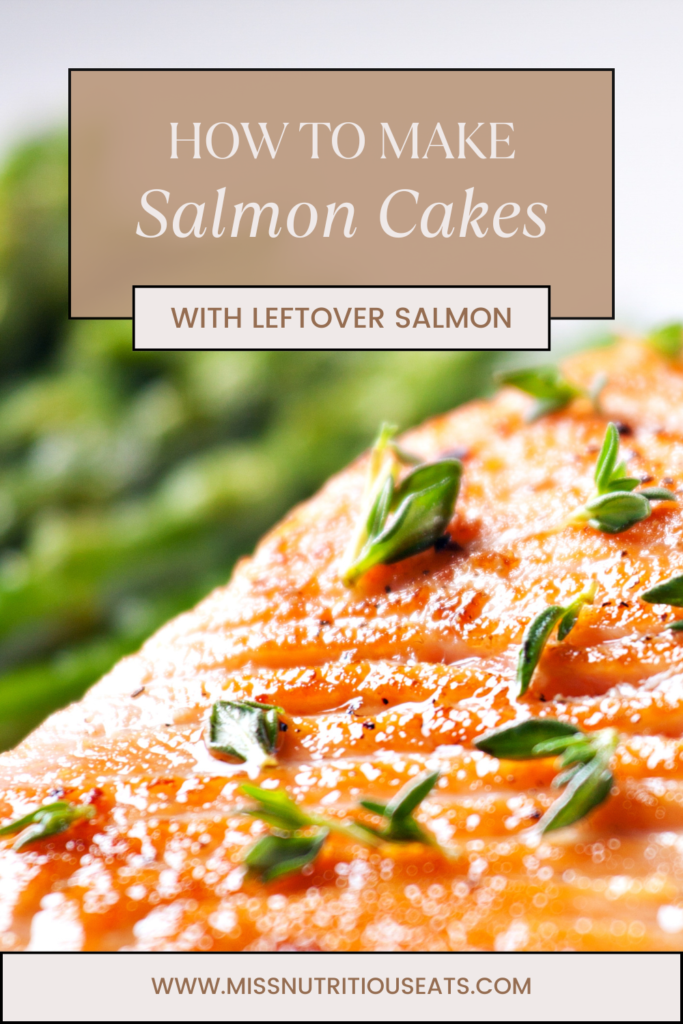
How to make gluten free salmon cakes (recipe)

When I shared this quick throw together recipe on my stories- ya’ll loved it!  It was born out of using up salmon that I cooked up from the weekend that needed new life.  But you can use canned and it will come out equally as good!  (This salmon salad is also delicious!) So if you’re looking for a delicious and easy weeknight dinner that’s both healthy and satisfying, these salmon cakes that happen to be gluten free are the perfect answer.

I like to make these because it’s one of the ways my husband actually enjoys eating salmon.  He loves crab cakes, and these are very similar.  

Jump to Recipe

Ingredients and substitutions

Before we get started, let’s gather all the ingredients:

  • salmon: Use what you have.  Wild-caught salmon like sockeye salmon or leftover Atlantic salmon work just as well as a couple of cans of salmon.
  • olive oil: Any neutral oil will do.  
  • onion: yellow or white onion works well. You can use pre chopped or even frozen.  
  • red bell pepper:  Any bell pepper works for this one.  I recommend yellow or orange.  Green bell peppers may be bitter.
  • garlic cloves:  Use fresh, frozen or jarred.  I like frozen for this one.
  • almond flour:  You could use regular breadcrumbs or gluten free breadcrumbs instead.
  • eggs: Egg whites could be used.  I do not recommend flax eggs for this purpose.
  • mayonnaise: Sour cream could be used in a pinch.
  • Dijon mustard:
  • parsley: fresh or dried will work, feel free to use green onions or chives if you have them.
  • dill: fresh or dried will work.  
  • Kosher salt and black pepper to taste
Jump to Recipe

Step-by-Step Guide to Making Gluten-Free Salmon Cakes

Follow these simple steps to make the best gluten-free salmon cakes:

1. Prepare the Salmon Mixture

In a large mixing bowl, combine the flaked salmon, diced onion, red bell pepper, minced garlic, almond flour, beaten eggs, mayonnaise, Dijon mustard, parsley, dill, salt, and pepper. Mix until well combined.

I find that using my alligator chopper really helps to make this meal come together very quickly.

Tip: If the mixture feels too wet to form into patties, add a little bit of almond flour to help bind it together.

2. Form the Patties

Form the salmon mixture into 8 patties, depending on your desired size. These easy salmon patties should hold together well but may need a gentle touch.

3. Cook the Salmon Cakes

Heat 3 tablespoons of olive oil in a large skillet (I like using my cast-iron skillet) over medium heat. Once the oil is hot, add the salmon patties in batches. Cook each patty for about 4-5 minutes on each side, or until they turn a beautiful golden brown and are cooked through.

Alternative cooking methods:

  • Air Fryer: Preheat your air fryer to 375°F. Place the patties on a parchment-lined baking sheet and air fry for 3-4 minutes on each side.
  • Oven: Bake the salmon cakes on a parchment paper-lined baking sheet at 375°F for 15-20 minutes, flipping halfway through.

4. Serve and Enjoy

Serve your gluten-free salmon cakes with a dollop of tartar sauce or a squeeze of fresh lemon juice. These healthy salmon patties pair really well with a summer corn salad, mixed greens salad, or coleslaw.

Join my next round of the FASTer Way

Tired of endless diets and no results? Join the FASTer Way to Fat Loss and see real, sustainable changes in just 6 weeks!

Melanie Marcus FASTer Way to Fat Loss Coach

Storage and Meal Prep Tips

  • Leftovers: Store any leftover salmon cakes in an airtight container in the refrigerator for up to 3 days. Reheat gently in a skillet or oven for the best flavor and texture.
  • Freezing: Freeze uncooked patties on a parchment-lined baking sheet. Once frozen, transfer them to a bpa-free freezer bag. They can be cooked directly from frozen; just add a few extra minutes to the cooking time.

Why You’ll Love This Recipe

  • Healthy and Nutritious: Packed with omega-3 fatty acids, these patties are a great addition to a gluten-free diet.
  • Versatile: This recipe can be made with wild salmon, canned salmon, or even farm-raised salmon. Just choose your favorite kind of salmon for the best results.
  • Easy: With minimal prep time and cooking time, these salmon cakes are perfect for an easy weeknight dinner or meal prep sessions.

FASTer Way Clients

Savet this recipe for a low carb or regular macro night. It’s higher in healthy fats and protein to help you meet your macro goals easily.

Whether you’re aiming to impress, or just trying to get a weeknight meal on the table, these salmon cakes are a surefire way to elevate your dinner table. 

Ready to get started? Follow my easy recipe card below and don’t forget to rate the recipe with a star rating!

Note: Some links in this blog may be affiliate links. I earn a small commission if you make a purchase through them, at no extra cost to you.

Salmon Cakes

If you like crab cakes, this one is for you!
Prep Time 10 minutes
Cook Time 10 minutes
Total Time 20 minutes
Course Main Course
Cuisine American
Servings 4
Calories 436 kcal

Ingredients
  

  • 16 oz cooked salmon
  • 3 tablespoons olive oil
  • 1 medium onion finely diced
  • 1 red bell pepper finely diced
  • 1 to 2 garlic cloves minced
  • ½ cup almond flour
  • 2 large eggs beaten
  • 2 tablespoons mayonnaise
  • 1 tablespoon Dijon mustard
  • cup fresh parsley finely chopped
  • Kosher salt and black pepper to taste

Instructions
 

  • In a large mixing bowl, combine the flaked salmon, diced onion, red bell pepper, minced garlic, almond flour, beaten eggs, mayonnaise, Dijon mustard, parsley, dill, salt, and pepper. Mix until well combined.
  • Form the salmon mixture into 8 patties, depending on your desired size. These easy salmon patties should hold together well but may need a gentle touch.
  • Heat 3 tablespoons of olive oil in a large skillet (I like using my cast-iron skillet) over medium heat. Once the oil is hot, add the salmon patties in batches. Cook each patty for about 4-5 minutes on each side, or until they turn a beautiful golden brown and are cooked through.

Nutrition

Serving: 2pattiesCalories: 436kcalCarbohydrates: 8gProtein: 29gFat: 32gSaturated Fat: 5gPolyunsaturated Fat: 8gMonounsaturated Fat: 12gTrans Fat: 0.02gCholesterol: 147mgSodium: 172mgPotassium: 727mgFiber: 3gSugar: 3gVitamin A: 1525IUVitamin C: 47mgCalcium: 75mgIron: 2mg
Keyword low carb
Tried this recipe?Let us know how it was!

About Me

I’m Melanie.

I’m a chef, registered dietitian, foodie, wife and mom.
If you’re looking for quick and healthy meal inspiration that supports your health goals while feeding the rest of your family (including the kiddoes) well, then you’ve come to the right place!

Melanie Marcus Selfie

How to eat bread for weight loss, according to a dietitian

Carbs are a supercharged topic in weight loss, so many of my clients have avoided it for years for fear of gaining weight. But the truth is, bread can be part of a healthy eating plan, especially if you want it to be. Whether you’re a mom trying to lose a few pounds, a bread lover who can’t imagine life without it, or simply someone curious about the healthiest ways to enjoy carbs, this one is for you.  

Why do I encourage eating bread?  

Mostly because if you are trying to live a healthy lifestyle, all foods fit.  It is all about moderation and the long game. (plus your body really does need carbs to fuel your brain as well as your muscles during physical activity).

Bread can be part of a healthy diet, especially when choosing whole grain options. It provides valuable nutrients and can contribute to a feeling of fullness, which can support weight management.

– Melanie Marcus, Registered Dietitian

Bread’s Nutritional Benefits

Bread delivers carbohydrates, a primary source of energy for the human body and the brain! Bread offers other important nutrients like fiber, B vitamins, and essential amino acids too. However, not all types offer the same nutritional value and some may be ultra-processed bread, which should be avoided. The key is choosing the right type of bread and eating it in moderation, which is totally possible!

Personally, I would much rather eat a real bagel just once a year than have sub par bagels frequently.  I’d also rather have a slice of homemade sourdough bread than any other white bread hands down.  

Understanding Bread Types

Whole Grain vs. White Bread

Whole-Grain Bread and whole-wheat bread are your best choices for weight loss. These varieties offer higher fiber content, which helps with digestion and keeps you feeling full longer. They’re heartier and more flavor IMO. On the other hand, white bread is made from refined grains or white flour that strip away essential nutrients and fiber, leading to blood sugar spikes and crashes.

Low-Calorie Bread vs. Regular Bread

You may think low-calorie bread can be a good option if you’re looking to reduce calorie intake, but this bread is way more processed.  And personally, I don’t recommend it as a general rule. It has fewer calories, so isn’t quite as satisfying and when you take a look at the ingredients list- it’s usually filled with difficult to pronounce ingredients and often little natural fiber or vitamins. One of the main principles in the FASTer Way to Fat Loss (FW or FASTer Way) is Whole Food Nutrition to fuel our body properly for fat loss. 

Join my next round of the FASTer Way

Tired of endless diets and no results? Join the FASTer Way to Fat Loss and see real, sustainable changes in just 6 weeks!

Melanie Marcus FASTer Way to Fat Loss Coach

Specific Types of Bread for Weight Loss

The grocery store bread aisle can be overwhelming, here are a few of my favorites.

  • Sourdough Bread: Naturally fermented, offering better gut health benefits due to its lower glycemic index.
  • Ezekiel Bread: Made from sprouted grains, providing more protein and fiber than regular bread.
  • Dave’s Killer Bread: High in fiber and protein while using organic ingredients and minimal added sugar.
  • Joseph’s Whole Wheat Pita: Just half a pita is 90 calories and has great amount of both fiber and protein. I keep these in my freezer for a quick lunch with turkey on most work days. And thanks to their higher fiber content, I can usually make them work into a low carb day.

Is Gluten-Free Bread Better for You?

This depends on your individual dietary needs and health conditions. If you have celiac disease or gluten intolerance, gluten-free bread is essential as it prevents adverse reactions and long-term health issues associated with gluten consumption. However, if you don’t have gluten sensitivities, the benefits of gluten-free bread are less clear. While some gluten-free breads offer excellent nutritional profiles, others may lack essential nutrients like fiber, vitamins, and minerals. Additionally, some commercially available gluten-free breads are high in sugar and additives, which can detract from their potential health benefits. Ultimately, the best choice is a bread that aligns with your specific health requirements and dietary preferences, which means looking for a gluten-free option that is rich in nutrients and low in unnecessary additives. 

Tips for Choosing the Best Bread

The type of bread you choose matters. Whole grain varieties offer more fiber, which helps with digestion and can help you feel full longer, supporting your weight loss goals.

  1. Check the Ingredient List: Look for bread where the first ingredient is whole grain or whole wheat flour.
  2. Avoid Added Sugars and Preservatives: Opt for breads with minimal added sugar and no high fructose corn syrup.
  3. Look for High Fiber Content: Choose breads with at least 3 grams of fiber per slice.
  4. Consider Portions: Even the healthiest breads should be eaten in moderation. Stick to one or two slices per meal.
  5. Timing Matters: Consuming bread in the morning can provide sustained energy throughout the day, avoiding late-night carb loading that can lead to weight gain. Which is why I like intermittent fasting.

Incorporating Bread into Your Day

Breakfast Options

  • Whole Grain Toast with Avocado or Poached Egg: A great way to start your morning with healthy fats and protein.
  • Sourdough Toast with Cottage Cheese and Tomato:  A combo that will keep you energy level high no matter what time you break your fast.
  • Peanut Butter on Whole Wheat Bread with Mashed Raspberries: Add some fruit for a nutrient-packed breakfast.

Lunch and Dinner

  • Open-Faced Sandwiches: Use whole grain or sourdough bread topped with lean proteins and plenty of vegetables.
  • Healthy Side: Pair a slice of crusty bread with veggie-rich dishes like cauliflower bake or ratatouille.

Snacks

  • English Muffins with a healthy spread like almond butter or hummus.

How to have the most control over your bread intake

If you are counting macros or just don’t want to consume too much bread, this tip is for you and it is so simple.  Don’t buy pre sliced bread. Instead, choose a sprouted-grain bread, or any kind of bread you prefer, I love a crusty multigrain bread called Harvest Loaf that I get at my local Harris Teeter.  Then slice it to meet your needs.  You can slice thinner pieces for paninis or toasts, or a heartier slice of bread to dip into soup.  You simply have more control than whatever the store pre-slices for you, with the benefit of having the flavor that you really like.  

Never eat bread alone. Always have it with a protein and healthy fat to keep you from going back for another slice.

Join my next round of the FASTer Way

Tired of endless diets and no results? Join the FASTer Way to Fat Loss and see real, sustainable changes in just 6 weeks!

Melanie Marcus FASTer Way to Fat Loss Coach

How much is too much bread?

Let’s start by saying, a healthy diet and lifestyle is all about balance.  I find the best way for my clients to start incorporating foods such as bread and pasta into their diet is by becoming more aware of portions and tracking food with an app like My Fitness Pal or FASTer Way to Fat Loss. When you become a client I help set your carbohydrate goals for each day and then work with you to tweak your intake to help lose body fat while including foods that you enjoy eating.  Usually by week three clients are feeling confident in food choices and tracking them easily while losing visceral fat!  

When it comes to weight loss, portion control is key. Enjoying a slice or two of high-quality, whole grain bread can fit into a balanced diet, but be mindful of your portions and overall daily calorie intake.

– Melanie Marcus, RD

Unpopular Opinion:

Eating bread during weight loss doesn’t mean giving up your favorite carb entirely. By making smart choices and incorporating bread into a balanced diet, you can enjoy its benefits without derailing your weight loss goals. Always consult with your health care provider or a registered dietitian to tailor a plan that suits your specific needs.

For more personalized advice and to start your weight loss plan, consider sending me an email to chat through you’re specific concerns.   Learn more and take the first step towards a healthier you!

By following these guidelines, you can confidently enjoy bread as part of a nutritious and satisfying diet. Remember, the key is to make informed choices and maintain balance in your diet and lifestyle.

About Me

I’m Melanie.

I’m a chef, registered dietitian, foodie, wife and mom.
If you’re looking for quick and healthy meal inspiration that supports your health goals while feeding the rest of your family (including the kiddoes) well, then you’ve come to the right place!

Melanie Marcus Selfie

Check out this healthy -ish protein rich Egg Salad Recipe

I polled you all in my stories and was interested to learn that 100% of you ate egg salad!  All different kinds of ways too – some simply mashed with avocado, others mash eggs with a bit of mayo, whether for breakfast or for lunch, you all love your egg salad.  And I do too.  

What’s not to love, it holds well, tastes great, and is protein rich – fitting into many eating patterns including low carb, diabetic, keto and of course, for those of us carb cycling in the FASTer Way.  I think there’s a misconception though: That egg salad is unhealthy because most creamy salads are loaded with fat. And lets be honest, a lot of time they are!  But with a few thoughtful swaps, and measurements (don’t eyeball the mayo!) you can create an easy egg salad recipe that has great flavor and will keep you on your health journey.

Jump to Recipe
Jump to Recipe

Why Choose Egg Salad?

Egg salad is an excellent source of protein, thanks to the egg whites and Greek yogurt. It’s also packed with essential vitamins and minerals like B vitamins, vitamin D, and selenium. By substituting mayonnaise with plain Greek yogurt, you reduce the fat content while still achieving that creamy texture we all love. Plus, using lots of fresh herbs and crunchy veggies adds fiber and antioxidants, and most importantly flavor.  

Ingredients and substitutions:

  • Hard-boiled eggs – This is really the star of the show, I think you could substitute with possibly chickpeas or extra firm tofu but would like to test that for you first. What makes this a great no-cook recipe is that you can either boil your own eggs, or purchase them pre-boiled at nearly every grocery store.
  • Plain Greek yogurt – I love full fat Greek yogurt, but use whatever you have. Sour cream, cottage cheese or simply more mayo works here too.  
  • Mayo – I kept this in to hold onto that traditional egg salad flavor.  A little mayo goes a long way for extra flavor and a little creaminess! You can use any of the yogurt substitutions if you want to omit.  
  • Dijon mustard – You can sub any mustard you have on hand, even yellow mustard 
  • Parsley, fresh dill, or chives – if you don’t have fresh use a teaspoon of dried herbs.  
  • Red onion – green onions or fresh chives would work well too.  If you don’t have red onion all together, you can use celery to get a similar crunch.  
  • Capers – these are optional but add a great brininess and pop of bright flavor.
  • Black pepper and kosher salt to taste – sea salt is fine too, I just prefer kosher!
Jump to Recipe
three brown eggs in bowl

Instructions:

  1. Boil Eggs:
  • Place eggs in a large bowl.
  • Fill the bowl with hot water until the eggs are covered.
  • Bring the water to a rolling boil, then reduce the heat and simmer for about 10 minutes to achieve perfect hard-boiled eggs.
  • For an easier method, you can use an Instant Pot or air fryer to make hard-boiled eggs.
  1. Cool the Eggs:
  • Transfer the boiled eggs to an ice bath (a bowl filled with cold water and ice) to cool them quickly.
  • Once cooled, peel the eggs and chop them into small pieces.
  1. Mix the Ingredients:
  • In a separate bowl, combine the chopped eggs, Greek yogurt, Dijon mustard, red onion, and fresh herbs.
  • If using, add capers.
  • Season with fresh cracked black pepper and sea salt to taste.
  1. Serve and Enjoy:
  • Serve your delicious egg salad in romaine lettuce cups for a low-carb option or on slices of whole-grain bread for a more traditional egg salad sandwich.
  • For a nice crunch, add some fresh celery or bell pepper pieces.
  • Store any leftovers in an airtight container in the refrigerator.

Join my next round of the FASTer Way

Tired of endless diets and no results? Join the FASTer Way to Fat Loss and see real, sustainable changes in just 6 weeks!

Melanie Marcus FASTer Way to Fat Loss Coach

Health Benefits

High Protein Content

Our healthy egg salad recipe is rich in protein, aiding in muscle repair and growth. The combination of eggs and Greek yogurt provides a complete protein source, making it an excellent choice for those looking to increase their protein intake.

Essential Vitamins and Minerals

Eggs are loaded with B vitamins, vitamin D, and selenium, all of which are crucial for maintaining overall health and well-being. These nutrients support energy production, immune function, and bone health.

Heart-Healthy Option

By using Dijon mustard and capers, you add depth of flavor without the need for additional salt. 

Fresh Herbs and Veggies

Incorporating fresh parsley, dill, chives, and crunchy veggies like celery and bell pepper adds fiber and antioxidants. These components promote digestive health and provide a bright, fresh flavor.

how to hard boil eggs pin

Different Ways to Enjoy Egg Salad

Egg salad is incredibly versatile and can be enjoyed in various ways:

  • Lettuce Wraps: Serve in romaine lettuce cups for a low-carb meal.
  • Whole Grain Bread: Create a classic healthy egg salad sandwich using slices of whole-grain bread and a dash of hot sauce.
  • Avocado Toast: Top your favorite avocado toast with a scoop of egg salad for added protein and flavor.

Meal Prep Made Easy

Egg salad is a great way to use up leftover hard-boiled eggs from Easter time or any meal prep session. Store your egg salad in an airtight container in the refrigerator, and it will stay fresh for up to three days. This makes it a convenient option for healthy lunches throughout the week.

With its high protein content and essential vitamins it’s a dish that aligns perfectly with a health-conscious lifestyle. Plus, the variety of ways to serve it ensures that you’ll never get bored.

Love this healthy egg salad recipe? Share your star rating and leave a comment below! For more delicious recipes and healthy eating tips, sign up for my newsletter and follow on social media.

Egg Salad Recipe

Quick and classic egg salad. High in protein too!
Course Main Course, Salad
Cuisine American
Servings 3
Calories 234 kcal

Ingredients
  

  • 6 hard-boiled eggs chopped
  • 2 tbsp plain Greek yogurt I use full fat
  • 2 tbsp mayo
  • 1 tbsp Dijon mustard
  • 2 tbsp parsley dill, or chives
  • 1/4 cup red onion finely chopped
  • 2 tbsp capers optional
  • Fresh cracked black pepper and sea salt optional

Instructions
 

  • Combine all ingredients in bowl.
  • Let sit in fridge 20 minutes before serving.

Nutrition

Calories: 234kcalCarbohydrates: 3gProtein: 14gFat: 18gSaturated Fat: 4gPolyunsaturated Fat: 6gMonounsaturated Fat: 6gTrans Fat: 0.02gCholesterol: 377mgSodium: 244mgPotassium: 184mgFiber: 1gSugar: 2gVitamin A: 755IUVitamin C: 5mgCalcium: 72mgIron: 1mg
Keyword no cook, quick
Tried this recipe?Let us know how it was!

About Me

I’m Melanie.

I’m a chef, registered dietitian, foodie, wife and mom.
If you’re looking for quick and healthy meal inspiration that supports your health goals while feeding the rest of your family (including the kiddoes) well, then you’ve come to the right place!

Melanie Marcus Selfie

Hands off air fryer pork tenderloin recipe

Aren’t most recipes made in the air fryer hands off?  That’s what I love so much about it. I was making this recipe last week when my husband walked in the house and commented how good it smelled.  Trust me, it is super delicious and packs a lot of flavor and uses simple ingredients without requiring a lot of attention which means you can focus on what else needs to get on the dinner table.  

It may just be the best way to make pork tenderloin.  

Jump to Recipe

Ingredients You’ll Need

  • Lean pork tenderloin – Trim the silver skin from the tenderloin if there is any.  This marinade would work equally well with boneless pork chops or bone-in chops.  Just note the nutrition will be slightly higher in fat.  
  • Apple cider vinegar – Adds a tangy flavor that helps tenderize the meat.
  • Mustard – Ground mustard, (grainy mustard) works great here but you can use whatever you have on hand.
  • Garlic – I prefer to use fresh or frozen but garlic powder or even jarred will work.
  • Maple syrup – Balances the tanginess with a touch of sweetness. Brown sugar could be used in a pinch.  
  • Kosher salt – Tenderizes and brings out the flavor.
  • Rosemary – Fresh or dried, it adds an aromatic touch.

​Optional:  If you love onion, feel free to slice some, or even add onion powder if you have it. If you love the bite of black pepper, you can season with that as you like as well.  These ingredients, don’t add extra calories, so you can play around with the flavors that you like.  

Olive oil really isn’t necessary for this because we’re air frying.  

Step-by-Step Cooking Instructions

Step 1: Prepare the Pork

Start by trimming any excess fat or silver skin from your pork tenderloin. This ensures even cooking and prevents unwanted calories from fat.

Step 2: Marinate the Pork

In a small bowl, mix together apple cider vinegar, mustard, garlic, maple syrup, kosher salt and rosemary. Place the pork in a resealable bag or container and pour the marinade over it. Seal and refrigerate for at least 20 minutes or overnight for best results.

Step 3: Preheat the Air Fryer

Preheat your air fryer to 400 degrees F. You really want to be sure it’s preheated to get a proper cook.

Step 4: Cook the Pork

Remove the pork from the marinade and pat it dry with a paper towel. Place it in the air fryer basket in a single layer. Air fry the pork at 400 degrees F for about 20 minutes, or until the internal temperature reaches 145 degrees F. Use an instant-read thermometer to check the center of the meat for accurate cooking.

Step 5: Rest the Meat

Once cooked, remove the pork tenderloin from the air fryer and let it rest for 5-10 minutes. This helps the juices redistribute, ensuring a juicy, delicious pork chop every single time.

Serving Suggestions

  • Roasted or air-fried vegetables – Sweet potatoes, green beans, or cauliflower rice are great options.
  • Fresh green salad – A light vinaigrette complements the flavors beautifully.
  • Quinoa or wild rice pilaf – Compliment your protein with whole grain carbs to round out the meal.
  • Savory apple chutney – Or even apple sauce complements the pork’s flavors with a touch of sweetness.

One of my favorite sides this summer has been this celery salad – the kids even love it.  They also like to have pork with tater tots or sweet potato.  

Tips for the Best Pork Tenderloin

  • Use a meat thermometer – Ensuring the pork reaches the correct internal temperature is key to food safety. This may just be my most used piece of kitchen equipment!
  • Don’t skip the marinade – It’s one of my favorite ways to infuse the pork with flavor. Just 15 minutes is all it takes!
  • Preheat the air fryer – A preheated air fryer ensures even cooking.
  • Rest the meat – This step guarantees a clean plate every time.

Join my next round of the FASTer Way

Tired of endless diets and no results? Join the FASTer Way to Fat Loss and see real, sustainable changes in just 6 weeks!

Melanie Marcus FASTer Way to Fat Loss Coach

Nutrition and Macros

You may think pork is a no-no if you’re trying to keep calories low, but in reality, pork tenderloin is a lean cut of meat, meaning it has a low fat content and is lower in calories compared to other cuts of pork. This makes it an ideal choice for those who are trying to maintain a healthy diet. In fact, a 3-ounce serving of pork tenderloin contains only about 120 calories and 2.5 grams of fat.

It’s also high in protein, which can help keep you feeling fuller for longer periods of time and can aid in building and repairing muscle. And if you’re doing the FASTer Way with me, you know hitting your protein goals helps reduce cravings and prevent overeating.

It’s also a good source of essential vitamins and minerals such as iron, zinc, and B vitamins. These nutrients are important for maintaining overall health and can be lacking in certain restrictive diets.

This easy recipe is perfect for busy weeknights and will become one of your favorite air fryer recipes. If you try this recipe, and I hope you do, let me know!  

For more delicious recipes like my quick air fried donut holes, make sure to join my mailing list.  

Rosemary Garlic Pork Tenderloin

Course Main Course
Cuisine American
Servings 6
Calories 180 kcal

Ingredients
  

  • 2 pounds lean pork tenderloin
  • 1.5 tbsp apple cider vinegar
  • 2 tbsp grainy mustard
  • 4 cloves garlic
  • 2.5 tsp maple syrup
  • 2 tsp kosher salt
  • 2 tsp dried rosemary

Instructions
 

  • Mix together marinade ingredients and submerge pork for at least 15 minutes or overnight in fridge.
  • Pull pork out about 30 min before cooking.
  • Place in preheated air frier (400F) for about 20 minutes or until thermometer reads 145F.

Nutrition

Serving: 5ozCalories: 180kcalCarbohydrates: 3gProtein: 32gFat: 3gSaturated Fat: 1gPolyunsaturated Fat: 1gMonounsaturated Fat: 1gTrans Fat: 0.03gCholesterol: 98mgSodium: 911mgPotassium: 629mgFiber: 0.3gSugar: 2gVitamin A: 5IUVitamin C: 1mgCalcium: 19mgIron: 2mg
Tried this recipe?Let us know how it was!

About Me

I’m Melanie.

I’m a chef, registered dietitian, foodie, wife and mom.
If you’re looking for quick and healthy meal inspiration that supports your health goals while feeding the rest of your family (including the kiddoes) well, then you’ve come to the right place!

Melanie Marcus Selfie

DIY pineapple foot scrub that really works

I go through a lot of whole, fresh, pineapple. More than most.  So I got to thinking, besides throwing them in a composter, what else can be done?  So today, we’re talking recipes, but not the kind you eat! This recipe is for your feet, and you really only need 3 ingredients.

Are you tired of dealing with rough skin on the soles of your feet? Say goodbye to dry, achy feet with this refreshing and effective DIY pineapple foot scrub. This deep exfoliating foot scrub uses the natural enzymes found in fresh pineapple, combined with the gentle exfoliating power of sugar and the moisturizing benefits of coconut oil. Follow my step-by-step guide to create your own luxurious foot scrub at home.

Cut pineapple on board with body scrub in jar

Ingredients You’ll Need

  • Fresh Pineapple (1/2 cup, finely chopped)
  • Granulated Sugar (1 cup)
  • Coconut Oil (1/4 cup)

Optional:

  • A few drops of peppermint essential oil
  • A few drops of vitamin E oil

Why These Ingredients Work

Pineapple (Ananas Sativus)

Pineapple contains bromelain, an enzyme that helps break down dead skin cells, making it an excellent natural exfoliant. It also has citric acid and vitamin C, which are great for brightening and refreshing your skin.

Sugar

The sugar acts as a physical exfoliant, gently removing rough and dry skin from your feet. It’s a simple yet effective way to achieve smoothness – and a much healthier way to include sugar into your daily routine!

Coconut Oil (Cocos Nucifera)

Coconut oil is rich in fatty acids and vitamin E, which moisturize and soften the skin. It forms a protective barrier, keeping your feet hydrated for longer.

Peppermint Essential Oil

A few drops of peppermint oil can add a refreshing scent and a cooling sensation that helps soothe achy feet.

Vitamin E Oil

Vitamin E is known for its skin-nourishing and antioxidant properties, making it a perfect addition to your foot scrub.

Step-by-Step Instructions

Step 1

Start by cutting a few slices of fresh pineapple and finely chopping them. You’ll need about 1/2 cup in total. If you don’t know how to cut a pineapple – check out this guide.

Step 2

In a mixing bowl, combine the chopped pineapple with 1 cup of granulated sugar.

Step 3

Slowly add 1/4 cup of coconut oil to the mixture, stirring until well combined.

Step 4

Adjust the consistency by adding more sugar for a thicker scrub or more oil for a smoother texture.

Step 5

Once the scrub reaches your desired consistency, transfer it to an airtight container for storage.

Step 6

To use, apply a generous amount of foot scrub to your wet feet, massaging in circular motions for a few minutes. Focus on the rough skin areas like the soles of your feet.  

Step 7

Rinse with warm water and pat your feet dry. For best results, follow up with a moisturizer.

Benefits of Using Pineapple Foot Scrub

  • Exfoliation: The fruit enzymes in pineapple help break down dead skin cells, while the sugar provides a physical exfoliation.
  • Moisturization: The combination of coconut oil and pineapple helps to moisturize and soften the skin, leaving it feeling smooth and hydrated.
  • Improved Texture: Regular use can improve the overall appearance and texture of your feet.
  • Refreshing: The addition of peppermint essential oil gives a refreshing cooling sensation for achy feet.

    Tips for Best Results

    • Use the scrub 2-3 times a week for optimal results.
    • For a more intense exfoliation, use a pumice stone after applying the scrub.
    • Store the scrub in the fridge to keep it fresh.

    Pineapple Recipes

    For some other really cool ways to use pineapple in recipes you can eat check out:

    1
    pineapple pancakes
    Pineapple Pancakes
    Check out this recipe
    2
    Alcohol Free Winter Sangria
    Tangy wine-like sangria
    Check out this recipe

    About Me

    I’m Melanie.

    I’m a chef, registered dietitian, foodie, wife and mom.
    If you’re looking for quick and healthy meal inspiration that supports your health goals while feeding the rest of your family (including the kiddoes) well, then you’ve come to the right place!

    Melanie Marcus Selfie