Buffalo Chicken Dip Recipe (Healthier + Easy) 🐔🔥

I’ve been thinking that game day needs a healthy twist in the Marcus house. I just wanted something higher protein, lower fat and not full of empty calories. And I wanted something that we would all eat. So when Primal Kitchen sent us a sampler box complete with dressings, dips and buffalo sauce, a healthier buffalo chicken dip was an obvious choice. I tweaked the recipe they have on their website to trim down the fat even more and guess what? No one noticed :). I recommend you try this healthier buffalo chicken dip recipe if you need a crowd favorite or something for this years Super Bowl party. Using simple ingredients, this dip offers all the creamy texture and bold flavors you love, without the guilt. Yay!
Table of contents
😍 Why You’ll Love This Healthier Buffalo Chicken Dip
This dip is packed with flavor from rotisserie chicken, buffalo sauce, and a blend of cheeses. It’s a lighter version that keeps that classic taste while sneaking in healthier ingredients like low-fat cream cheese. You’ll love how easy it is to make too – a great option for last-minute gatherings.
🗒️ Ingredients
Here’s what you’ll need to whip up this delicious dip:
- rotisserie chicken breast, shredded
- low-fat cream cheese, softened to room temperature
- Primal Kitchen Mayo
- Primal Kitchen Original Buffalo Sauce (1 bottle)
- Avocado Oil Spray
- 1 stalk green onion, chopped
- ¼ cup blue cheese crumbles
💡 Gluten-Free? Read This!
This dip is naturally gluten-free when served with options like celery sticks, carrot sticks, or gluten-free tortilla chips.
👩🍳 How to Make My Healthier Buffalo Chicken Dip
- Preheat Your Oven to 350°F.
- Shred the Chicken using your hands or a food processor. (I like to do this in my stand mixer). Place the shredded chicken in a large mixing bowl.
- Mix the Ingredients by adding the softened cream cheese and mixing well. Pour the buffalo sauce and mayo over the mixture, and mix until thoroughly combined.
- Prepare the Baking Dish by lightly greasing it with avocado oil spray. Scoop the mixture into the dish.
- Bake for 20 Minutes or until the dip is golden and bubbly.
- Top with Blue Cheese Crumbles and Green Onions for extra flavor and a pop of color.
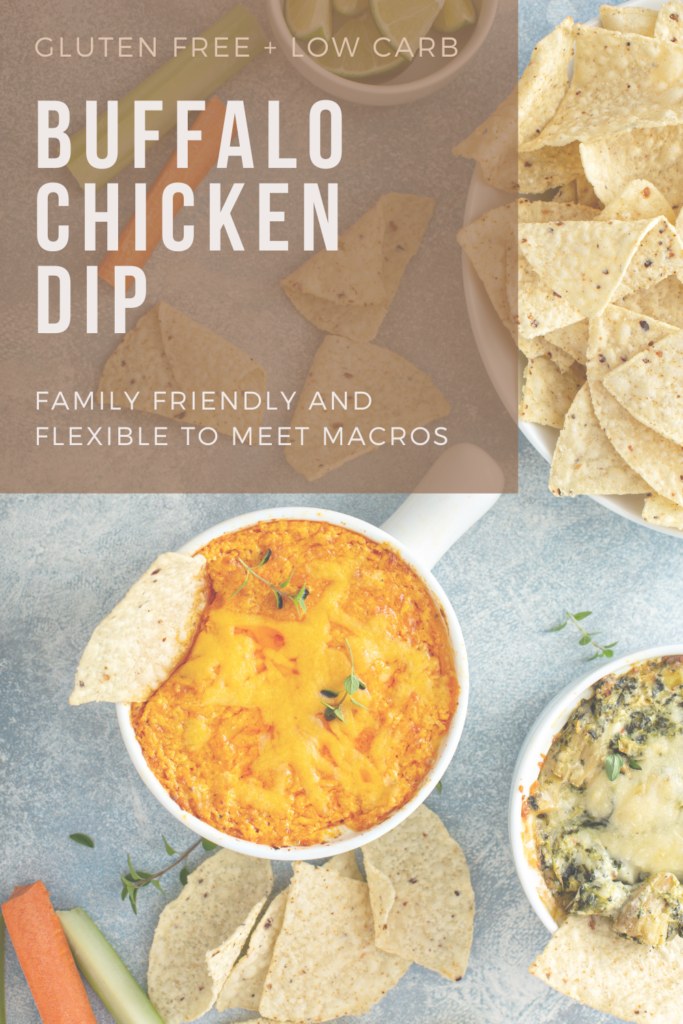
📓 Best Served With
This dip pairs well with an assortment of your usual veggies like celery sticks and carrot sticks, or snacks like pretzels, pita chips, or tortilla chips. For a milder flavor, try serving with mini bell peppers or red bell peppers. You can also go the sweet and savory route and serve with diced pineapple for a fresh bite.
👝 How to Store Leftovers
Store any leftover healthy buffalo chicken dip in an airtight container. It will stay fresh in the fridge for 3-4 days. Simply reheat the leftover dip in a microwave-safe dish or a slow cooker for the best results.
🧠 Common Questions
Can I use canned chicken?
Yes, canned chicken is a convenient substitute. Just make sure to drain it well before using.
Can I make this in a crock pot?
Absolutely! Combine all ingredients in a crock pot and cook on medium heat for 2-3 hours, stirring occasionally.
What about adding extra cheese?
Feel free to experiment with different cheeses like cheddar cheese, mozzarella, or pepper jack for more flavor. Just remember this will increase the fat macros quickly.
What’s the benefit of using Primal Kitchen Buffalo sauce?
Quality Fats: Primal Kitchen uses high-quality, minimally processed fats like avocado oil, which is rich in monounsaturated fats and tend to be less inflammatory than seed oils (e.g., canola or soybean oil) that are more common in processed foods.
Whether you’re hosting a super bowl party or just in the mood for a delicious, lighter version of a classic recipe, this healthier buffalo chicken dip is sure to be a hit.
Join my next 6 week challenge!
Tired of endless diets and no results? Join the FASTer Way to Fat Loss and see real, sustainable changes in just 6 weeks!

👩🍳 Why Is This Recipe Macro Friendly?
This healthy buffalo chicken dip recipe is great for anyone watching their macros! It strikes a perfect balance of protein, fats, and carbs, making it fit for different diets. Lean chicken breast gives you plenty of protein for muscle building and repair. Plus, using low-fat dairy or dairy-free options keeps the saturated fats down, so you can enjoy that creamy texture and rich flavor without worrying about heart health. Don’t forget the fresh veggies for dipping—they add fiber and vitamins, keeping the carbs light and wholesome. You can enjoy this tasty snack without sacrificing your dietary goals!
Plus, I made the portion size “reasonable”. The original recipe called for 10 portions, but we all know buffalo dip is hard to resist! So let’s just be realistic 🙂

Ingredients
Method
- Preheat your oven to 350°F.
- Using your hands, remove all of the meat from the rotisserie chicken and shred into small pieces. Place chicken meat in a stand mixer.
- Add softened cream cheese and mix.
- Pour Primal Kitchen Buffalo Sauce over the mixture and add Primal Kitchen Mayo. Mix until thoroughly combined.
- Scoop the mixture into an oven-safe baking dish lightly greased with oil spray.
- Bake for 20 minutes or until golden and bubbly. Top with blue cheese crumbles and green onions, if desired
- Serve with an assortment of celery and carrot sticks, pretzels, or potato chips. Enjoy!